東京メトロ 02系 車側表示灯を点灯させるの続きとして今回は車側表示灯をリレーモジュールを使用して制御します。
https://qiita.com/usashirou/items/2e85c1c2a7cbb2de0899
リレーモジュール
初めに、リレーモジュールと言うのものを使用します。
Arduinoなどのマイコンで制御できる5Vで動作するものを選択します。

構成
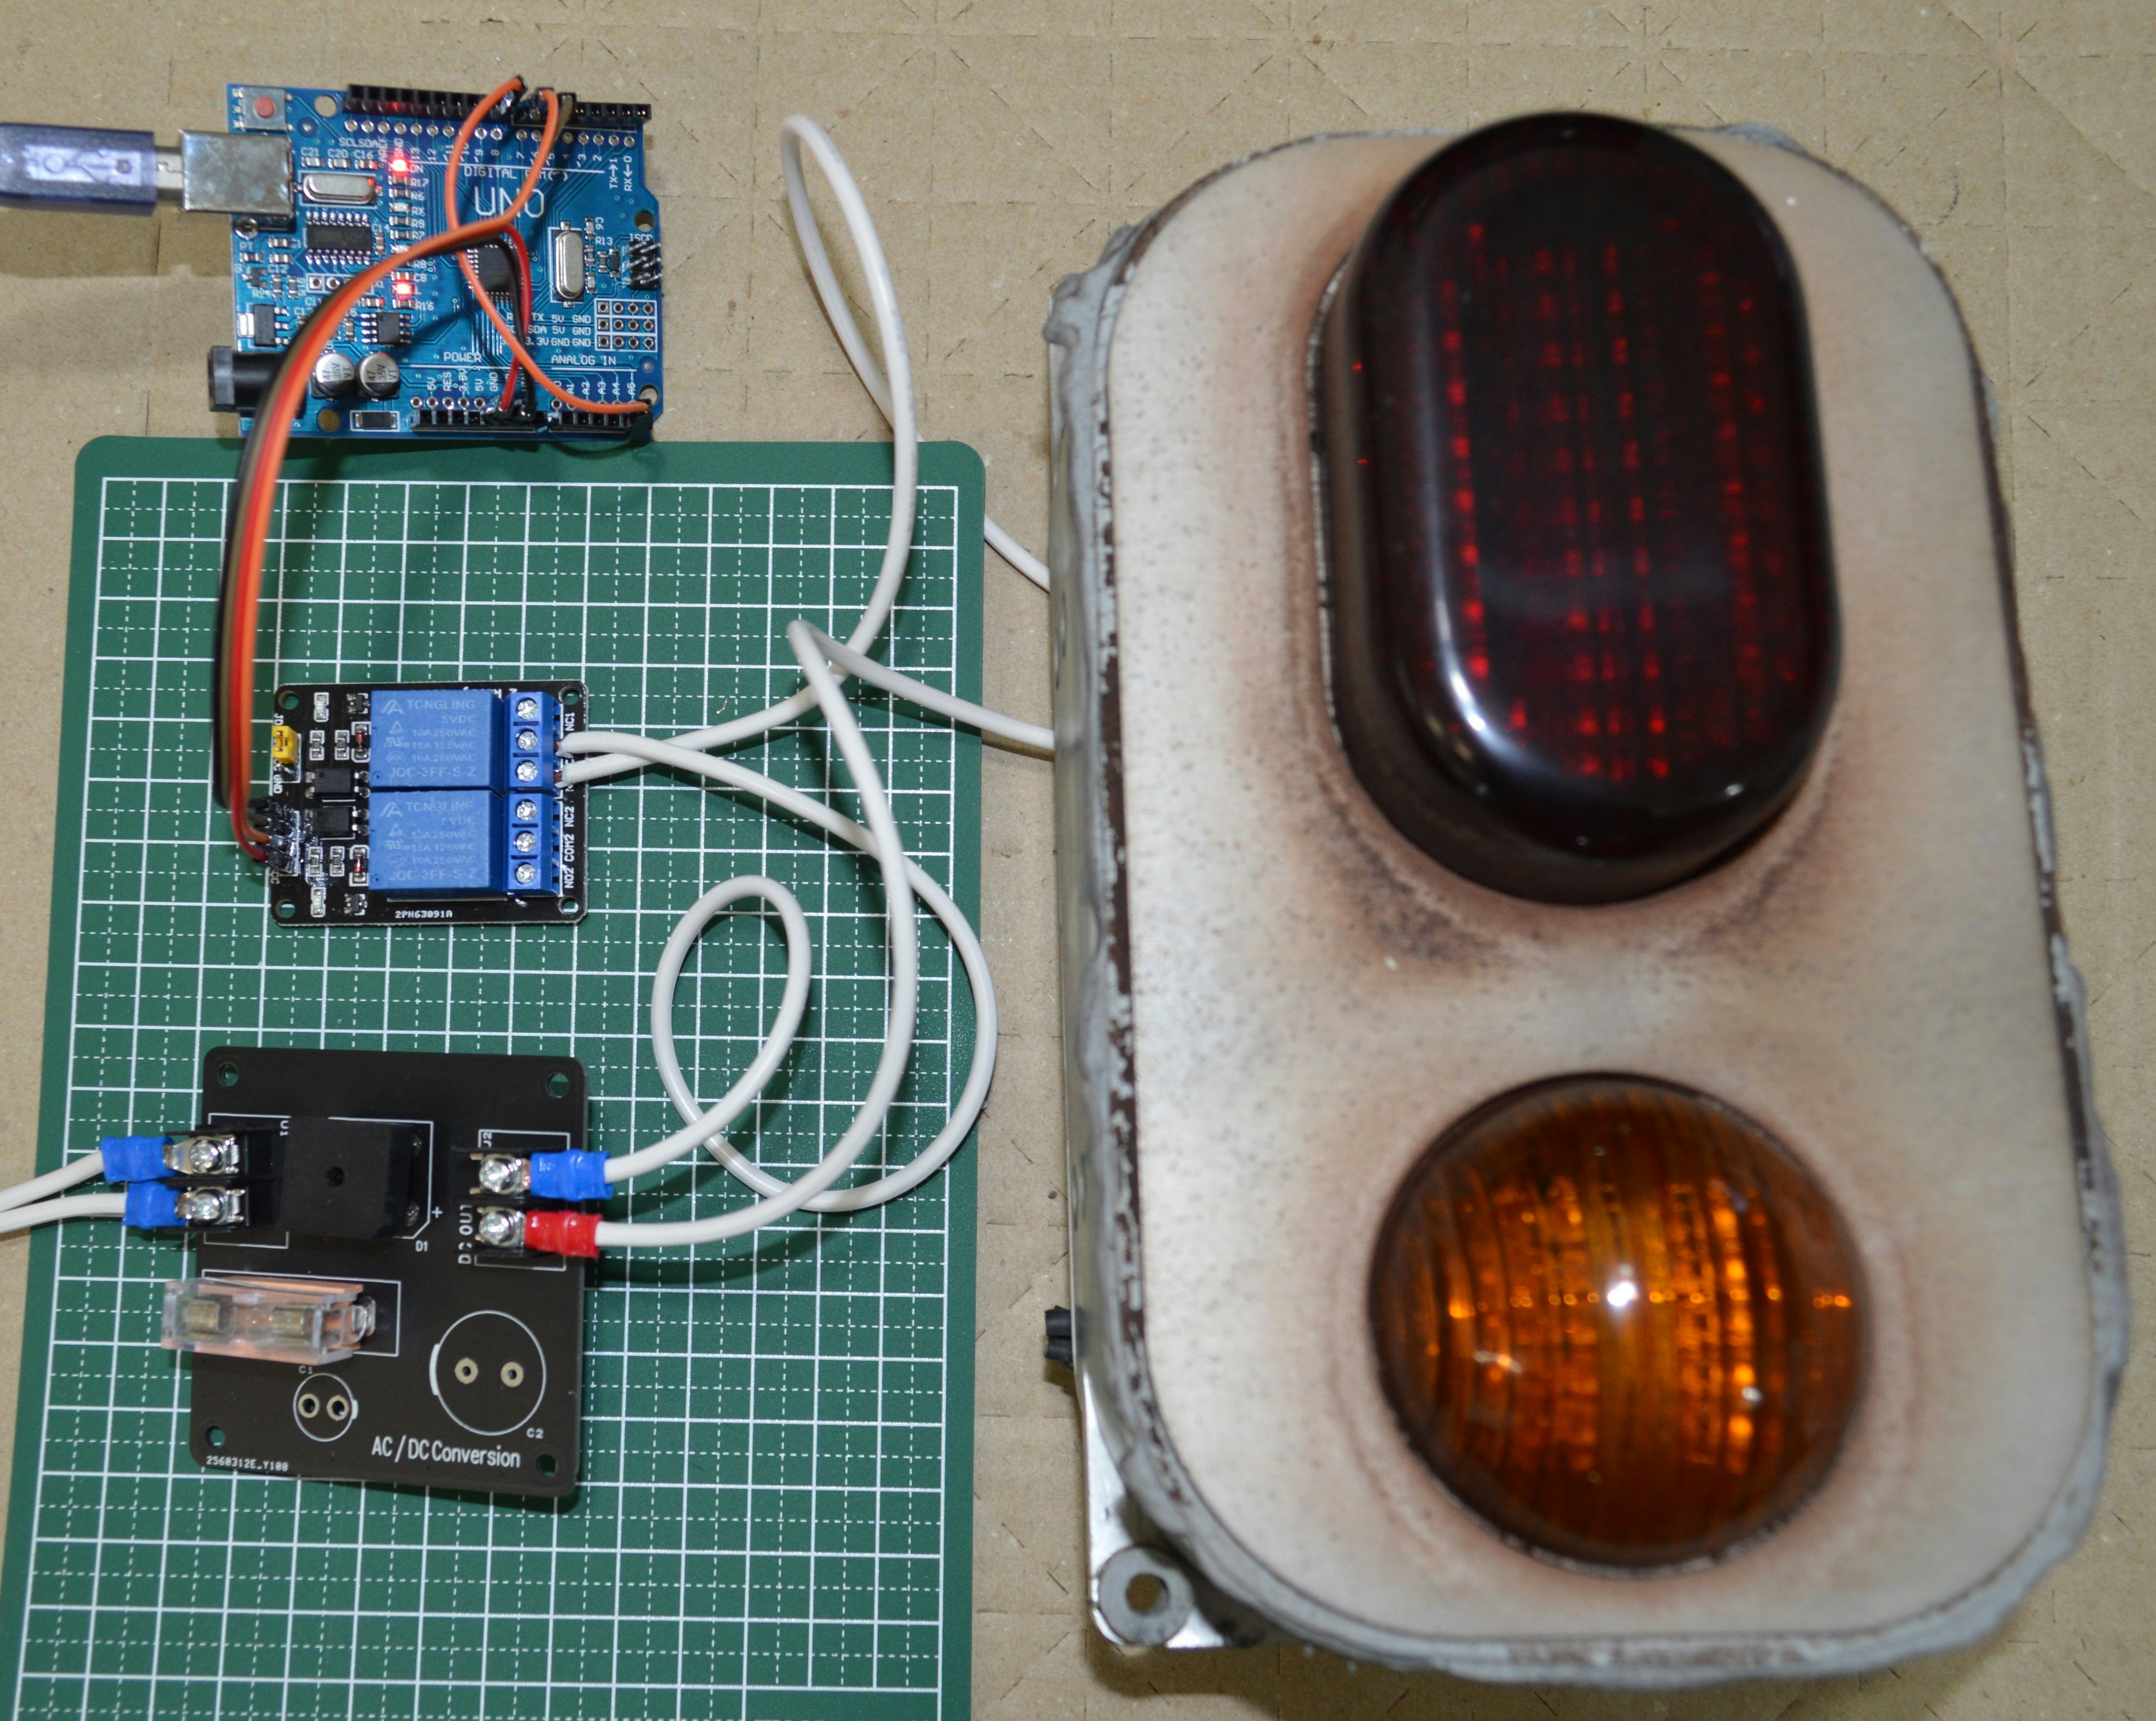
今回はArduinoUnoとリレーモジュール、交流直流変換ボードを使用します。
直流100VのGNDをリレーモジュールに入れて、制御される出力端子を交流直流変換ボードのGNDに接続します。
ArduinoUnoの任意のデジタルピンとGNDと5Vをリレーモジュールに接続します。

テスト
初めに動作確認を行います。
リレーがキチンと駆動するかGPIOをHigh/Lowをさせてみます。
LOWにする事でリレーが駆動するようになっていました。
次に、直流100Vを印加して車側表示灯が点灯することを確認し、リレーで動作することを確認しましょう。
実行プログラム
今回は2個のリレーが載っているリレーモジュールですのでどちらもコントロールできるプログラムにしました。
スイッチを押すことで起動するプログラムにしました。
車掌スイッチでコントロールする事も出来ますね。
void setup() {
  pinMode(6, OUTPUT);
  pinMode(7, OUTPUT);
  pinMode(8, INPUT_PULLUP);
  digitalWrite(6, HIGH);
  digitalWrite(7, HIGH);
}

void loop() {
    if (digitalRead(8) == LOW)
  {
    digitalWrite(6, LOW);
    delay(2000);
    digitalWrite(7, LOW);
  }
}
動作の様子
BGM入り https://t.co/IZ73vatvrY pic.twitter.com/Ag21UZ0zCU
— usashirou (@usashirou1) November 7, 2021