SPRESENSEを使ってみましょう
メーカーサイトにも詳しく書いてありますのでこちらを参照ください。
https://developer.sony.com/ja/develop/spresense/developer-tools/get-started-using-arduino-ide/set-up-the-arduino-ide
https://developer.sony.com/develop/spresense/docs/home_ja.html
Arduino準備
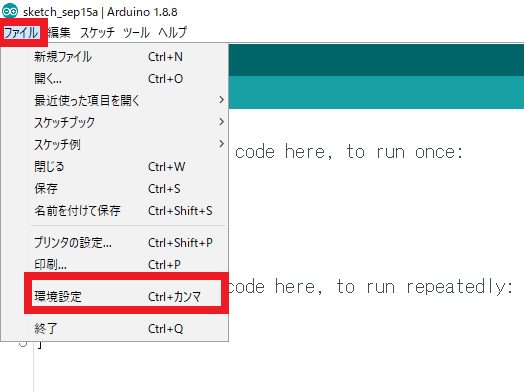
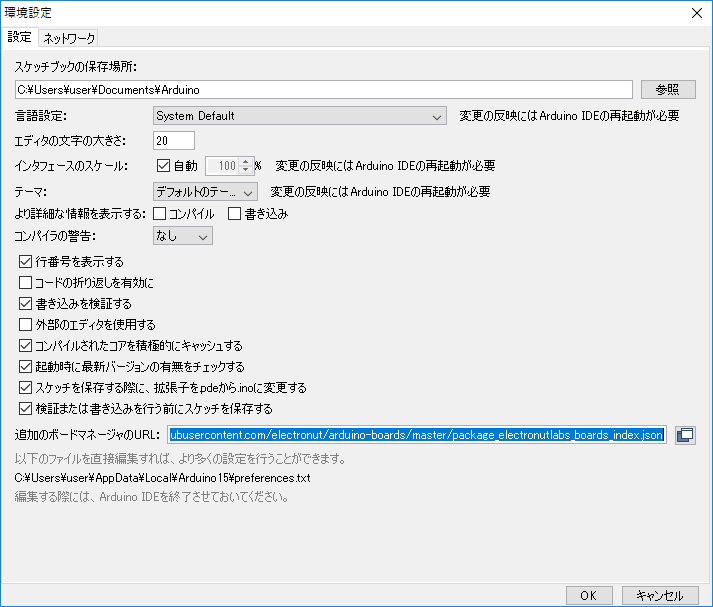
追加のボードマネージャーのURLに
https://github.com/sonydevworld/spresense-arduino-compatible/releases/download/generic/package_spresense_index.json
を入力します。
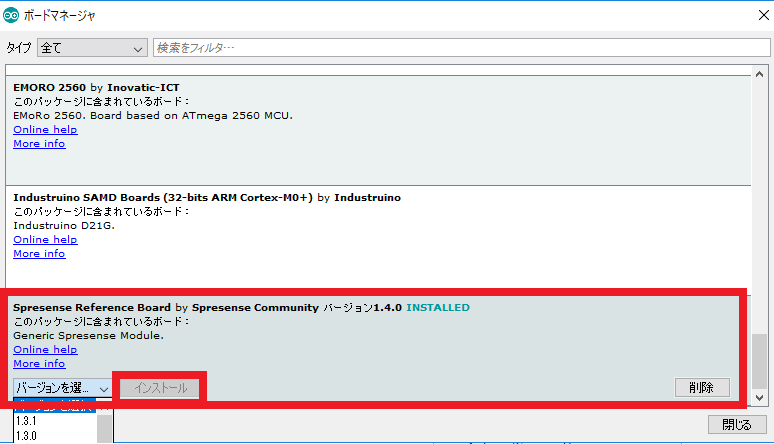
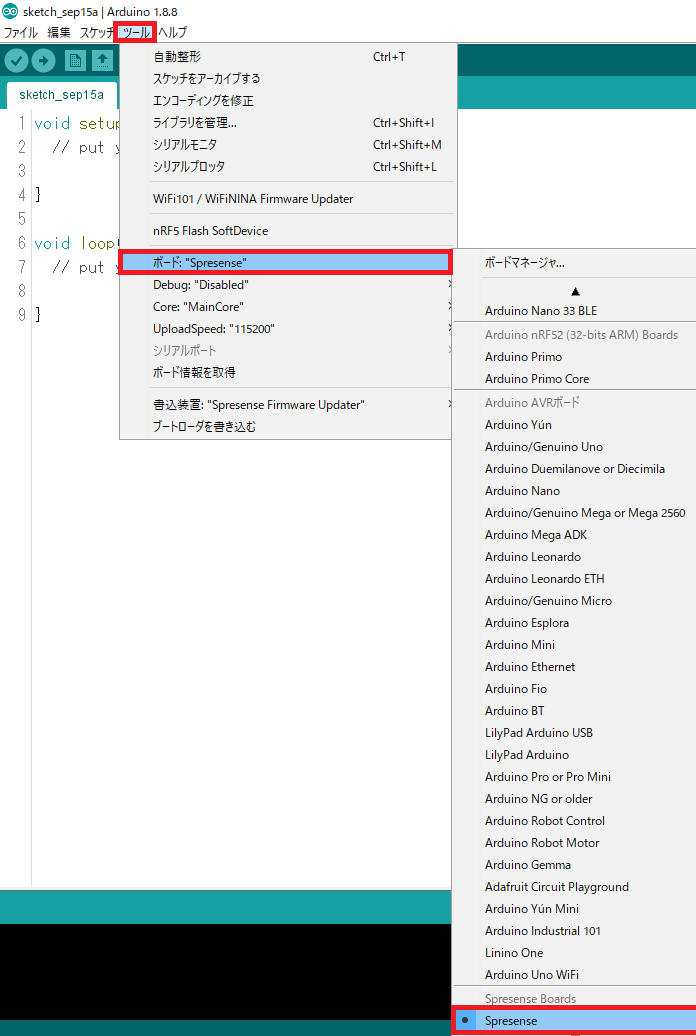
ツール⇒ボード⇒ボードマネージャーを選択します。
(すでにSpresenseになってますね・・・・)
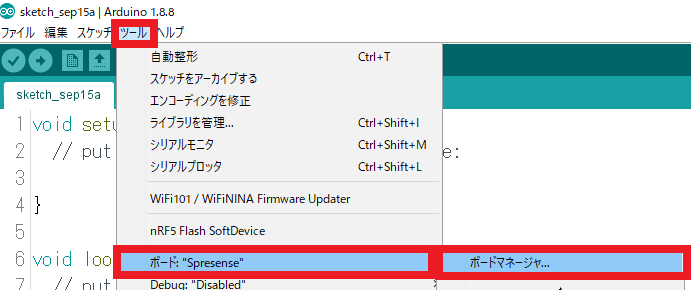
これで、Arduinoの準備が終わりました。
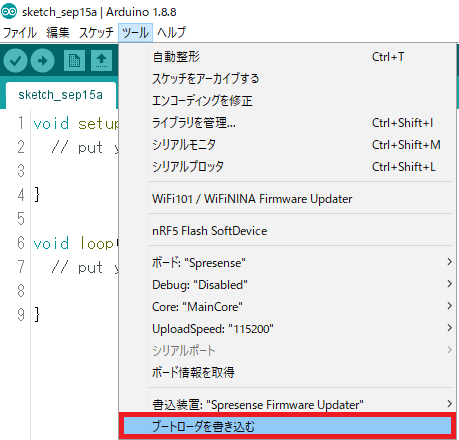
初めて使う人は、ここでブートローダーを書き込む必要があります。
ツール⇒書込装置⇒SPRESENSE
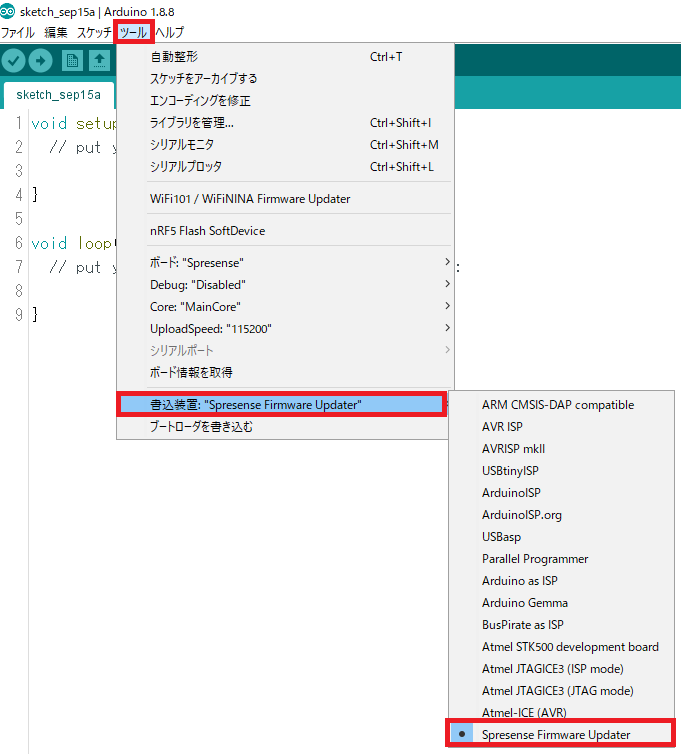
⇒ブートローダーを書き込む
Lチカ
今回は、次のステップとして、Arduinoを使ってLチカをします。
https://developer.sony.com/ja/develop/spresense/developer-tools/get-started-using-arduino-ide/set-up-the-arduino-ide
void setup() {
    pinMode(LED0, OUTPUT);
    pinMode(LED1, OUTPUT);
    pinMode(LED2, OUTPUT);
    pinMode(LED3, OUTPUT);
}

void loop() {
    digitalWrite(LED0, HIGH);
    delay(100);
    digitalWrite(LED1, HIGH);
    delay(100);
    digitalWrite(LED2, HIGH);
    delay(100);
    digitalWrite(LED3, HIGH);
    delay(1000);

    digitalWrite(LED0, LOW);
    delay(100);
    digitalWrite(LED1, LOW);
    delay(100);
    digitalWrite(LED2, LOW);
    delay(100);
    digitalWrite(LED3, LOW);
    delay(1000);
}
次に、LEDを外付けしてみましょう
武藤先生のプログラムです。
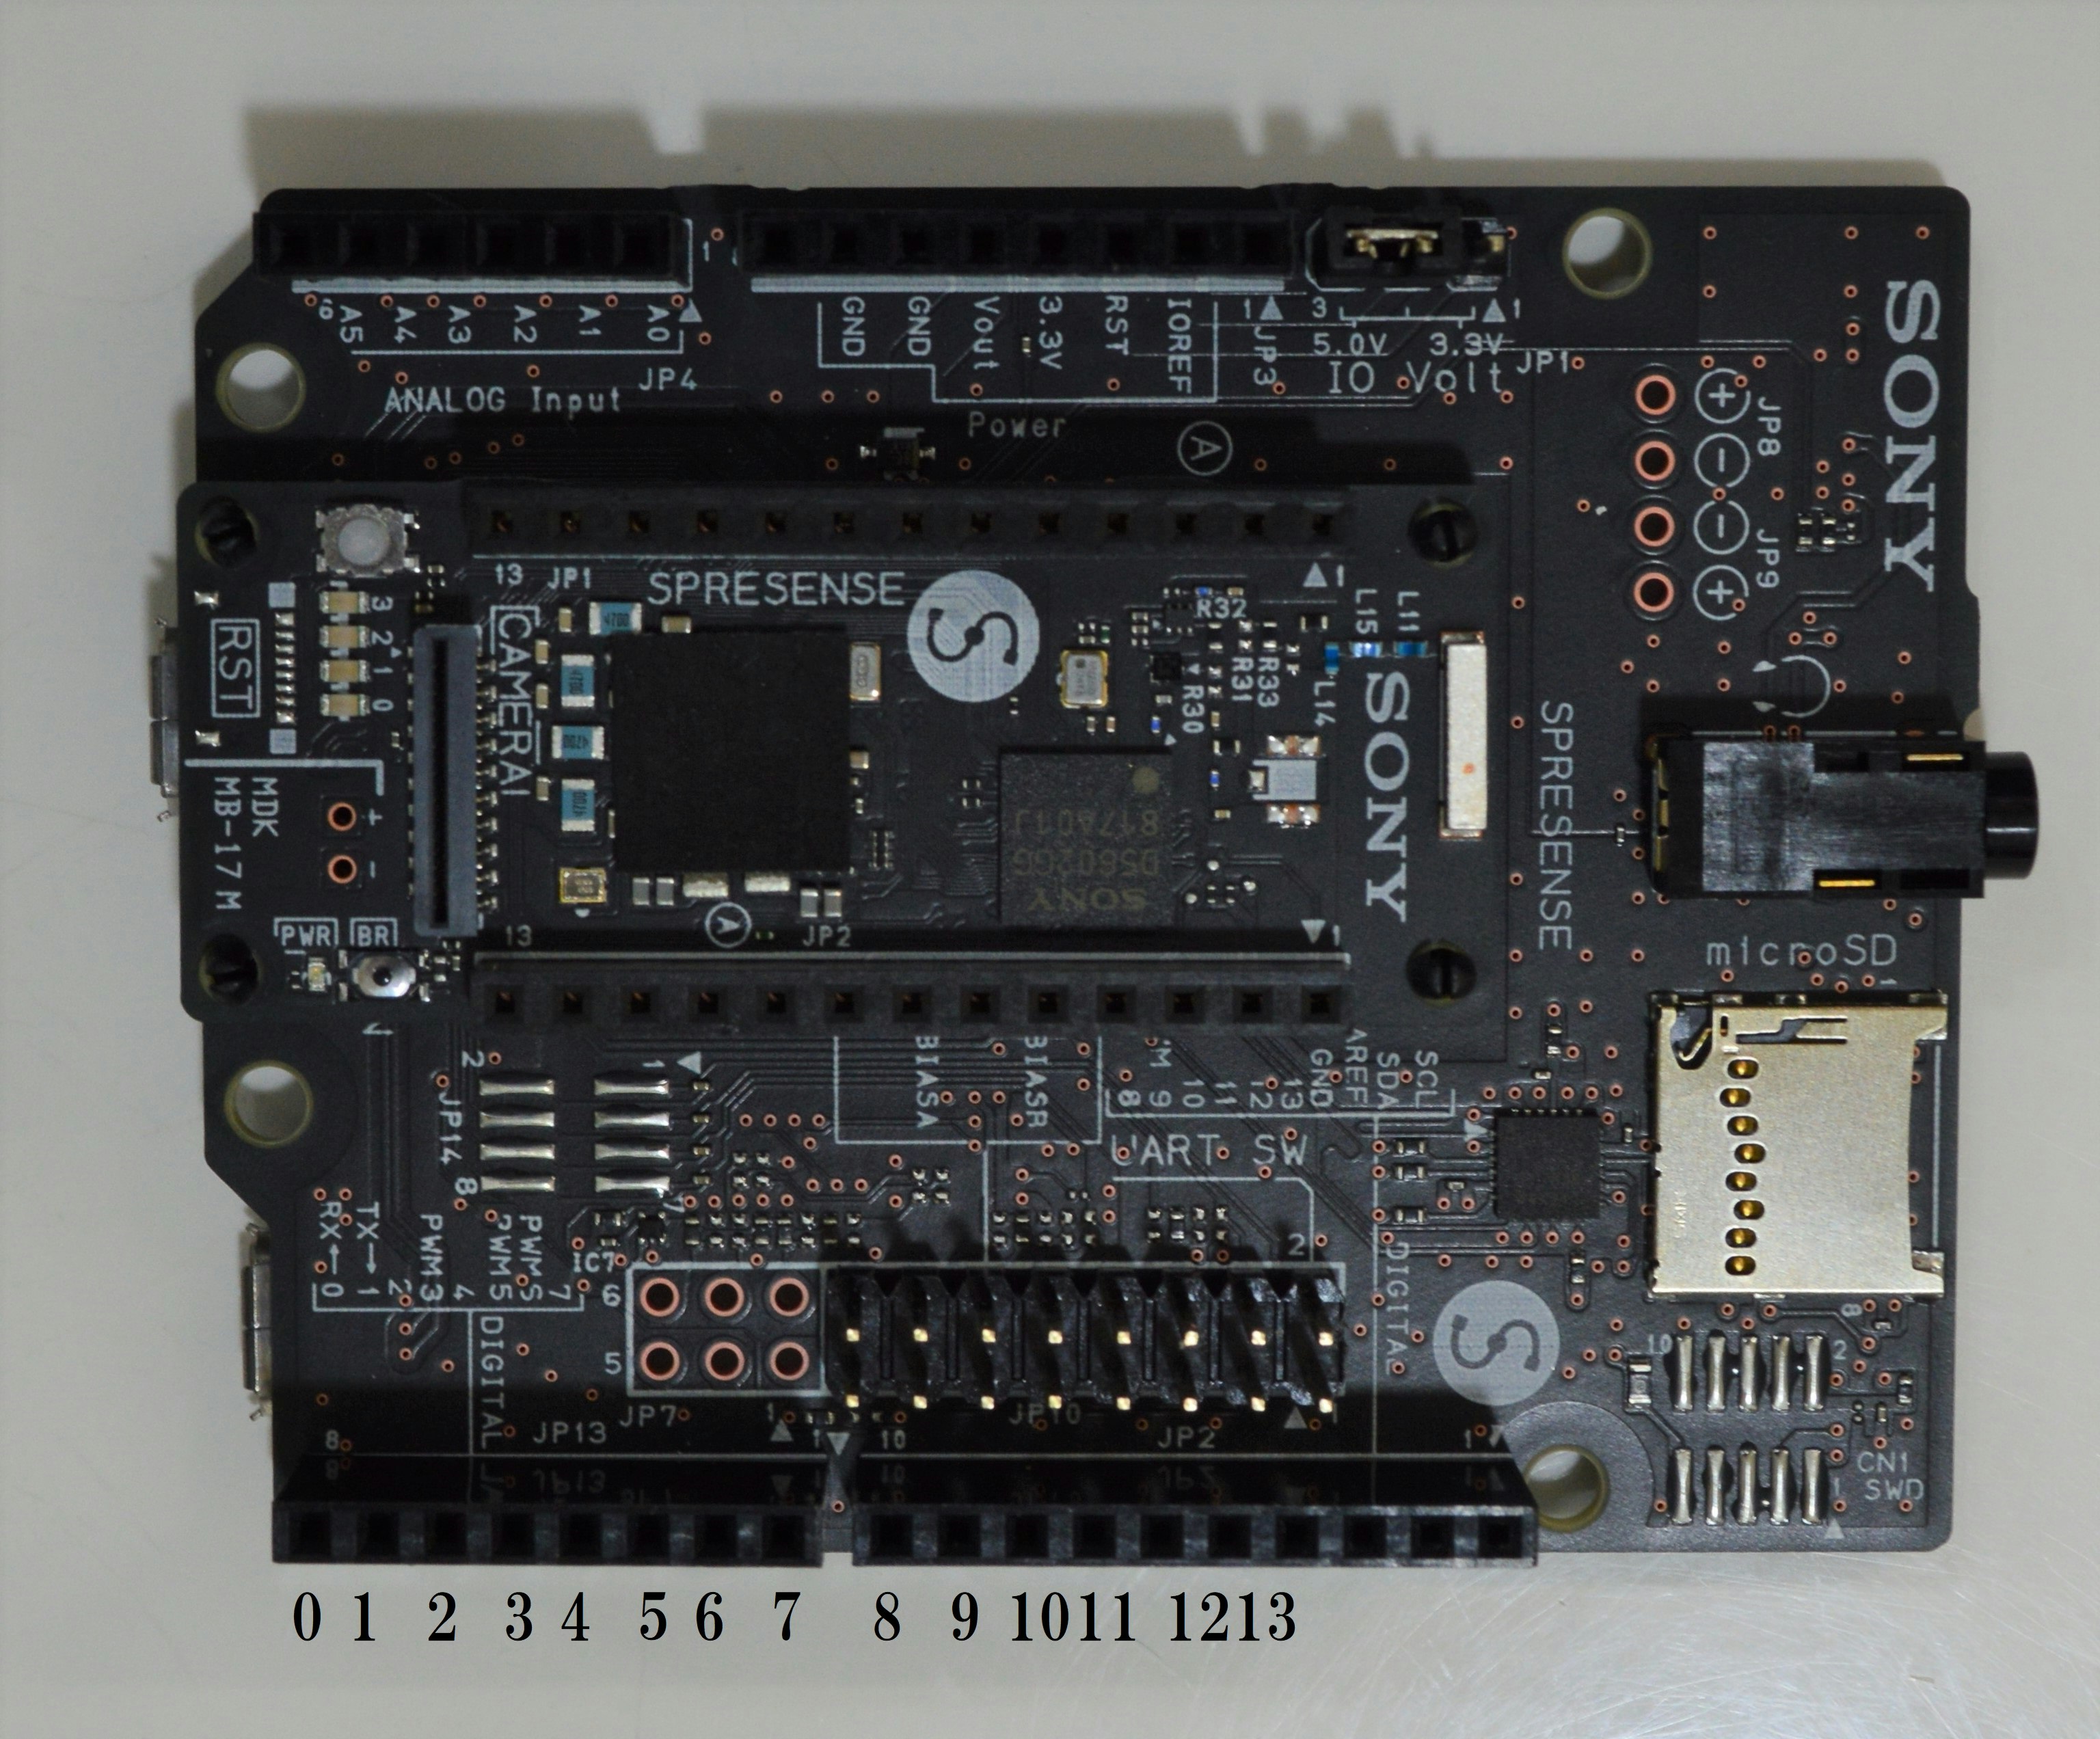
デジタル出力の6,7ピンをLEDとして使用しています。
https://docs.google.com/document/d/1XGrlxr9OR0KiB8XKCgiyRZS-VBkZQ3wfE6fPRwZr98A/edit#
ピンアサインはArduinoUnoと同じなので、一番下から0~13となります。
//LED接続ピン定義
# define PIN1 7    //青LED接続ピン
# define PIN2 6    //黄LED接続ピン

//初期化処理
void setup()
{
  //LEDを初期化(消灯)
  pinMode(PIN1, OUTPUT);    //PIN1を出力用に設定
  pinMode(PIN2, OUTPUT);    //PIN2も出力用に設定
  digitalWrite(PIN1, LOW);  //PIN1をOFF
  digitalWrite(PIN2, LOW);  //PIN2もOFF
}

//メインループ
void loop()
{
  digitalWrite(PIN1, HIGH);  //PIN1をON
  digitalWrite(PIN2, LOW);   //PIN2をOFF
  usleep(100000);            //0.1秒(100000μ秒)待つ
  digitalWrite(PIN1, LOW);   //PIN1をOFF
  digitalWrite(PIN2, HIGH);  //PIN2をON
  usleep(100000);            //0.1秒(100000μ秒)待つ
}
# define PIN1 7
pinMode(PIN1, OUTPUT);
とすればデジタルピンの7番目をPin1として出力で使用できます。
Sony SPRESENSEを使ってみよう(2) へ続く
