STM32CubeIDEでTouchGFXを使おう1の続きです。
https://qiita.com/usashirou/items/4fdbeec5c7c154872b19
次は、外部出力を使ってみましょう。
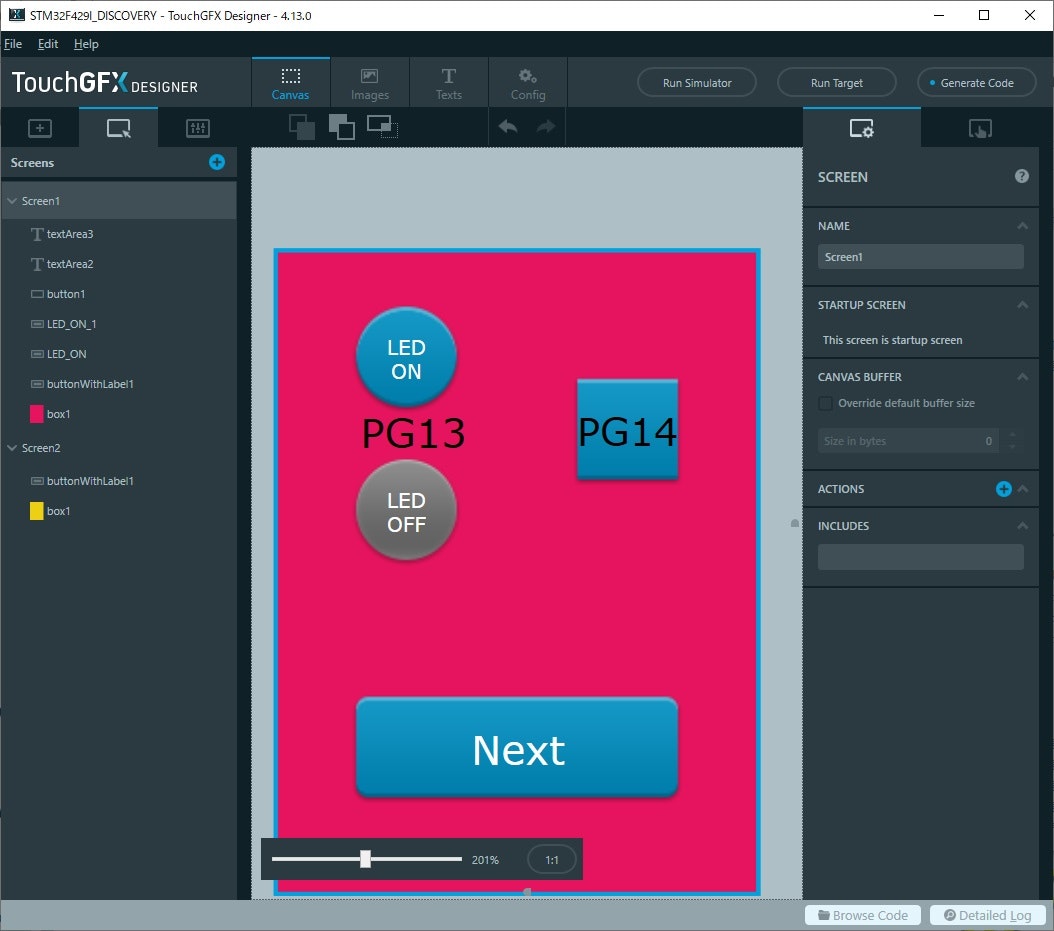
画面をこんな感じで製作しました。
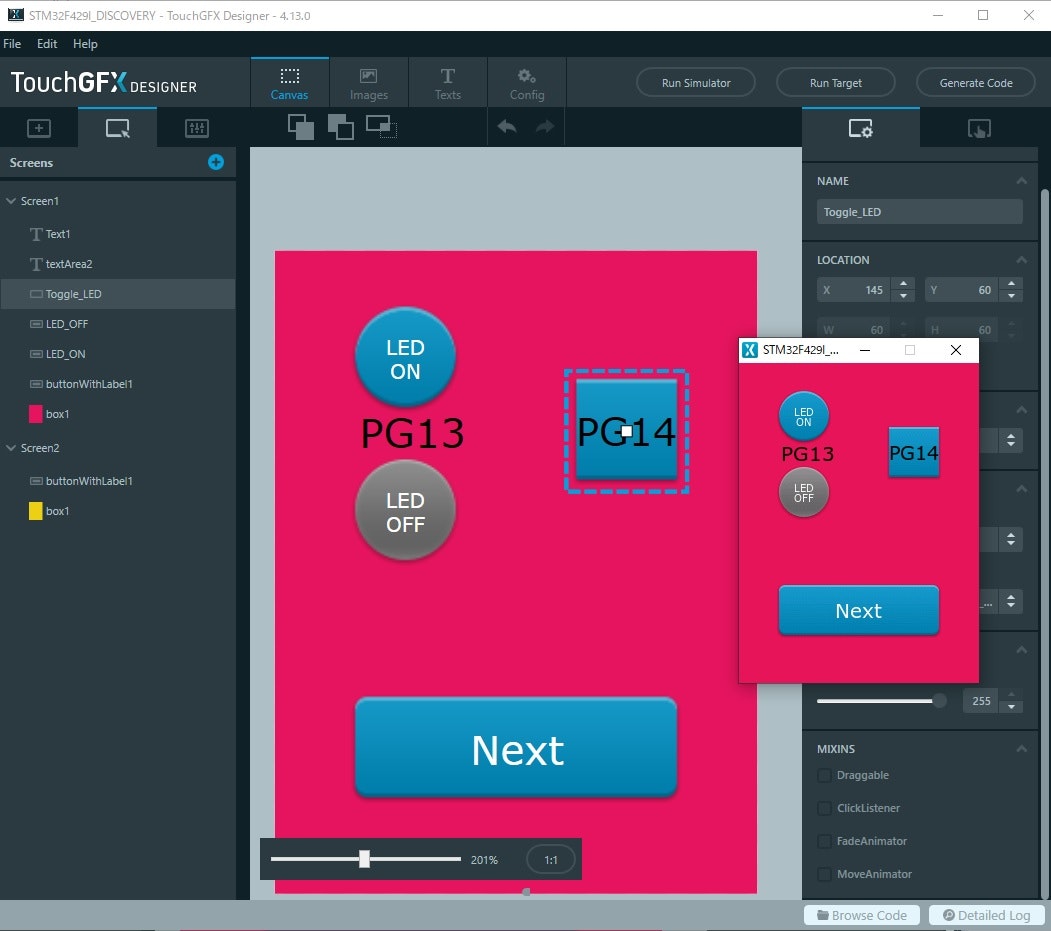
ここで、シミュレーターと、実機で確認しましょう。
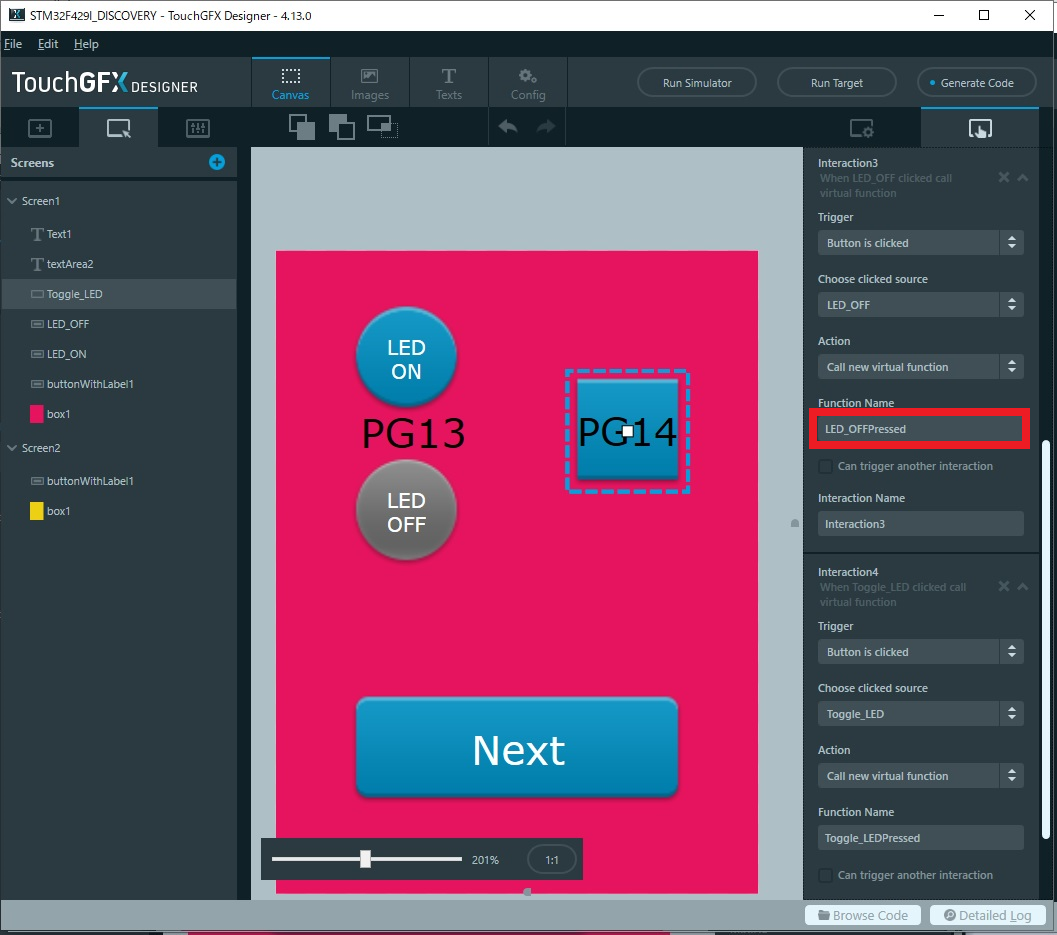
次は、Interactionを設定します。
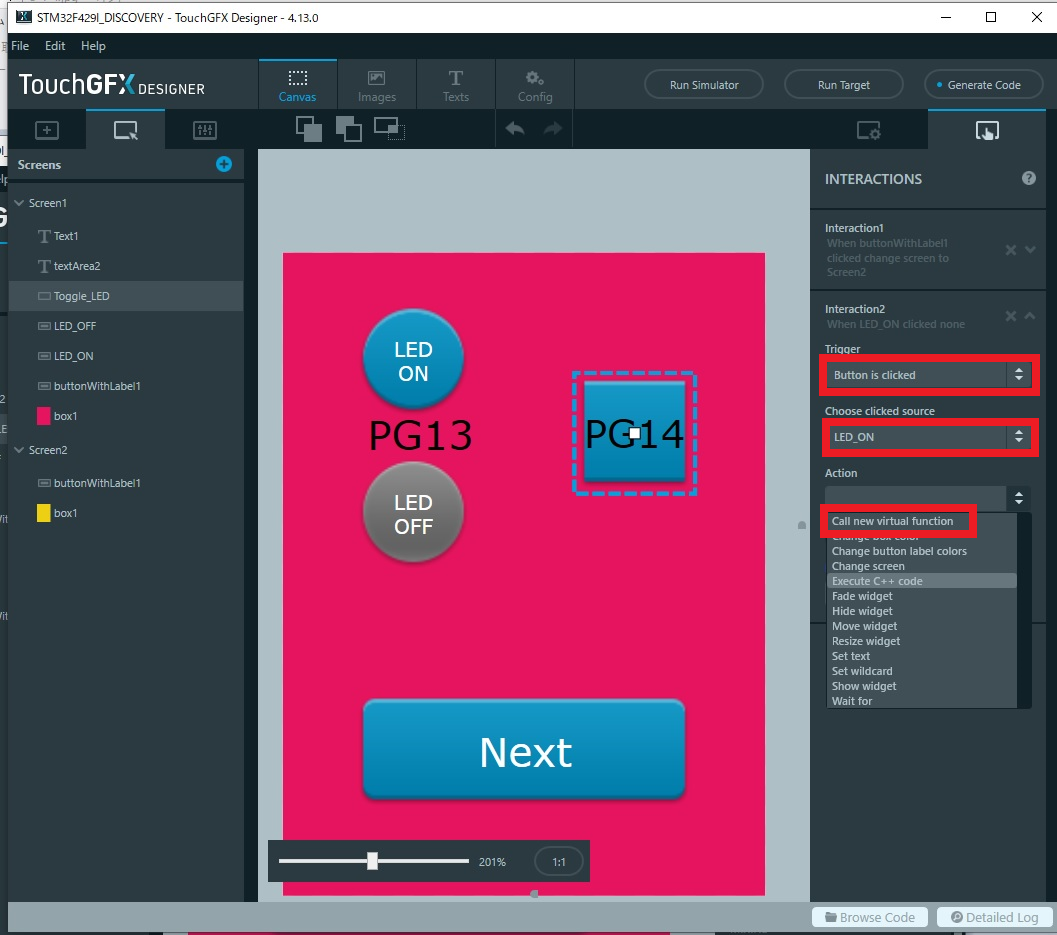
今回のアクションは、Call new Virtual Functionになります。
FunctionNameは、ボタンと同じではいけないので後ろにPressedを付けておきます。
LED_ONPressed
LED_OFFPressed
Toggle_LEDPressed
の3種類になります。
ここまでで、再度、実機確認をしましょう
コード作成
次は、コードを作っていきましょう。
STマイクロの資料では、Lab3になります。
STマイクロの資料では画面のボタンの遷移ですが、今回はLEDを点滅させていきます。
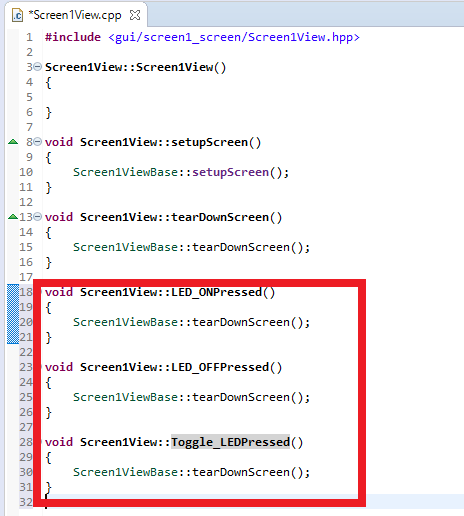
\TouchGFX\gui\src\screen1_screen\Screen1View.cpp
を開き
以下を追加します。
void Screen1View::LED_ONPressed()
{
    Screen1ViewBase::tearDownScreen();
}

void Screen1View::LED_OFFPressed()
{
    Screen1ViewBase::tearDownScreen();
}

void Screen1View::Toggle_LEDPressed()
{
    Screen1ViewBase::tearDownScreen();
}
ファイル名:Screen1View.cpp
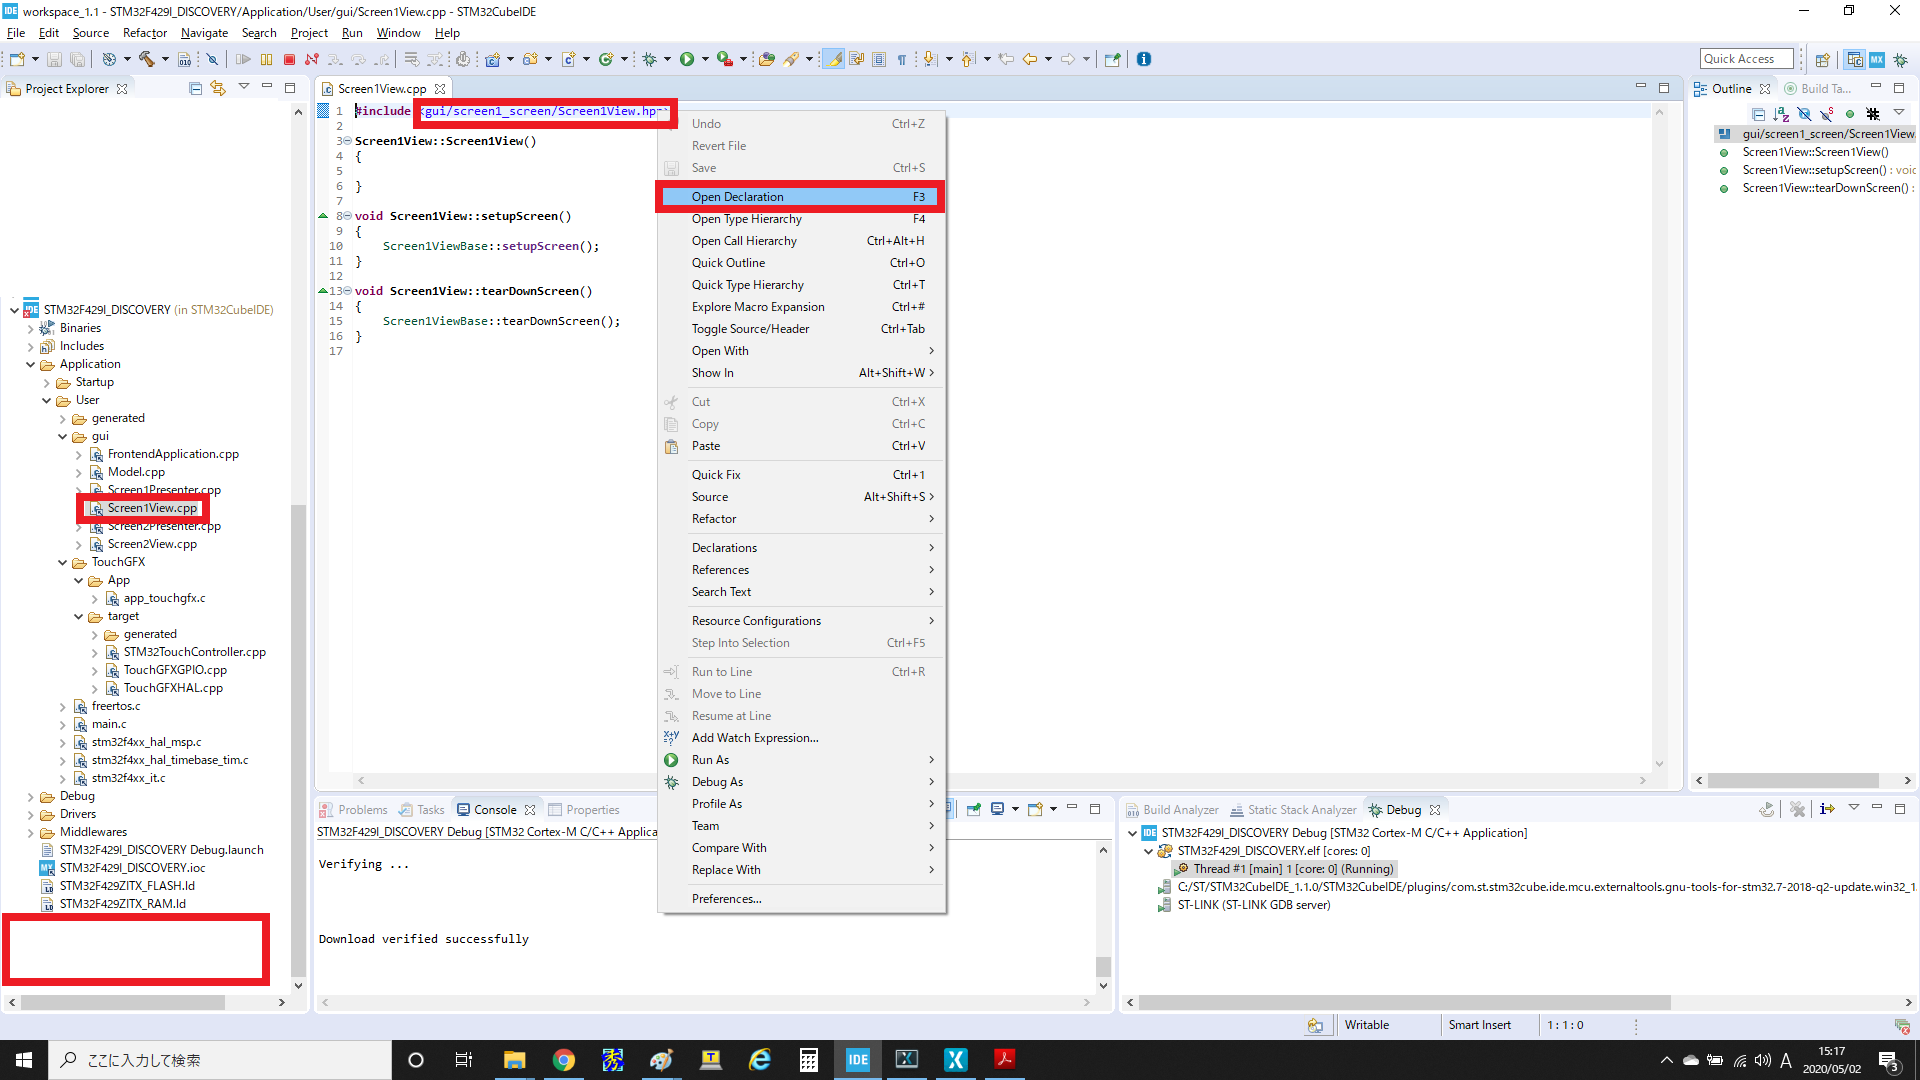
include
を右クリックしOpenDeclarationをクリックします。
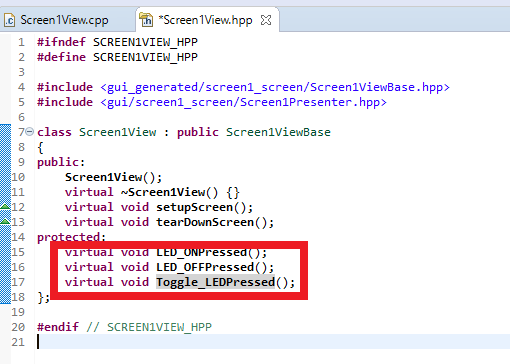
以下を追加します。
    virtual void LED_ONPressed();
    virtual void LED_OFFPressed();
    virtual void Toggle_LEDPressed();
ファイル名:gui/screen1_screen/Screen1View.hpp
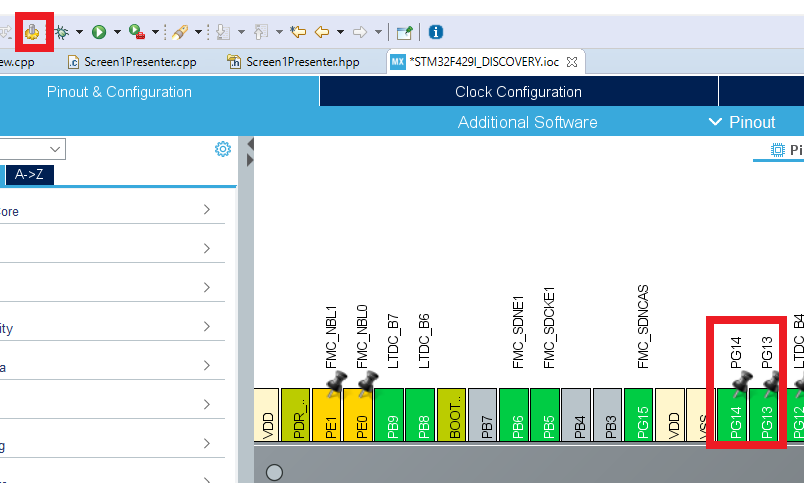
次に、LEDのピンを設定します。
PG13,PG14をGOPIO OUTPUTにします。

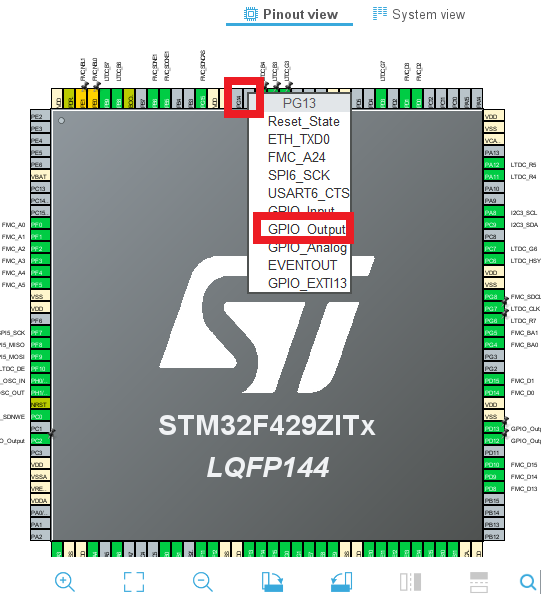
そして、ジェネレーションします。
Screen1Presenter.cppにプログラムを追加します。
void Screen1View::LED_ONPressed()
{
//Screen1ViewBase::tearDownScreen();
HAL_GPIO_WritePin(PG13_GPIO_Port,PG13_Pin,GPIO_PIN_SET);
}
void Screen1View::LED_OFFPressed()
{
//Screen1ViewBase::tearDownScreen();
HAL_GPIO_WritePin(PG13_GPIO_Port,PG13_Pin,GPIO_PIN_RESET);
}
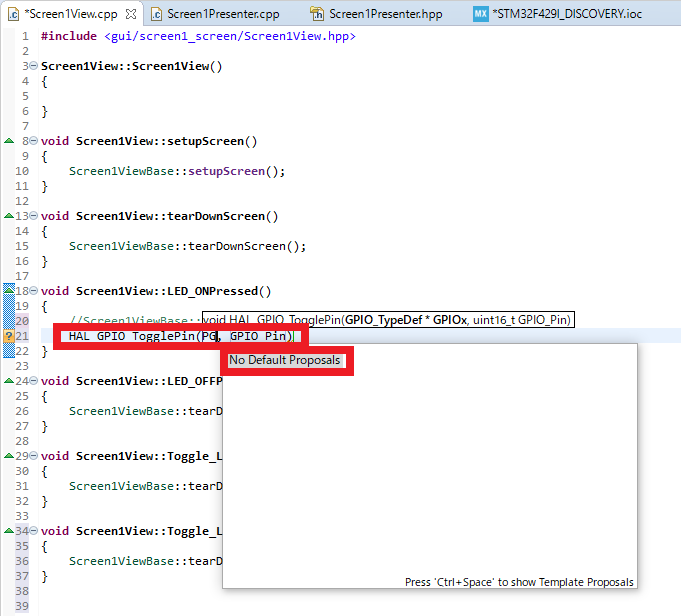
void Screen1View::Toggle_LEDPressed()
{
//Screen1ViewBase::tearDownScreen();
HAL_GPIO_TogglePin(GPIOG, GPIO_PIN_14);
}
このままでは、エラーが出てしまうのでトップにヘッダーファイルを追加します。
# include "main.h"
GPIOは1や0ではエラーとなり
GPIO_PIN_SETとGPIO_PIN_RESET
とします。
これで、LEDのオンオフが出来るようになったと思います。
以上で、TouchGFXを使用できるようになりましたね。