STM32CubeIDEを使ってみよう How To STM32CubeIDE 日本語版 (7) 割り込みを使ってみようの続きです。
今回はI2Cを使ってみます。
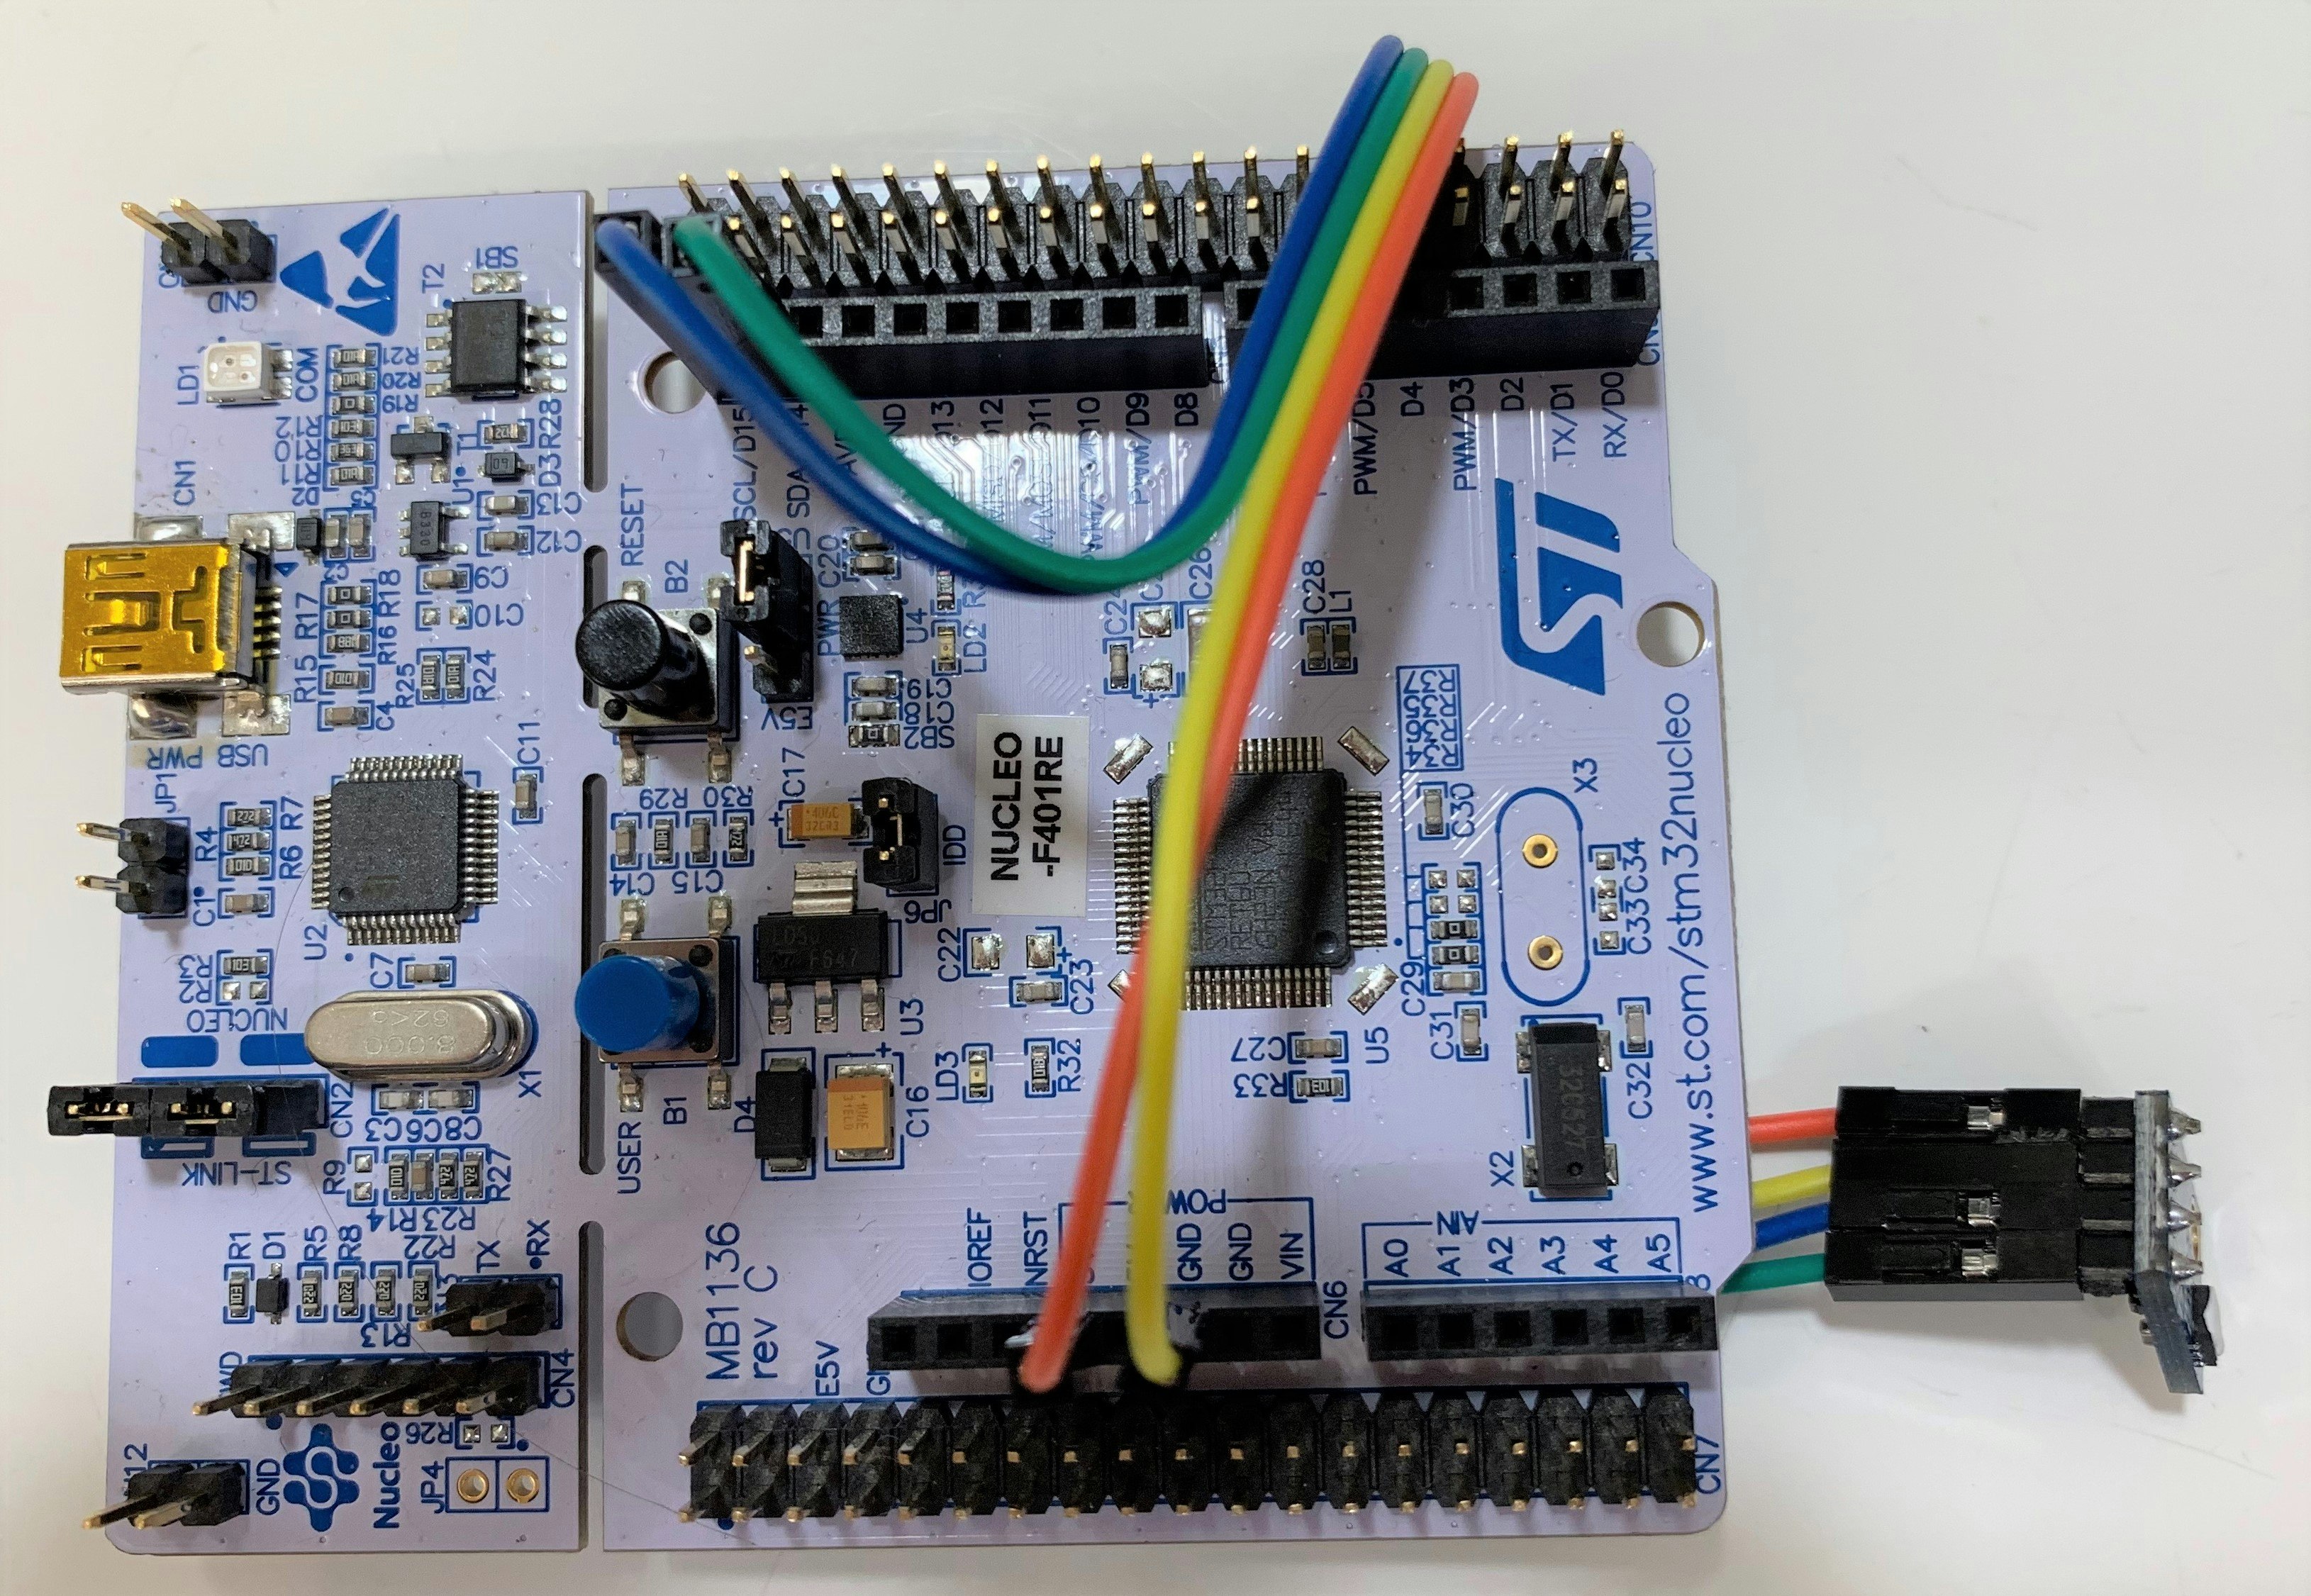
まずは、STM32Nucleoにセンサーをつないでみましょう。
今回は、Si7020を使いました。
まずは、Nucleoボードにジャンパーワイヤーでセンサーをつなげましょう。
この時、配線を間違えると、燃えることがありますので要注意です。
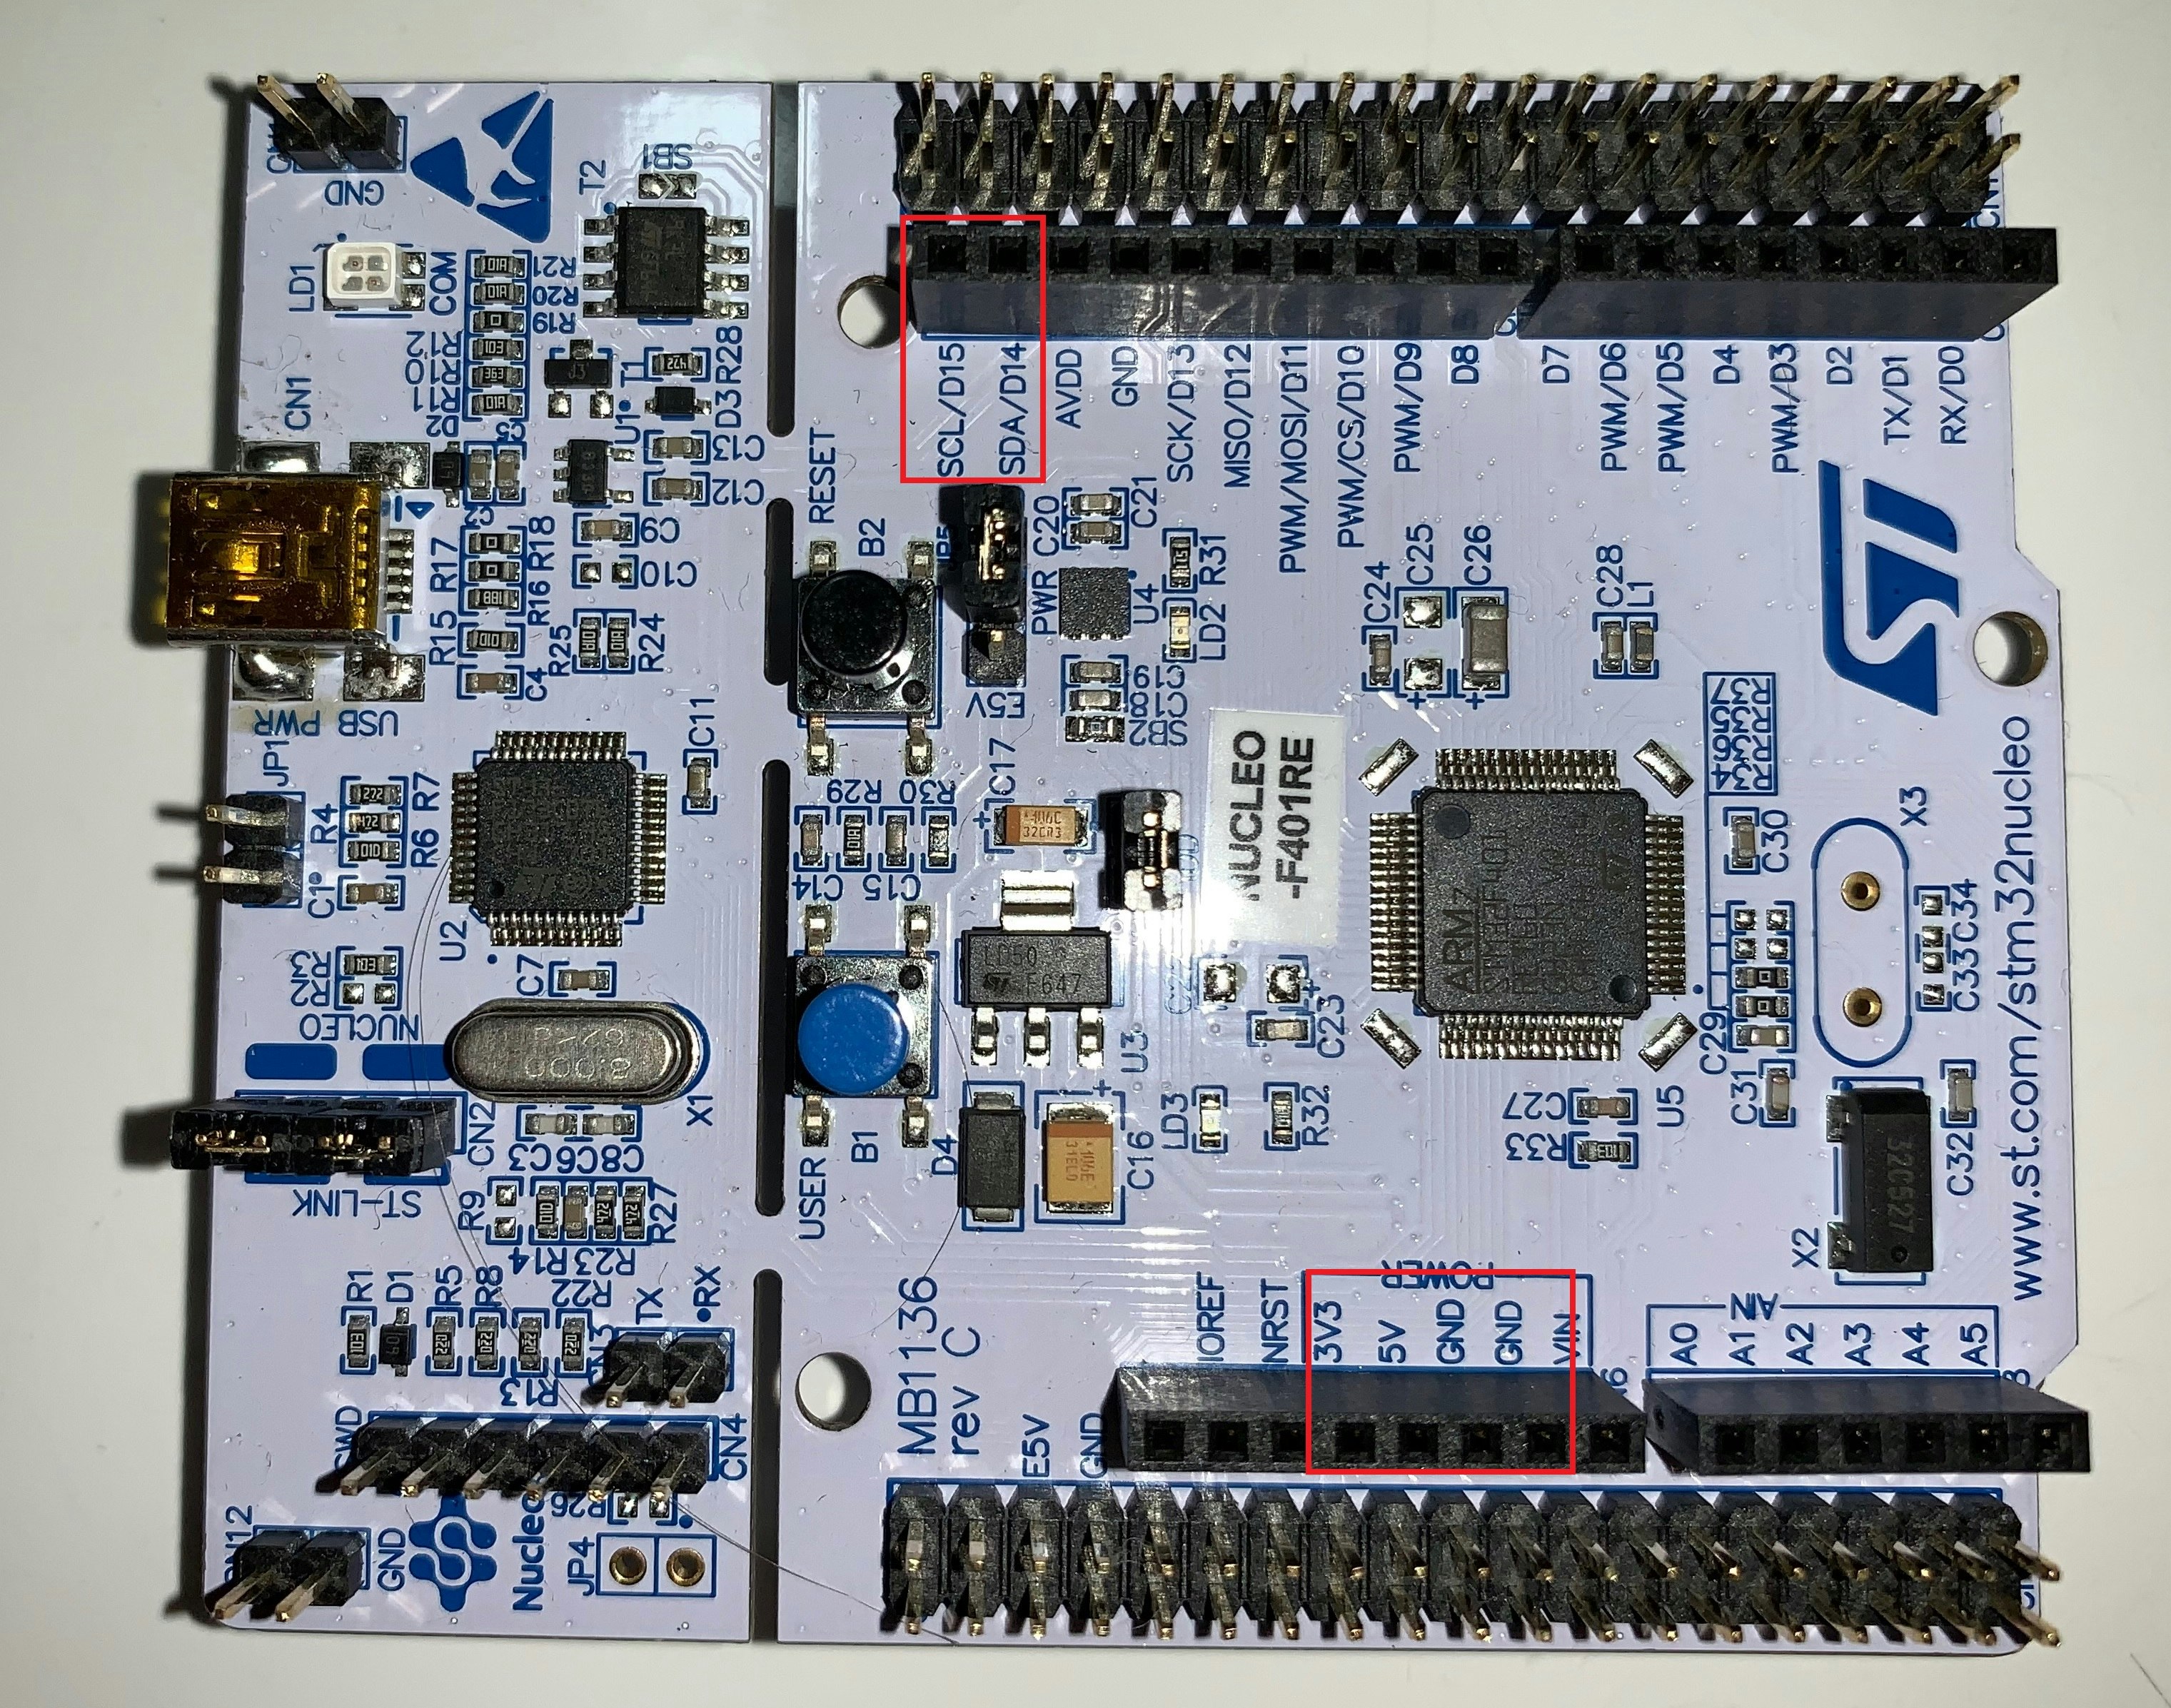
SCLとSDA,3Vまたは、5VとGNDを繋げます。
絶対にGNDと3V/5Vは逆に繋げないでください。
繋いだ状態です。
次に、何がつながっているかを確認したいので、Githubのi2c_bus_scanのコードを使ってプログラムを作ってみましょう。
https://github.com/ProjectsByJRP/stm32_hal_i2c_bus_scan
今後、皆さんが、プログラムを書く際も、まずは、既存のプログラムを触って、動かしてみましょう。
(なお、動かないものも多々あるので要注意です)
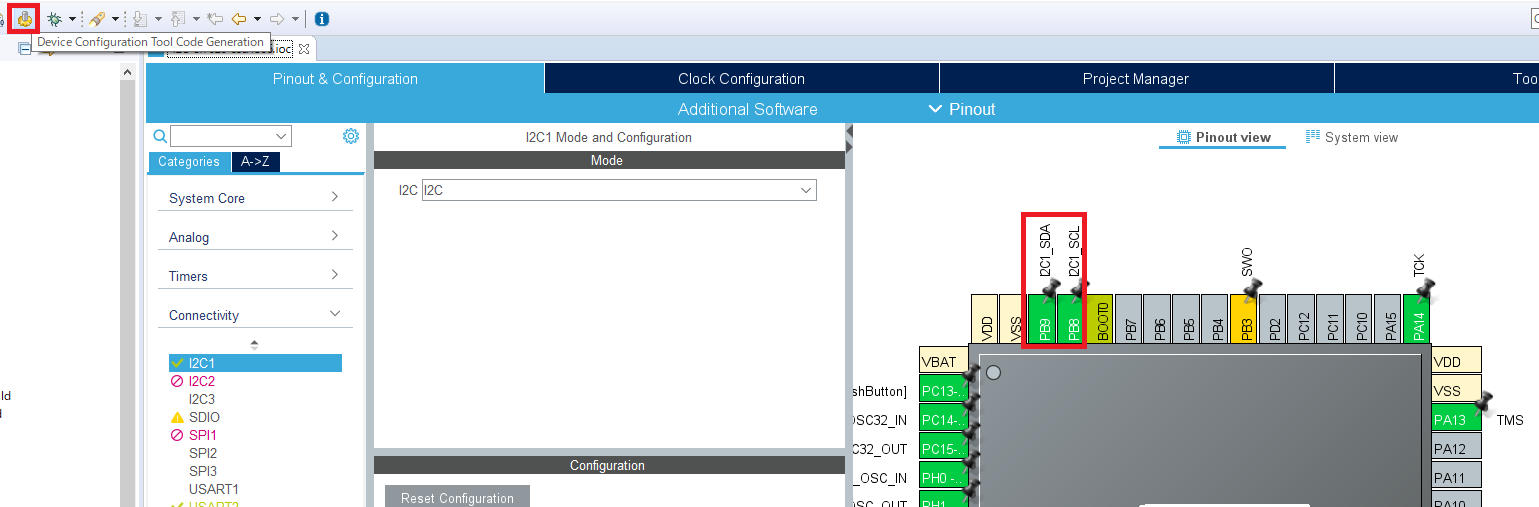
まずは、設定をしましょう。
新規プロジェクトを立ち上げてI2Cの設定をします。
I2C1をI2Cにします。
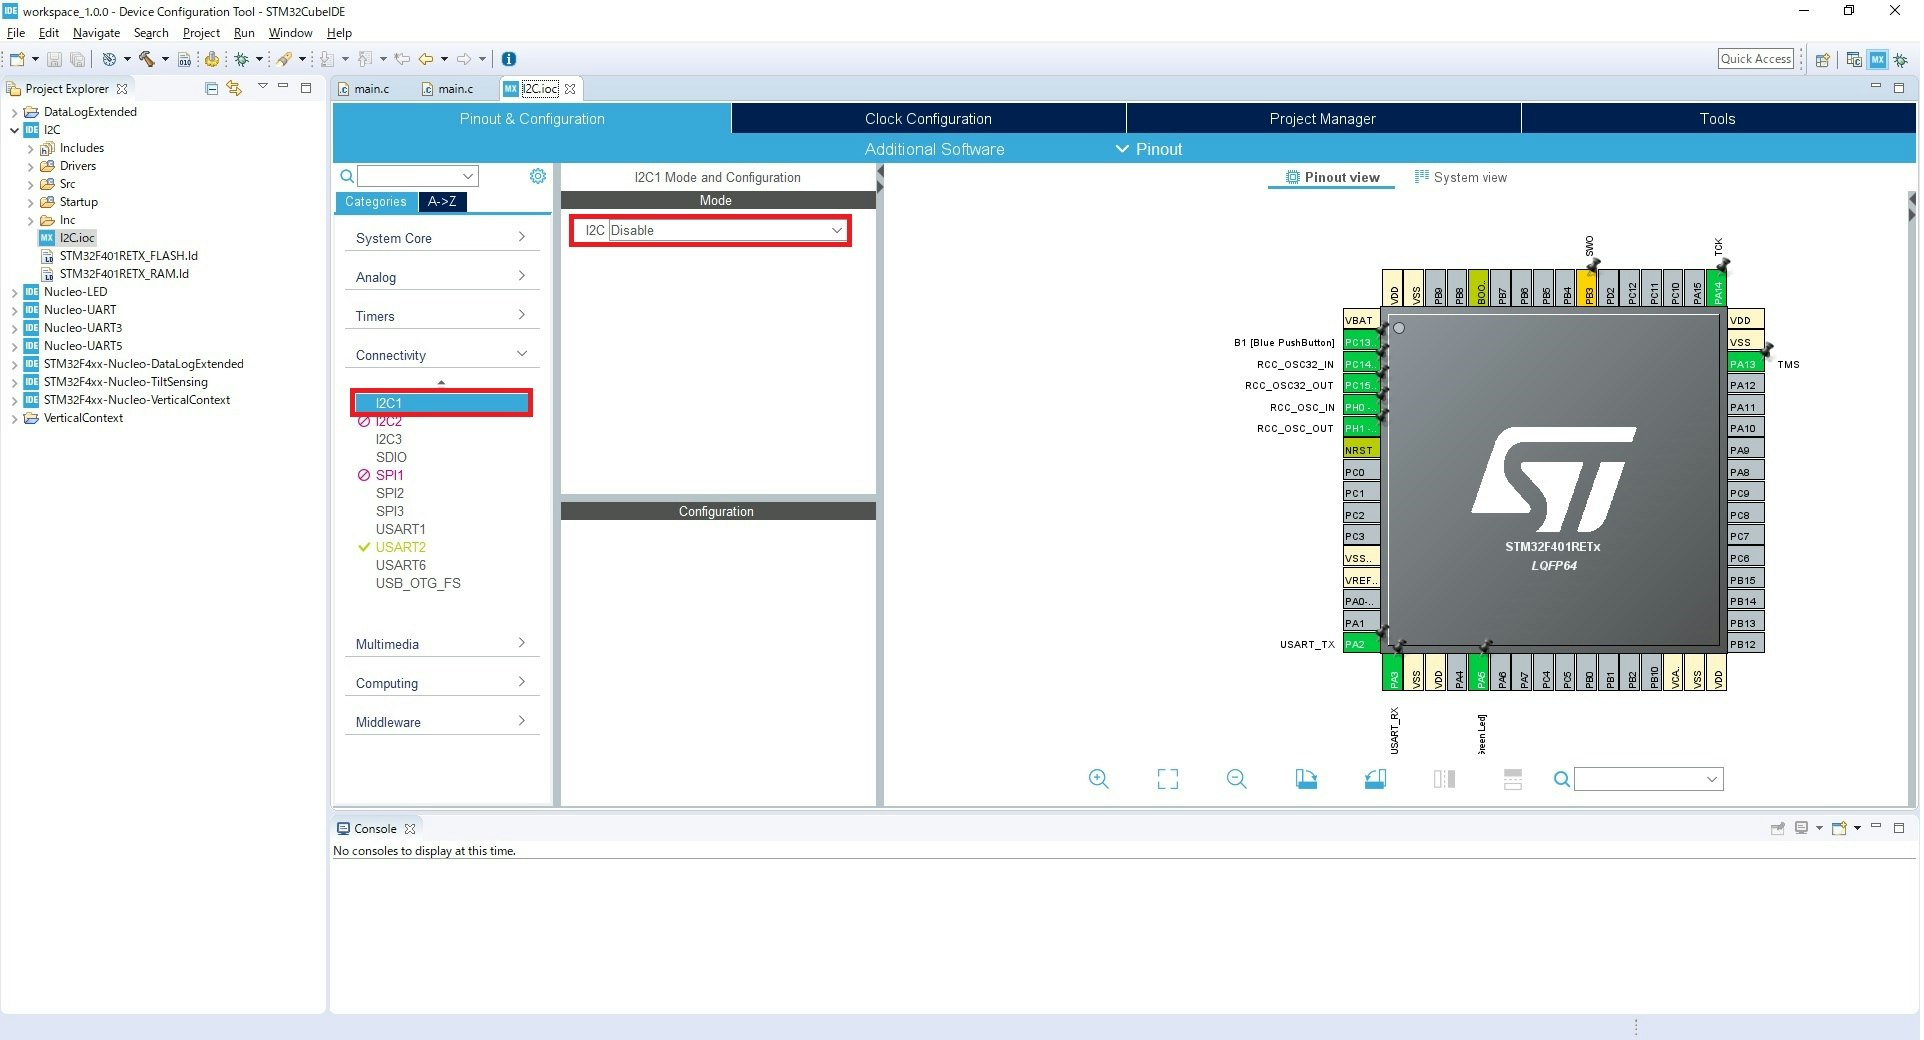
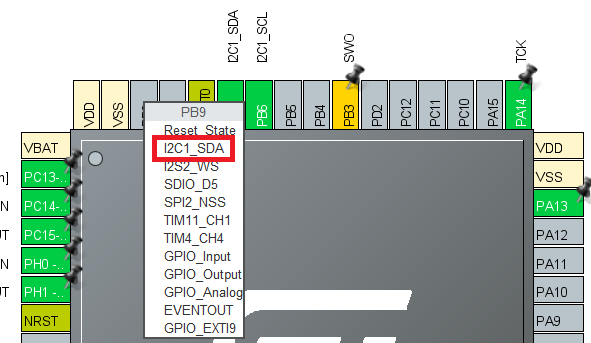
PB8,PB9にI2CのSCLとSDAが割り当てます。
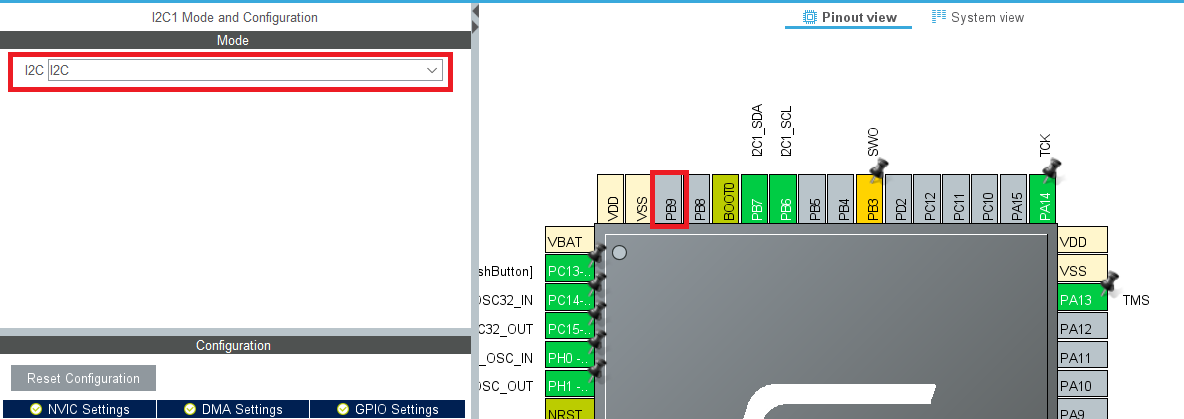
それでは、CodeGenerateしましょう。
次に、main.cにプログラムを追加します。
それではi2c_bus_scanから必要な部分をコピーします。
https://github.com/ProjectsByJRP/stm32_hal_i2c_bus_scan
99行目
  char uart2Data[24] = "Connected to UART Two\r\n";
   /*
    * Output to uart2
    * use screen or putty or whatever terminal software
    * 8N1 115200
    */
   HAL_UART_Transmit(&huart2, (uint8_t *)&uart2Data,sizeof(uart2Data), 0xFFFF);

 	printf("\r\n");

 	printf("Scanning I2C bus:\r\n");
	HAL_StatusTypeDef result;
 	uint8_t i;
 	for (i=1; i<128; i++)
 	{
 	  /*
 	   * the HAL wants a left aligned i2c address
 	   * &hi2c1 is the handle
 	   * (uint16_t)(i<<1) is the i2c address left aligned
 	   * retries 2
 	   * timeout 2
 	   */
 	  result = HAL_I2C_IsDeviceReady(&hi2c1, (uint16_t)(i<<1), 2, 2);
 	  if (result != HAL_OK) // HAL_ERROR or HAL_BUSY or HAL_TIMEOUT
 	  {
 		  printf("."); // No ACK received at that address
 	  }
 	  if (result == HAL_OK)
 	  {
 		  printf("0x%X", i); // Received an ACK at that address
 	  }
 	}
 	printf("\r\n");
60行目
/* USER CODE BEGIN 0 */
/* Direct printf to output somewhere */
# ifdef __GNUC__
# define PUTCHAR_PROTOTYPE int __io_putchar(int ch)
# else
# define PUTCHAR_PROTOTYPE int fputc(int ch, FILE *f)
# endif /* __GNUC__ */

# ifndef __UUID_H
# define __UUID_H
//#define STM32_UUID ((uint32_t *)0x1FF0F420)
# define STM32_UUID ((uint32_t *)UID_BASE)
# endif //__UUID_H

/* USER CODE END 0 */
302行目
/* USER CODE BEGIN 4 */
/**
  * @brief  Retargets the C library printf function to the USART.
  * @param  None
  * @retval None
  */
PUTCHAR_PROTOTYPE
{
  /* Place your implementation of fputc here */
  /* e.g. write a character to the USART2 and Loop until the end of transmission */
  HAL_UART_Transmit(&huart2, (uint8_t *)&ch, 1, 0xFFFF);

  return ch;
}

/* USER CODE END 4 */
これを動かすとteraTermでこんな表示になると思います。
0x40というのがSi7020 温湿度センサーになります。

以下はデータシートです。
https://www.silabs.com/documents/public/data-sheets/Si7020-A20.pdf
これを読めば、センサーデータを読むことができるのですが読めますか?
ふつうは(というか、初心者は)無理ですよね。
ということで、次は、センサーデータを見てみましょう。
それでは、次は、これをもとにI2Cデバイスとお話をしてみます。
STM32CubeIDEを使ってみよう How To STM32CubeIDE 日本語版 (9) I2Cを使ってみよう2 si7020編へ続きます。
https://qiita.com/usashirou/items/f59b4b82d7d4086b8936