はじめに
・Umbrella S3 ログ取得方法について具体的な方法が説明されているドキュメントを見つけることができなかったのでやってみたメモ
・ログを取得は Cyberduck というクライアントソフトを利用 (version 7.10)
ログアクセス情報
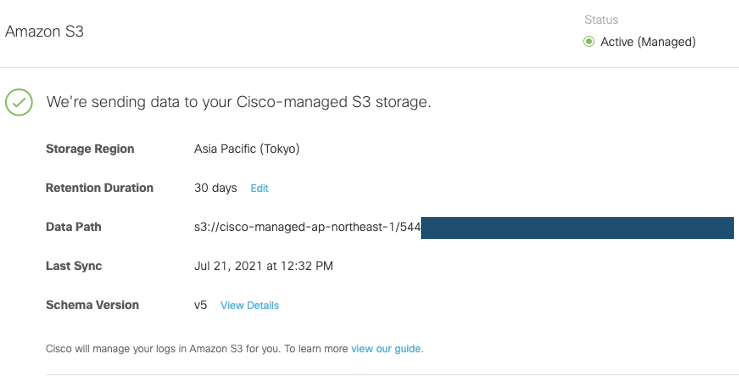
デフォルトで無効。設定を有効にすると Cisco 管理の Amazon S3 ストレージに最長 30 日間ログを保管することが可能。
この画面で表示されている情報をメモしておく(Secret Key はあとで参照できない)
Data Path と記載されている s3://XXX/XXX という箇所が AWS の世界でいう s3://{bucket-name}/{key-name} という構造になっている。(Virtual-hosted–style access)
S3 には Path-style access と呼ばれる URL 形式もあったが廃止がアナウンスされている。
https://docs.aws.amazon.com/AmazonS3/latest/userguide/access-bucket-intro.html
Cyberduck
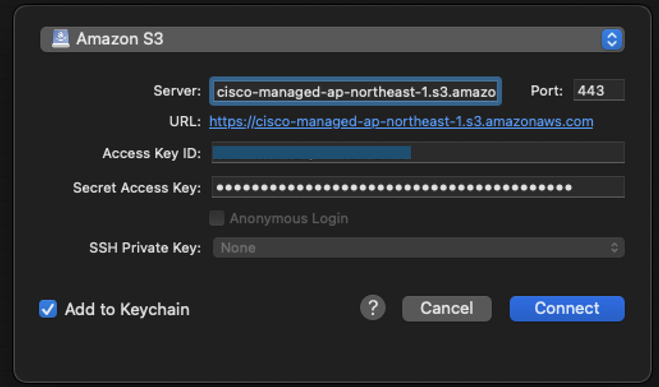
Open Connectionし、プロトコルで Amazon S3 を選択、
Server に {bucket-name}.s3.amazonaws.com を指定し、
アクセス情報でメモした Access Key ID と Secret Access Key を入力し Connect
今回 Storage Region を東京にしたが、Third party buckets であるためどこに指定しようと Endpoint は s3.amazonaws.com となる、らしい。
Access third party buckets
Connecting to a bucket you are not the owner (and therefore not included when logging in as above and listing all your owned buckets) is possible. You can access buckets owned by someone else if the ACL allows you to access it by either:
- Specify the bucket you want to access in the hostname to connect to like .s3.amazonaws.com. Your own buckets will not be displayed but only the third-party bucket.
- Set the Default Path in the bookmark to the bucket name.
- Choose Go → Go to Folder… when already connected.
https://trac.cyberduck.io/wiki/help/en/howto/s3
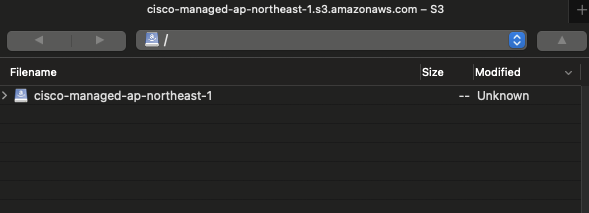
するとバケツにアクセスできるが、その下のディレクトリへはアクセスできない。
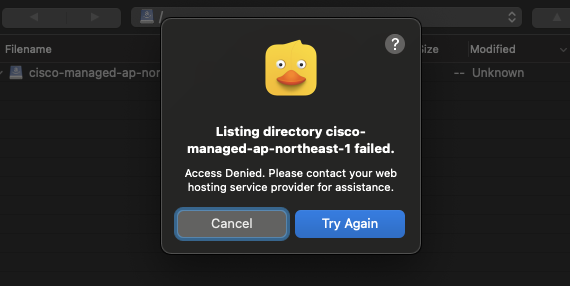
特定ディレクトリに移動するために、メニューバー Go からパスを指定して移動する(mac です)
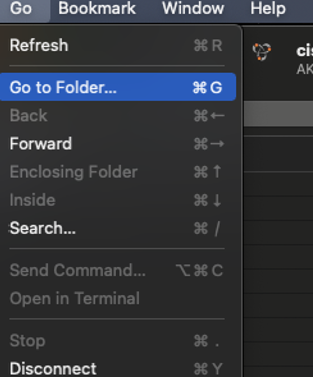
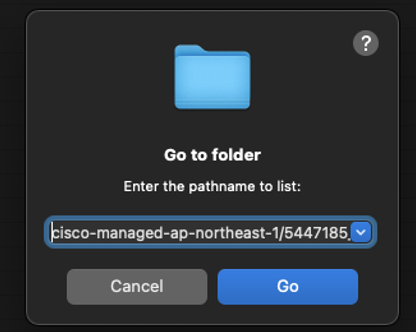
このとき Data Path と記載されていた文字列 {bucket-name}/{key-name} を指定すればよい。
DNS 関連のログは dnslogs 配下に日毎に置かれる。
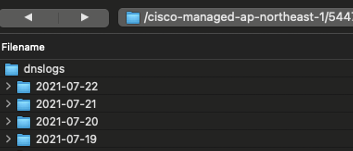
参考までに利用する機能によって proxylogs, firewalllogs, auditlogs などもある。ログフォーマットについては以下が詳しい。
https://docs.umbrella.com/deployment-umbrella/docs/log-formats-and-versioning
Reference
https://docs.umbrella.com/deployment-umbrella/docs/cisco-managed-s3-bucket
https://support.umbrella.com/hc/en-us/articles/231248468-How-to-Downloading-logs-from-Cisco-Umbrella-Log-Management-in-AWS-S3
https://trac.cyberduck.io/wiki/help/en/howto/s3
