今回はJSの勉強なので、HTML、CSSはここからコピペする。
HTML
<!DOCTYPE html>
<html lang="ja">
<head>
  <meta charset="UTF-8" />
  <title>ツーリングスポットナビ</title>
  <link rel="stylesheet" href="style.css" />
</head>
<body>
    <header>
      <div class="header-inner">
      <h1 class="title">ツーリングスポットナビ</h1>
      <input type="search" id="search" name="search" class="search-box" placeholder="スポットを検索"/>
      <button class="search-button">検索する</button>
      <ul class="header-nav">
        <li class="header-li">お気に入り</li>
        <li class="header-li">ログイン</li>
      </ul>
    </div>
    </header>

    <main>
      <div class="main-inner">
        <div class="main-content">
          <div class="map"></div>
          <div class="side">
            <div class="filter">
              <h2 class="filter-title">絞り込み検索</h2>
              <div class="filter-box">
                <div class="filter-group">
                  <label class="filter-label">エリア</label>
                  <select class="area-select">
                    <option value="">選択してください</option>
                    <option value="hokkaido">北海道</option>
                    <option value="tohoku">東北</option>
                    <option value="kanto">関東</option>
                    <option value="chubu">中部</option>
                    <option value="kinki">近畿</option>
                    <option value="chugoku">中国・四国</option>
                    <option value="kyushu">九州</option>
                    <option value="okinawa">沖縄</option>
                  </select>
                </div>

                <div class="filter-group">
                  <label class="filter-label">スポットタイプ</label>
                  <div>
                    <button type="button" class="select-button">海</button>
                    <button type="button" class="select-button">山</button>
                    <button type="button" class="select-button">展望台</button>
                    <button type="button" class="select-button">カフェ</button>
                  </div>
                </div>

                <div class="filter-group">
                  <label class="filter-label">季節</label>
                  <div>
                    <button type="button" class="select-button">春</button>
                    <button type="button" class="select-button">夏</button>
                    <button type="button" class="select-button">秋</button>
                    <button type="button" class="select-button">冬</button>
                  </div>
              </div>

              <div class="filter-group">
                <label class="filter-label">難易度</label>
                <div>
                  <button type="button" class="select-button">初心者</button>
                  <button type="button" class="select-button">中級</button>
                  <button type="button" class="select-button">上級</button>
                </div>
              </div>
            </div>
              <div class="filter-actions">
                <button class="filter-search">検索する</button>
                <button class="filter-reset">リセット</button>
              </div>
            </div>
          </div>
        </div>

        <div class="content-below">
          <div class="plan">
            <h2 class="plan-title">ツーリングプラン</h2>
            <div class="plan-content"></div>
          </div>
          <div class="recommend">
            <h2 class="recommend-title">おすすめスポット</h2>
          </div>
        </div>

      </div>
    </main>
    <script src="./script.js"></script>

</body>
</html>
CSS
body {
  margin: 0;
  background-color: #d7e4f7;
}


header {
  background-color: #25619d;
}

.header-inner {
  display: flex;
  align-items: center;
  justify-content: space-between;
  max-width: 1200px;
  margin: 0 auto;
}

.title {
  margin-right: 20px;
  color: white;
}

.search-box {
  width: 300px;
  height: 40px;
}

.search-button {
  padding: 7px 20px;
  color: #114076;
  font-size: 15px;
  font-weight: bold;
  background-color: white;
  border: 3px solid #95b4e0;
  border-radius: 5px;
  cursor: pointer;
}

.header-nav {
  display: flex;
  list-style: none;
  gap: 30px;
  color: white;
  align-items: center;
  cursor: pointer;
}

.header-li {
  background-color: #154172;
  padding: 7px 20px;
  border: 3px solid #619dd2;
  border-radius: 5px;
}

.main-inner {
  max-width: 1200px;
  margin: 0 auto;
  margin-top: 20px;
}

.main-content {
  display: flex;
  justify-content: center;
  gap: 20px;
}

.map {
  width: 850px;
  height: 640px;
  background-color: pink;
}

.side {
  display: flex;
  gap: 20px;
}

.filter {
  width: 320px;
  height: 570px;
  background-color: orange;
  border: 5px solid #cad1d7;
  border-radius: 10px;
}

.filter-title {
  margin-top: 0;
  padding-top: 10px;
  padding-left: 20px;
  color: #154172;
}

.filter-box {
  width: 300px;
  display: flex;
  flex-direction: column;
  justify-content: left;
}

.filter-group {
  margin-bottom: 20px;
  margin-left: 20px;
  padding-bottom: 20px;
  display: flex;
  flex-direction: column;
  gap: 10px;
  border-bottom: solid 2px #cad1d7;
}

.filter-label {
  font-size: 18px;
  font-weight: bold;
}

.area-select {
  width: 150px;
  height: 30px;
}

.select-button {
  height: 30px;
  background-color: white;
  border-radius: 3px;
  border: 1px solid #414346;
}

.filter-actions {
  display: flex;
  justify-content: center;
  gap: 10px;
  padding-bottom: 20px;
}

.filter-search {
  color: white;
  background-color: #154172;
  border-radius: 3px;
  padding: 10px 20px;
}

.filter-reset {
  padding: 0 6px;
}

.content-below {
  display: flex;
  margin-top: 20px;
  gap: 20px;
}

.plan {
  width: 450px;
  height: 400px;
  background-color: yellow;
  border: 5px solid #cad1d7;
  border-radius: 10px;
}

.plan-title {
  color: white;
  background-color: #25619d;
  margin-top: 0;
  padding-top: 10px;
  padding-bottom: 10px;
  padding-left: 10px;
  border-radius: 6px 6px 0 0;
}

.recommend {
  width: 770px;
  height: 400px;
  background-color: green;
  border: 5px solid #cad1d7;
  border-radius: 10px;
}

.recommend-title {
  color: white;
  background-color: #25619d;
  margin-top: 0;
  padding-top: 10px;
  padding-bottom: 10px;
  padding-left: 10px;
  border-radius: 10px 10px 0 0;
}
今回進めるのはこの赤枠部分
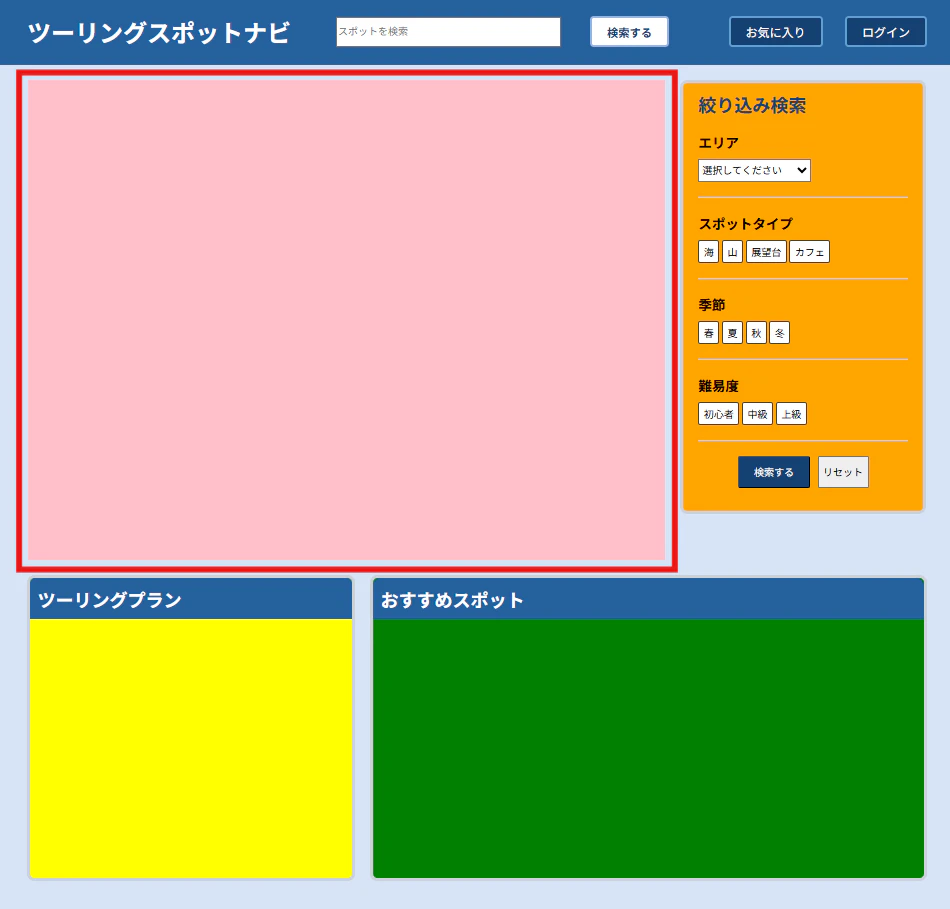
ステップ1|Googleマップを表示しよう
まず地図を表示するだけをやってみよう
Google Maps APIのキーを取得しよう
Googleマップを使うには「APIキー」が必要です。
Google Cloud Console で取得できます(無料枠あり)。
取得したら index.html の </body> の直前に以下を追加します。
<script src="https://maps.googleapis.com/maps/api/js?key=ここにAPIキーを入れる"></script>
<script src="./script.js"></script>
script.js より前に読み込んでおく必要があります
script.js に地図を表示するコードを書こう
.map の部分に地図を表示します。
まずは日本全体が見える状態で表示してみましょう。
const map = new google.maps.Map(document.querySelector('.map'), {
  center: { lat: 36.5, lng: 137.0 }, // 日本の中心あたり
  zoom: 6,
});
- ブラウザで開いて、地図が表示されたら成功です!
-
zoomの数字を変えると拡大・縮小が変わります。試してみましょう。
ステップ2|スポットのデータを自分で書こう
データを配列で定義しよう
地図に表示するスポットのデータをJSで書きます。
まずは3〜5件、自分の好きなツーリングスポットを入れてみましょう。
const spots = [
  {
    name: "稚内 宗谷岬",
    lat: 45.52,
    lng: 141.93,
    type: "海",
    description: "日本最北端の地。地平線まで広がる海が絶景。",
  },
  {
    name: "角島大橋",
    lat: 34.36,
    lng: 130.87,
    type: "海",
    description: "エメラルドグリーンの海に伸びる絶景の橋。",
  },
  {
    name: "乗鞍スカイライン",
    lat: 36.10,
    lng: 137.55,
    type: "山",
    description: "標高2700mまで走れる日本屈指の山岳ルート。",
  },
];
📌
lat(緯度)とlng(経度)はGoogleマップで場所を右クリックすると確認できます
ステップ3|データを使って地図にピンを立てよう
forEach でスポットの数だけピンを立てよう
ステップ2で作った spots 配列を forEach で回して、
全スポットにピンを立てます。
spots.forEach(spot => {
  const marker = new google.maps.Marker({
    position: { lat: spot.lat, lng: spot.lng },
    map: map,
    title: spot.name,
  });
});
- 地図を開いて、ピンが表示されたら成功です!
-
titleに入れた文字は、ピンにマウスを乗せたときにブラウザのツールチップで出ます
ステップ4|ピンにホバーしたら内容を表示しよう
InfoWindowを使って吹き出しを出そう
Googleマップには「InfoWindow」という吹き出し表示の機能があります。
マウスを乗せたとき(mouseover)に出して、離れたとき(mouseout)に消します。
spots.forEach(spot => {
  const marker = new google.maps.Marker({
    position: { lat: spot.lat, lng: spot.lng },
    map: map,
    title: spot.name,
  });

  // 吹き出しの中身を定義する
  const infoWindow = new google.maps.InfoWindow({
    content: `<p>${spot.name}</p><p>${spot.type}</p>`,
  });

  // マウスを乗せたら表示
  marker.addListener('mouseover', () => {
    infoWindow.open(map, marker);
  });

  // マウスが離れたら閉じる
  marker.addListener('mouseout', () => {
    infoWindow.close();
  });
});
-
contentの中はHTMLが書けます。表示したい内容を増やしてみましょう
ステップ5|ピンをクリックしたらスポットの詳細を表示しよう
まず詳細表示エリアをHTMLに追加しよう
index.html の .map の下に詳細を表示するエリアを追加します。
最初は display: none で隠しておきます。
<div class="spot-detail" style="display: none;">
  <h2 class="detail-name"></h2>
  <p class="detail-type"></p>
  <p class="detail-description"></p>
</div>
クリックしたスポットのデータを流し込もう
ピンをクリックしたとき(click)に、詳細エリアを表示して
そのスポットの情報を書き込みます。
marker.addListener('click', () => {
  const detail = document.querySelector('.spot-detail');

  document.querySelector('.detail-name').textContent = spot.name;
  document.querySelector('.detail-type').textContent = spot.type;
  document.querySelector('.detail-description').textContent = spot.description;

  detail.style.display = 'block'; // 隠していたエリアを表示する
});
- クリックするたびに内容が切り替わるのを確認してみましょう
ステップ6|詳細ページへの画面遷移を実装しよう
URLにスポットの情報を乗せて渡そう
別ページに移動するとき、「どのスポットを見ているか」を
URLの末尾(クエリパラメータ)に乗せて渡します。
marker.addListener('click', () => {
  // スポット名をURLに乗せて detail.html へ移動する
  window.location.href = `detail.html?name=${encodeURIComponent(spot.name)}`;
});
📌
encodeURIComponentは日本語をURLで使える文字に変換してくれます
渡ってきた情報を detail.html 側で受け取ろう
detail.html 側では、URLからスポット名を取り出します。
まずコンソールに表示して、ちゃんと受け取れているか確認しましょう。
const params = new URLSearchParams(window.location.search);
const spotName = params.get('name');
console.log(spotName); // URLから取り出したスポット名が表示されるはず
受け取れたら、spots 配列から一致するデータを探してみましょう。
const spot = spots.find(s => s.name === spotName);
console.log(spot); // 一致したスポットのオブジェクトが表示されるはず
ステップ7|詳細画面を作ろう
detail.html を新しく作ろう
index.html と同じフォルダに detail.html を新規作成します。
表示する内容はステップ6で受け取ったデータを流し込みます。
<!DOCTYPE html>
<html lang="ja">
<head>
  <meta charset="UTF-8" />
  <title>スポット詳細</title>
  <link rel="stylesheet" href="style.css" />
</head>
<body>
  <header>
    <!-- index.html と同じヘッダーをコピーしてくる -->
  </header>

  <main>
    <div class="detail-page">
      <button class="back-button">← 地図に戻る</button>
      <h1 class="detail-name"></h1>
      <p class="detail-type"></p>
      <p class="detail-description"></p>
    </div>
  </main>

  <script src="./spots.js"></script><!-- データを別ファイルに切り出す(下記参照) -->
  <script src="./detail.js"></script>
</body>
</html>
スポットデータを別ファイルに切り出そう
index.html と detail.html の両方で同じデータを使いたいので、
spots.js というファイルに切り出しておくと管理が楽になります。
spots.js
const spots = [
  // ステップ2で書いたデータをここに移す
];
detail.js を書こう
URLからスポット名を受け取って、データを画面に表示します。
const params = new URLSearchParams(window.location.search);
const spotName = params.get('name');
const spot = spots.find(s => s.name === spotName);

document.querySelector('.detail-name').textContent = spot.name;
document.querySelector('.detail-type').textContent = spot.type;
document.querySelector('.detail-description').textContent = spot.description;

// 「地図に戻る」ボタン
document.querySelector('.back-button').addEventListener('click', () => {
  window.history.back();
});
- 地図のピンをクリックして詳細ページに飛び、「戻る」ボタンで地図に戻れたら完成です。
お疲れ様でした。
次は【絞り込み検索編】です。