<追記:2025/07/14>
Claude公式がwindowsをサポートしました 🎉🎉
そのため、当記事は非推奨です。
コマンドプロンプトから下記で使用可能になってました。簡単。
npm install -g @anthropic-ai/claude-code
cd C:\Users\umezy\MyUnityProject
claude
概要
VSCode on WindowsでClaude Codeを使うための環境構築をするマニュアルです。
Dev Containersという拡張機能を利用することで、手軽に構築できる点が特徴です。(15分程度目安)
本手順により仮想環境内のファイルでなく、既存のローカルファイルをClaude Codeで操作することが可能になります。
月額20ドルのClaudeProサブスクリプションが必要です。
手順
1. 必要な拡張機能のインストール
- VS Codeを開く
- 拡張機能タブ(Ctrl+Shift+X)を開く
- 「Dev Containers」で検索し、Microsoft製の拡張機能をインストール
2. 設定ファイルを追加
- プロジェクトのルートディレクトリに .devcontainer フォルダを作成
- 作成した.devcontainer フォルダ内に下記 devcontainer.json を配置
プロジェクト構造例:
MyUnityProject/
├── .devcontainer/
│   └── devcontainer.json
└── その他のファイルやフォルダ
devcontainer.json
{
  "name": "Claude Code for Unity Project",
  "image": "node:18-slim",
  "workspaceFolder": "/workspace",
  "postCreateCommand": "apt-get update && apt-get install -y git && echo '✅ Basic setup complete! You can manually install Claude Code with: npm install -g @anthropic-ai/claude-code'",
  "containerEnv": {
    "UNITY_PROJECT_PATH": "/workspace"
  },
  "mounts": ["source=${localWorkspaceFolder},target=/workspace,type=bind,consistency=cached"],
  "customizations": {
    "vscode": {
      // VS Code拡張機能の自動インストール
      "extensions": [],
      // エディタ設定の適用(通常.vscode/settings.jsonに記述する内容)
      "settings": {}
    }
  },
  "forwardPorts": [3000],
  "portsAttributes": {
    "3000": {
      "label": "Claude Code Server"
    }
  },
  "remoteUser": "root",
  "shutdownAction": "stopContainer"
}
3. Dev Container環境の起動
3-1. コンテナでプロジェクトを開く
- VS Codeでプロジェクトのルートディレクトリを開く
- コマンドパレット(Ctrl+Shift+P)を開く(もしくは右下にポップアップするダイアログをクリック)
- 「Dev Containers: Reopen in Container」を選択
WSL環境がない場合、下記がポップアップします。WSL版Dockerをインストールしてください
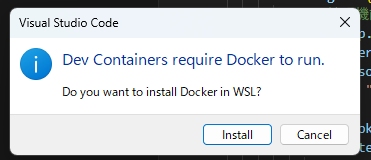
- ポップアップに沿って、Dockerをインストールします。数分かかります
- PCを再起動します
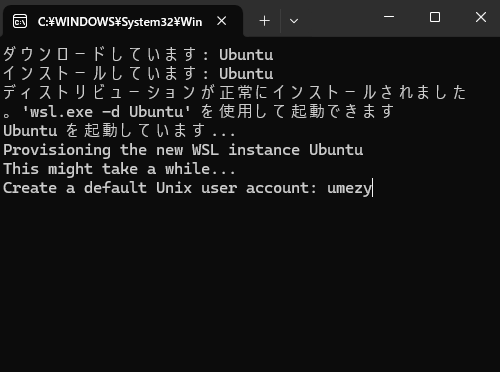
- 再起動後、自動的にUbuntuがインストールされます。アカウントとパスワードを設定してください
- vs codeから再度dev containersを開くと、WSL2環境内にDockerがインストールされます。
4.初回起動時はイメージのダウンロードとセットアップで数分かかります
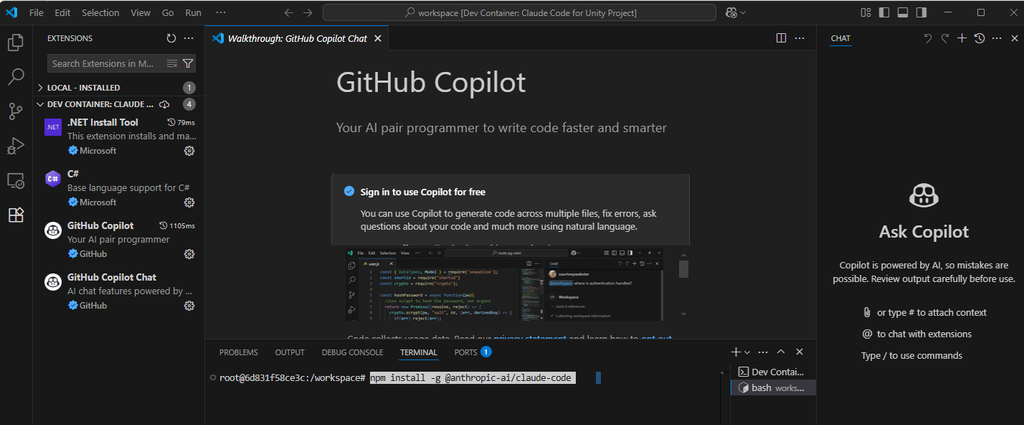
3-2. セットアップ完了の確認
コンテナ起動後、vs code内で新しいターミナルを開き、以下のコマンドを実行してclaudeをインストール:
npm install -g @anthropic-ai/claude-code
4. Claude Codeの使用開始
1. Claude Codeの起動
VS Code内のターミナルで以下のコマンドを実行:
claude
2. 初回設定
テキストスタイルなどプロジェクトの設定が完了すると、Claude Codeが使用可能になります