公式ドキュメントをもとにPlayFabを動かしてみたいと思います
(1)利用言語を選択する→Unity
PlayFabは主要なゲームエンジンや言語に対応しています
・Unity
・HTML5 (Javascript)
・Flash (ActionScript3)
・C#
・Cocos2d-x
・Xamarin
・Node
・Java
・Defold (Lua)
・Corona (Lua)
・Windows - C++
・Linux - C++
なので今回は「Unity」で試してみたいと思います
(2)UnityをDownloadする
Unity3Dをダウンロードする
https://store.unity.com/download
直近のバージョンはサポートされているそうですが、5.3以上が推奨とのこと
(2018年11月現在 最新はUnity 2018.2.15f1)

ダウンロードしたファイルをクリックしてインストールする

インストール完了したら新しいプロジェクトを作成する

必要事項を入れて「Create Project」をクリック

というわけでUnity側の準備完了

(3)PlayFabSDKをDownloadする
PlayFabのUnitySDK拡張をインストールします
https://github.com/PlayFab/UnityEditorExtensions/raw/master/Packages/PlayFabEditorExtensions.unitypackage

「Import」をクリックし拡張機能をインポートする

拡張機能が利用できることを確認
アカウントを持っていれば「login」をクリック(わかりにくい)、
持っていなければ新規作成のため「CREATE AN ACCOUNT」をクリック

ログイン後、SDKが入っていないと言われるので「Install PlayFab SDK」をクリック

インストール完了

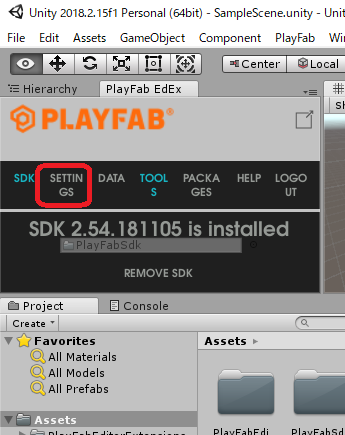
(4)タイトルセッティング
PlayFabの拡張をインストールしたので設定を行う
「SETTINGS」を押す
STUDIOを選択するとそれ以外の設定も自動的に変更される
マニュアルは「SAVE」ボタンが出るようですがでてこない・・・?

一旦設定は完了
いよいよAPIの設定に入りたいと思います