前提
-
pipが使える。
botを作成する
右上の`New Application"を選択。
名前を決めてCreateを押す。
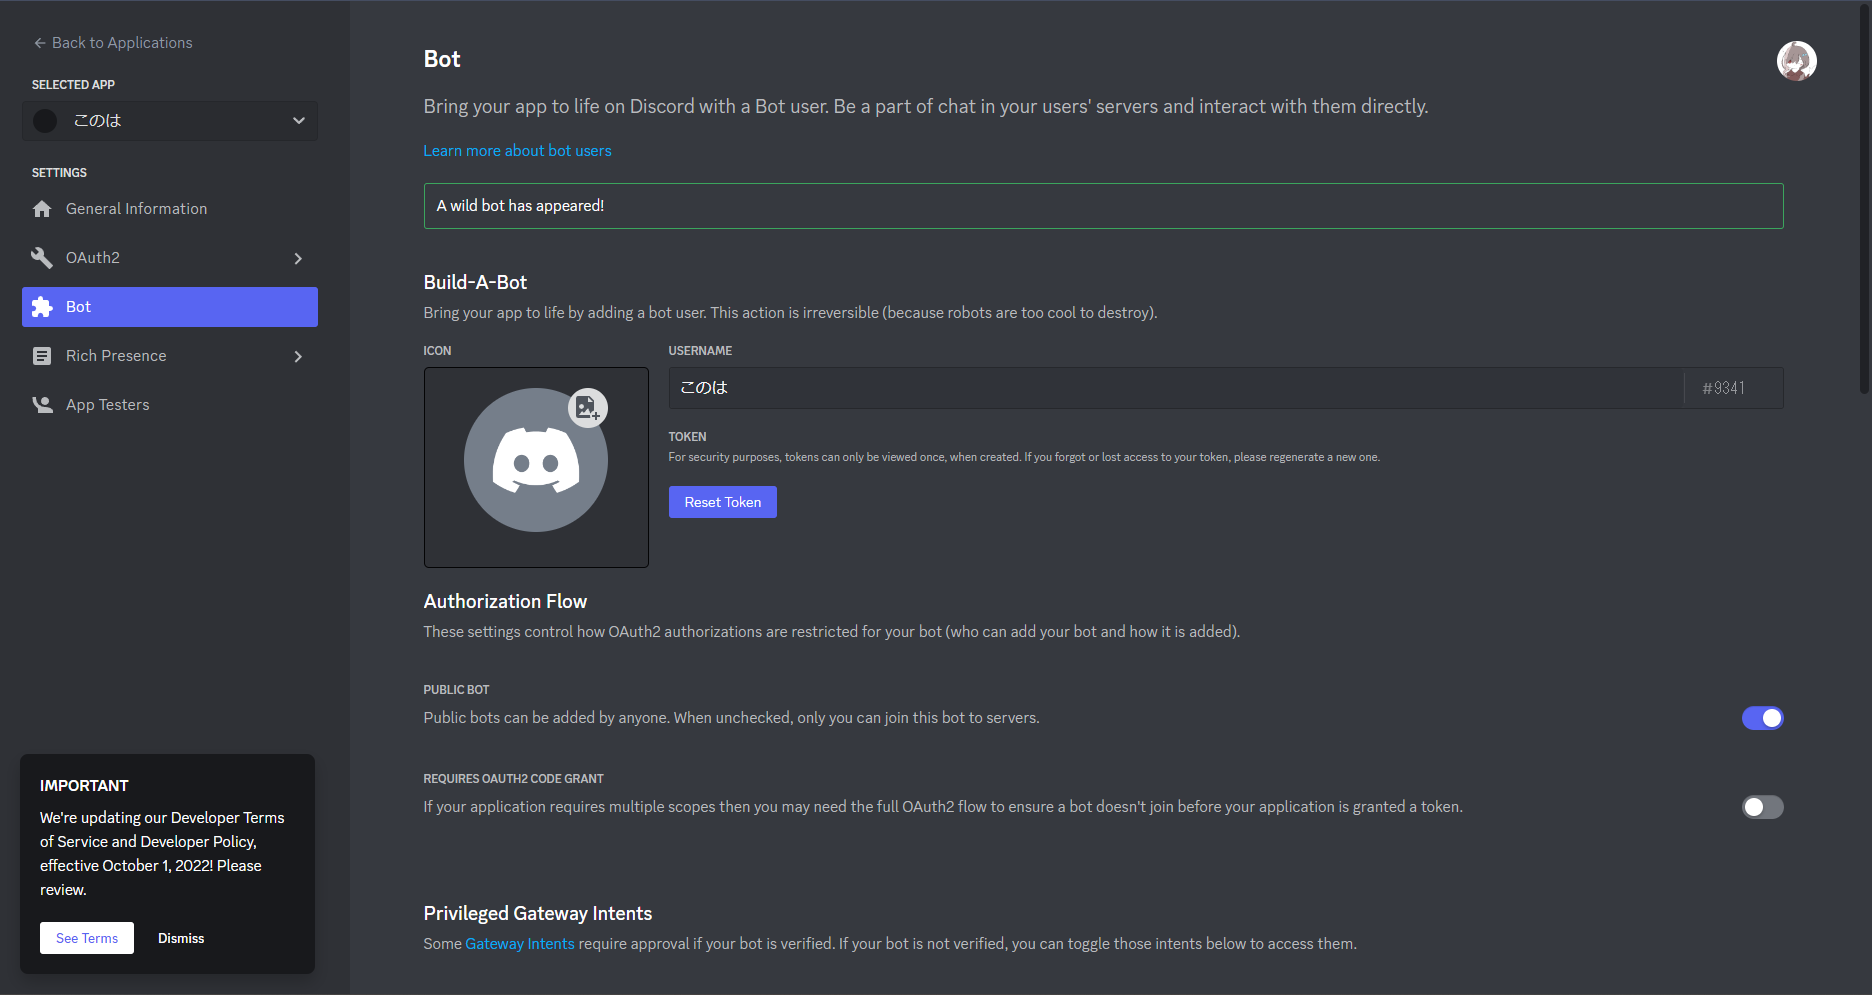
左側メニューからBotを選択。
Add Botを選択。
確認モーダルが出てくるのでYesを選択しよう。
Intent
下のPrivileged Gateway Intentsに注目。

(昔はこんなのなかったけど)一部のイベントはこの項目をオンにしておかないと受け取れないっぽい。
とりあえずMESSAGE CONTENT INTENTをアクティブにしておく。
サーバに導入
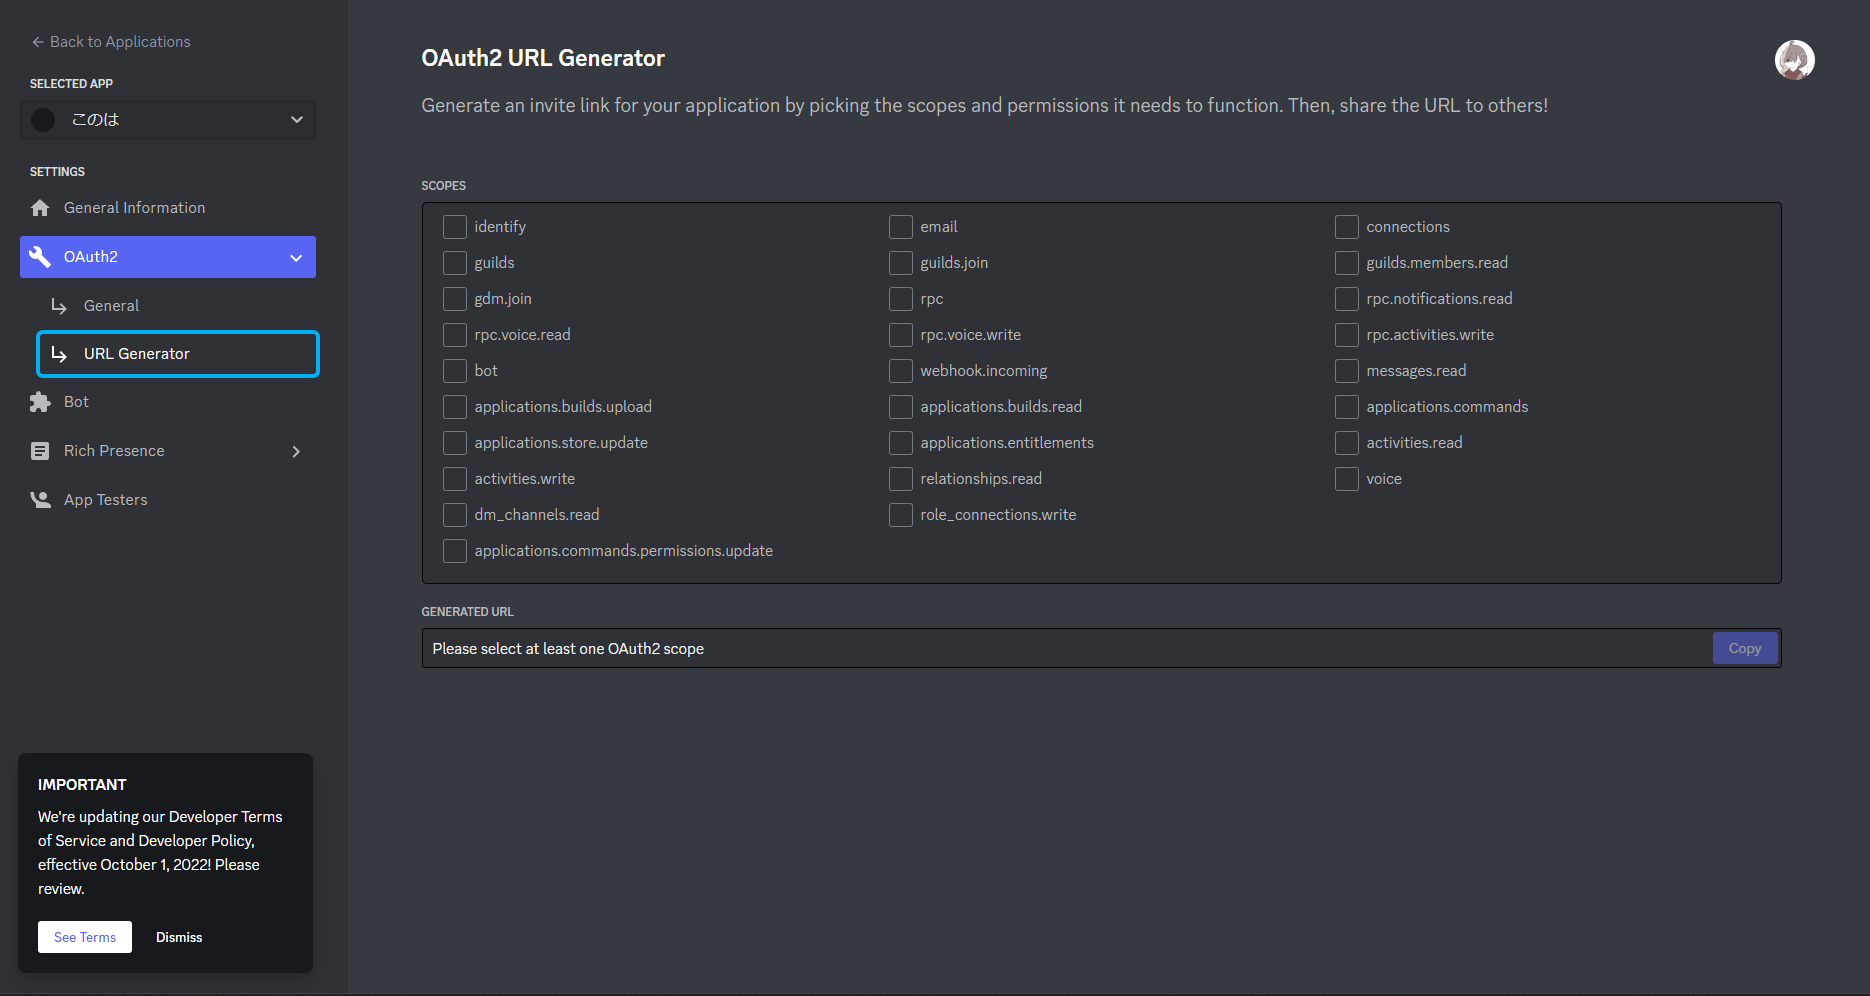
右のメニューからOAuth -> URL Generatorを選択。
SCOPESのBotを選択。
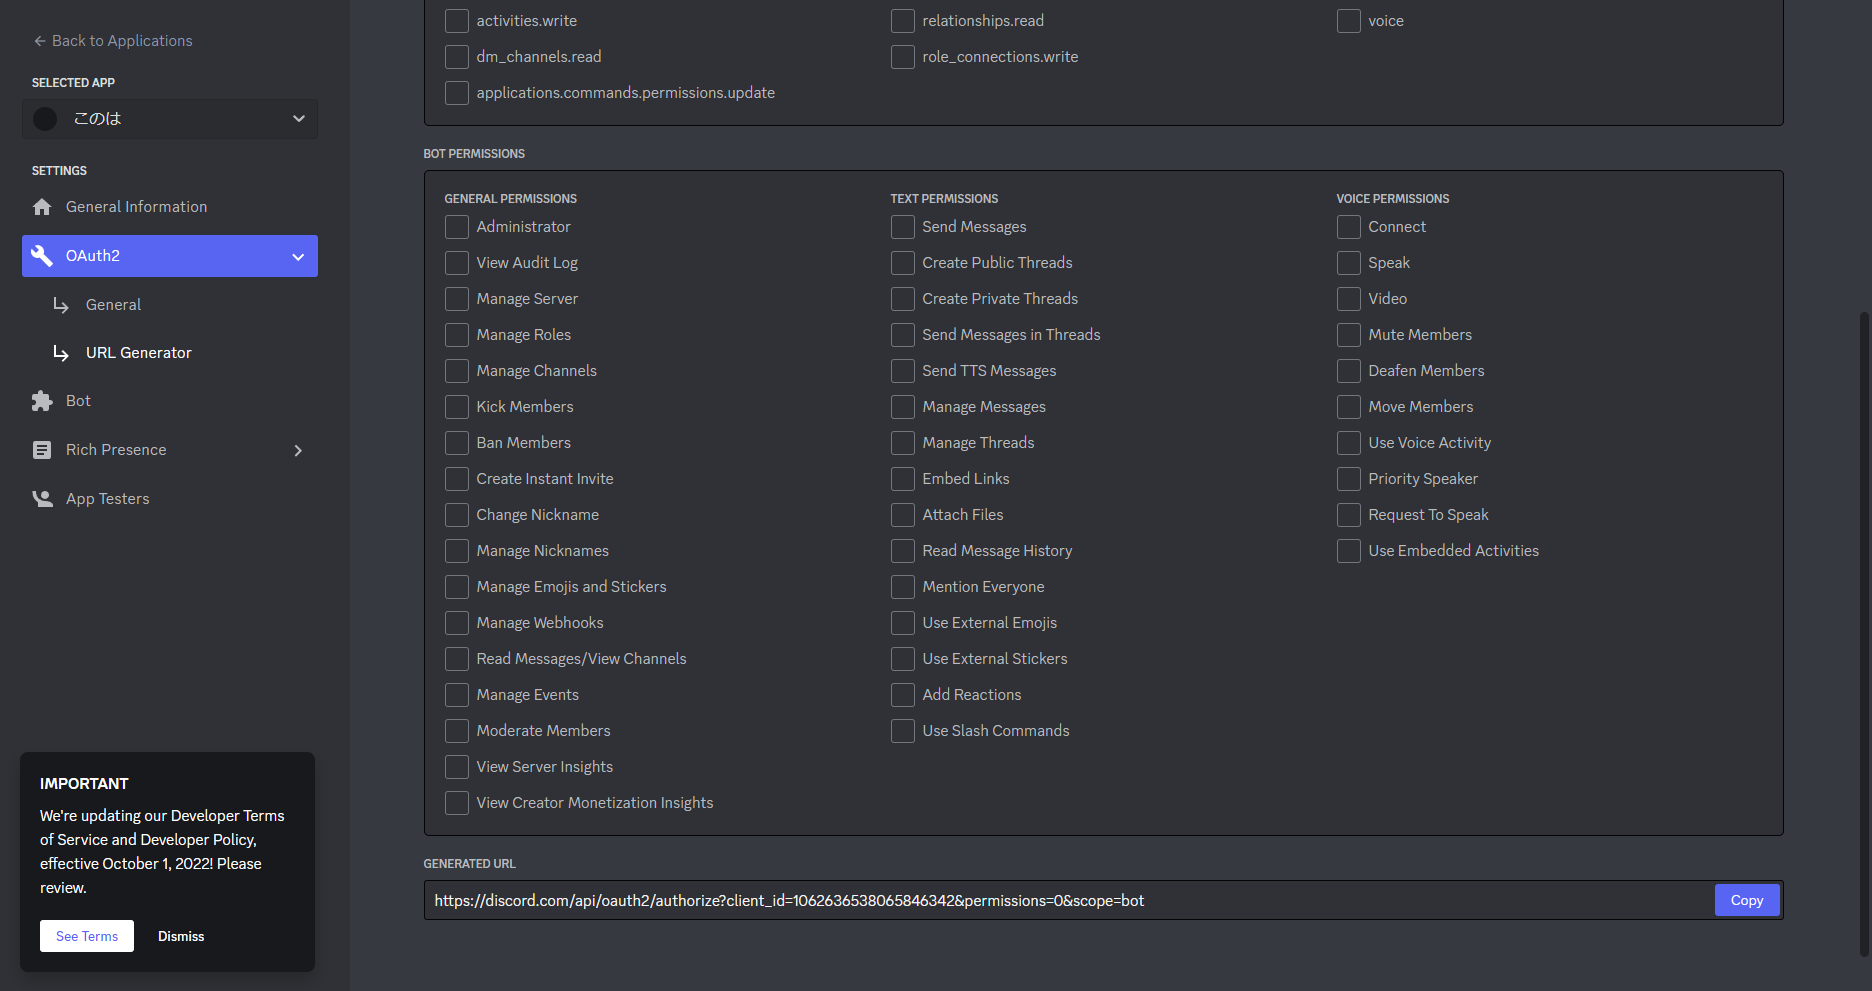
BOT_PERMISSIONが出てくる。
とくにこだわりがないならAdministratorを選択。
一番下のGENERATED URLにアクセスし、任意のサーバに導入する。
動かす
まずはdiscord.pyをインストールする。
pip install discord.py
コーディングに入る。
適当なファイルにPythonファイルを作成し、以下のように記述する。
import discord

intents = discord.Intents.all()  # すべてのIntentを有効にする
client = discord.Client(intents=intents)

@client.event
async def on_ready():
    print('ONLINE')

token = "your token"
client.run(token)
tokenに関しては、先ほどのページのBotのページで発行できる。
Reset Tokenを選択。
確認モーダルが出てくるので、Yesを押す。
ここで表示されるのがtokenになる。
公開すればbotを乗っ取られる危険性のある情報でもあるため、コードに直接載せないようにして扱うのがよい。


