SNSボタンを表示させたい
プログラミングを学び始めて、もうすぐ2ヶ月。
Webアプリを作ることが増えてきました。
そこで、よく思うことが「SNSボタンを綺麗に表示させたい・・・」
▲こーゆーやつを、ページ下部にキレイに表示させるのが初心者には大きな一歩なのだ!!!
ということで、自分への備忘録も兼ねて、作り方をまとめておきます。
作り方
「Bootstrap」というCSSフレームワークを使う
あくまで簡単に作るのが目的なので、「Bootstrap」を使います!
初心者の方に説明すると、htmlに一文ちょこっと追加するだけで、CSSが楽になる魔法のツールです!
では、以下のページにSNSボタンを追加してみましょう!
html
まず、htmlの
部分に以下を挿入します。<link href="https://maxcdn.bootstrapcdn.com/font-awesome/4.5.0/css/font-awesome.min.css" rel="stylesheet" />
こんな感じになります。
<!DOCTYPE html>
<html>
  <head>
    <meta charset="UTF-8" />
    <meta name="viewport" content="width=device-width, initial-scale=1.0" />
    <title>プロフィール</title>
    <link href="style.css" rel="stylesheet" />
    <link href="https://fonts.googleapis.com/css?family=Roboto" rel="stylesheet" />
    <link href="https://maxcdn.bootstrapcdn.com/font-awesome/4.5.0/css/font-awesome.min.css" rel="stylesheet" />

  </head>
なんと、これだけで「Bootstrap」が使えるようになりました!簡単!
次に、ボタンを入れたいところのhtmlに、以下のコードを挿入します。
    <ul class="profile-social-links">
        <li>
          <a target="_blank" href="#">
            <i class="fa fa-facebook"></i>
          </a>
        </li>
        <li>
          <a target="_blank" href="#">
            <i class="fa fa-twitter"></i>
          </a>
        </li>
        <li>
          <a target="_blank" href="#">
            <i class="fa fa-instagram"></i>
          </a>
        </li>
        <li>
            <a target="_blank" href="#">

              <i class="fa fa-linkedin"></i>
            </a>
          </li>
      </ul>
htmlは以上!
css
続いて、CSS!
下記をコピペでドーン
/*ボタン全体が入ってるブロック*/
.profile-social-links {
  width: 218px;
  display: inline-block;
  float: right;
  margin: 0px;
  padding: 15px 20px;
  background: #FFFFFF;
  margin-top: 50px;
  text-align: center;
  opacity: 0;
  -webkit-box-sizing: border-box;
  box-sizing: border-box;
  -webkit-animation: moveIn 1s 3.1s ease forwards;
  animation: moveIn 1s 3.1s ease forwards;
}

/*ボタンを横一列で表示する*/
.profile-social-links li {
  list-style: none;
  margin: -5px 0px 0px 0px;
  padding: 0px;
  float: left;
  width: 25%; /*今回4つなので25%です*/
  text-align: center;
}

/*ボタンの設定*/
.profile-social-links li a {
  display: inline-block;
  color: green; /*ボタンの色はここで変えてね!*/
  width: 24px;
  height: 24px;
  padding: 6px;
  position: relative;
  overflow: hidden!important;
  -webkit-border-radius: 50%;
  border-radius: 50%;
}

.profile-social-links li a i {
  position: relative;
  z-index: 1;
}
以上です!簡単ですね!
できたもの
良い感じにできた~~~~~嬉しい~~~~
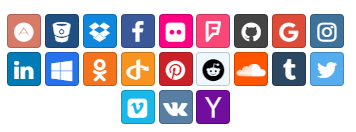
ちなみに、ボタンのラインナップはこちら!Youtubeとかもあればいいんですけどね~
<i class="fa fa-XXXX"></i>
ここの、XXXX部分をgoogleやyahooに変えるだけで、ボタンは変わります♪
私のような初心者さんのお役に立てれば嬉しいです!


