はじめに
MicrosoftのBot FrameworkのSDKとしては.NET(現時点ではC#のみ)とNode.js用があり、以下の名前で提供されています。
今回はNode.js版を利用し、Web ChatをインターフェースとしたBotのHello Worldを実装します。
環境はAzure WebApps + GitHubとし、Bot Framework Channel Emulatorを使ってテストするところまで実施します。
※追記:
AzureでSSLが使えるプランを使っていない場合は、Part-2で実施しているようにHeroku環境にする必要があります。Herokuは無料プランでもSSLが使用できます。
2016/9/5:Azure無料プランでもSSLは使用できましたので訂正します。
また、Part-2ではWeb Chatの動作確認まで実施しています。
前提
Node.js, gitなどインストール済
AzureにNode.jsが稼働するWebAppsを作成済 ※無料環境作成方法はこちらを参照
Bot Framework Channel Emulatorインストール済
1.Local環境でテスト
1-1.Bot登録とMicrosoft AppIdとPasswordを取得
Microsoft Bot Framework portalにアクセスしBOTを登録します。
必須入力の情報については以下を参考に入力します。
| 属性 | 設定値 | 補足説明 |
|---|---|---|
| Name | 例:tworks55-bot | 自分のボットの名前 |
| Bot handle | 例:tworks55-bot | 自分のボットのハンドル名 ※登録後は変更できません |
| Description | 例:tworks55-bot | 自分のボットの説明を記載 |
| Messaging endpoint | https://example.com/api/messages | テストの段階ではこのURLでOK |
| Microsoft App ID | 例:85724a49-xxxx-xxxx-xxxx-xxxxxxxxxxxx | 自分のボットの情報 ※1 |
| Publisher name | 例:tworks55 | 自分の名前など |
| Publisher Email | 例:myemail@example.com | 自分のメールアドレス |
| Privacy statement | https://example.com/api/privacy | テストの段階ではこのURLでOK |
| Terms of Use | https://example.com/api/terms | テストの段階ではこのURLでOK |
※1
Create Microsoft App ID and passwordをクリックし、MicrosoftAppIdとMicrosoftAppPasswordを生成します。生成された情報は後で使用するので控えておきます。
登録後はこのようになります。

1-2.Hello worldのコーディング
Botプロジェクト用のフォルダ(例:c:\tworks55-bot)でnpm init実行します。
※いろいろ聞かれますが、基本はデフォルト設定でOKですが、entry pointではapp.jsを指定します。
npm init
同フォルダで以下を実行します。
npm install --save botbuilder
npm install --save restify
app.jsというファイル名で以下を保存します。
var restify = require('restify');
var builder = require('botbuilder');

//=========================================================
// Bot Setup
//=========================================================

// Setup Restify Server
var server = restify.createServer();
var botenv = process.env.BOT_ENV;
server.listen(process.env.port || process.env.PORT || 3978, function () {
   console.log('%s listening to %s (%s)', server.name, server.url, botenv);
});

// Create chat bot
var connector = new builder.ChatConnector({
    appId: process.env.MICROSOFT_APP_ID,
    appPassword: process.env.MICROSOFT_APP_PASSWORD
});
var bot = new builder.UniversalBot(connector);
server.post('/api/messages', connector.listen());

//=========================================================
// Bots Dialogs
//=========================================================

bot.dialog('/', function (session) {

    session.send("Hello World from " + botenv );
});
環境変数を以下のように設定します。
SET MICROSOFT_APP_ID=85724a49-xxxx-xxxx-xxxx-xxxxxxxxxxxx
SET MICROSOFT_APP_PASSWORD=QVXTHxxxxxxxxxxxxxxxxxx
SET BOT_ENV=MYPC
※APP_IDとPASSWORDは、BOT登録時に生成されたものを設定します。
1-3.ローカル環境でテスト
BOTを起動します。
node app.js
Bot Framework Channel Emulatorを起動し、以下のように設定します。
| 属性 | 設定値 | 補足説明 |
|---|---|---|
| Local port | 9000 | |
| Emulator URL | http://localhost:9000/ | |
| Bot URL | http://localhost:3978/api/messages | |
| Microsoft App ID and password | 85724a49-xxxx-xxxx-xxxx-xxxxxxxxxxxx | BOT登録時に生成されたコード体系でないとエラーになります |
| Microsoft App Password | QVXTHxxxxxxxxxxxxxxxxxx |
BOTにメッセージを送信するとHello World from MYPCと返信がきます。MYPCの部分は環境変数BOT_ENVに設定した文字列となります。
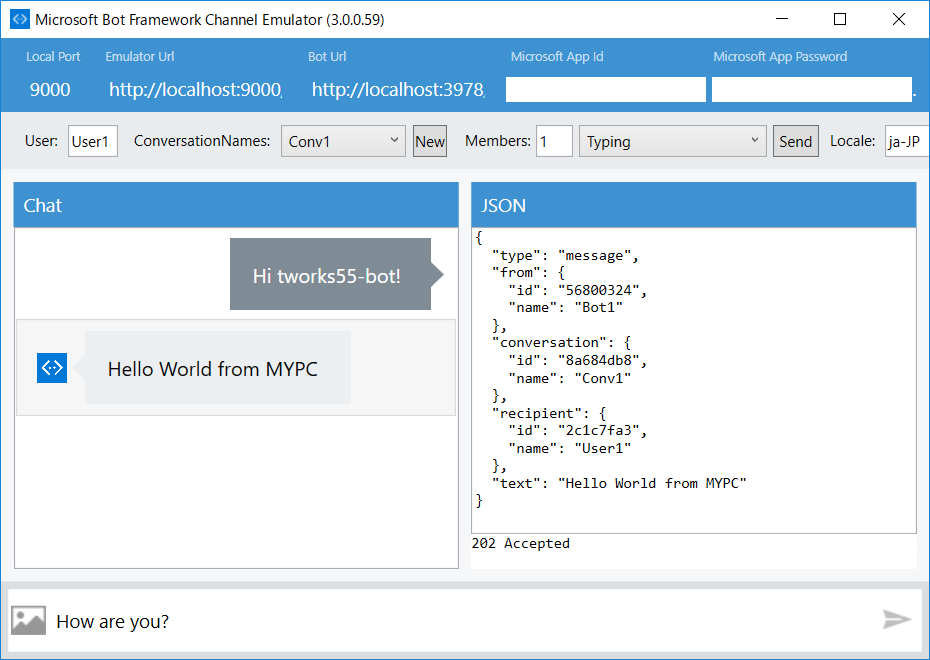
これでLocal環境でのテストは完了です。
2.GitHubへソースの登録
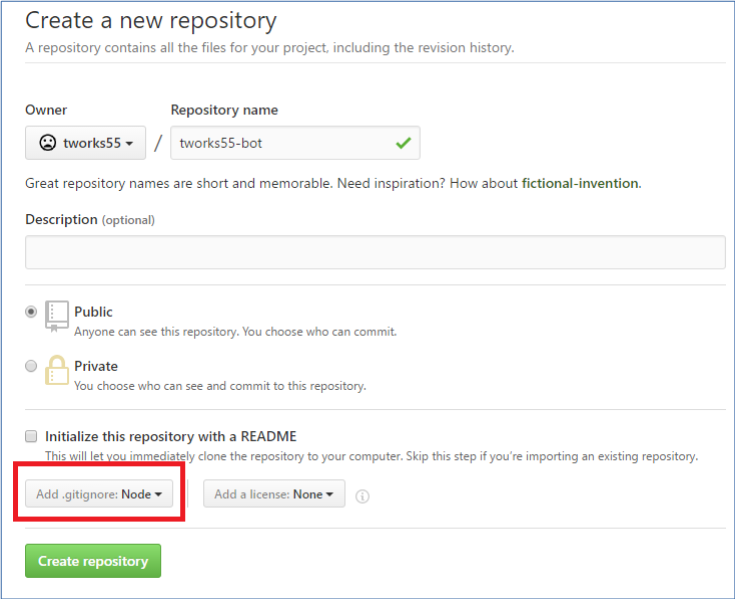
2-1 GitHubリポジトリ作成
Node.js向けリポジトリとして作成。
2-2.ローカルリポジトリとGitHubの連携
ローカルリポジトリを一旦作成し、リモートリポジトリにGitHubで作成したリポジトリを設定します。
※あくまでも簡易な設定方法なので、本格的に使う場合は別途設定が必要です。
以下のコマンドをプロジェクトのフォルダ(例:c:\tworks55-bot)で実行します。
git init
git remote add origin https://github.com/tworks55/tworks55-bot.git
git pull origin master
git add .
git commit -m "add bot source"
git push
3.Azure環境設定とテスト
3-1.環境変数設定
ローカル環境で設定した環境変数と同様に、AzureのWebAppsに環境変数を設定します。今回はGUIで設定します。
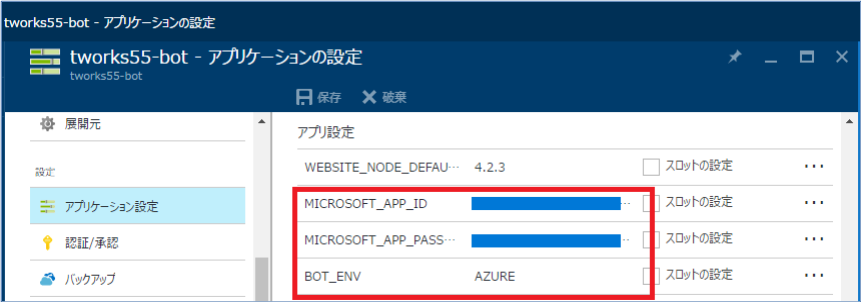
※BOT_ENVは、AZUREとします。
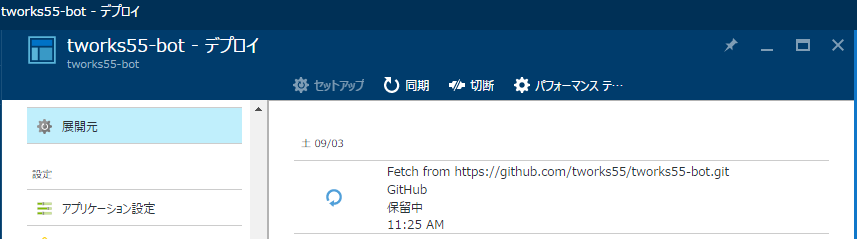
3-2.展開元設定
展開元はGitHubのリポジトリを設定します。
3-3.Azure環境でテスト
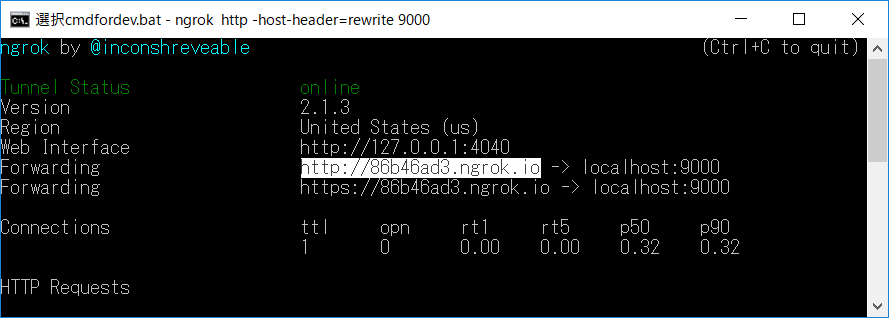
ngrokをダウンロードし、以下のオプションで実行します。
ngrok http -host-header=rewrite 9000
実行すると動的なURLを生成し、そのURLでローカル環境のエミュレーターがインターネットに公開されます。
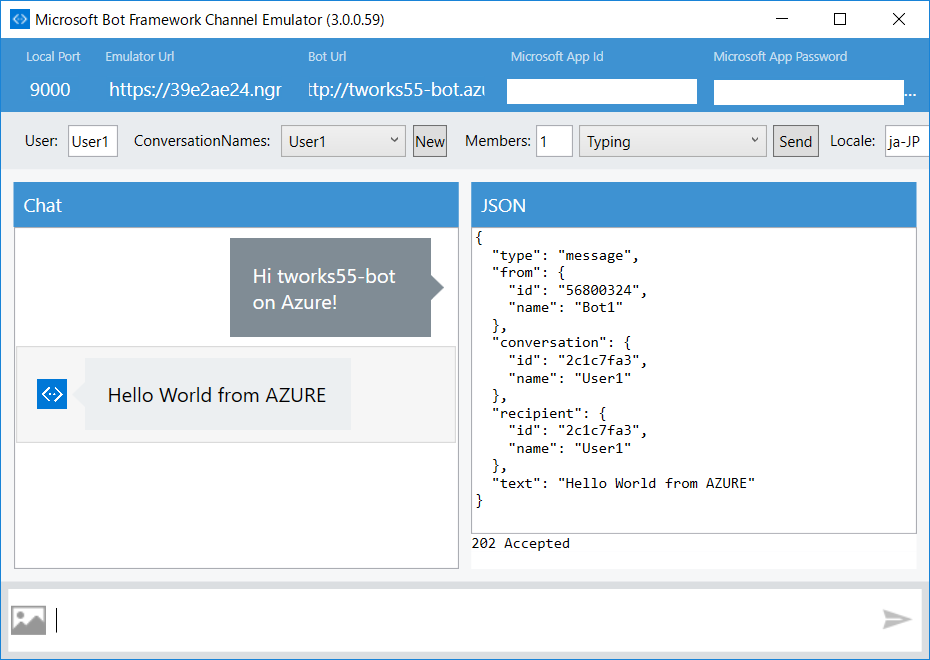
Bot Framework Channel Emulatorを起動し、以下のように設定します。
| 属性 | 設定値 | 補足説明 |
|---|---|---|
| Local port | 9000 | |
| Emulator URL | 例:http://86b46ad3.ngrok.io/ | ngrokで生成された動的URLを設定します ※2 |
| Bot URL | 例:http://tworks55-bot.azurewebsites.net/api/messages | AzureにデプロイしたBOTのURL |
| Microsoft App ID and password | 85724a49-xxxx-xxxx-xxxx-xxxxxxxxxxxx | BOT登録時に生成されたコード体系でないとエラーになります |
| Microsoft App Password | QVXTHxxxxxxxxxxxxxxxxxx |
※2 Bot Framework Emulatorの説明にも記載されていますが、Bot Framework V3からは、認証方法が変わりCallbackが発生するため、このようなことを実施する必要があるようです。ちなみにngrokはマイクロソフトのプロダクトではない旨、Bot Framework Emulatorの説明に記載されています。
BOTにメッセージを送信するとHello World from AZUREと返信がきます。AZUREの部分は環境変数BOT_ENVに設定した文字列となります。
これでAzure環境でのテストは完了です。