はじめに
2024/9/5にAWSのWhat's NewにAnnouncing Storage Browser for Amazon S3 for your web applications (alpha release)という記事がアナウンスされました。
Storage Browserとは、Amazon S3のバケットにUPされたファイル・ディレクトリを任意のWebアプリケーションから閲覧・作成・更新・削除できる機能です。

※後述しますが、CSSが一部おかしいようでUIが少し崩れてます。
S3の中身をGUIで確認するにはAWSマネジメントコンソールにアクセスしたり、AWS CLI, AWS SDKなどを使ってアクセスしたりするケースがほとんどかと思いますが、Storage Browserを使うことで開発者の作るWebアプリケーション上にS3のCRUD操作が可能なUIコンポーネントをインポートすることが可能です。
aws-amplify/amplify-uiのGitHubリポジトリにIssueが上がっています。
2024/9/7現在、Storage Browserはアルファリリース状態です。今後GAされるまでに変更が加えられる可能性があります。本記事は執筆時点でのライブラリを用いて実装したものになりますので、その点ご注意・ご了承ください。
本記事では、Next.js × AWS Amplifyを使ったフロントエンドアプリケーションからStorage Browserを利用するサンプルを紹介します。
サンプルアプリの紹介
サンプルアプリのソースコードは以下です。
本記事ではソースコードの一部分を抜粋しながら紹介していきます。
StorageBrowserの導入
GitHubのIssueを参考に、StorageBrowserのライブラリをインストールします。
npm i --save @aws-amplify/ui-react-storage@storage-browser aws-amplify@storage-browser
バックエンドのコードを書く
Amplifyの設定ファイルであるbackend.ts, resource.ts(auth & storage)を書いていきます。
storageだけでいいかなと最初思ってたんですが、authも追加しないとエラーで進めなかったのでauthも記載しています。
import { defineBackend } from '@aws-amplify/backend';
import { auth } from './auth/resource';
import { data } from './data/resource';
import { storage } from './storage/resource';

/**
 * @see https://docs.amplify.aws/react/build-a-backend/ to add storage, functions, and more
 */
defineBackend({
  auth,
  storage
});
import { defineAuth } from '@aws-amplify/backend';

/**
 * Define and configure your auth resource
 * @see https://docs.amplify.aws/gen2/build-a-backend/auth
 */
export const auth = defineAuth({
  loginWith: {
    email: true,
  },
});
import { defineStorage } from "@aws-amplify/backend";

export const storage = defineStorage({
  name: 'storage-browser-example',
  access: (allow) => ({
    'public/*': [
      allow.guest.to(['read']),
      allow.authenticated.to(['read', 'write', 'delete']),
    ],
    'protected/{entity_id}/*': [
      allow.authenticated.to(['read']),
      allow.entity('identity').to(['read', 'write', 'delete'])
    ],
    'private/{entity_id}/*': [
      allow.entity('identity').to(['read', 'write', 'delete'])
    ]
  })
});
フロントエンドのコードを書く
フロントエンドもIssueを参考に書いていきます。
"use client"
import { StorageBrowser } from '@aws-amplify/ui-react-storage';
import "@aws-amplify/ui-react-storage/styles.css";

// these should match access patterns defined in amplify/storage/resource.ts
const defaultPrefixes = [
  'public/',
  (identityId: string) => `protected/${identityId}/`,
  (identityId: string) => `private/${identityId}/`,
];

export default function DefaultStorageBrowser() {
  return (
    <StorageBrowser defaultPrefixes={defaultPrefixes} />
  )
}
defaultPrefixesはstorage/resource.tsの設定内容と一致させる必要があります。
このコンポーネントをpage.tsxでインポートしましょう。
"use client"
import outputs from "@/../amplify_outputs.json";
import { Amplify } from "aws-amplify";
import DefaultStorageBrowser from "../components/DefaultStorageBrowser";

Amplify.configure(outputs);

export default function Home() {
    return (
        <DefaultStorageBrowser />
    );
}
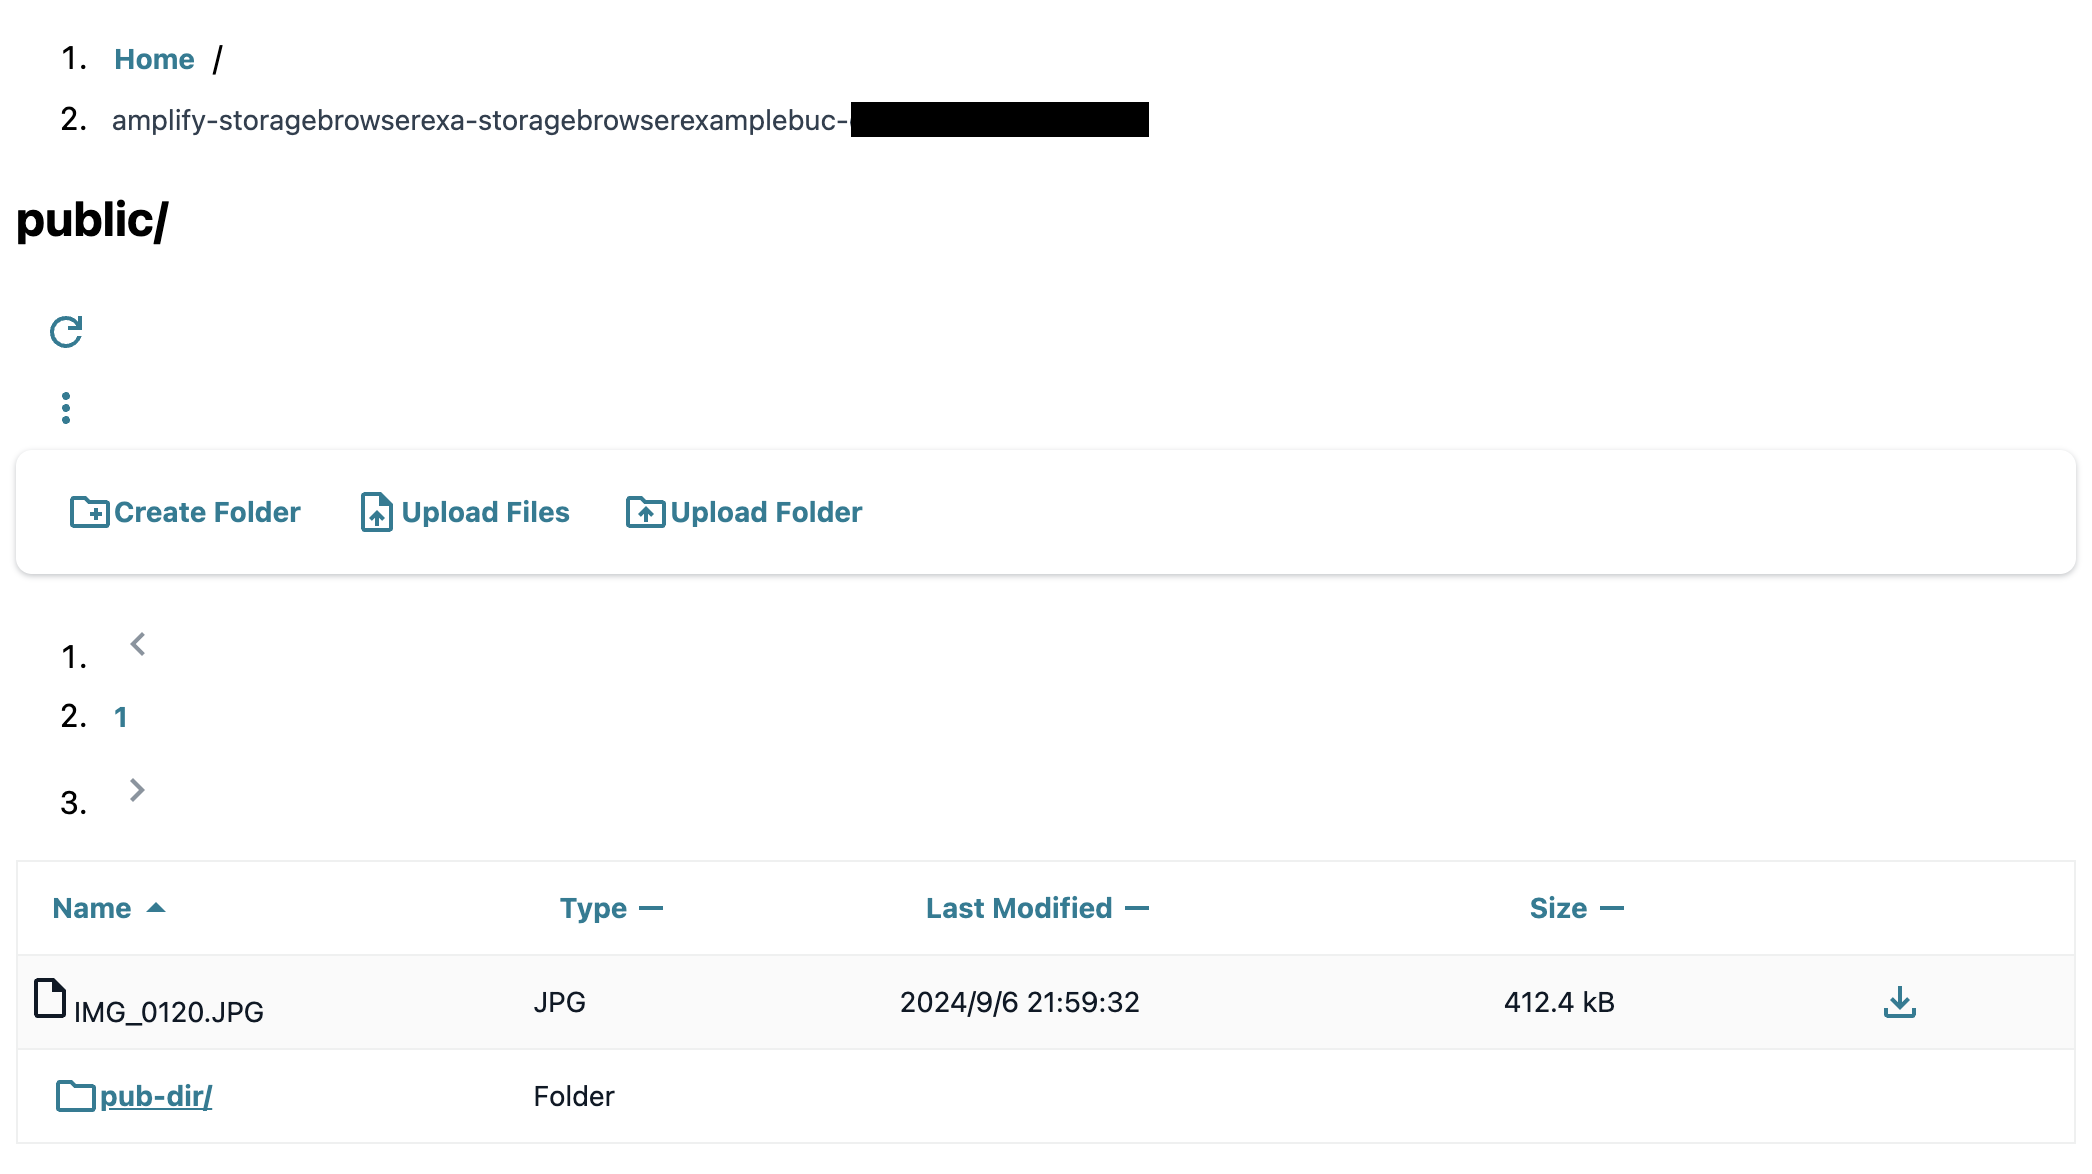
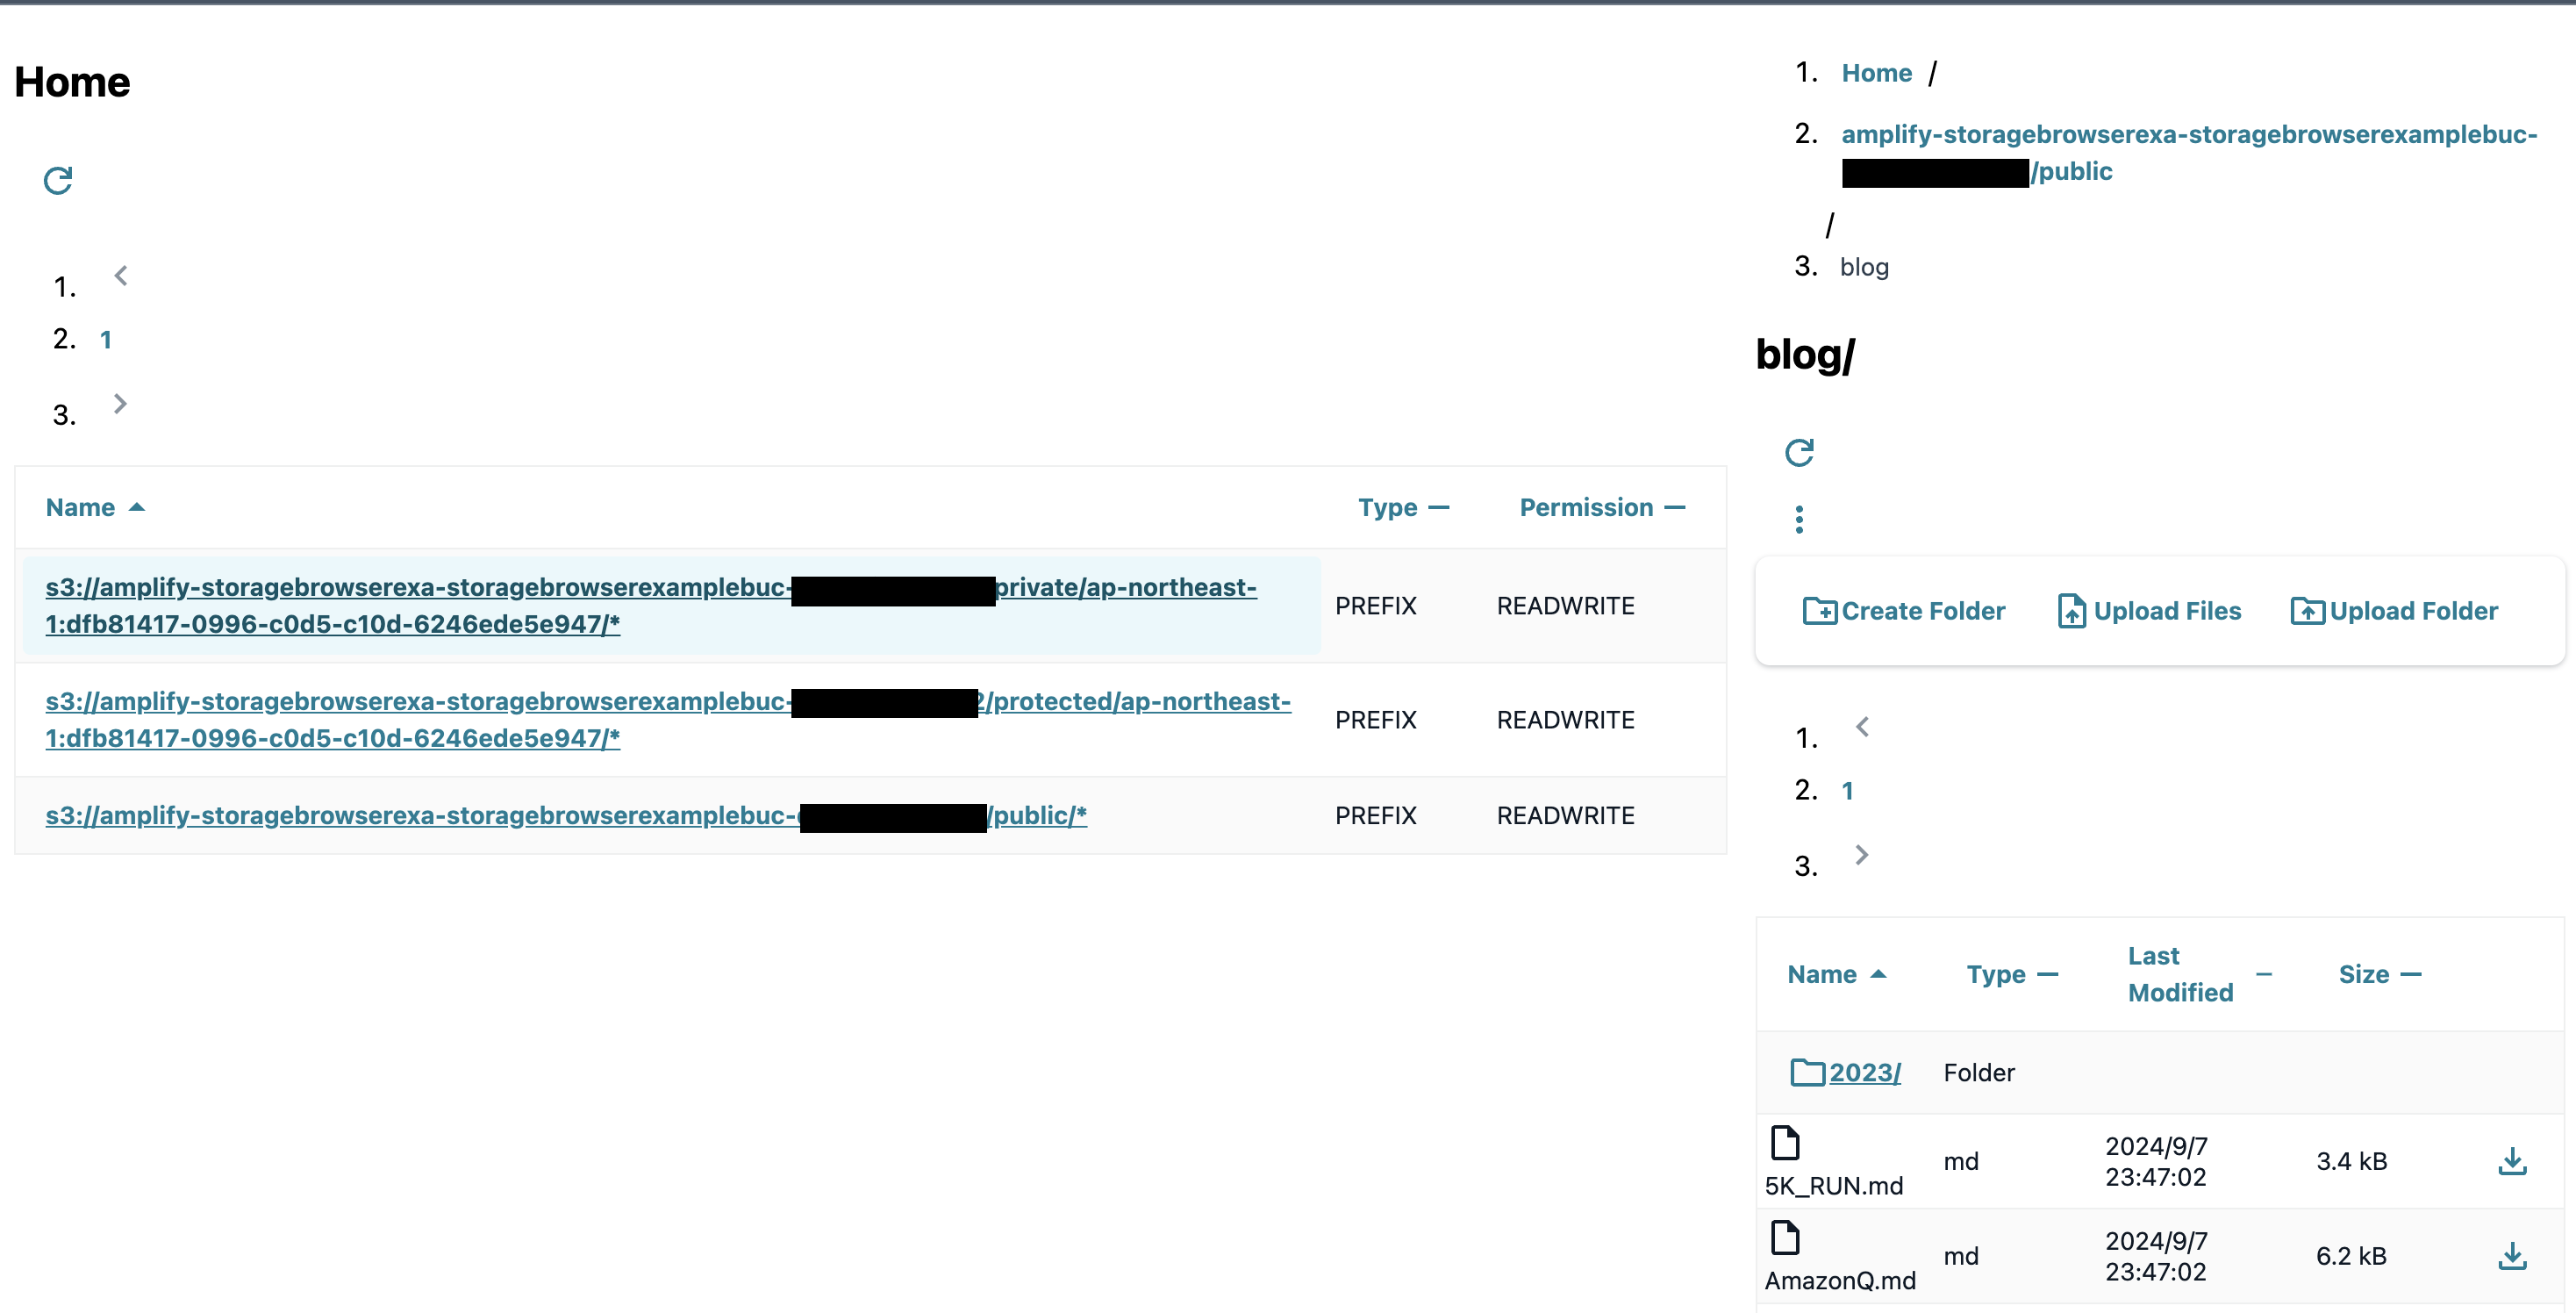
npm run devコマンドでアプリを起動しブラウザからアクセスすると、以下のようにS3バケットの一覧がGUIで表示されます。

私の実装に何か不備があるのか、CSSが一部おかしいようで、UIが崩れてる箇所があります。(パンくずリストなど)
アルファリリースゆえの問題なのかどうかは判断がつきませんでした。。。
できること
Storage Browserでできることを紹介します。
S3バケット内のファイルを自身のWebアプリケーションから直感的に操作可能
バケット内のディレクトリ移動や、ファイル・ディレクトリのアップロードとダウンロードを画面から実施可能です。

カスタムコンポーネント
以下のようにカスタムのUIコンポーネントを作成することも可能です。
import outputs from "@/../amplify_outputs.json";
import { Flex } from "@aws-amplify/ui-react";
import { createAmplifyAuthAdapter, createStorageBrowser, elementsDefault } from "@aws-amplify/ui-react-storage/browser";
import "@aws-amplify/ui-react-storage/styles.css";
import { Amplify } from "aws-amplify";

Amplify.configure(outputs);

const input = {
    elements: elementsDefault,
    config: createAmplifyAuthAdapter({
      options: {
        defaultPrefixes: [
            'public/',
            (identityId: string) => `protected/${identityId}/`,
            (identityId: string) => `private/${identityId}/`,
          ]
      },
    }),
} // `createStorageBrowser` input values
const { StorageBrowser, useControl } = createStorageBrowser(input);

function MyStorageBrowser() {
  const [{ selected }] = useControl('LOCATION_ACTIONS');

  return (
    <Flex>
      <Flex direction={'row'}>
        <StorageBrowser.LocationsView />
        <StorageBrowser.LocationDetailView />
      </Flex>
      {selected.type ? (
        <dialog open>
          <StorageBrowser.LocationActionView />
        </dialog>
      ) : null}
    </Flex>
  );
}

export default function CustomStorageBrowser() {
  return (
    <StorageBrowser.Provider>
      <MyStorageBrowser />
    </StorageBrowser.Provider>
  )
}
上記の例では、バケットのリストを左側のサイドメニューに表示するようにカスタマイズしているつもりです。ですが、先述の通りCSSがおかしいのか、ちょっと崩れてます。
とりあえず、カスタムのUIコンポーネントで色々見た目を変化させることができるということがわかりました。
気になったこと
パンくずリストに表示されるディレクトリ名がkey単位になっており、少し違和感を覚えました。
例えば、Home/amplify-storagebrowserexa-storagebrowserexamplebuc/public/blog/2023 という階層のディレクトリがあったとします。この場合、パンくずリストは以下のように表示されるのが自然かと思います。
Home /
amplify-storagebrowserexa-storagebrowserexamplebuc /
public /
blog /
2023
しかし、実際は以下のようにpublic/がamplify-storagebrowserexa-storagebrowserexamplebuc/の後に続けて記載されます。
Home /
amplify-storagebrowserexa-storagebrowserexamplebuc/public / ←publicディレクトリが統合されている!
blog /
2023
私の勝手な推測ですが、このパンくずリストの各パンくずはS3のkey名で取ってきてるんじゃないかと思います。
amplify-storagebrowserexa-storagebrowserexamplebuc/publicというオブジェクトはAmplifyが裏で自動で作成したものです。このオブジェクト作成の際に「amplify-storagebrowserexa-storagebrowserexamplebuc/ディレクトリを作成→public/ディレクトリを作成」という段階的な順序を踏まず、いきなりamplify-storagebrowserexa-storagebrowserexamplebuc/publicを作成したんじゃないかと思います。
その場合、S3オブジェクトとしてのamplify-storagebrowserexa-storagebrowserexamplebuc/publicのkeyは当然amplify-storagebrowserexa-storagebrowserexamplebuc/publicとなり、public/が独立した形として表れなくなります。
S3のkeyとprefixに関しては以下の記事が参考になります。
さいごに
いかがでしたでしょうか。
CSS起因(?)でUIが崩れているのが残念ではありますが、Storage Browserの概要は紹介できたかなと思います。
そのうちGAされると思いますので、そのときにまた触れてみようと思います。

