こちらの記事は,Markdownでレポートを書きたいの続きです.
レポートを楽に,綺麗に書きたい
※読み飛ばしOK
レポートを書くというのは,非常に時間のかかる行為です.できるだけ効率的に短時間で,でもきれいに書きたいという気持ちは多くの学生が抱いていることと思います.
そこで前回の記事ではMarkdownでレポートを書くということを考え,表紙や図番号などを作りました.でも,図番号についてはこちらの記事などいろいろなところで紹介されている通りすでにあるようです.
いったん話は変わりますが,学校で求められるレポートは意外と多岐にわたります.「この社会問題について,自分の意見をA4二枚にまとめて」と言われることもありますし(実際に言われた),「この日の授業は来れないから代わりに練習問題を解いて提出したら出席扱いにする」と言われることもあります(実際に言われた).
そういった際にレポートのテンプレートを使いまわすというのは少々問題があります.というのも,そんなレポートに実験目的や考察なんて書かないですよね.1ページや2ページで終わるレポートには1ページや2ページで終わるレポートに合ったレイアウトがあります.こういう状況にフレキシブルに対応できないかな,という悩みも学生は抱えています.少なくとも僕は抱えています.
上記のような要求,
-
1. 様々な状況に対応したい!
そして,前回CSSとJavaScriptを初めてやって思った,
-
2. 意外と楽しい! もっとやりたい!
この二つの要求を満たすMarkdownレポートを考えてみました.
が,1ページや2ページで終わるレポートは正直装飾くらいしかやることがないので,この記事では普通のレポートを作ってみます.
フォルダ構成
今回,CSSとJavaScriptのコードがかなり長くなってしまったので他のファイルにまとめることにしました.
.
├── img
│   ├── grad.png
│   ├── pink.png
│   └── title_call.png
├── static
│   ├── script.js
│   └── style.css
├── test.md
└── test.pdf
今回はこれらに加えてPythonファイルなども登場しますが,ごちゃごちゃするのでここでは省きます.というか,ここで省いたファイルを置く位置はあまり重要ではないです.
レポートを書き始める前に
format関数を作成します.
"{0}回", 20を引数として与えると"20回"が返り値になります.C#のformatと似たような感じです.
"{:4d}"のような複雑な書式には対応してないです.
また,普通に中括弧を表示させたいときは{{}}と二重にすることで対応しています.
const format = (template, ...args) => {
    var is_d = new RegExp(/^\d+$/);
    var rtn = "";
    var is_change = false;

    template.split(/({|})/).forEach( value => {
        if (value == "{") {
            is_change = !is_change;
            if (!is_change) {
                rtn = rtn + value;
            }
        } else if (is_change && is_d.test(value)) {
            rtn = rtn + args[value];
        } else if (is_change && value == "}") {
            is_change = false;
        } else if (!is_change && value == "}") {
            is_change = true;
            rtn = rtn + value;
        } else {
            rtn = rtn + value;
        }
    });

    return rtn;
};
sectionの数字
前回の記事でもsectioの数字は自動で管理していましたが,あまりうまい方法ではありませんでした.label関数とref関数のふたつを呼び出す必要があったためです.
ここでは,section関数ひとつで管理することにしました.
方針自体は前回とほぼ同じで,数字を保存しておくmapを適宜編集するというものです.
sectionの数字は,画像に添えられる数字と違い二つ以上前の数字を記憶しておく必要がありません.そのため,新しいsectionが呼ばれるたびに更新されていきます.
var label_num = new Map(
    [
        [
            "build-in",
            new Map(
                [
                    ["section", 0],
                    ["subsection", 0],
                    ["subsection", 0]
                ]
            )
        ]
    ]
);

const section = (name) => {
    var l = label_num.get("build-in");
    l.set("section", l.get("section")+1);
    l.set("subsection", 0);
    l.set("subsubsection", 0);

    var num = l.get("section");
    document.write(format("<h1>{0}. {1}</h1>", num, name))
}

const subsection = (name) => {
    var l = label_num.get("build-in");
    l.set("subsection", l.get("subsection")+1);
    l.set("subsubsection", 0);

    var num = l.get("section");
    var sub_num = l.get("subsection");
    document.write(format("<h2>{0}-{1} {2}</h2>", num, sub_num, name));
}

const subsubsection = (name) => {
    var l = label_num.get("build-in");
    l.set("subsubsection", l.get("subsubsection")+1);

    var num = l.get("section");
    var sub_num = l.get("subsection");
    var subsub_num = l.get("subsubsection");
    document.write(format("<h3>{0}-{1}-{2} {3}</h3>", num, sub_num, subsub_num, name));
}
各関数のdocument.write()内を変更すれば,自分好みの書式で各sectionの文字を変更できます.
私はLaTeXに慣れているので3つぐらいあれば十分ですが,h5くらいまで使いたい場合はh5sectionのように多様な関数を追加すれば実装できると思います.
もちろん今回も装飾しました.といってもレポートなので控えめですが.
@font-face {
    font-family: section;
    src: "Yu Mincho";
    unicode-range: U+0030-0039;
}
h1 {
    font-family: sans-serif;
    font-family: section;
    font-size: 1.5rem;
    border: none;
    border-left: 4px red solid;
    padding: 0.2rem 0;
    padding-left: 0.2rem;
}
h2 {
    font-family: sans-serif;
    font-family: section;
    font-size: 1.2rem;
    padding-left: 1rem;
}
h3 {
    font-family: sans-serif;
    font-family: section;
    font-size: 1.1rem;
    padding-left: 1rem;
}
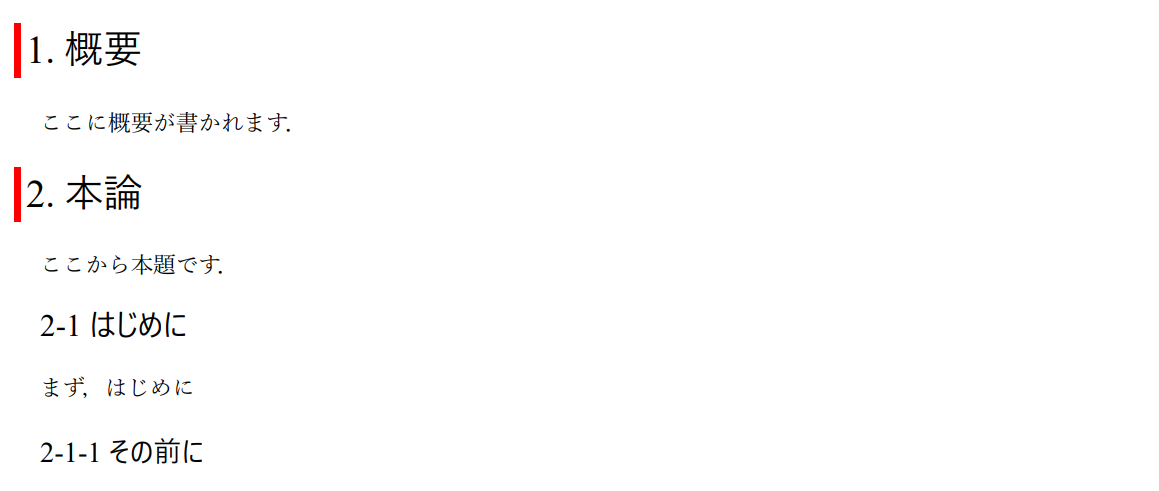
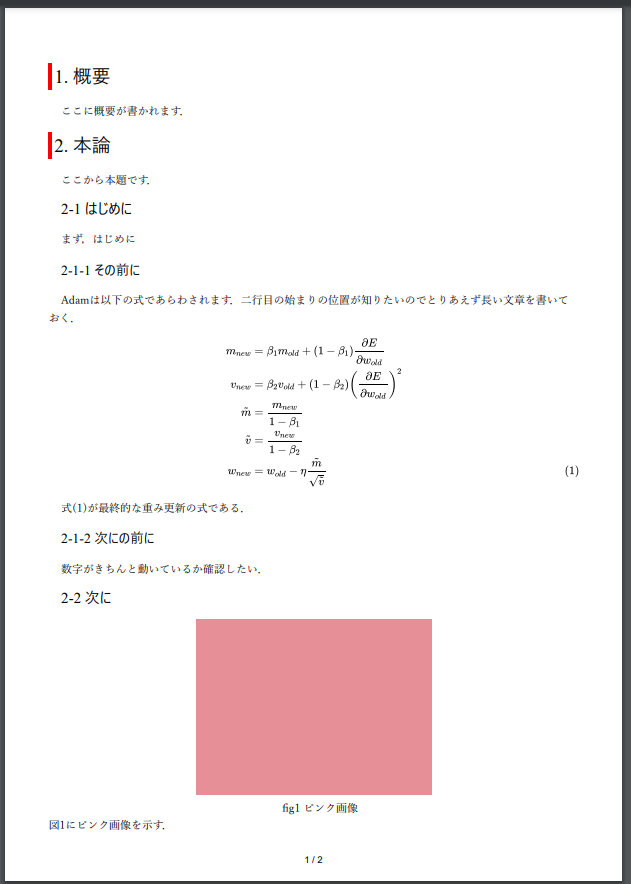
これで,以下のようなsectionが作れます.
画像の挿入
前回,画像の挿入には4行を擁していましたが,大変なので修正することにします.
ただsectionと違い,図番号はどこで参照されるかわかりませんから,こちらは2つの関数を使う必要があります.といっても,ある程度負担は軽くなるはずです.
let imgs = new Map;

const label = (alt, name, id) => {
    imgs.set(id, new Map([
        ["alt", alt],
        ["name", name],
        ["num", imgs.size+1]
    ]));
}
const img = (id) => {
    var img_inf = imgs.get(id);
    document.write("<div class='img'>");
    document.write(format("<img src='{0}'>", img_inf.get("name")));
    document.write(format(
        "<p>fig{0} {1}</p>",
        img_inf.get("num"),
        img_inf.get("alt")
    ));
    document.write("</div>");
}
const img_ref = (id) => {
    document.write(format(
        "<span>図{0}</span>",
        label_num.get("img").get(id).get("num")
    ));
}
section同様,img関数内のdocument.write()の引数を変更することで好きな書式に変更できます.さらに,CSSを使うことで自由度が上がります.
div.img {
    margin-bottom: 0;
    text-align: center;
}
二行だけですが,とりあえず図の体裁は整います.
実際に使う時はこんな感じになります.
上五行の定義はファイル上部など分かりやすいところに置いておき,実際に図表を挿入する位置に下のようにimg関数を呼び出します.
<script>
label("img", "ピンク画像", "img/pink.png", "pink");
label("img", "グラデーション画像", "img/grad.png", "grad");
label("img", "完成画像", "img/title_call.png", "title_call");
</script>

<script>
img("pink");
</script>

<script>img_ref("pink");</script>にピンク画像を示す.
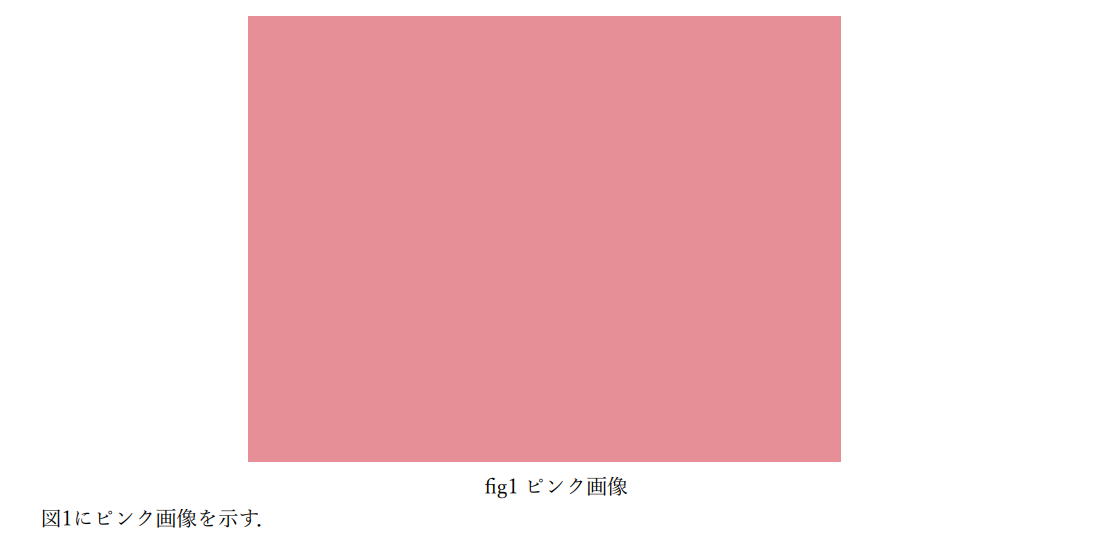
ただこれ,<script>img_ref("pink")</script>の前に何か書かれていると図番号が正常に表示されません.理由や解決法が分からないので詳しい方ご教授ください….
画像を横並びにしたい
LaTeXでは少々面倒な作業ですが,CSSは偉大です.
まず,先ほど作成したimg関数を以下のように修正します.
const img = (id, width) => {
    var img_inf = label_num.get("img").get(id);
    document.write("<div class='img'>");

    if (width) {
        document.write(format(
            "<img style='width: {0}px;' src='{1}'>",
            width,
            img_inf.get("name")
        ));
    } else {
        document.write(format(
            "<img src='{0}'>",
            img_inf.get("name")
        ));
    }
    document.write(format(
        "<p>fig{0} {1}</p>",
        img_inf.get("num"),
        img_inf.get("alt")
    ));
    document.write("</div>");
}
これでサイズ指定ができるようになりました.
次に,CSSで以下のclassを定義します.
div.two-img {
    display: flex;
    justify-content: space-around;
}
Markdownでは以下のように書きます.
<div class="two-img">
<script>
img("grad", 250);
img("title_call", 250);
</script>
</div>
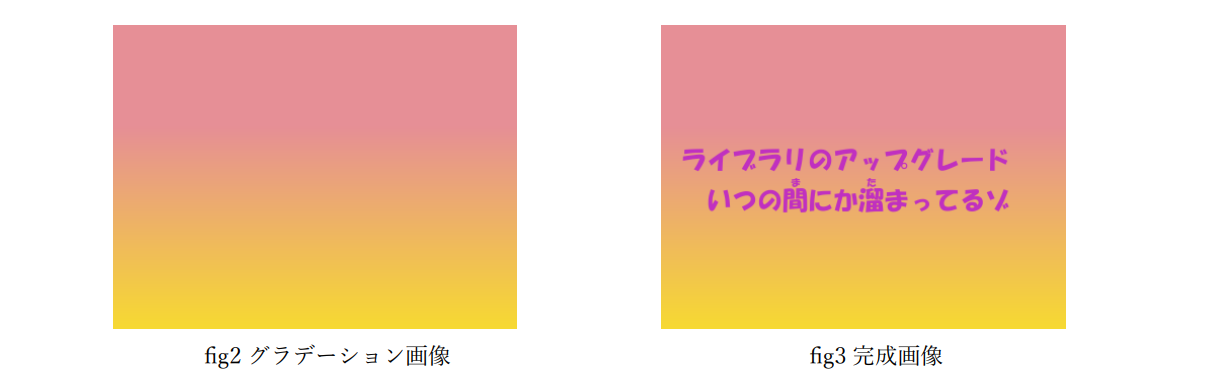
LaTeXでは若干面倒な作業となりますが,MarkdownではCSSの活用により本文は6行で終わってしまいます.
また,これを応用すれば画像の右に文章を配置したり,3カラムのデザインにしたり,CSSでできることならどんなレイアウトも実現できることになります.しかもそれを自分好みに微調整することができます.
数式の番号
いろいろ試しましたが自動管理は無理でした.
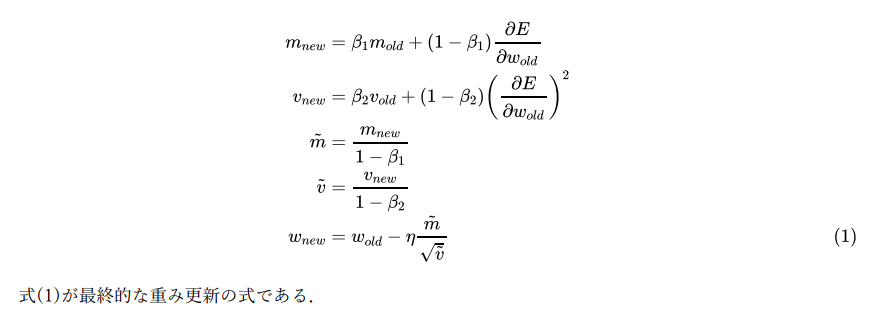
ここでは\tag{1}で式に番号を振り,文中ではマジックナンバーを用いています.
どなたか楽な方法をご教授くださると幸いです.
\begin{align}
m_{new}&=\beta_1m_{old}+(1-\beta_1)\frac{\partial E}{\partial w_{old}}\\\\
v_{new}&=\beta_2v_{old}+(1-\beta_2)\left(\frac{\partial E}{\partial w_{old}}\right)^2\\\\
\tilde{m}&=\frac{m_{new}}{1-\beta_1}\\\\
\tilde{v}&=\frac{v_{new}}{1-\beta_2}\\\\
w_{new}&=w_{old}-\eta\frac{\tilde{m}}{\sqrt{\tilde{v}}}\tag{1}
\end{align}

式(1)が最終的な重み更新の式である.
ワンポイント
レポートではあまりやらないかもしれませんが,補足などで使えると思います.
const point = (...msgs) => {
    document.write("<div class='point'>");
    document.write("<span class='point-title'>ポイント</span>");
    document.write("<div class='ps'>");
    for (var msg of msgs) {
        document.write(format(
            "<p>{0}</p>",
            msg
        ));
    }
    document.write("</div></div>");
}
/* ポイント */
div.point {
    position: relative;
    margin: 0;
    margin-top: 1rem;
    padding: 0;
    border: solid 3px #eb0;
    border-radius: 8px;
}
div.point span.point-title {
    position: absolute;
    display: inline-block;
    top: -13px;
    left: 10px;
    padding: 0 9px;
    padding-left: 1rem;
    line-height: 1;
    font-size: 19px;
    background: #FFF;
    color: #eb0;
    font-weight: bold;
}
div.point span.point-title::before {
    background-color: #eb0;
    content: "!";
    font-size: 0.9rem;
    color: white;
    border-radius: 50%;
    padding: 0 0.5rem;
}
div.point div.ps {
    margin: 0.5rem 0;
}
div.point p {
    margin: 0;
}
<script>
point(
    "ここに補足などを書きます",
    "複数行にしたいなら複数の引数を渡します"
);
</script>

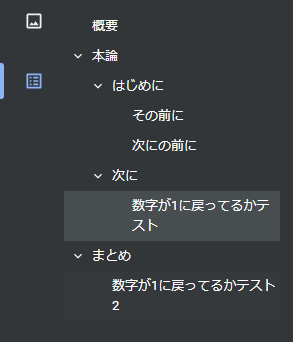
ブックマーク
ブックマーク機能を付けます.
と言っても,調べた限りではMarkdownにそのような機能はなさそうです.
ということで,Pythonとの合わせ技により実現したいと思います.
以下の順番で実行します.
- ソースコードを読み,各セクション名を得る
- pdfファイルを読み,各セクションが実際に何ページになったか確認しながらブックマークを作る
- 完成したファイルを出力
各セクションの情報は辞書型で保持し,それぞれ自らのブックマークと親の名前を持ちます.
import re

from PyPDF2 import PdfFileWriter, PdfFileReader

INPUT_FILE_NAME = "test.pdf"
OUTPUT_FILE_NAME = "out.pdf"

# 1. ソースコードを読み,各セクション名を得る
section_p = re.compile(r"<script>section(.+)</script>\n")
subsection_p = re.compile(r"<script>subsection(.+)</script>\n")
subsubsection_p = re.compile(r"<script>subsubsection(.+)</script>\n")
now_section = ""
now_subsection = ""
now_subsubsection = ""
bookmarks = {}

with open("test.md", "r", encoding="UTF-8") as fp:
    for line in fp:
        # bookmarkにそのセクションのブックマークオブジェクトを,
        # parentにそのセクションの親の名前を格納
        if section_p.match(line):
            now_section = line.split("\"")[1]
            bookmarks[now_section] = {"bookmark": None, "parent": None}
        elif subsection_p.match(line):
            now_subsection = line.split("\"")[1]
            bookmarks[now_subsection] = {"bookmark": None, "parent": now_section}
        elif subsubsection_p.match(line):
            now_subsubsection = line.split("\"")[1]
            bookmarks[now_subsubsection] = {"bookmark": None, "parent": now_subsection}

# 2. pdfファイルを読み,各セクションが実際に何ページになったか確認しながらブックマークを作る
section_p = re.compile(r"\d+\. |\d+-\d+ |\d+-\d+-\d+ ")
space_p = re.compile(" ")
input = PdfFileReader(open(INPUT_FILE_NAME, "rb"))
output = PdfFileWriter()
output.cloneDocumentFromReader(input)

for i in range(input.getNumPages()):
    page = input.getPage(i)               # ページ取得
    text = page.extractText().split("\n") # そのページの文字取得
    for line in text:
        if section_p.search(line):
            section_name = section_p.sub("", line)
            ### 後で解説
            if re.search("/", line):
                section_name = line.split(" ")[3]
            section_name = space_p.sub("", section_name)
            ###
            parent_name = bookmarks[section_name]["parent"]
            if parent_name:
                # 親がいる場合(subsectionまたはsubsubsection)
                bookmarks[section_name]["bookmark"] = output.addBookmark(
                    section_name,
                    i,
                    parent=bookmarks[parent_name]["bookmark"] # 親が持つブックマークオブジェクト
                )
            else:
                # 親がいない場合(section)
                bookmarks[section_name]["bookmark"] = output.addBookmark(
                    section_name,
                    i,
                    parent=None
                )

# 3. 完成したファイルを出力
with open(OUTPUT_FILE_NAME, "wb") as fp:
    output.write(fp)
後で解説としたところですが,まず,1ページ目と2ページ目の文字を出力した以下のデータを見てください.
['1 / 21. 概要', 'ここに概要が書かれます .', '2. 本論', 'ここから本題です .', '2-1 はじめに', 'まず ,はじめに', '2-1-1 その前に', 'Adamは以下の式であらわされます .⼆⾏⽬の始まりの位置が知りたいのでとりあえず⻑い⽂章を書いて', 'おく.', '式(1)が最終的な重み更新の式である.', '2-1-2 次にの前に', '数字がきちんと動いているか確認したい.', '2-2 次に', 'fig1 ピンク画像', '図1 にピンク画像を⽰す .mnew=β1mold+(1−β1)', 'vnew=β2vold+(1−β2)( )2', '~m=', '~v=', 'wnew=wold−η (1)∂E', '∂wold', '∂E', '∂wold', 'mnew', '1−β1', 'vnew', '1−β2~m', '√~v']
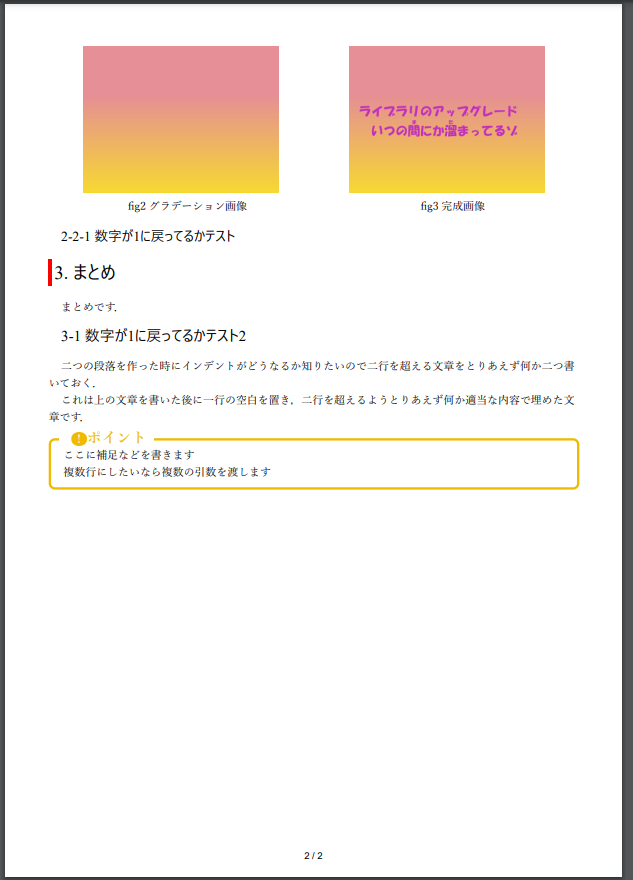
['2 / 2', 'fig2 グラデーション画像', ' fig3 完成画像', '2-2-1 数字が 1 に戻ってるかテスト', '3. まとめ', 'まとめです .', '3-1 数字が 1に戻ってるかテスト 2', '⼆つの段落を作った時にインデントがどうなるか知りたいので⼆⾏を超える⽂章をとりあえず何か⼆つ書', 'いておく.', 'これは上の⽂章を書いた後に⼀⾏の空⽩を置き,⼆⾏を超えるようとりあえず何か適当な内容で埋めた⽂', '章です .', 'ここに補⾜などを書きます', '複数⾏にしたいなら複数の引数を渡します! ポイント']
最初の概要セクションはなぜかフッターと同じ行として文字検出されています.そのため最初のif文で"/"を含む場合はそれをはじくという処理を行っています.
また,2ページ目の「数字が1に戻ってるかテスト」を見ると,1の前後に実際には存在しないスペースが入っています.これを除去する処理を追加しました.
実はまだ問題がありまして,もともと「まとめ」というセクション名ではなく「結言」でした.しかし文字検出の結果,「結⾔」と誤って検出したのです.「言」の文字コードが違いまして,実際には「\xe7\xb5\x90\xe8\xa8\x80」が私の打ち込んだ「結言」ですが,検出した「結⾔」は「\xe7\xb5\x90\xe2\xbe\x94」でした.文字コードが違うということでプログラムの後半部分がうまく動きませんでした.
さらに,もともと「数字が1に戻ってるかテスト」という同一のセクション名が二つあり,そのせいでおかしな挙動をしていました.そのため,二つ目を「数字が1に戻ってるかテスト2」と変更したことで事なきを得ました.
ほかにもこういったことがあるかもしれないというのは弱点の一つです.
とはいえ,一応このように成功しました.
表紙の結合
markdownはフッターを設定で追加できますが,そのフッターは表紙にもついてしまいます.
現在,私は「現在のページ数/総ページ数」をフッターとしていますが,表紙にこれはつけたくありません.
そこで,表紙は表紙で別に出力し,本文と表紙をPythonで結合させることを考えました.
まず表紙を作ります.といっても前回とほぼ同じです.
<style>
div p {
    font-family: "SimSun";
    text-align: center;
}
.front-cover {
    margin-top: 0;
    padding-top: 200px;
    padding-left: 200px;
    background-color: #6e5064;
}
.title {
    display: grid;
    flex-direction: column;
    justify-content: space-around;
    grid-template-columns: 250px 80px;
    writing-mode: vertical-rl;
    align-items: center;
    margin-left: 100px;
    border-left: solid;
}
.main-title {
    font-size: 2rem;
}
</style>

<div class="front-cover">
    <div class="title">
        <p class="main-title">塑性加工の歴史</p>
        <p class="author">田中太郎</p>
    </div>
    <div style="page-break-before:always"></div>
</div>
そして,以下のプログラムで結合させます.
from PyPDF2 import PdfFileMerger

output = PdfFileMerger()
output.append("表紙.pdf", pages=(0, 1))
output.append("out.pdf")
output.write("表紙付きレポート.pdf")
output.close()
結果,結合したのですが・・・
見事にbookmark情報が失われてしまいました.上のget_bookmark.pyをもう一度このファイルに対して使用すると,
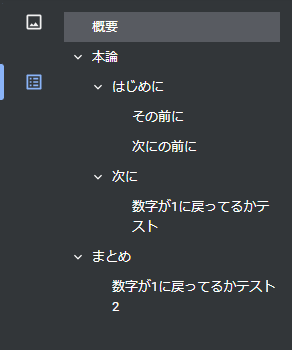
bookmarkが復活しました!
ただ,表紙作成時と本文作成時でいちいち設定を変更しなければならないのが面倒ポイントですね.
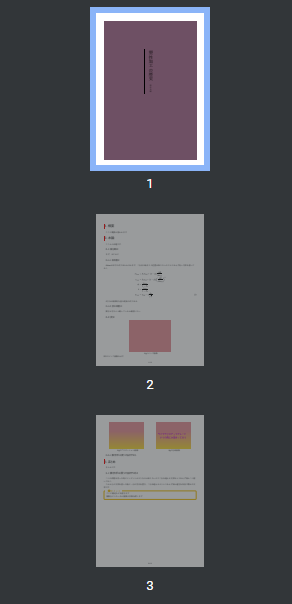
まとめ
最後に,今回完成したフルバージョンのレポートとソースコードを貼ります.
pdfが貼れなかったのでスクショですが・・・.

test.md
今回のメインファイルです.<!-- pandoc test.md -o test.pdf -->
<div class="config">
<link rel="stylesheet" type="text/css" href="static/style.css">
<script type="text/javascript" src="static/script.js"></script>
<script type="text/javascript" async src="https://cdnjs.cloudflare.com/ajax/libs/mathjax/2.7.7/MathJax.js?config=TeX-MML-AM_CHTML">
</script>
<script type="text/x-mathjax-config">
MathJax.Hub.Config({
tex2jax: {
inlineMath: [['$', '$'] ],
displayMath: [ ['$$','$$'], ["\\[","\\]"] ]
}
});
</script>
</div>
<script>
img_label("ピンク画像", "img/pink.png", "pink");
img_label("グラデーション画像", "img/grad.png", "grad");
img_label("完成画像", "img/title_call.png", "title_call");
</script>
<script>section("概要")</script>
ここに概要が書かれます.
<script>section("本論")</script>
ここから本題です.
<script>subsection("はじめに")</script>
まず,はじめに
<script>subsubsection("その前に")</script>
Adamは以下の式であらわされます.二行目の始まりの位置が知りたいのでとりあえず長い文章を書いておく.
\begin{align}
m_{new}&=\beta_1m_{old}+(1-\beta_1)\frac{\partial E}{\partial w_{old}}\\\\
v_{new}&=\beta_2v_{old}+(1-\beta_2)\left(\frac{\partial E}{\partial w_{old}}\right)^2\\\\
\tilde{m}&=\frac{m_{new}}{1-\beta_1}\\\\
\tilde{v}&=\frac{v_{new}}{1-\beta_2}\\\\
w_{new}&=w_{old}-\eta\frac{\tilde{m}}{\sqrt{\tilde{v}}}\tag{1}
\end{align}
式(1)が最終的な重み更新の式である.
<script>subsubsection("次にの前に")</script>
数字がきちんと動いているか確認したい.
<script>subsection("次に")</script>
<script>
img("pink", 300);
</script>
<script>img_ref("pink");</script>にピンク画像を示す.
<div class="two-img">
<script>
img("grad", 250);
img("title_call", 250);
</script>
</div>
<script>subsubsection("数字が1に戻ってるかテスト")</script>
<script>section("まとめ")</script>
まとめです.
<script>subsection("数字が1に戻ってるかテスト2")</script>
二つの段落を作った時にインデントがどうなるか知りたいので二行を超える文章をとりあえず何か二つ書いておく.
これは上の文章を書いた後に一行の空白を置き,二行を超えるようとりあえず何か適当な内容で埋めた文章です.
<script>
point(
"ここに補足などを書きます",
"複数行にしたいなら複数の引数を渡します"
);
</script>
style.css
装飾ファイルです.@font-face {
font-family: section;
src: "Yu Mincho";
unicode-range: U+0030-0039;
}
body {
font-family: "Yu Mincho";
}
h1 {
font-family: sans-serif;
font-family: section;
font-size: 1.5rem;
border: none;
border-left: 4px red solid;
padding: 0.2rem 0;
padding-left: 0.2rem;
}
h2 {
font-family: sans-serif;
font-family: section;
font-size: 1.2rem;
padding-left: 1rem;
}
h3 {
font-family: sans-serif;
font-family: section;
font-size: 1.1rem;
padding-left: 1rem;
}
p {
text-indent: 1rem;
margin: 0;
padding: 0;
}
div.img {
margin-bottom: 0;
text-align: center;
}
div.two-img {
display: flex;
justify-content: space-around;
}
/* ポイント */
div.point {
position: relative;
margin: 0;
margin-top: 1rem;
padding: 0;
border: solid 3px #eb0;
border-radius: 8px;
}
div.point span.point-title {
position: absolute;
display: inline-block;
top: -13px;
left: 10px;
padding: 0 9px;
padding-left: 1rem;
line-height: 1;
font-size: 19px;
background: #FFF;
color: #eb0;
font-weight: bold;
}
div.point span.point-title::before {
background-color: #eb0;
content: "!";
font-size: 0.9rem;
color: white;
border-radius: 50%;
padding: 0 0.5rem;
}
div.point div.ps {
margin: 0.5rem 0;
}
div.point p {
margin: 0;
}
script.js
JavaScriptです.var label_num = new Map(
[
[
"build-in",
new Map(
[
["section", 0],
["subsection", 0],
["subsection", 0]
]
)
]
]
);
const format = (template, ...args) => {
var is_d = new RegExp(/^\d+$/);
var rtn = "";
var is_change = false;
template.split(/({|})/).forEach( value => {
if (value == "{") {
is_change = !is_change;
if (!is_change) {
rtn = rtn + value;
}
} else if (is_change && is_d.test(value)) {
rtn = rtn + args[value];
} else if (is_change && value == "}") {
is_change = false;
} else if (!is_change && value == "}") {
is_change = true;
rtn = rtn + value;
} else {
rtn = rtn + value;
}
});
return rtn;
};
const section = (name) => {
var l = label_num.get("build-in");
l.set("section", l.get("section")+1);
l.set("subsection", 0);
l.set("subsubsection", 0);
var num = l.get("section");
document.write(format("<h1>{0}. {1}</h1>", num, name))
}
const subsection = (name) => {
var l = label_num.get("build-in");
l.set("subsection", l.get("subsection")+1);
l.set("subsubsection", 0);
var num = l.get("section");
var sub_num = l.get("subsection");
document.write(format("<h2>{0}-{1} {2}</h2>", num, sub_num, name));
}
const subsubsection = (name) => {
var l = label_num.get("build-in");
l.set("subsubsection", l.get("subsubsection")+1);
var num = l.get("section");
var sub_num = l.get("subsection");
var subsub_num = l.get("subsubsection");
document.write(format("<h3>{0}-{1}-{2} {3}</h3>", num, sub_num, subsub_num, name));
}
const img_label = (alt, name, id) => {
if (!label_num.has("img")) {
label_num.set("img", new Map);
}
label_num.get("img").set(id, new Map([
["alt", alt],
["name", name],
["num", label_num.get("img").size+1]
]));
}
const img_ref = (id) => {
document.write(format(
"<span>図{0}</span>",
label_num.get("img").get(id).get("num")
));
}
const img = (id, width) => {
var img_inf = label_num.get("img").get(id);
document.write("<div class='img'>");
if (width) {
document.write(format(
"<img style='width: {0}px;' src='{1}'>",
width,
img_inf.get("name")
));
} else {
document.write(format(
"<img src='{0}'>",
img_inf.get("name")
));
}
document.write(format(
"<p>fig{0} {1}</p>",
img_inf.get("num"),
img_inf.get("alt")
));
document.write("</div>");
}
const point = (...msgs) => {
document.write("<div class='point'>");
document.write("<span class='point-title'>ポイント</span>");
document.write("<div class='ps'>");
for (var msg of msgs) {
document.write(format(
"<p>{0}</p>",
msg
));
}
document.write("</div></div>");
}
表紙.md
表紙作成用のmarkdownファイル.<style>
div p {
font-family: "SimSun";
text-align: center;
}
.front-cover {
margin-top: 0;
padding-top: 200px;
padding-left: 200px;
background-color: #6e5064;
}
.title {
display: grid;
flex-direction: column;
justify-content: space-around;
grid-template-columns: 250px 80px;
writing-mode: vertical-rl;
align-items: center;
margin-left: 100px;
border-left: solid;
}
.main-title {
font-size: 2rem;
}
</style>
<div class="front-cover">
<div class="title">
<p class="main-title">塑性加工の歴史</p>
<p class="author">田中太郎</p>
</div>
<div style="page-break-before:always"></div>
</div>
get_bookmark.py
pdfファイルにbookmarkを付けるためのファイルです.import re
from PyPDF2 import PdfFileWriter, PdfFileReader
INPUT_FILE_NAME = "test.pdf"
OUTPUT_FILE_NAME = "out.pdf"
# 1. ソースコードを読み,各セクション名を得る
section_p = re.compile(r"<script>section(.+)</script>\n")
subsection_p = re.compile(r"<script>subsection(.+)</script>\n")
subsubsection_p = re.compile(r"<script>subsubsection(.+)</script>\n")
now_section = ""
now_subsection = ""
now_subsubsection = ""
bookmarks = {}
with open("test.md", "r", encoding="UTF-8") as fp:
for line in fp:
# bookmarkにそのセクションのブックマークオブジェクトを,
# parentにそのセクションの親の名前を格納
if section_p.match(line):
now_section = line.split("\"")[1]
bookmarks[now_section] = {"bookmark": None, "parent": None}
elif subsection_p.match(line):
now_subsection = line.split("\"")[1]
bookmarks[now_subsection] = {"bookmark": None, "parent": now_section}
elif subsubsection_p.match(line):
now_subsubsection = line.split("\"")[1]
bookmarks[now_subsubsection] = {"bookmark": None, "parent": now_subsection}
# 2. pdfファイルを読み,各セクションが実際に何ページになったか確認しながらブックマークを作る
section_p = re.compile(r"\d+\. |\d+-\d+ |\d+-\d+-\d+ ")
space_p = re.compile(" ")
input = PdfFileReader(open(INPUT_FILE_NAME, "rb"))
output = PdfFileWriter()
output.cloneDocumentFromReader(input)
for i in range(input.getNumPages()):
page = input.getPage(i) # ページ取得
text = page.extractText().split("\n") # そのページの文字取得
for line in text:
if section_p.search(line):
section_name = section_p.sub("", line)
### 後で解説
if re.search("/", line):
section_name = line.split(" ")[3]
section_name = space_p.sub("", section_name)
###
parent_name = bookmarks[section_name]["parent"]
if parent_name:
# 親がいる場合(subsectionまたはsubsubsection)
bookmarks[section_name]["bookmark"] = output.addBookmark(
section_name,
i,
parent=bookmarks[parent_name]["bookmark"] # 親が持つブックマークオブジェクト
)
else:
# 親がいない場合
bookmarks[section_name]["bookmark"] = output.addBookmark(
section_name,
i,
parent=None
)
# 3. 完成したファイルを出力
with open(OUTPUT_FILE_NAME, "wb") as fp:
output.write(fp)
marge.py
表紙と本文を結合するプログラム.from PyPDF2 import PdfFileMerger
output = PdfFileMerger()
output.append("表紙.pdf", pages=(0, 1))
output.append("out.pdf")
output.write("表紙付きレポート.pdf")
output.close()
追記
2022/07/24
図表番号の追加はこちらの記事の方が楽そうです.
2022/8/7
新しいネタが浮かぶたびに記事を作ると乱立して困るので,追記という形で記載します.
章番号をふる
今までJavaScriptを使って章番号を振ってきましたが,CSSをうまく使えばその必要はありませんでした.
さらに,恥ずかしながら<h1>タグなどを使わずとも#などで構わないということを知りませんでした.CSSでh1を指定しているので,タグを使う必要があると思っていました.
#を使うことでVSCodeでは章をたたんで表示することができるようになり,作業が楽になります.
body {
    counter-reset: h1-count 0;
}

h1 {
    counter-reset: h2-count 0;
    counter-increment: h1-count 1;
    border: none;
}
h1::before {
    content: "第" counter(h1-count) "章 ";
}

h2 {
    counter-reset: h3-count 0;
    counter-increment: h2-count 1;
}
h2::before {
    content: counter(h1-count) "-" counter(h2-count) " ";
}

h3 {
    counter-increment: h3-count 1;
    margin-left: 1rem;
}
h3::before {
    content: "(" counter(h3-count) ") ";
}
<link rel="stylesheet" href="static/style.css">

# 序論
# 本論
## 実験手順
## 結果
### 一つ目の実験
### 二つ目の実験
## 考察
### 一つ目の実験
### 二つ目の実験
# 結言
## 一つ目の実験
## 二つ目の実験
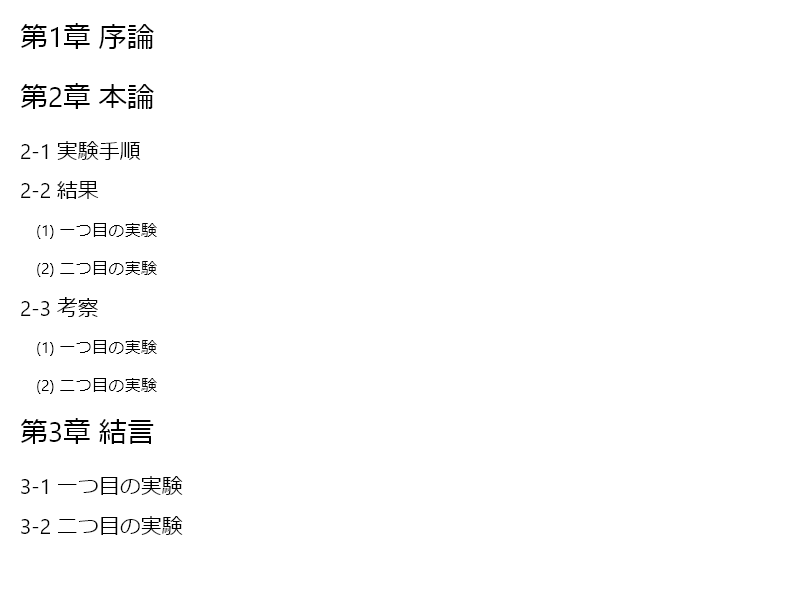
同様にして図番号なども簡単に記載できますね.
表を楽に作成する
表の作成は$\LaTeX$でも<table>タグでもMarkdownの書式でも,どれを使ったとしても面倒です.
そこで,csvファイルの内容を<table>タグに起こすプログラムを書きました.
コマンドラインで引数として与えられたファイルを見に行き,その内容をHTMLタグにし,クリップボードへコピーしてくれます.
import sys
import re

import pandas as pd
import pyperclip as pc

# ファイル名を取得する
argv = sys.argv
if len(argv) < 2:
    raise ValueError("Write your the file name.")
elif len(argv) > 2:
    raise ValueError("Write your one file name.")

# csvファイルを開く
file_name = argv[1]
data = pd.read_csv(
    file_name if re.search("\.csv", file_name) else file_name + ".csv",
    encoding="cp932"
)

# 表作成
html = "<table>\n"

# 列名
html += "    <tr>\n"
columns = []
for column in data:
    html += "        <th>%s</th>\n" % column
    columns.append(column)
html += "    </tr>\n"

# 値
for i in range(len(data)):
    html += "    <tr>\n"
    for column in columns:
        html += "        <td>%s</td>\n" % data[column][i]
    html += "    </tr>\n"

# クリップボードにコピー
pc.copy(html + "</table>")
このプログラムはDataFrameのような形の表にしか対応していませんが,中身をいじれば応用が効きます.
これならExcelで簡単に表を作成して,あとはコマンドを一行打てば表の完成です.
このプログラムは数か月前に遊びで作成したものでしたが,つい先日のレポートでまさかの大活躍をしてくれました.
