追記(20200623)
XCode12 + iOS14 からTabViewの挙動が変更されて、タブを切り替えても前のViewが保持されるようになりましたのでiOS14以降ならこの記事はあまり意味がなくなりましたw
SwiftUIのTabViewの問題に自作TabView(SwiftUI製)で対処する
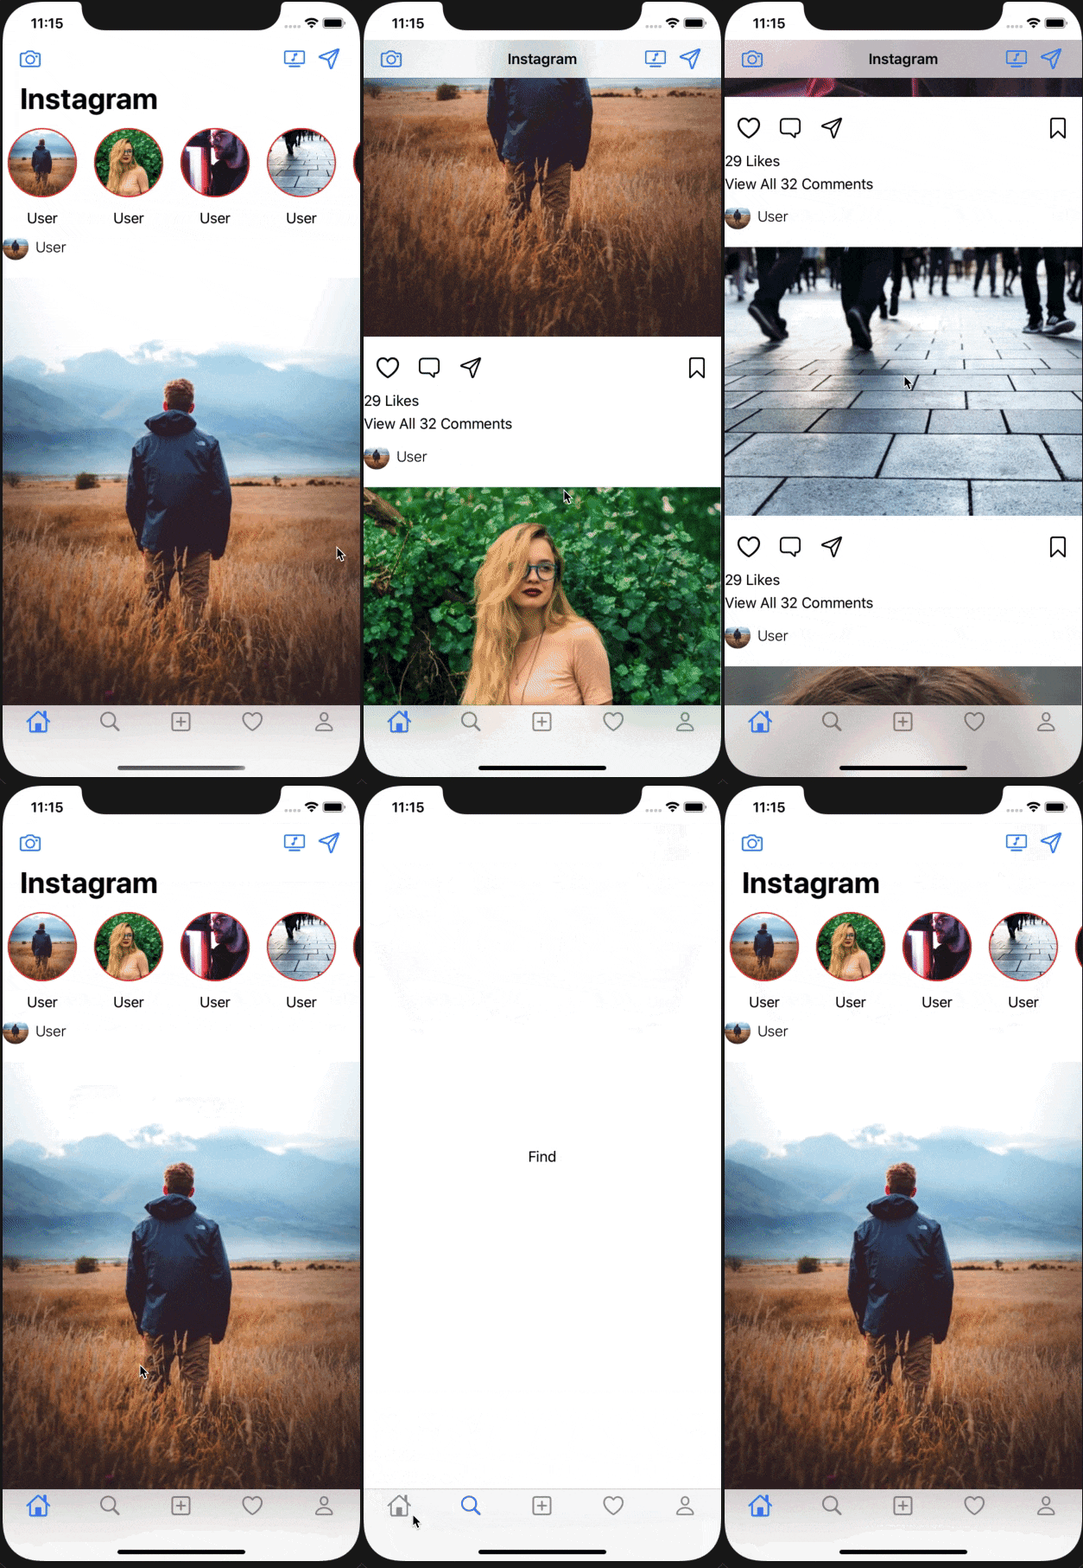
SwiftUIのTabViewには、Tabを切り替えると切り替えた先のタブを再生成するためスクロールした位置や状態を保持しておくことができませんでした。
それに対処するために、今回自作TabViewを作成しましたので、その tipsを共有します。
作成したTabViewを見たい方はこちらから!
https://github.com/tsuzukihashi/SwiftUI_CustomTabBar
また、UIKitのUITabBarControllerを Representaぶる方法もあります。そっちの方がiOS的には優しいかもしてません...
こっちのメリットは、タブ切り替えのアニメーションがいじりやすいのと、オールSwiftUIのモチベぐらいでしょうか...
間違いやアドバイスがあればじゃんじゃんコメントください!お願い致します🙇♂️
Twitter やっています!
https://twitter.com/tsuzuki817
色々アプリをリリースしているので一度見てみてください🙇♂️
https://apps.apple.com/jp/developer/ryo-tsudukihashi/id1320583602?l
現状の問題を把握
先ほど説明しましたが、改めてGIFアニメーション載せておきます。

自作TabViewへの道
大まかな流れは以下のようになっています。
- ステップ1
ルートのViewで現在選択しているcurrentPageを保持する - ステップ2
ルートのViewでタブで遷移したいViewをZStackで並べる - ステップ3
ステップ2で配置したViewのopacityをcurrentPageによって変える - ステップ4
タブもどきに設置したボタンでcurrentPageを切り替える
説明しやすいように、シンプルなアプリを作成します。
表示させたいView達
変化が分かりやすいように縦に多くスクロールできるViewを作成しています。
Page2では天下のイラストや様の画像を少しばかりお借りしております。
import SwiftUI
struct Page1: View {
    var body: some View {
        NavigationView {
            VStack {
                List(0..<30) { i in
                    Text("\(i)列目")
                }
            }.navigationBarTitle("1ページ目")
        }
    }
}

struct Page2: View {
    var body: some View {
        NavigationView {
            ScrollView(.vertical, showsIndicators: false) {
                ForEach(1..<8) { i in
                    Image("irasutoya\(i)")
                        .resizable()
                        .aspectRatio(contentMode: .fit)
                }
            }.navigationBarTitle("2ページ目")
        }
    }
}

struct Page3: View {
    var body: some View {
        NavigationView {
            VStack {
                List(0..<30) { i in
                    Text("\(i)列目")
                }
            }.navigationBarTitle("3ページ目")
        }
    }
}
ルートのView
このViewで@State で currentPageを保持しておきます。
そのcurrentPageの値を見てViewのopacityを変更して、表示・非表示を切り替えています。
また、ここでoffsetをいじっているのですが、これはアニメーションのために利用しています。
そのためアニメーションを利用しない方は、なくてもおkです!
(.rotation3DEffectとか使ったらリッチになって面白そうだったのですが、navigationbar が少しおかしくなりました;;)
import SwiftUI

struct ContentView: View {
    @State  var currentPage = 1

    var body: some View {
        ZStack {
            Page1()
                .opacity(currentPage == 1 ? 1 : 0)
                .offset(x : currentPage == 1 ? 0 : 100)
                .animation(Animation.spring())

            Page2()
                .opacity(currentPage == 2 ? 1 : 0)
                .offset(x : currentPage == 2 ? 0 : 100)
                .animation(Animation.spring())

            Page3()
                .opacity(currentPage == 3 ? 1 : 0)
                .offset(x : currentPage == 3 ? 0 : 100)
                .animation(Animation.spring())

            MyTabView(currentPage: $currentPage)
        }
    }
}
肝心の自作TabView
@BindingでcurrentPageをルートViewから受け取り、設置するボタンでその値を変更します。
VStack, Spacer() , ZStack, Rectangleを駆使して擬似タブを作成します。
.edgesIgnoringSafeArea(.bottom)を使って、セーフエリアまで覆うのを忘れないようにしておけば、後は結構自由です。
struct MyTabView: View {
    @Binding var currentPage: Int
    var width = UIScreen.main.bounds.width
    var body: some View {
        VStack {
            Spacer()
            ZStack {
                Rectangle()
                    .foregroundColor(Color.gray)
                    .frame(width: width, height: 88)

                HStack(spacing: 88) {
                    Button(action: {
                        self.currentPage = 1
                    }) {
                        VStack {
                            Image(systemName: "flame")
                                .foregroundColor(Color.red)
                                .font(.system(size: 32, weight: .bold, design: .rounded))

                        }
                    }.padding(.bottom, 24)

                    Button(action: {
                        self.currentPage = 2
                    }) {
                        VStack {
                            Image(systemName: "bolt")
                                .foregroundColor(Color.yellow)
                                .font(.system(size: 32, weight: .bold, design: .rounded))

                        }
                    }.padding(.bottom, 24)

                    Button(action: {
                        self.currentPage = 3
                    }) {
                        VStack {
                            Image(systemName: "leaf.arrow.circlepath")
                                .foregroundColor(Color.green)
                                .font(.system(size: 32, weight: .bold, design: .rounded))

                        }
                    }.padding(.bottom, 24)

                }
            }
        }.edgesIgnoringSafeArea(.bottom)
    }
}
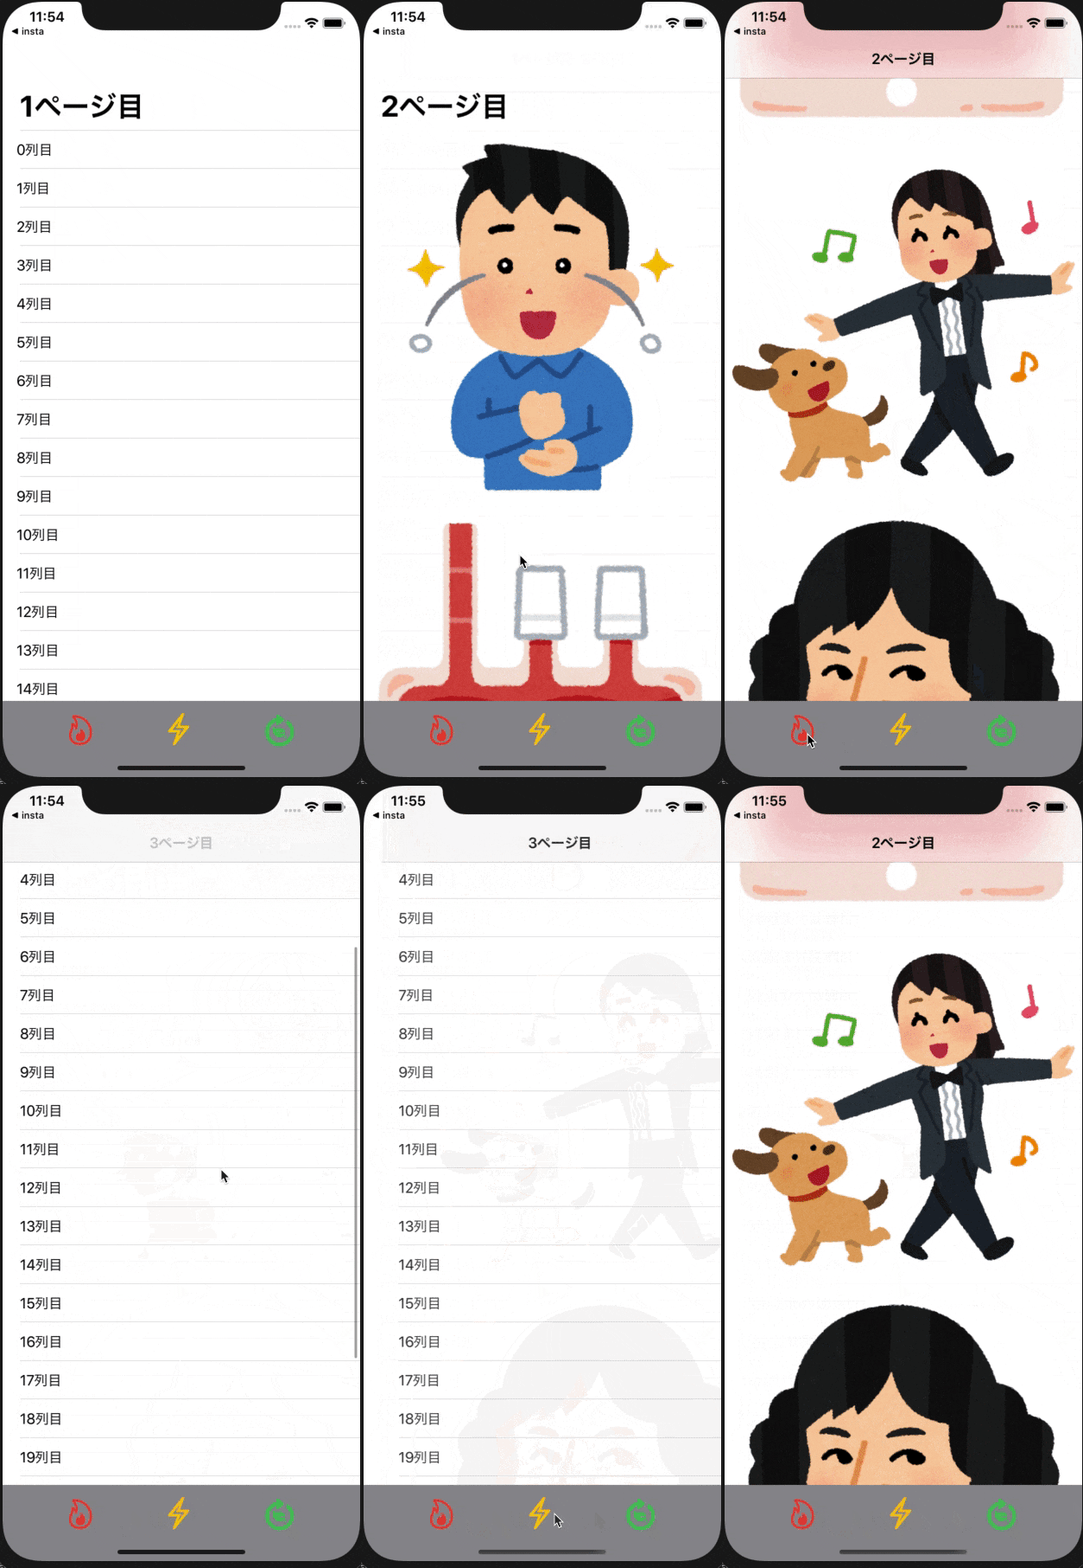
できたもの
タブを切り替えてもViewは作り直されず、遷移前の状態を保持することができました!
最終的な着地点
以上で実装は終わりです!
SwiftUIは色々不便なことも多いですが、楽しいですね!
そのうちTabViewの問題もApple様が直してくれそうですが、一時的な場しのぎとしてどうでしょうか
最後にもう一度作成したリポジトリです!
https://github.com/tsuzukihashi/SwiftUI_CustomTabBar
閲覧ありがとうございましたmm
