背景
データベースをREST APIを使ってアクセスしたいというニーズがあります。Db2ではDb2 REST Serviceをコンテナとして稼働させることによりRESTでアクセス可能になります。IBM CloudとAWSにはDb2の情報が多いですがAzureは少ないので投稿します。
Db2 REST Service自体の構築手順は以下のQiitaをご覧ください。
REST API による Db2アクセス
やりたいこと
Azure上に構築したDb2サーバーへRESTでアクセスしたい。具体的には以下になります。
- Db2 REST ServiceのコンテナをAzure Container Registory(以下、ACR)にプッシュしたい
- Web App for ContainersにDb2 REST Serviceをデプロイしたい
- Db2 REST ServiceとAzure上に構築したDb2サーバーとを接続したい(VNet統合)
環境
- Azure Container RegistryにDb2 REST Serviceのリポジトリーをプッシュ
- Web App for ContainersにDb2 REST Serviceをデプロイ
- Azure仮想マシンにDb2サーバーをインストール
- ローカルPCからDb2 REST Serviceを経由してデータベースにアクセス
| 区分 | 製品サービス |
|---|---|
| ローカルPC | Windows V11 |
| コンテナレジストリー | Azure Container Registry |
| ミドルウェア | IBM Db2 V12.1 REST Service |
| コンテナ実行環境 | Azure App Service Web App for Containers |
| 仮想マシンOS | Ubuntu 22.04 LTS |
| データベース | IBM Db2 V11.5 Server for LUW |
注意
ネットワークのセキュリティーには言及しません。必要に応じて、プライベートエンドポイントなどを設定してください。
事前準備(説明しないこと)
- ローカルPC
- Docker Desktop or Podmanのインストール、稼働
- Azure CLIのインストール
- コンテナレジストリー
- リポジトリーを登録するプライベートレジストリーを作成
- 仮想マシン
- Db2サーバーのインストール、構成、稼働
- Db2データベースの作成
ローカルPCにPull
Db2 REST Serviceを以下のウェブサイトを参考にIBM Cloud Container RegistryからローカルPCにPullしてください。
ACRへPush
Pullしたコンテナイメージにタグ付け後、ACRへPushします。作業はローカルPCのPowerShellから行います。
Azureにログイン
- ログイン
- サブスクリプションを選択
- サブスクリプションを確認
az login
az account set --subscription "Your Subscription"
az account list
ACRにログイン
- コンテナレジストリーを指定してログイン
- リポジトリーを確認
- ACRログインサーバー名を確認
- タグ付けするコンテナイメージを確認
az acr login --name yourenv1acr
az acr repository list -n yourenv1acr --output table
az acr list --resource-group your-env1-rg --query "[].{acrLoginServer:loginServer}" --output table
docker images
タグ付け
- コンテナイメージにタグ付け
- イメージID:前節で確認したイメージID(aaaabbbbccc)
- ACRログインサーバー名:前節で確認したサーバー名(yourenv1acr.azurecr.io)
- リポジトリー名:ACRで表示したい名前(db2rest)
- タグ:ACRで表示したいタグ(12.1.0.0.315)
- タグ付けしたコンテナイメージを確認
docker tag aaaabbbbcccc yourenv1acr.azurecr.io/db2rest:12.1.0.0.315
docker images
ACRにPush
- タグ付けしたコンテナイメージをPush
- ACRに登録された内容を確認
docker push yourenv1acr.azurecr.io/db2rest:12.1.0.0.315
az acr repository show-tags -n yourenv1acr --repository db2rest
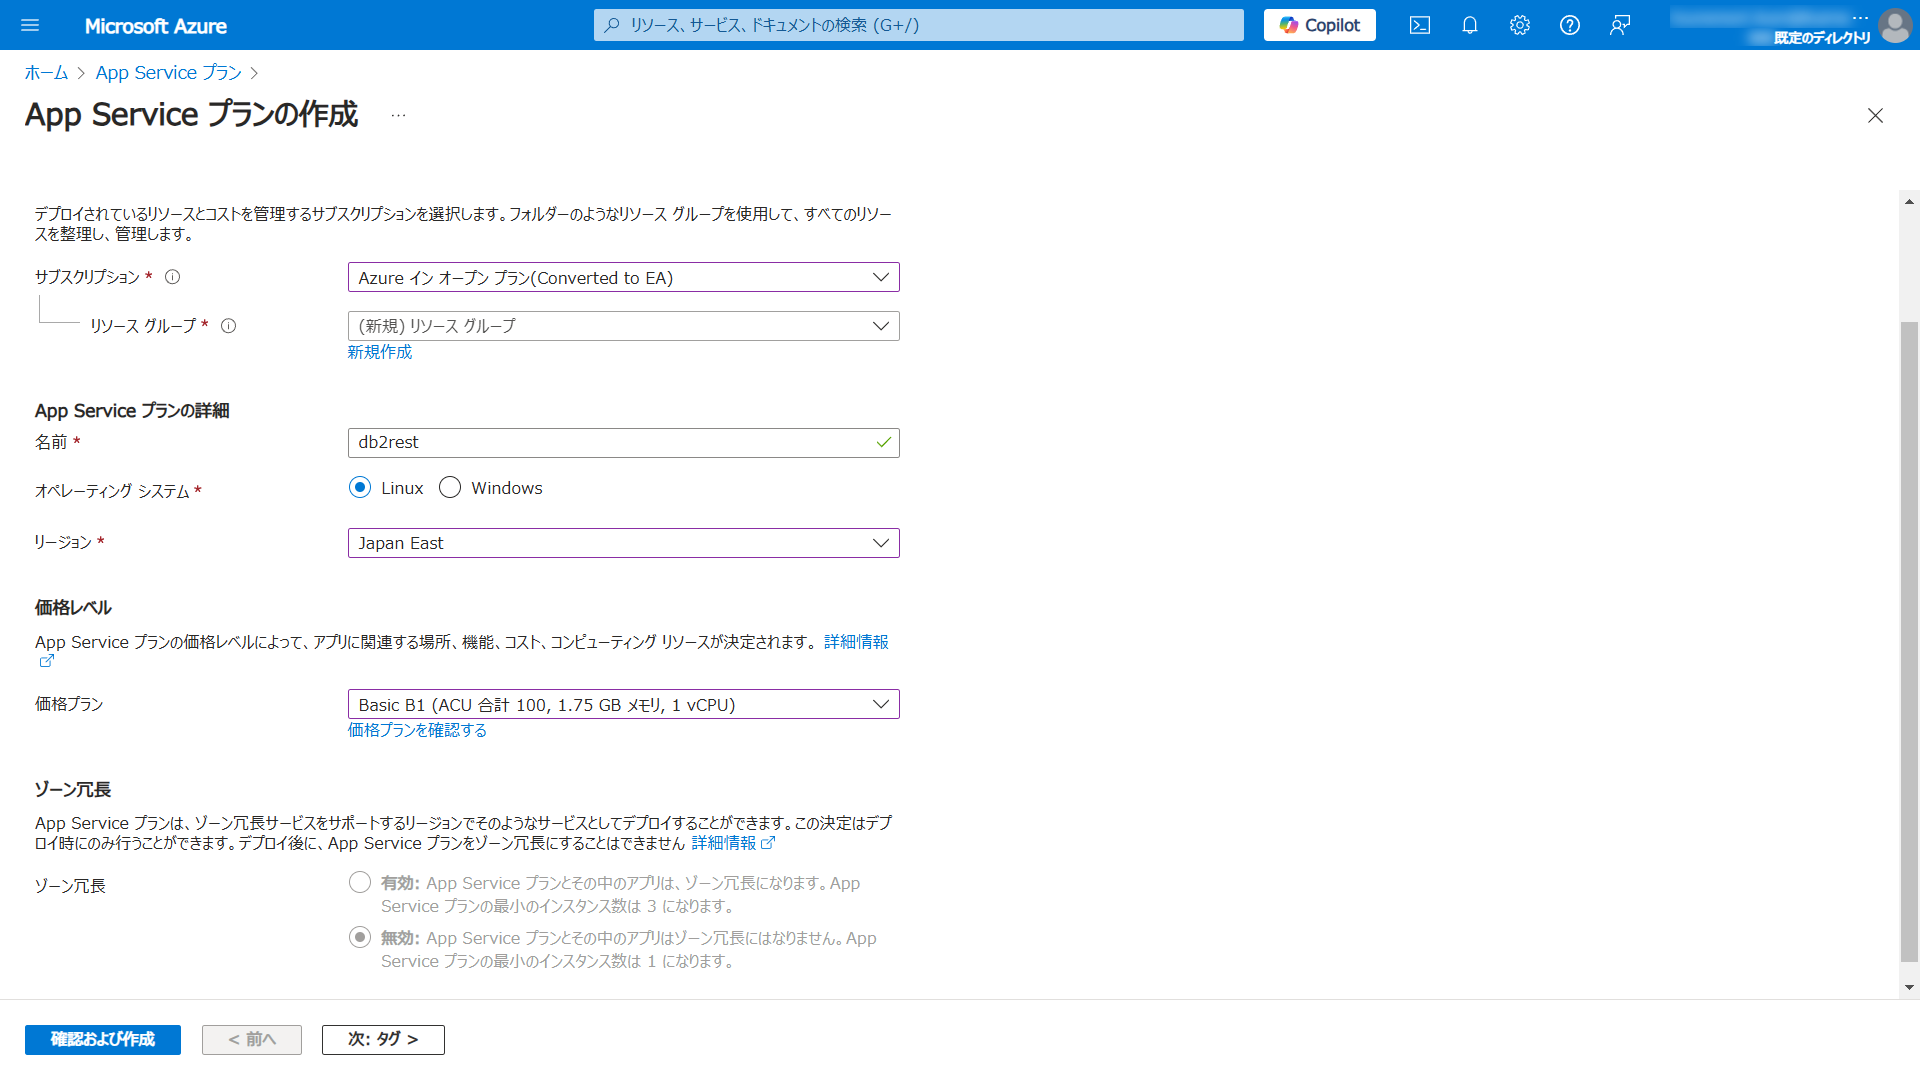
Azure Serviceプランを作成
Web App for Containersが稼働するプラン(環境)を作成します。
- AzureポータルからApp Serviceプランを表示
- 作成をクリック
- パラメーターを指定して作成
- オペレーティングシステム:Linux
- プランの名前:任意(db2rest)
- リージョン:東日本はリソース不足で時々失敗します
- 価格プラン:VNet統合をする場合、Basic以上
Web App for Containersを作成
Db2 REST ServiceコンテナをAzureにデプロイします。
ACRのユーザー、パスワードを確認
- Azureポータルから、コンテナーレジストリ→対象レジストリ→設定→アクセスキー
- ユーザー名
- パスワード
Web Appを作成
- デプロイ
- リソースグループ(-g):任意の名前(sre-1515-rg)
- App Serviceプラン(-p):前節で作成したプラン(db2rest)
- Web App名(-n):任意の名前(db2rest-env01-your-app)
- コンテナ(-c):登録したリポジトリー(yourenv1acr.azurecr.io/db2rest:12.1.0.0.315)
- ユーザー(-s):前節で確認したACRのユーザー名(yourenv1acr)
- パスワード(-w):前節で確認したACRのパスワード(xxxxxxyyyyyyzzzzzz)
- 作成したコンテナイメージを確認
az webapp create -g sre-1515-rg -p db2rest -n db2rest-env01-your-app -c yourenv1acr.azurecr.io/db2rest:12.1.0.0.315 -s yourenv1acr -w xxxxxxyyyyyyzzzzzz
az webapp list -g sre-1515-rg
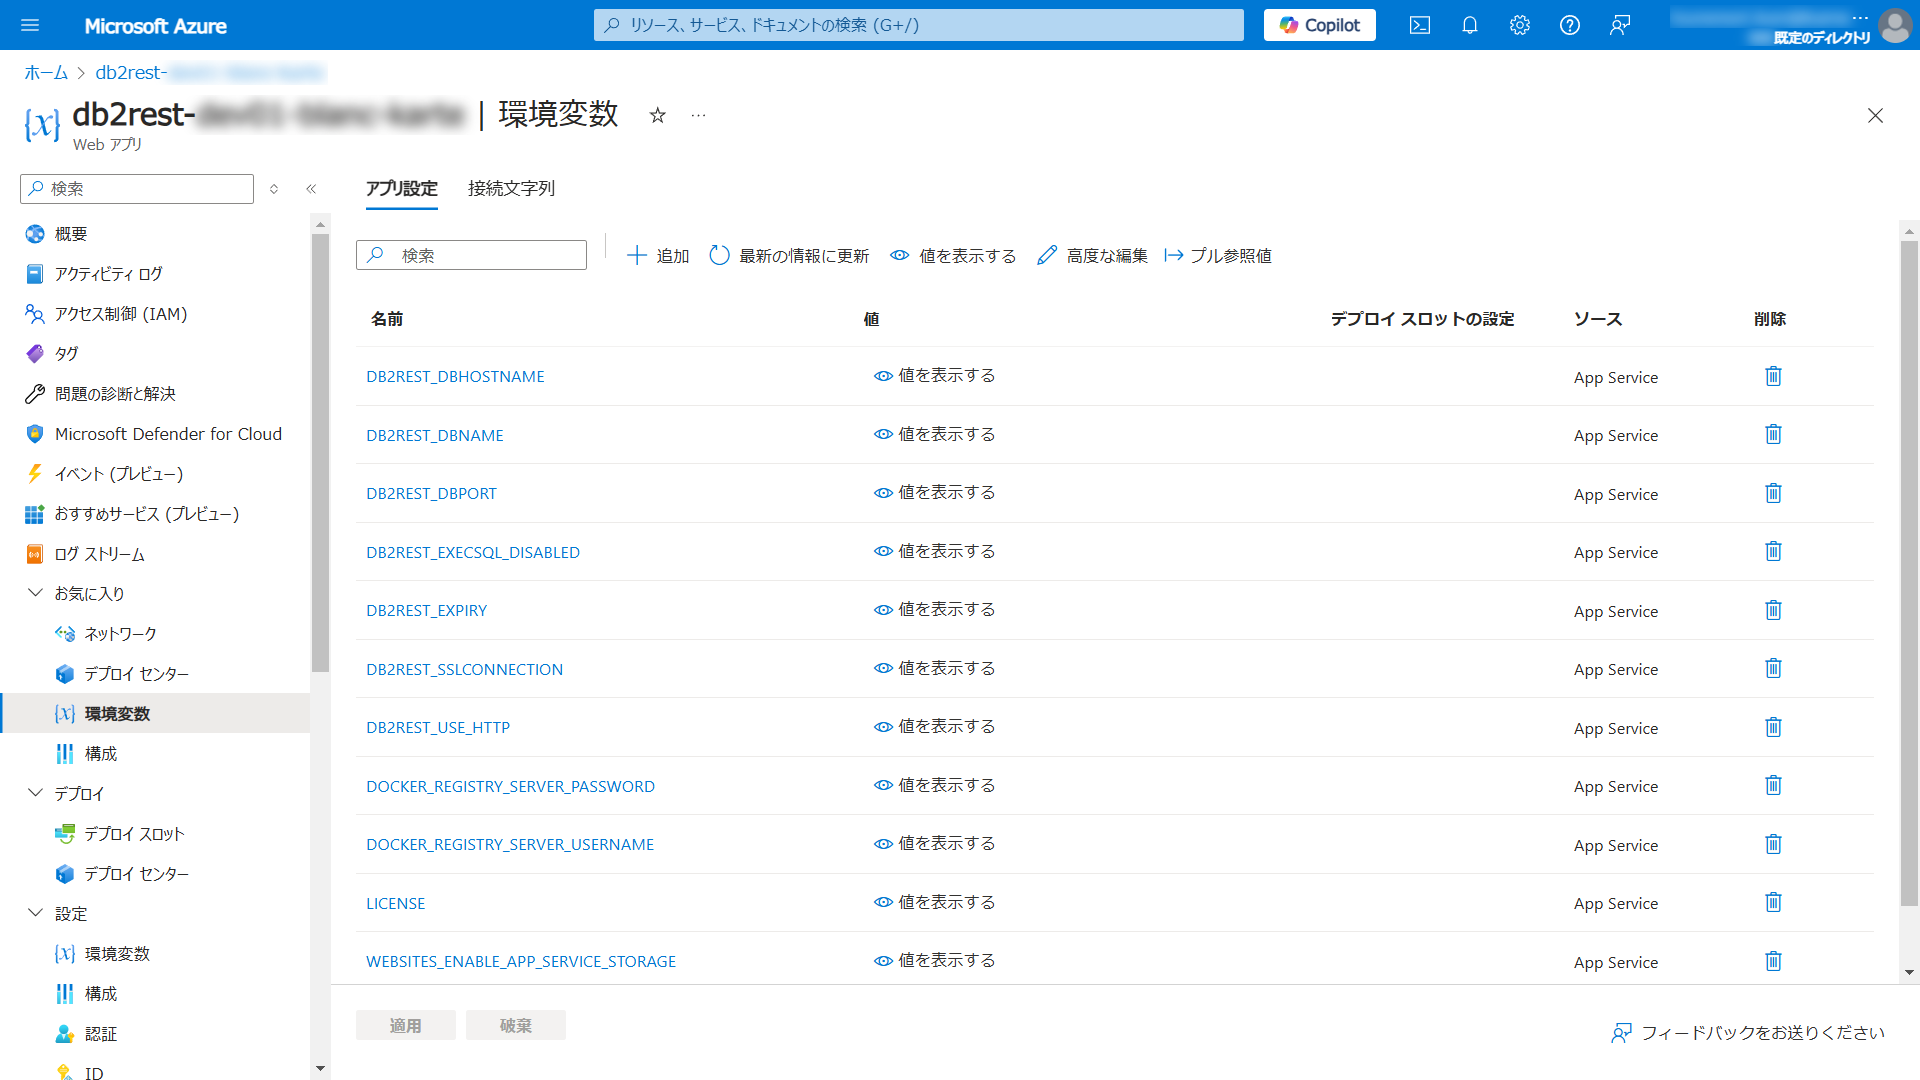
Web Appの環境変数を登録
- 環境変数をコマンドで登録
- Web App名(-n):前節で作成した名前(db2rest-env01-your-app)
- リソースグループ(-g):Web Appのあるリソースグループ(sre-1515-rg)
- WEBSITES_PORT:Db2 REST Serviceが使用するポート番号(50050)
- DB2REST_DBHOSTNAME:DBサーバーのIPアドレス(192.168.1.1)
- DB2REST_DBNAME:接続するデータベース(test01)
- DB2REST_DBPORT:Db2インスタンスのポート番号(50000)
※上記以外の環境変数はDb2 REST Serviceのマニュアルを参照して設定してください。
az webapp config appsettings set -n db2rest-env01-your-app -g sre-1515-rg --settings WEBSITES_PORT=50050 LICENSE=accept DB2REST_DBHOSTNAME=192.168.1.1 DB2REST_DBNAME=test01 DB2REST_DBPORT=50000 DB2REST_SSLCONNECTION=false DB2REST_EXECSQL_DISABLED=false DB2REST_USE_HTTP=true DB2REST_EXPIRY=30m
Web Appの稼働確認
- curlコマンドでDb2 REST Serviceのバージョンを確認
- FQDN:Web App名.azurewebsites.net(db2rest-env01-your-app.azurewebsites.net)
curl https://db2rest-env01-your-app.azurewebsites.net/v1/version
StatusCode        : 200
StatusDescription : OK
Content           : {"apiVersion":"315","version":"12.1.0.0"}

RawContent        : HTTP/1.1 200 OK
                    Content-Length: 42
                    Content-Type: application/json
                    Date: Tue, 26 Nov 2024 07:49:00 GMT
                    Set-Cookie: ARRAffinity=08307498aa991c84523184617d17f074bad5139bd2c0710fdf2b1a0ad3d3a9b7;Path=...
Forms             : {}
Headers           : {[Content-Length, 42], [Content-Type, application/json], [Date, Tue, 26 Nov 2024 07:49:00 GMT], [Set-Cookie,
                    ARRAffinity=08307498aa991c84523184617d17f074bad5139bd2c0710fdf2b1a0ad3d3a9b7;Path=/;HttpOnly;Secure;Domain=db
                    2rest-env01-your-app.azurewebsites.net,ARRAffinitySameSite=08307498aa991c84523184617d17f074bad5139bd2c0710
                    fdf2b1a0ad3d3a9b7;Path=/;HttpOnly;SameSite=None;Secure;Domain=db2rest-env01-your-app.azurewebsites.net]...
                    }
Images            : {}
InputFields       : {}
Links             : {}
ParsedHtml        : mshtml.HTMLDocumentClass
RawContentLength  : 42
VNet統合
DBサーバーがある仮想ネットワークに接続します。
サブネットを作成
- ポータルの仮想ネットワークより空のサブネットをVNet統合用に作成
- DBサーバーと接続できる仮想ネットワークでサブネットを作成するか、ルーティングしてください
- DBサーバーからは作成したサブネットから接続しているように見えます
仮想ネットワーク統合
- ポータルからWeb Appのネットワークより仮想ネットワーク統合の未構成をクリック
- 仮想ネットワーク統合の追加をクリック
- 前節で作成したサブネットを指定、接続をクリック
注意
docker-compose.ymlからデプロイするとVNet統合ができません。その場合、未構成がグレーアウトします。
データベースへの接続確認
- 稼働確認用のスクリプトを修正して実行
- FQDN:Web App名.azurewebsites.net(db2rest-env01-your-app.azurewebsites.net)
- username:接続するDBサーバーのユーザー(youruser_01)
- password:接続するDBサーバーのパスワード(your@password)
$res = Invoke-WebRequest https://db2rest-env01-your-app.azurewebsites.net/v1/auth `
        -Method "POST" `
        -Headers @{"Content-type"="application/json"} `
        -Body '{"dbParms": {
                  "dbHost": "",
                  "dbName": "",
                  "dbPort": -1,
                  "isSSLConnection": true,
                  "username": "youruser_01",
                  "password": "your@password"
                  },
                "expiryTime": "" }'
$json = ConvertFrom-Json $res.Content
$token = $json.token

$res = Invoke-WebRequest https://db2rest-env01-your-app.azurewebsites.net/v1/services/execsql `
        -Method "POST" `
        -Headers @{"Content-type"="application/json"; "authorization"=$token} `
        -Body '{"sqlStatement": "select current timestamp as timestamp from sysibm.dual",
        "sync": true}'

$json = [System.Text.Encoding]::UTF8.GetString($res.RawContentStream.ToArray()) | ConvertFrom-Json
$json.resultSet
スクリプトを実行するとタイムスタンプが返されます。
./db2rest_execsql

TIMESTAMP
---------
2024-11-28T16:01:00.832117Z
おわりに
Azureには以下のようにコンテナ実行環境がたくさんありますが、今回説明したWeb App for Containersは比較的容易に環境を構築できます。Db2 REST ServiceのようなWebアプリを検証するには向いているのではないでしょうか。
- Web App for Containers (App Service)
- Azure Functions
- Azure Container Instances (ACI)
- Azure Container Apps (ACA)
- Azure Kubernetes Services (AKS)


