Vue CLI3 で作成した SPA(Single Page Application)プロジェクト上で、段階的に Vue.js を学んで行きましょう。
今回はライフサイクル編です。
前提事項
Vuex編 が完了していること。
ライフサイクル
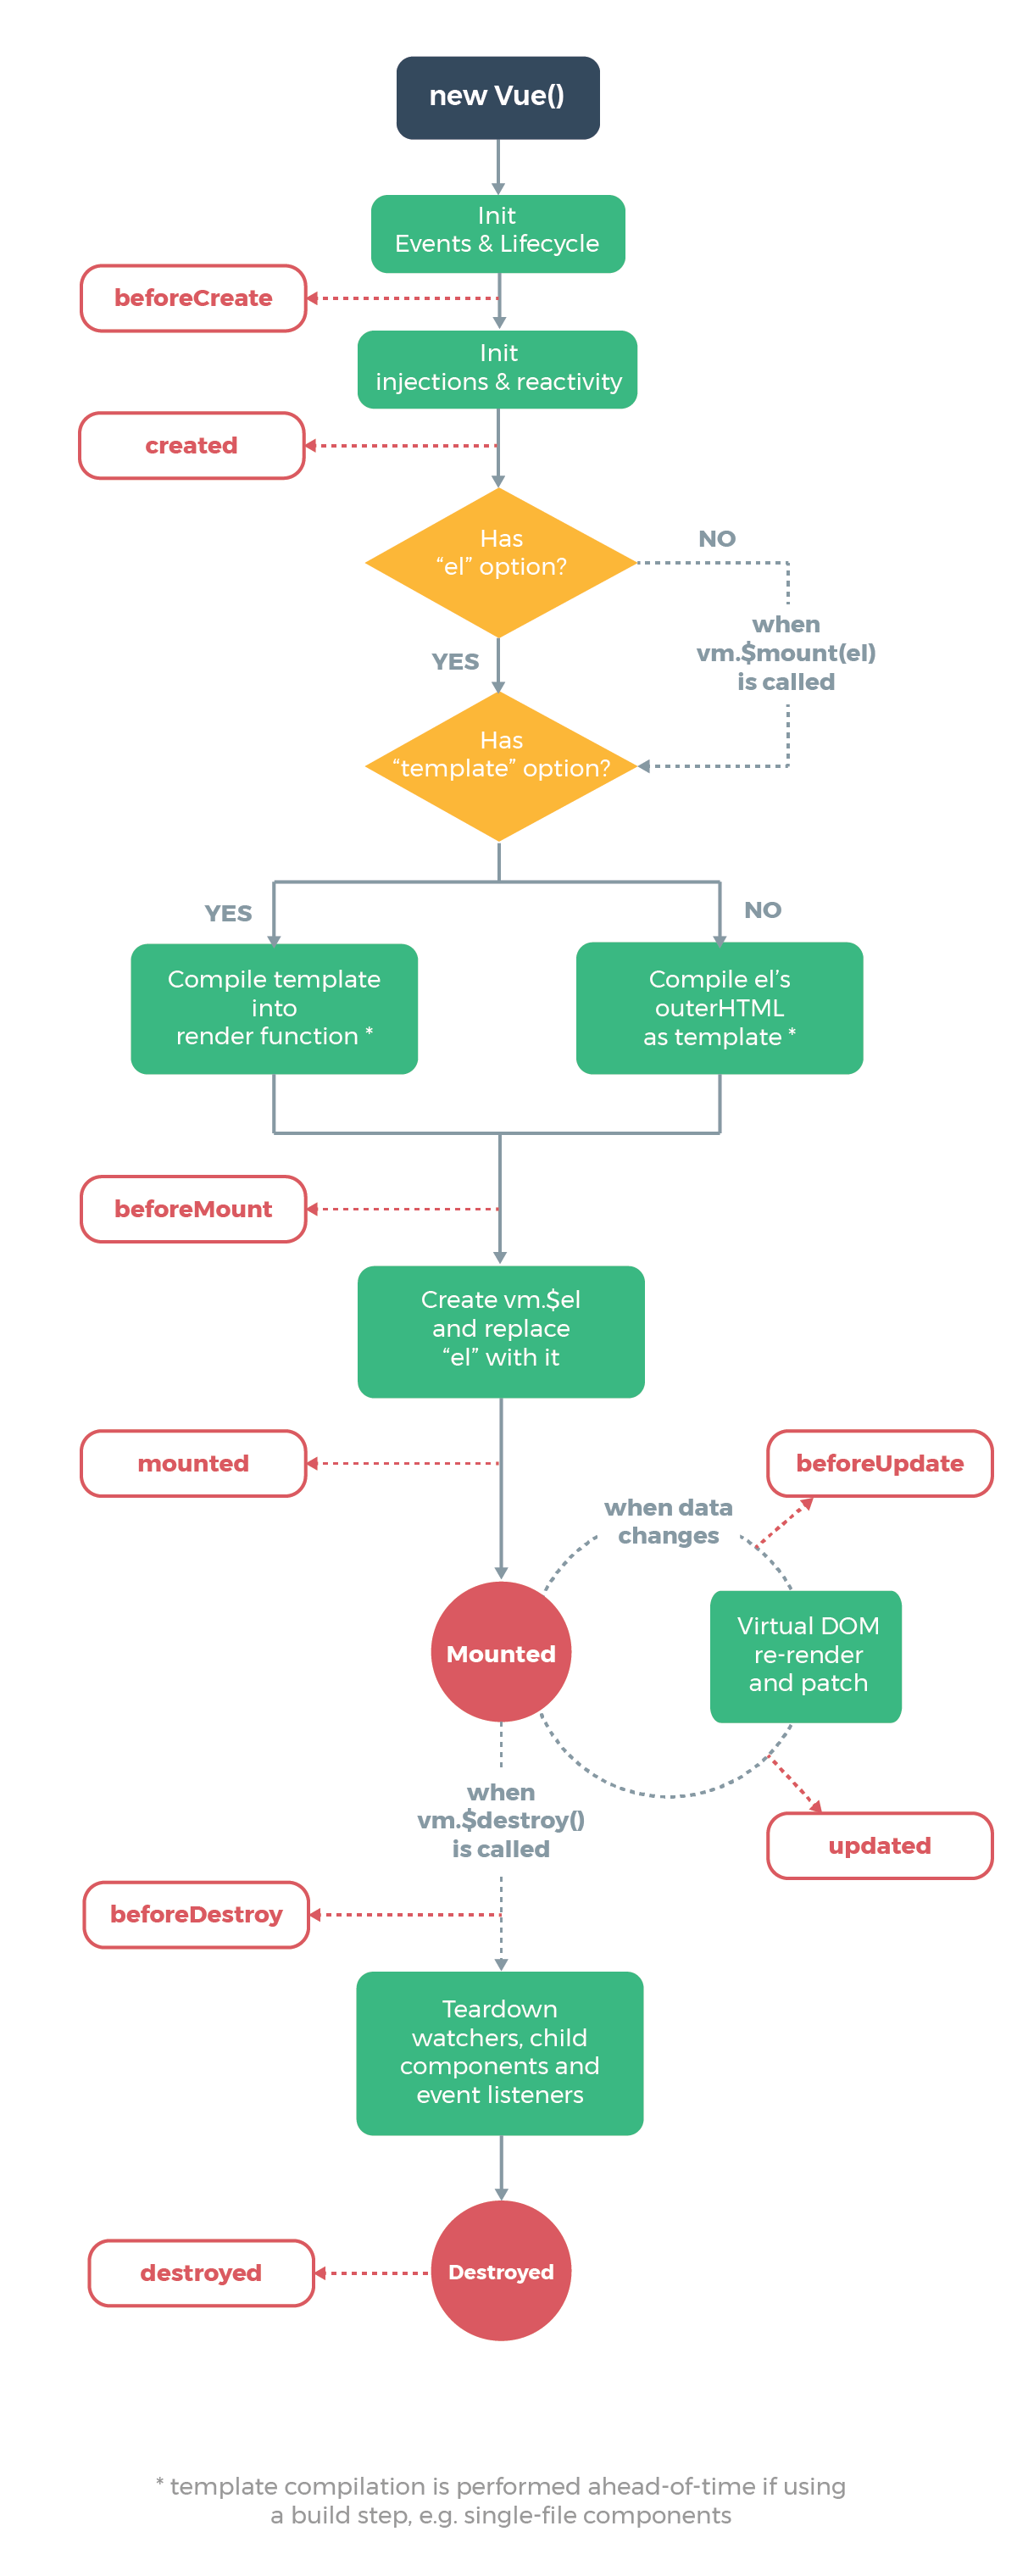
上記が Vue が生成されてから破棄されるまでの流れ図になります。赤い四角がライフサイクルフックと呼ばれる関数です。
ライフサイクルの主なイベントは以下の4つです
- Vue インスタンスの作成
- beforeCreate: インスタンス作成前
- created: インスタンス作成後
- DOM へのマウント
- beforeMount: DOM へのマウント前
- mounted: DOM へのマウント後
- 画面、データの更新
- beforeUpdate: 更新前
- updated: 更新後
- Vue インスタンスの破棄
- beforeDestroy: インスタンス破棄前
- destroyed: インスタンス破棄後
ライフサイクルフック
前回作成した Counter.vue にライフサイクルフックを追加してみます。
Counter.vue
export default {
  beforeCreate() {
    console.log("beforeCreate");
  },
  created() {
    console.log("created");
  },
  beforeMount() {
    console.log("beforeMount");
  },
  mounted() {
    console.log("mounted");
  },
  beforeUpdate() {
    console.log("beforeUpdate");
  },
  updated() {
    console.log("updated");
  },
  beforeDestroy() {
    console.log("beforeDestroy");
  },
  destroyed() {
    console.log("destroyed");
  },
  //...
}
動作確認
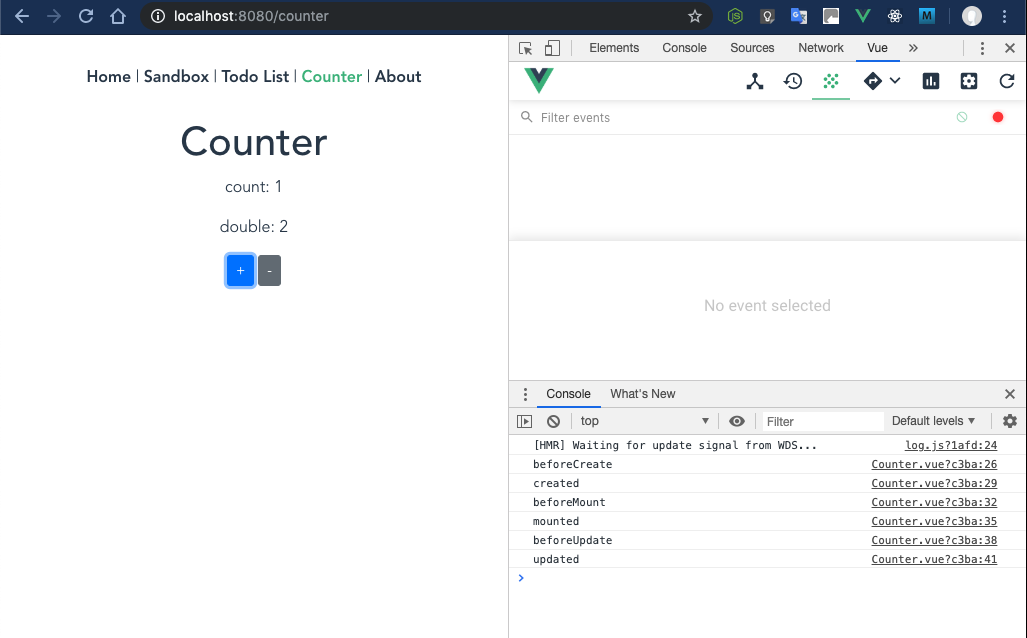
Counter ページを開いて、Console ログを確認してみましょう。+ ボタン、- ボタンを押した時のログも確認してみてください。

