はじめに
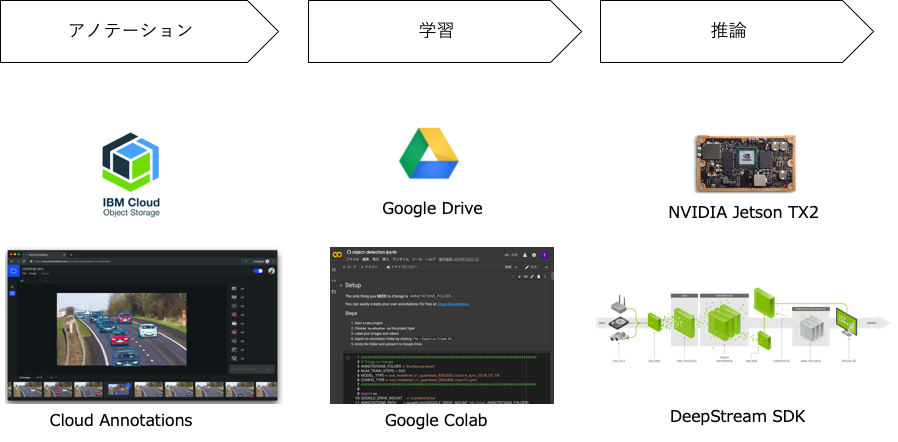
この記事では、NVIDIA JetsonのDeepStream SDKで自分で用意したデータで学習した物体検出モデルを利用する手順について記述しています。データのアノテーションと学習は以下の図にあるように、Cloud AnnotationsとGoogle colabを使って行います。どちらも無料で使えます。
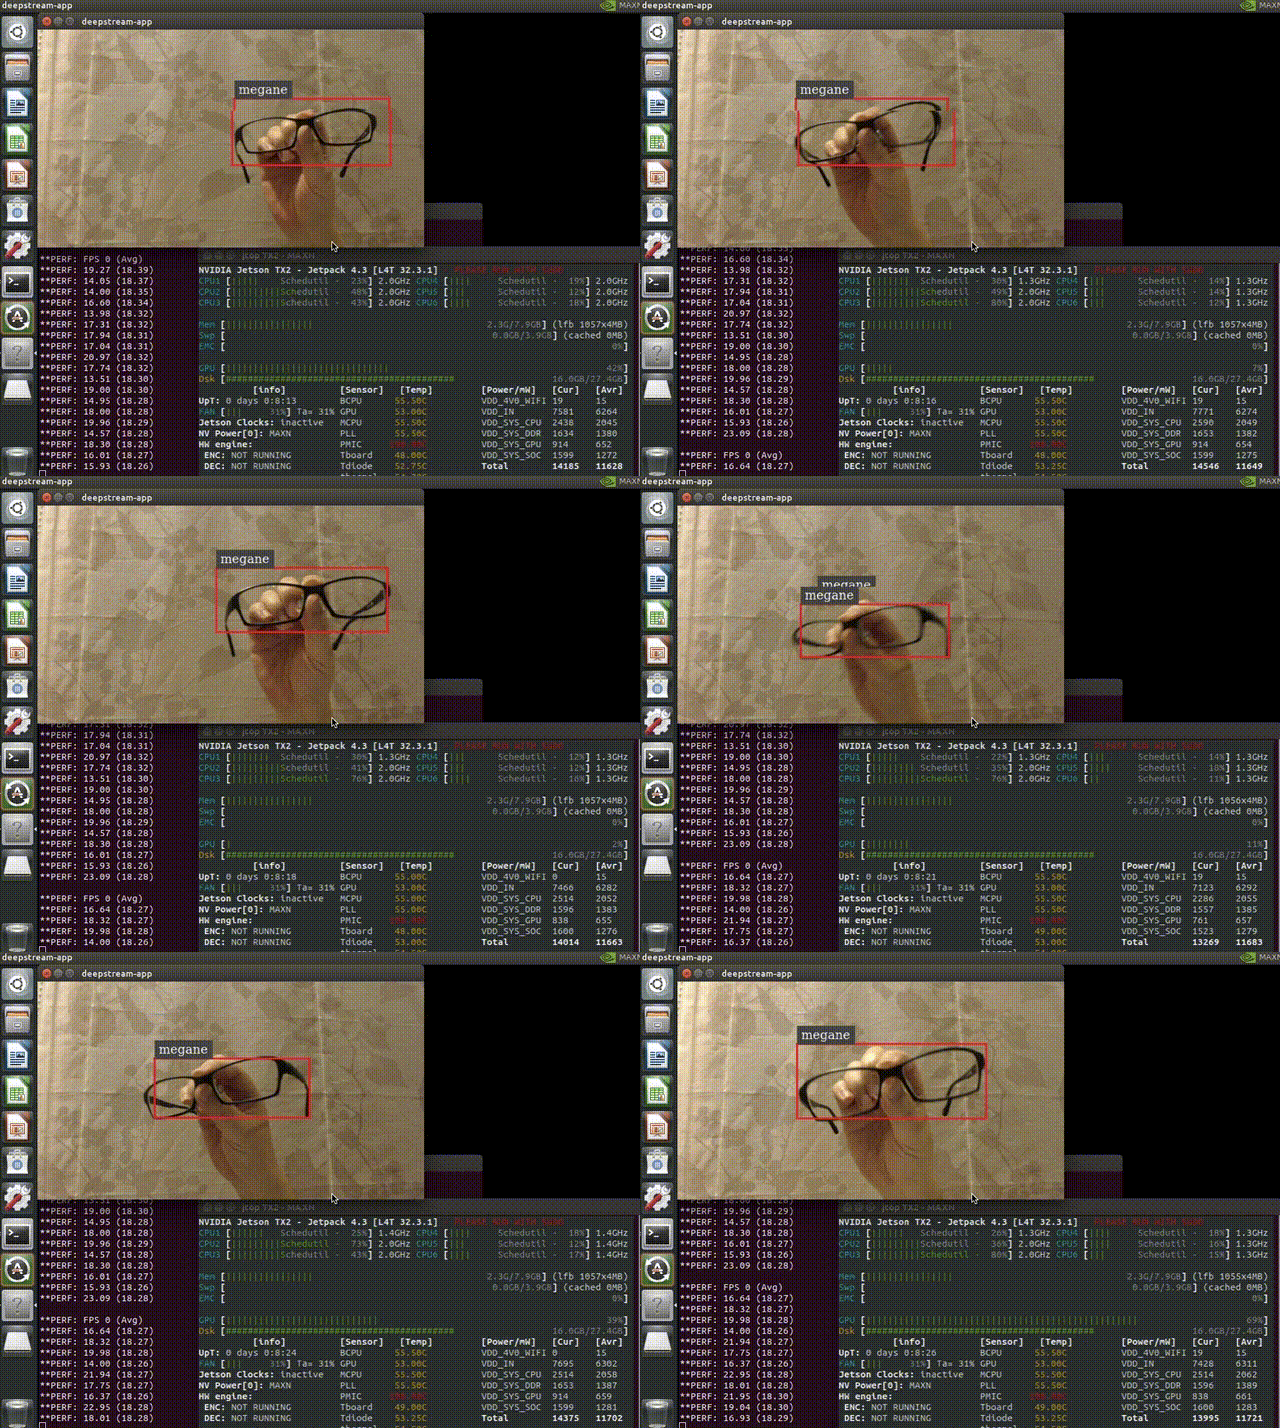
以下はメガネを検出できるように学習させたモデルをJetsonのDeepStream SDKで動かしている様子です。平均で18FPSぐらいでています。よく考えてみるとコーディングらしいコーディングをすることなく(構成ファイルやパラメーターの変更のみ)準備されたものを組み合わせて、ここまで出来てしまっています。
環境
tensorflowのバージョンは、1.13.1がおすすめです。(1.15や1.14を使用すると実行時にエラーになりました)
tensorflow 1.13.1
Object Detection API tag:v1.13.0
DeepStreamSDK 4.0.2
Jetpack 4.3
Jetson TX2
カメラ:LOGICOOL HD PRO WEBCAM C920
手順概要
- Cloud Annotationsでデータ・アノテーション
- Google Colabで学習
- DeepStreamで推論
1. Cloud Annotationsでデータ・アノテーション
以前の記事にCloud Annotationsでのデータ・アノテーションの方法を紹介していますので、こちらを参考にしてください。
データのアノテーションからTensorflow Object Detection APIでの学習までをクラウドで簡単に行う方法
https://qiita.com/tsota/items/123514cbfd036e6bd808
2. Google Colabで学習
2-1. Notebookの修正
以下のNotebookを開き一部コードを修正します。
物体検出モデル作成のためのNotebook
https://colab.research.google.com/github/cloud-annotations/google-colab-training/blob/master/object_detection.ipynb
以下の修正が必要です。
Tensorflowのバージョン1.13.1を使うために、セルを追加して、以下のようなコードを記述して実行します。

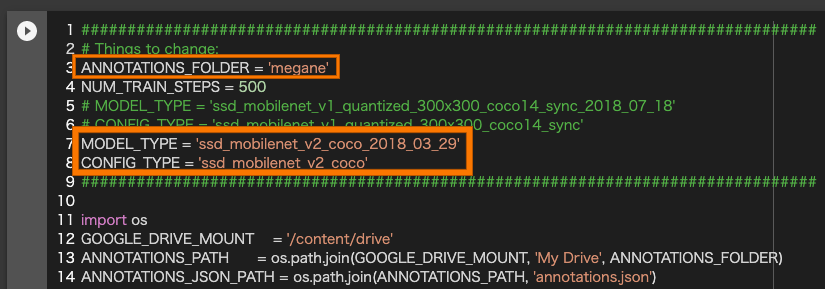
MobilenetV2を使うために「Setup」セルで以下の点を変更します。
「ANNOTATIONS_FOLDER」:Google Driveにアップロードしたフォルダ名に変更します。
「MODEL_TYPE」:ssd_mobilenet_v2_coco_2018_03_29に変更します。
「CONFIG_TYPE」:ssd_mobilenet_v2_cocoに変更します。
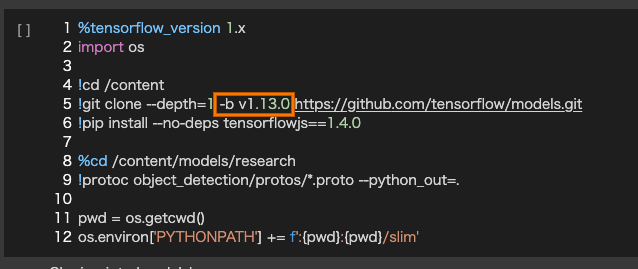
Object Detection APIのv1.13.0を使うために、「Install the TensorFlow Object Detection API」セルの5行目に-b v1.13.0を追加します。
「Model config」のセルの8行目をモデルタイプが直接記述されている箇所をCONFIG_TYPEの変数名に変更します。

2-2. Notebookを実行
修正したNotebookを上から実行していきます。
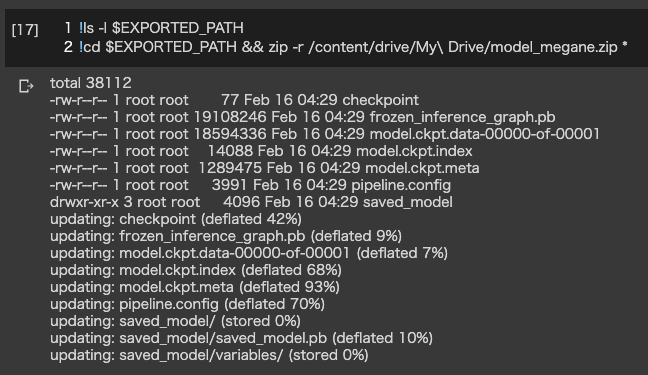
2-3. モデルをダウンロード
セルを追加し、以下のようなコードを記入して作成したモデルをGoogle Driveに移動します。
3. DeepStreamで推論
3-1. Jetsonに転送
先程DownloadしたモデルをJetsonに転送します。
3-2. サンプルコードをコピー
サンプルコードをホームディレクトリの下にコピーします。
$ mkdir ~/work
$ cp -r /opt/nvidia/deepstream/deepstream-4.0/sources/ ~/work
$ cp -r /opt/nvidia/deepstream/deepstream-4.0/samples/ ~/work
3-3. モジュールのビルド
nvdsinfer_custom_impl_ssdモジュールをビルドします。
ビルド前にクラス数の変更をします。
ディレクトリを移動して、nvdsparsebbox_ssd.cppを編集します。
$ cd ~/work/sources/objectDetector_SSD
$ vi nvdsinfer_custom_impl_ssd/nvdsparsebbox_ssd.cpp
nvdsparsebbox_ssd.cppの52行目のNUM_CLASSES_SSDの数をクラス数+1に変更します。今回はMEGANEクラス1つなので、NUM_CLASSES_SSDは2に設定します。
 41 /* C-linkage to prevent name-mangling */
 42 extern "C"
 43 bool NvDsInferParseCustomSSD (std::vector<NvDsInferLayerInfo> const &outputLayersInfo,
 44         NvDsInferNetworkInfo  const &networkInfo,
 45         NvDsInferParseDetectionParams const &detectionParams,
 46         std::vector<NvDsInferObjectDetectionInfo> &objectList)
 47 {
 48   static int nmsLayerIndex = -1;
 49   static int nms1LayerIndex = -1;
 50   static bool classMismatchWarn = false;
 51   int numClassesToParse;
 52   static const int NUM_CLASSES_SSD = 2;
 53
変更後、モジュールをビルドします。
make -C nvdsinfer_custom_impl_ssd
3-4. モデルをuff形式に変換
アップロードしたモデルをuff形式に変換します。
変換には、config.pyファイルを作成する必要があります。
# model_megane.zip: アップロードしたファイル
$ mv model_megane.zip ~/work/model_megane
$ cd ~/work/model_megane
$ unzip model_megane.zip
# config.pyファイルを作成
$ vi config.py
# uff形式に変換
$ python3 /usr/lib/python3.6/dist-packages/uff/bin/convert_to_uff.py frozen_inference_graph.pb -o ssd_mobilenet_v2.uff -O NMS -p config.py
# objectDetector_SSDディレクトリにコピー
cp ssd_mobilenet_v2.uff ~/work/sources/objectDetector_SSD/
MobilenetV2用のconfig.pyファイルは以下のQAに添付してある内容で作成します。
https://devtalk.nvidia.com/default/topic/1066088/deepstream-sdk/how-to-use-ssd_mobilenet_v2/post/5399649/#5399649
config.pyの23行目のnumClassesはクラス数に合わせて変更します。ここでもクラス数+1に変更します。
 15 NMS = gs.create_plugin_node(name="NMS", op="NMS_TRT",
 16     shareLocation=1,
 17     varianceEncodedInTarget=0,
 18     backgroundLabelId=0,
 19     confidenceThreshold=1e-8,
 20     nmsThreshold=0.6,
 21     topK=100,
 22     keepTopK=100,
 23     numClasses=2,
 24     ###########################################
 25     inputOrder=[0, 2, 1],
 26     # inputOrder=[1, 0, 2],
 27     ###########################################
 28     confSigmoid=1,
 29     isNormalized=1)
3-5. 各種設定ファイル修正
objectDetector_SSDディレクトリに移動して各種設定ファイルを修正します。
$ cd ~/work/sources/objectDetector_SSD/
$ vi ssd_megane_labels.txt
ssd_megane_labels.txtファイルは以下のような内容を記述します。
unlabeled
megane
deepstream_app_config_ssd.txtファイルは以下のような内容にします。
入力をUSBカメラにしています。
[application]
enable-perf-measurement=1
perf-measurement-interval-sec=1
gie-kitti-output-dir=streamscl

[tiled-display]
enable=0
rows=1
columns=1
width=640
height=360
gpu-id=0
nvbuf-memory-type=0

[source0]
enable=0
# Type - 1=CameraV4L2 2=URI 3=MultiURI
type=3
num-sources=1
uri=file://../../samples/streams/sample_1080p_h264.mp4
gpu-id=0
cudadec-memtype=0

[source1]
enable=1
# Type - 1=CameraV4L2 2=URI 3=MultiURI
type=1
camera-width=640
camera-height=360
camera-fps-n=30
camera-fps-d=1
camera-v4l2-dev-node=1

[streammux]
gpu-id=0
batch-size=1
batched-push-timeout=-1
## Set muxer output width and height
width=640
height=360
nvbuf-memory-type=0

[sink0]
enable=1
# Type - 1=FakeSink 2=EglSink 3=File
type=2
sync=1
source-id=0
gpu-id=0

[osd]
enable=1
gpu-id=0
border-width=3
text-size=15
text-color=1;1;1;1;
text-bg-color=0.3;0.3;0.3;1
font=Serif
show-clock=0
clock-x-offset=800
clock-y-offset=820
clock-text-size=12
clock-color=1;0;0;0
nvbuf-memory-type=0

[primary-gie]
enable=1
gpu-id=0
batch-size=1
gie-unique-id=1
interval=0
labelfile-path=ssd_megane_labels.txt
model-engine-file=ssd_mobilenet_v2.uff_b1_fp32.engine
config-file=config_infer_primary_ssd.txt
nvbuf-memory-type=0
config_infer_primary_ssd.txtファイルを以下のような内容に変更します。
[property]
gpu-id=0
net-scale-factor=0.0078431372
offsets=127.5;127.5;127.5
model-color-format=0
model-engine-file=ssd_mobilenet_v2.uff_b1_fp32.engine
labelfile-path=ssd_megane_labels.txt
uff-file=ssd_mobilenet_v2.uff
uff-input-dims=3;300;300;0
uff-input-blob-name=Input
batch-size=1
## 0=FP32, 1=INT8, 2=FP16 mode
network-mode=0
num-detected-classes=2
interval=0
gie-unique-id=1
is-classifier=0
# output-blob-names=MarkOutput_0
output-blob-names=NMS
parse-bbox-func-name=NvDsInferParseCustomSSD
custom-lib-path=nvdsinfer_custom_impl_ssd/libnvdsinfer_custom_impl_ssd.so

[class-attrs-all]
threshold=0.5
roi-top-offset=0
roi-bottom-offset=0
detected-min-w=0
detected-min-h=0
detected-max-w=0
detected-max-h=0

## Per class configuration
# [class-attrs-2]
# threshold=0.6
# roi-top-offset=20
# roi-bottom-offset=10
# detected-min-w=40
# detected-min-h=40
# detected-max-w=400
# detected-max-h=800
3-6. アプリケーションを起動
deepstream-appでdeepstream_app_config_ssd.txt構成ファイルを指定して起動します。
$ deepstream-app -c deepstream_app_config_ssd.txt
まとめ
Object Detection APIで学習させたMobilenetV2のモデルをNVIDIA JetsonのDeepStream SDKで動かすことが出来ました。
実際にやってみるといろいろハマり動かすまでに時間がかかってしまいました。以下の点に注意してください。
・tensorflowのバージョンは1.13.1を使用する
・Object Detection APIもtensorflowのバージョンに合わせてtag:v1.13.0を使用する
・deepstreamの構成ファイル等でのクラス数は学習させたクラス数+1(背景)を指定する
参考
High Performance Real time object detection on Nvidia Jetson TX2.
https://techcommunity.microsoft.com/t5/educator-developer-blog/high-performance-real-time-object-detection-on-nvidia-jetson-tx2/ba-p/917067
How to use ssd_mobilenet_v2
https://devtalk.nvidia.com/default/topic/1066088/deepstream-sdk/how-to-use-ssd_mobilenet_v2/post/5399649/#5399649
How do I replace it with my own SSD target detection model?
https://devtalk.nvidia.com/default/topic/1069133/deepstream-sdk/how-do-i-replace-it-with-my-own-ssd-target-detection-model-/post/5415755/#5415755
