ごきげんよ〜 ( ∴ )/
ぼくたちのスマホのディスプレイが巨大化していく一方で、モーダルウィンドウの上部に配置されがちなもどるボタンはユーザーの指からどんどん離れていってます。モーダルウィンドウは閉じて本来の作業に戻ることが目的であるにも関わらず、戻るためのUIが遠くにあるのでよろしくないユーザー体験になっているというケースが多くあるかと思います😣
問題解決方法として、画面を下方向にひっぱって閉じることができればストレスなく遷移を完了することができるのではないでしょうか。そんなインタラクティブに閉じることができるモーダルの実装方法をご紹介します。
ScrollViewを考慮したものをつくる
引っ張って閉じることができるモーダルを実装する (UINavigationControllerの場合)
↑の記事にあるようにひっぱって閉じる方法として、素のViewやNavigationControllerを考慮した方法はすでにありましたので、ここではモーダルウィンドウ内にScrollViewがある場合を考慮したものに適応していきます。(TableViewでも大丈夫)
ちょっと面倒なところはScrollViewのジェスチャーと閉じるためのジェスチャーが衝突するため制御する必要があるところです。ジェスチャーの衝突を克服し、スクロールと遷移のインタラクションが融合したエレガントな画面遷移を実現します。
完成品

はい、とてもエレガントですね✨
利用するもの
- カスタム遷移アニメーション
- UIViewControllerAnimatedTransitioning
- UIViewControllerTransitioningDelegate
- 閉じるジェスチャー
- UIPanGestureRecognizer
- インタラクティブな遷移
- UIPercentDrivenInteractiveTransition
遷移元と遷移先の画面を作成
ViewController.swift
// 遷移元
class ViewController: UIViewController {

    @IBAction func tapOpenModal(_ sender: Any) {
        let vc = storyboard?.instantiateViewController(withIdentifier: "Modal") as! ModalViewController
        present(vc, animated: true, completion: nil)
    }

    override func viewDidLoad() {
        super.viewDidLoad()
    }
}
ModalViewController.swift
// 遷移先
class ModalViewController: UIViewController {

    @IBOutlet weak var scrollView: UIScrollView!

    @IBAction func tapClose(_ sender: Any) {
        dismiss(animated: true, completion: nil)
    }

    override func viewDidLoad() {
        super.viewDidLoad()
    }
}
遷移元と遷移先のViewControllerを作成します。遷移用のボタンをそれぞれの画面に用意して行ったり来たりできるようにしておきます。
Storyboard
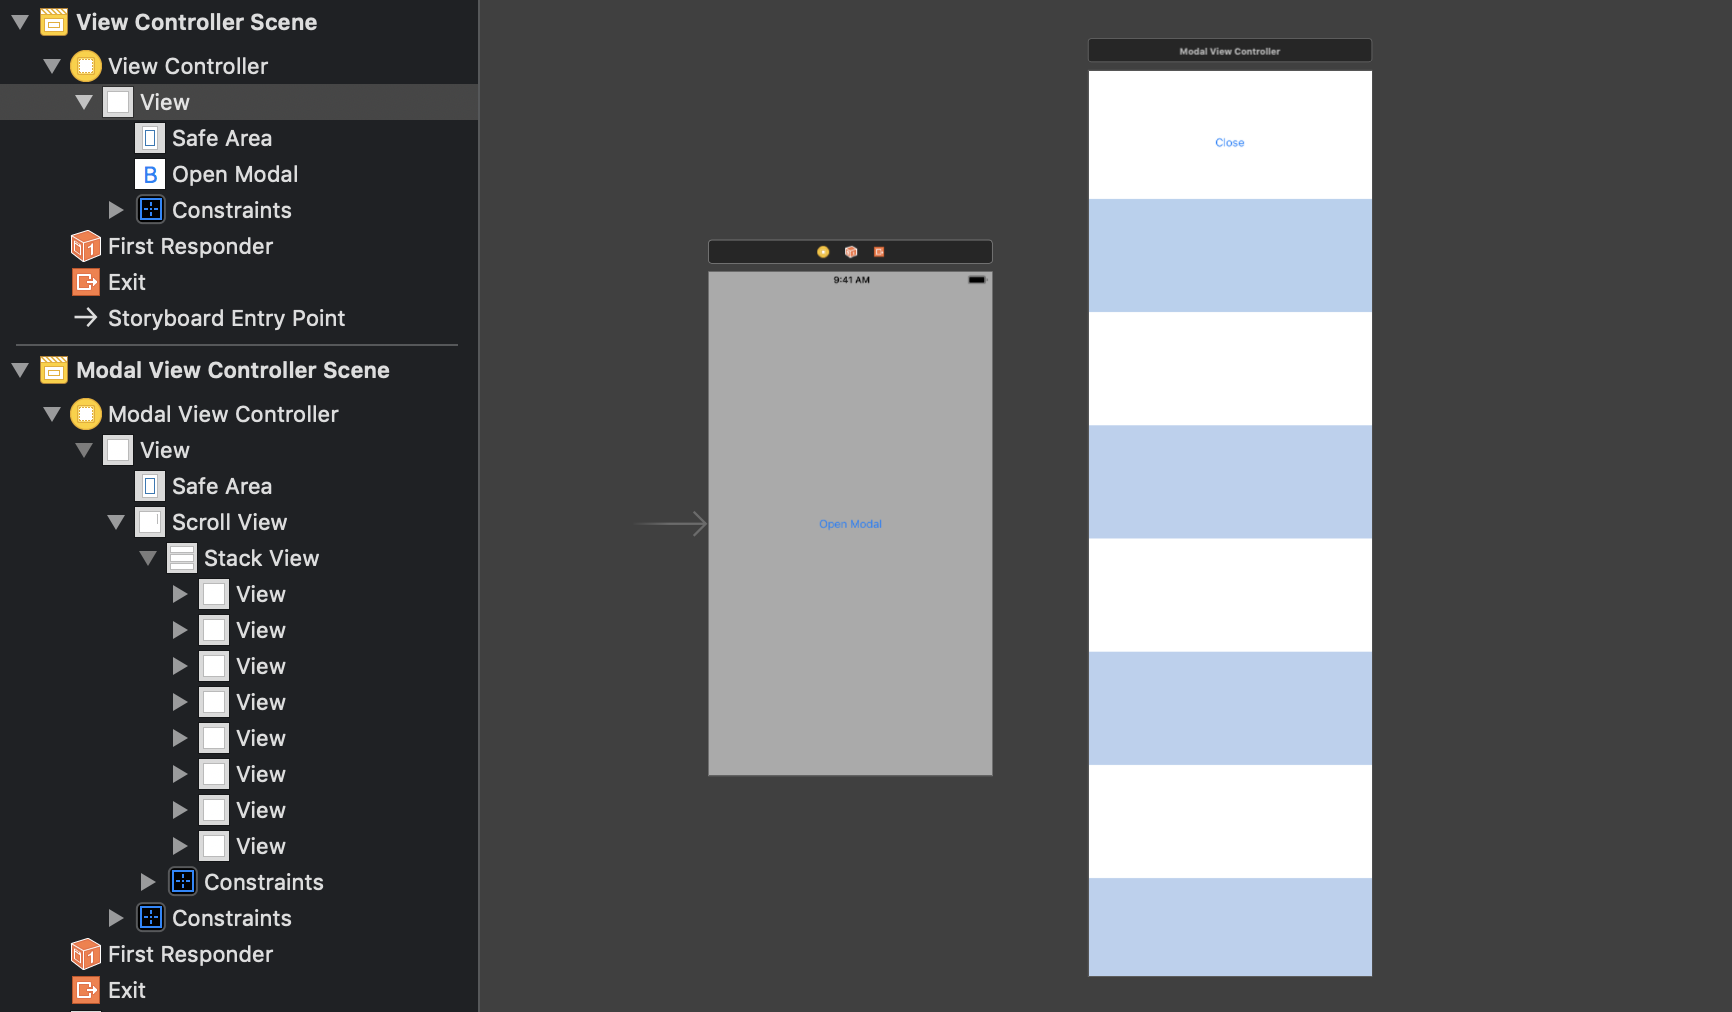
遷移先にはScrollView > StackView > View*n の画面をつくってスクロールできる画面を作成します。
カスタムアニメーション遷移
UIViewControllerAnimatedTransitioningに準拠したクラスDismissAnimatorを作成してカスタムアニメーション遷移を実装します。
ここで独自のアニメーションを作成することができますが、ここではモーダルを閉じるいつものアニメーション(下に落ちるやつ)をトレースしたものを作成します。
カスタムアニメーション遷移クラスを作成
import UIKit

class DismissAnimator : NSObject {
}

extension DismissAnimator: UIViewControllerAnimatedTransitioning {
    func transitionDuration(using transitionContext: UIViewControllerContextTransitioning?) -> TimeInterval {
        return 0.6
    }

    func animateTransition(using transitionContext: UIViewControllerContextTransitioning) {
        guard
            let fromVC = transitionContext.viewController(forKey: UITransitionContextViewControllerKey.from),
            let toVC = transitionContext.viewController(forKey: UITransitionContextViewControllerKey.to)
            else {
                return
        }

        transitionContext.containerView.insertSubview(toVC.view, belowSubview: fromVC.view)

        let screenBounds = UIScreen.main.bounds
        let bottomLeftCorner = CGPoint(x: 0, y: screenBounds.height)
        let finalFrame = CGRect(origin: bottomLeftCorner, size: screenBounds.size)

        UIView.animate(
            withDuration: transitionDuration(using: transitionContext),
            animations: {
                fromVC.view.frame = finalFrame
            },
            completion: { _ in
                transitionContext.completeTransition(!transitionContext.transitionWasCancelled)
            }
        )
    }
}
transitionDuration(using transitionContext: UIViewControllerContextTransitioning?) で遷移時間、animateTransition(using transitionContext: UIViewControllerContextTransitioning) で遷移アニメーションを設定します。
fromVC(ModalViewController)を画面1つ分下げるアニメーションを定義しています。UIView.animate()のcompletionで遷移の完了を確定させるかどうかの処理があるかと思いますが、こちらは後で追加するインタラクションからキャンセルが伝搬されることが考慮されています。
カスタムアニメーション遷移クラスを接続する
extension ViewController: UIViewControllerTransitioningDelegate {
    func animationController(forDismissed dismissed: UIViewController) -> UIViewControllerAnimatedTransitioning? {
        return DismissAnimator()
    }
}
遷移元ViewControllerをUIViewControllerTransitioningDelegateに準拠させます。
animationController(forDismissed dismissed: UIViewController)メソッドで閉じる遷移のアニメーションを先ほど作成したカスタム遷移クラスで置き換えます。
animationController(forPresented presented: UIViewController, presenting: UIViewController, source: UIViewController)という進む用のメソッドもありますが設定したいのはforDismissedの方なので間違えないように。
let vc = storyboard?.instantiateViewController(withIdentifier: "Modal") as! ModalViewController
vc.transitioningDelegate = self // 追加
present(vc, animated: true, completion: nil)
遷移する際に遷移先へデリゲートを設定します。
カスタム遷移が適用される
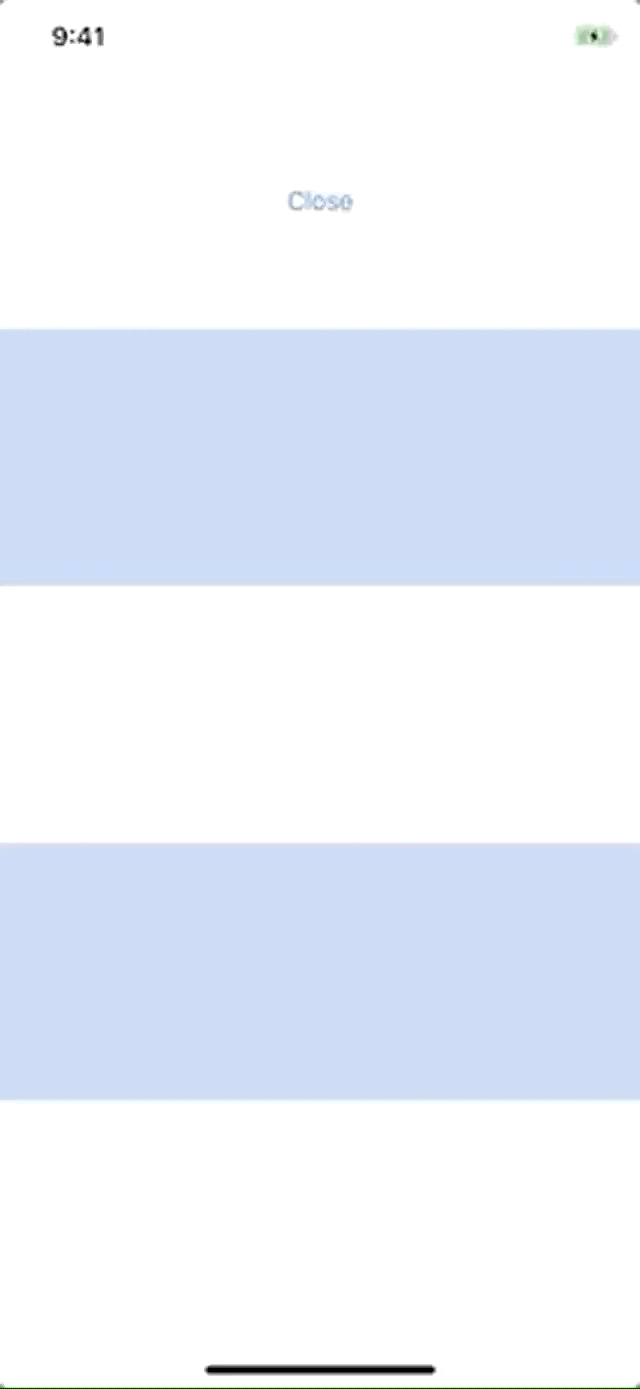
一見変わってないように見えますが、遷移時間をいじると適用されているのがわかるかと思います。
遷移をインタラクティブに制御するためのクラスを作成
class Interactor: UIPercentDrivenInteractiveTransition {
    var hasStarted = false
}
UIPercentDrivenInteractiveTransitionのサブクラスInteractorを作成します。
UIPercentDrivenInteractiveTransitionを通して遷移の進捗更新、キャンセル、完了することができます。
あとで利用するのでサブクラスには遷移中かどうかの状態を管理する変数を持たせておきます。
とじるためのジェスチャー
ジェスチャーを追加

StorybordからUIPanGestureRecognizerをModalViewControllerの子Viewに配置します。
ViewControllerに置くと動かなくてハマるのでちゃんと子Viewに配置するように気をつけてください。StackViewに吸われたりしますのでそれも気をつけてください。😅
とじるためのジェスチャーとスクロールの衝突を回避
extension ModalViewController: UIGestureRecognizerDelegate {
    func gestureRecognizer(_ gestureRecognizer: UIGestureRecognizer, shouldRecognizeSimultaneouslyWith otherGestureRecognizer: UIGestureRecognizer) -> Bool {
        return true
    }
}
スクロールのジェスチャーと衝突しても動くようにdelegateを設定します。IBでジェスチャーからViewContorollerにデリゲートを設定するのもお忘れなく。
ジェスチャーのアクションを追加
ここからはエレガントな遷移を表現するための魔法です。
var interactor: Interactor?
インタラクション制御クラスを遷移元と共有するためにModalViewControllerに変数を持たせます。
@IBAction func handleGesture(_ sender: UIPanGestureRecognizer) {
    guard let interactor = self.interactor else { return }
    // 遷移キャンセルのしきい値
    let percentThreshold: CGFloat = 0.3
    // ジェスチャー移動量
    let translation = sender.translation(in: view)
    // 画面全体サイズでみた縦方向の移動量割合
    let verticalMovement = translation.y / view.bounds.height
    // 下限を0.0に制限、上方のジェスチャーは無視
    let downwardMovement = max(verticalMovement, 0.0)
    // 上限を1.0に制限、0 ~ 1で遷移の進捗状況を表す
    let progress = min(downwardMovement, 1.0)

    // 下方スクロールでスクロール最上部の場合にとじる遷移を開始する
    let hasDown = downwardMovement > 0
    let isAtTop = scrollView.contentOffset.y <= -scrollView.contentInset.top
    if hasDown && isAtTop {
        if (!interactor.hasStarted) {
            interactor.hasStarted = true
            dismiss(animated: true, completion: nil)
            // ジェスチャー移動量を0からとする
            sender.setTranslation(.zero, in: view)
        }
    }

    switch sender.state {
    case .began:
        print("Began!")
        break
    case .changed:
        // ジェスチャーの移動量割合を遷移の進捗状況に変換
        interactor.update(progress)
    default:
        interactor.hasStarted = false
        if progress > percentThreshold  {
            interactor.finish()
        } else {
            interactor.cancel()
        }
    }
}
複雑なのでソースコード上にコメントを入れました。
やっていることとしては以下です。
- ひっぱりジェスチャーの移動量を計算
- スクロール位置などを条件に遷移開始タイミングを制御
- 移動量を遷移の進捗状況に変換
- ひっぱり終了時に移動量がしきい値を超えて入れば遷移を完了、でなければキャンセル
ジェスチャーが.beganのときに遷移をはじめたくなりますが、そこでやらずに制御するのがポイントです。そして、遷移開始と同時にジェスチャーの移動量を0にしている部分は、スクロールの最上部よりシームレスに画面遷移へ移行するための重要な設定になります。
インタラクション制御クラスを接続する
最後にインタラクション制御クラスを接続します。
遷移元のViewControllerに以下を追加していきます。
let interactor = Interactor()
遷移元でインスタンスをつくって
let vc = storyboard?.instantiateViewController(withIdentifier: "Modal") as! ModalViewController
vc.transitioningDelegate = self
vc.interactor = interactor // 追加
present(vc, animated: true, completion: nil)
遷移先にシェアします。
func interactionControllerForDismissal(using animator: UIViewControllerAnimatedTransitioning) -> UIViewControllerInteractiveTransitioning? {
    return interactor.hasStarted ? interactor : nil
}
UIViewControllerTransitioningDelegateに上のメソッドを追加してあげます。これによってジェスチャーでの遷移ととじるボタンでの遷移を分岐しています。
うごかしてみる
以上で実装完了です。いかがだったでしょうか。
説明不足な箇所があるかもしれないのでサンプルのリポジトリを置いておきます。
https://github.com/trueSuperior/InteractiveDismissModal
おわりに
インタラクティブな遷移の実装は縦長ディスプレイのUXを向上させるためのとてもいいアイデアだと思っています。我々は物理的な使いにくさを技術力で改善していきたいですね💪