概要
本記事は、Web Component APIで作ったWeb ComponentのShadow DOMで配信されたEventをLight DOMで受信する方法を紹介するものです。
本記事で使うコードは、前回の記事の成果物を使うものです。
目次
- Web Component内で配信されたEventをWeb ComponentからCustom Eventとして配信する
- Custom EventのComposedとBubblesの設定でShadow DOMからLight DOMへ
- CustomEventから情報をLight DOMに配信する方法
Web Component内で配信されたEventをWeb ComponentからCustom Eventとして配信する
投稿者は、Web Component内で発生したEventをLight DOMで受信する常套手段として、Web ComponentからEventTarget.dispatchEvent()を使います。
Light DOMのWeb ComponentエレメントにEventListenerを追加します。
import MyComponent from "./my-component";

customElements.define("my-component", MyComponent);

const body = document.querySelector("body")!;

const myComponent = document.createElement("my-component");
myComponent.addEventListener("tile-click", (event) => {
  console.log("Event Received in Light DOM", event);
});

body.append(myComponent);
そして、Web Componentではこのように、Shadow DOMのEventを受信した時に、EventをWeb Component元で配信するようにします。
import template from "./template.html";
import styles from "./styles.css";

export default class MyComponent extends HTMLElement {
  #listData: string[] = [];
  #ul: HTMLUListElement;

  constructor() {
    console.log("Element Created.");
    super();
    this.attachShadow({ mode: "open" });
    if (!this.shadowRoot) throw Error("Browser does not support Shadow DOM");
    this.shadowRoot.innerHTML = template;
    const styleElement = document.createElement("style");
    styleElement.innerHTML = styles;
    this.shadowRoot.append(styleElement);
    this.#ul = this.shadowRoot.querySelector("ul")!;
  }

  get listData(): string[] {
    return this.#listData;
  }
  set listData(value: string[]) {
    this.#listData = value;
    this.#ul.childNodes.forEach((li) => li.removeEventListener("click", this.#handleLIClick));
    this.#ul.innerHTML = "";
    this.#listData.forEach((item) => {
      const li = document.createElement("li");
      li.textContent = item;
      li.addEventListener("click", this.#handleLIClick);
      this.#ul.append(li);
    });
    console.log("Data rendered to DOM");
  }

  #handleLIClick: EventListener = (event) => {
    console.log("Event inside Shadow DOM");
    const customEvent = new Event("tile-click");
    this.dispatchEvent(customEvent); // thisは\<my-component>を指しています。
  };

  connectedCallback() {
    console.log("Element Added to DOM");
    fetch("https://jsonplaceholder.typicode.com/posts?_limit=10")
      .then((result) => result.json())
      .then((data) => {
        console.log("Data Retrieved.");
        this.listData = data.map((post) => post.title);
      });
  }
}
クリックしてみた結果

このように、Shadow DOM内の<li>エレメントで発生したEventをコントロールした形でLight DOMで受信できます。
この方法が一番お勧めです。なぜなら、開発者がどのようなイベントをこのComponentから配信したいのかを考えさせるからです。ただ、以前ご指摘をいただきましたが、昔のJQueryの悩みと同様に、Custom Event名で混乱が起きかねます。
Custom EventのComposedとBubblesの設定でShadow DOMからLight DOMへ
次に紹介する方法は、Shadow DOMで配信されたEventがそのままLight DOMのEventListenerまで到達するように書くものです。
import MyComponent from "./my-component";

customElements.define("my-component", MyComponent);

const body = document.querySelector("body")!;

const myComponent = document.createElement("my-component");
myComponent.addEventListener("tile-click", (event) => {
  console.log("Event Received in Light DOM", event);
});

body.append(myComponent);
import template from "./template.html";
import styles from "./styles.css";

export default class MyComponent extends HTMLElement {
  #listData: string[] = [];
  #ul: HTMLUListElement;

  constructor() {
    console.log("Element Created.");
    super();
    this.attachShadow({ mode: "open" });
    if (!this.shadowRoot) throw Error("Browser does not support Shadow DOM");
    this.shadowRoot.innerHTML = template;
    const styleElement = document.createElement("style");
    styleElement.innerHTML = styles;
    this.shadowRoot.append(styleElement);
    this.#ul = this.shadowRoot.querySelector("ul")!;
  }

  get listData(): string[] {
    return this.#listData;
  }
  set listData(value: string[]) {
    this.#listData = value;
    this.#ul.childNodes.forEach((li) => li.removeEventListener("click", this.#handleLIClick));
    this.#ul.innerHTML = "";
    this.#listData.forEach((item) => {
      const li = document.createElement("li");
      li.textContent = item;
      li.addEventListener("click", this.#handleLIClick);
      this.#ul.append(li);
    });
    console.log("Data rendered to DOM");
  }

  #handleLIClick: EventListener = (event) => {
    console.log("Event inside Shadow DOM");
    const target = event.target;
    if (!(target instanceof HTMLElement)) return;
    const customEvent = new Event("tile-click", { bubbles: true, composed: true });
    target.dispatchEvent(customEvent); // \<li>のエレメントもしくはその子エレメントから配信する
  };

  connectedCallback() {
    console.log("Element Added to DOM");
    fetch("https://jsonplaceholder.typicode.com/posts?_limit=10")
      .then((result) => result.json())
      .then((data) => {
        console.log("Data Retrieved.");
        this.listData = data.map((post) => post.title);
      });
  }
}
このようにbubbles: trueとcomposed: trueを使うと、thisじゃなくても、Shadow DOM内のエレメントから配信されたEventをLight DOMで受信することができます。
| 設定キー | 意味 |
|---|---|
| composed | Shadow DOMとLight DOMの境界を超えてもいいEventであることを示す。基本的にShadow DOM内のEventはこの境界を超えないようになっている。 |
| bubbles | EventがEventListenerに到達するまで、続いて親エレメントに配信してもらう設定 |
CustomEventから情報をLight DOMに配信する方法
1番目の方法の延長線ですが、このようにできます。
import MyComponent from "./my-component";

customElements.define("my-component", MyComponent);

const body = document.querySelector("body")!;

const myComponent = document.createElement("my-component");
myComponent.addEventListener("tile-click", (event) => {
  if (!(event instanceof CustomEvent)) throw Error("Event not Custom Event.");
  const data = event.detail;
  console.log("Event Received in Light DOM. Data: ", data);
});

body.append(myComponent);
import template from "./template.html";
import styles from "./styles.css";
export default class MyComponent extends HTMLElement {
#listData: string[] = [];
#ul: HTMLUListElement;
constructor() {
console.log("Element Created.");
super();
this.attachShadow({ mode: "open" });
if (!this.shadowRoot) throw Error("Browser does not support Shadow DOM");
this.shadowRoot.innerHTML = template;
const styleElement = document.createElement("style");
styleElement.innerHTML = styles;
this.shadowRoot.append(styleElement);
this.#ul = this.shadowRoot.querySelector("ul")!;
}
get listData(): string[] {
return this.#listData;
}
set listData(value: string[]) {
this.#listData = value;
this.#ul.childNodes.forEach((li) => li.removeEventListener("click", this.#handleLIClick));
this.#ul.innerHTML = "";
this.#listData.forEach((item) => {
const li = document.createElement("li");
li.textContent = item;
li.addEventListener("click", this.#handleLIClick);
this.#ul.append(li);
});
console.log("Data rendered to DOM");
}
#handleLIClick: EventListener = (event) => {
console.log("Event inside Shadow DOM");
const target = event.target;
if (!(target instanceof HTMLElement)) return;
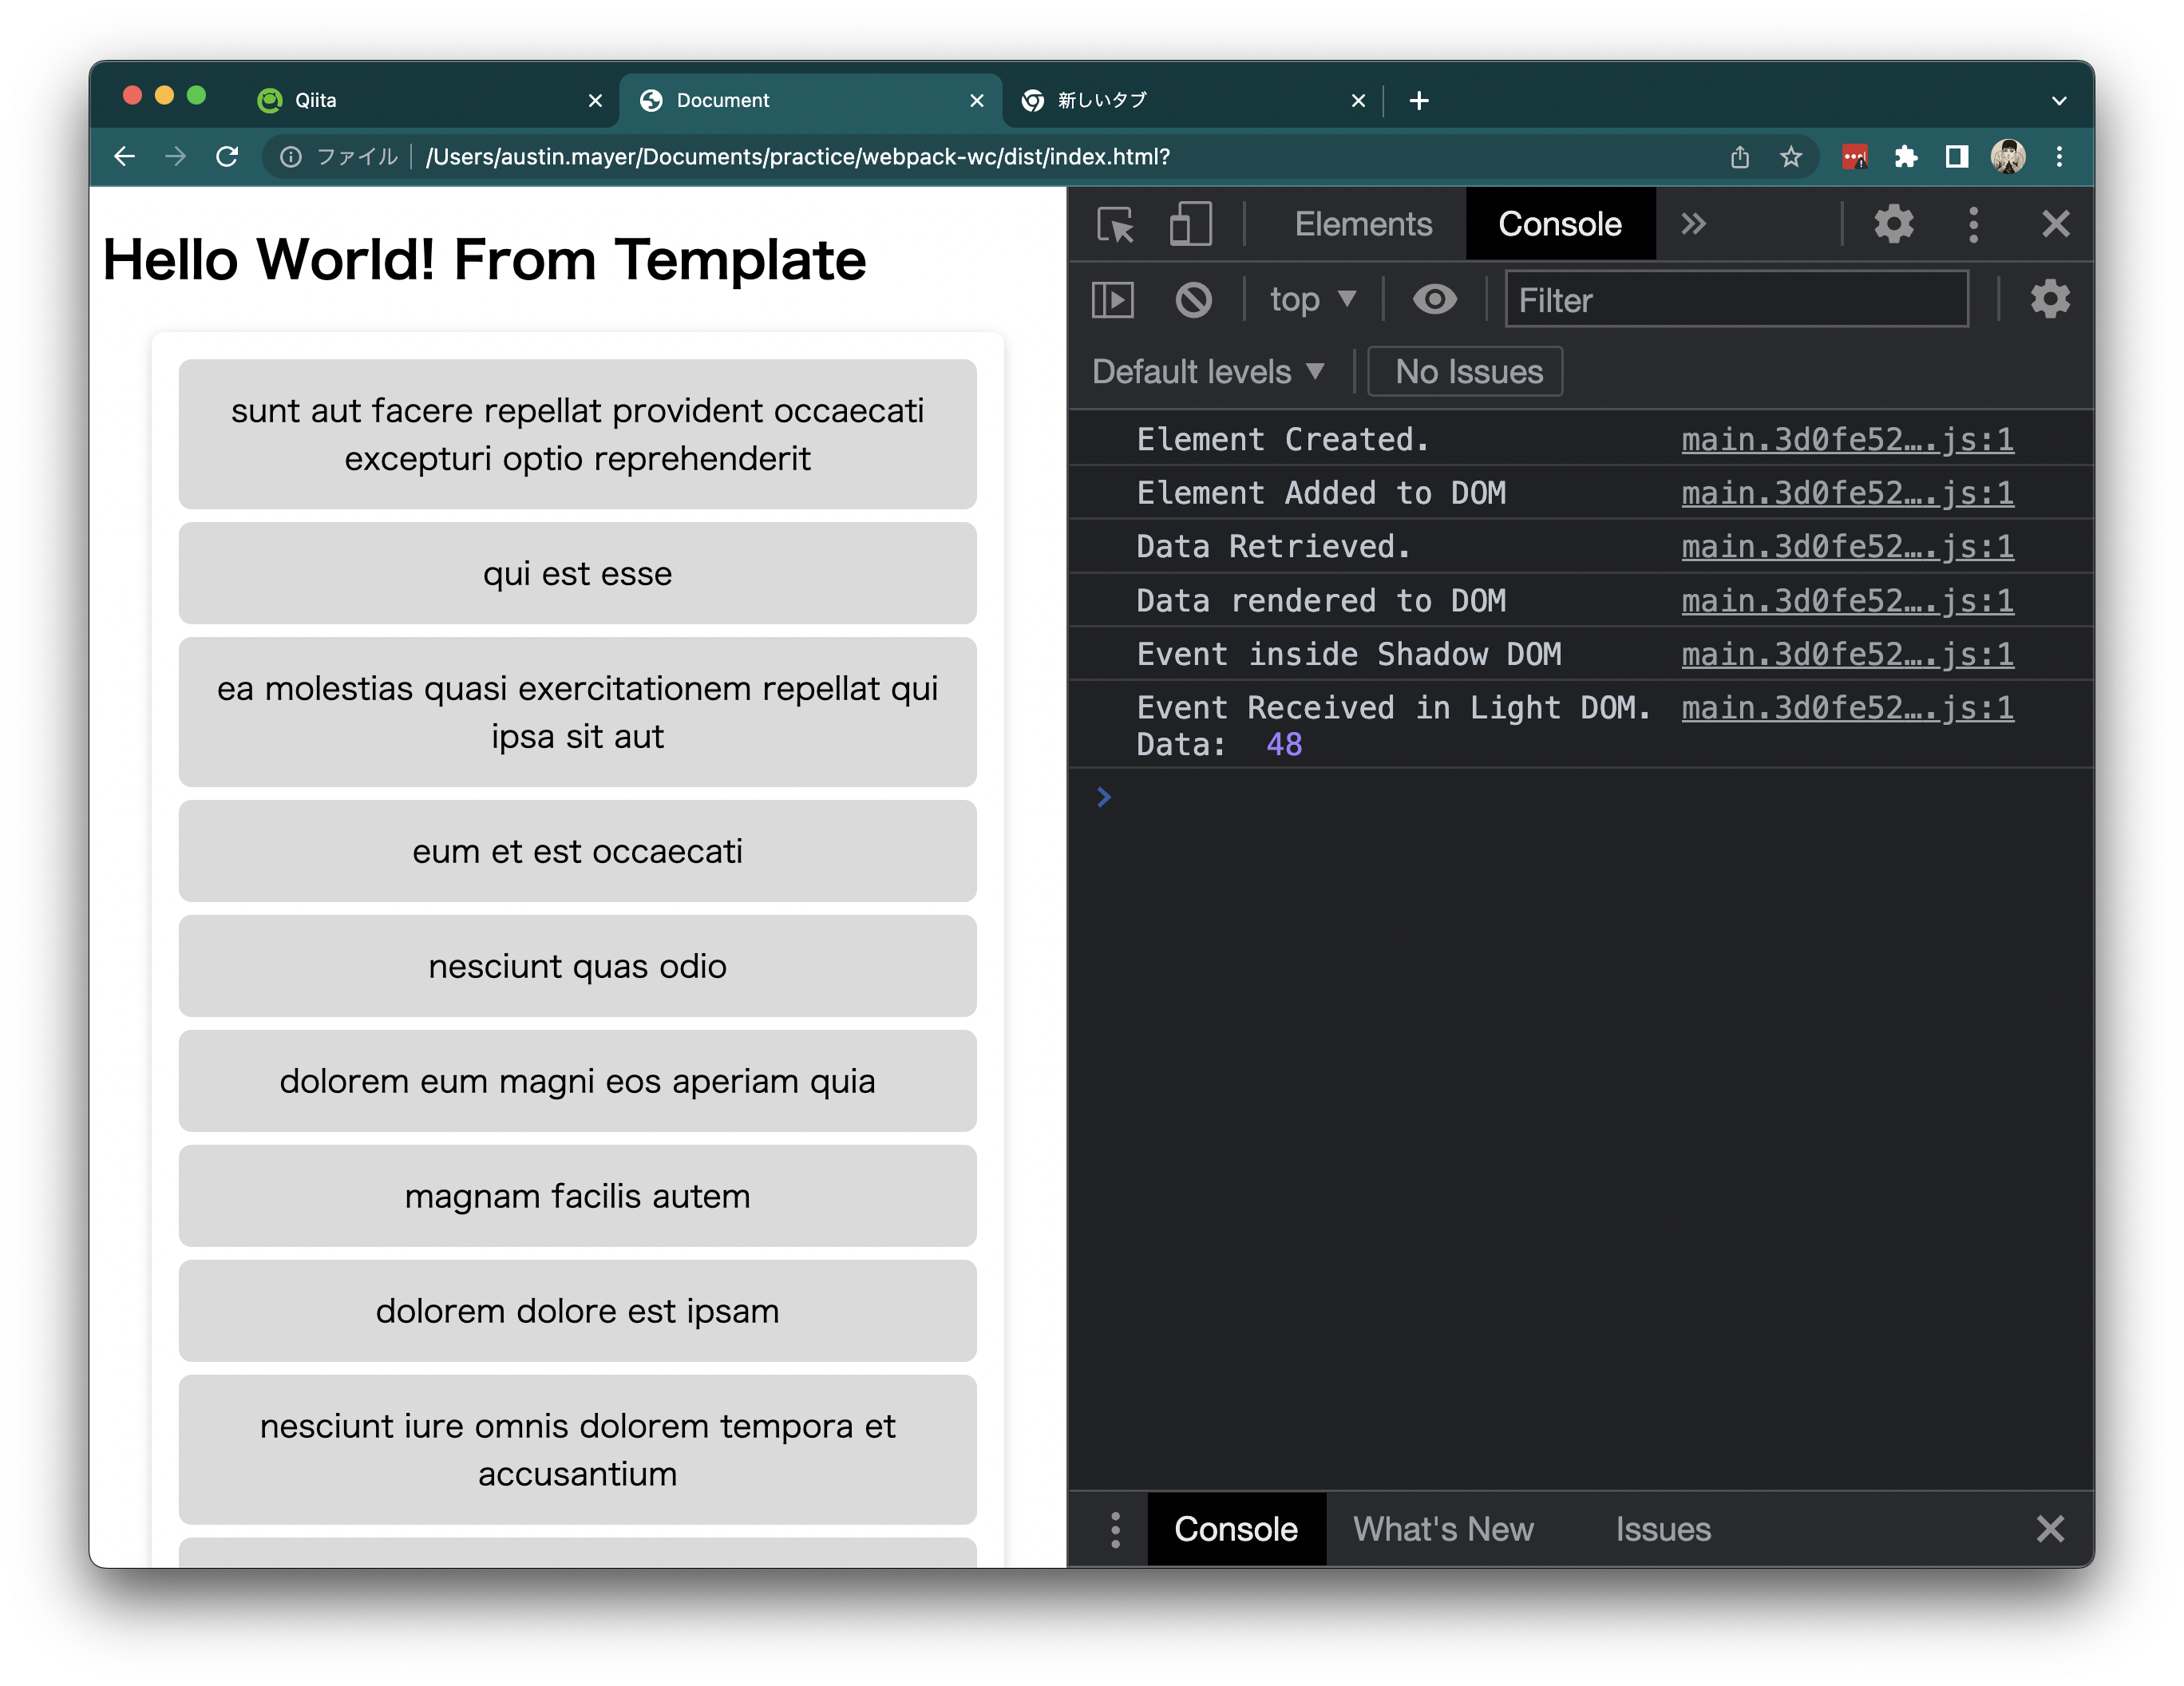
const customEvent = new CustomEvent("tile-click", { bubbles: true, composed: true, detail: 48 });
target.dispatchEvent(customEvent); // \<li>のエレメントもしくはその子エレメントから配信する
};
connectedCallback() {
console.log("Element Added to DOM");
fetch("https://jsonplaceholder.typicode.com/posts?_limit=10")
.then((result) => result.json())
.then((data) => {
console.log("Data Retrieved.");
this.listData = data.map((post) => post.title);
});
}
}
detailのキーに渡したい情報を入れます。文字列、数字、関数、Object、なんでもOK。
結果
まとめ
以上、Web ComponentのShadow DOM内からEventをLight DOMに配信する方法を紹介しました。
筆者は、Web Componentsの勉強を始めた頃、Shadow DOM内のEventの仕組みでかなり混乱しましたが、こちらで記載している情報がわかれば、大体大丈夫です。