アプリケーション例: 心拍数に応じて強さを調整する五目並べAI

モンテカルロ木探索による五目並べAIにて紹介した五目並べAIの強さを、心拍数に応じて調整する。具体的には、心拍数が上がるとAIは弱くなり、逆に心拍数が下がるとAIは強くなる。
目的
- fitbitデバイスを用いて、リアルタイムに心拍データを取得する
- ただし後述する「現時点での制限」のように、実行時におけるいくつかの制限がある。
- 主な使用用途
- 心拍データを用いたゲームのプロトタイプ作成
- 心理学的実験のための簡易心拍取得装置
環境
- 心拍の取得(身に付けるもの)
- fitbit sense (他のfitbitでもたぶん可)
- スマートフォンのfitbit app (ここで試したのはAndroid)
- 開発、実行の制御(開発するもの。また現時点では実行時にも必要なもの)
- windows 10 home (開発だけでなく実行の制御も現時点ではしている)
- docker (websocket serverの構築のために使用)
- websocket server(心拍データを受け取り、配信するもの)
- Google Cloud Platform (この中のContainer Registryでdocker imageを管理し、Cloud Runでそのimageを実行している)
構成

- 図の黒い矢印は開発時の関係、黄色の矢印は実行時のデータ経路を示す。
- fitbitのデバイスから直接、サーバ等に心拍データを送信することができないため、スマートフォンのfitbit appにデプロイしたcompanion(fitbit companion apiを用いて開発したfitbit appの中で動くもの)経由でサーバにデータを送信する。
- サーバへの接続方法は、http get/postとwebsocketが用意されている。ここでは通信効率の良いと思われるwebsocketを使用する。
- websocketのサーバには、googleのcloud runを使用する。cloud runは、dockerのイメージをそのまま実行できる環境である。dockerとは、OSを含めて実行環境をひとまとめにパックできるようなもので、ローカルPCのOSに依存せずにサーバの開発などができる。今回は、debianディストリビューションのlinuxをOSとしたpythonの環境をdocker hubのpython imagesから参照して、そこにpython上でASGI(asynchronous server gateway interface): 非同期サーバゲートウェイインターフェースを構築するためのuvicornによってwebsocketサーバを構築する。
現時点での制限
- 約2分間の実行後にfitbitデバイスのアプリが終了する。現時点では、fitbitデバイスをタップしてスリープさせないようにする必要がある。fitbit device apiのappTimeoutEnabledをfalseにしてアプリのタイムアウトを無効化しても、なぜか約2分でアプリは落ちる。fitbitデバイスの画面設定で「常に画面をON」をつけると、少し実行できる時間は伸びて、一度試してみたところ、3分半ぐらいになった。
- Websocketサーバとして使用するGoogle Cloud Runは、デフォルトで5分間で接続が切れる。Cloud Runのマニュアルには、非アクティブが5分続くとタイムアウトするとの説明があるが、Cloud Runのwebsocketでの使用に関するマニュアルにも示されているように、Websocketを通信し続けていても、5分で接続は切れる。Cloud Runの設定でタイムアウトを15分までなら伸ばすことができるとの説明があるが試してはいない。クライアントでwebsocketの接続断イベントを取得し、再接続を行うことによって疑似的な永続的接続を構築することは出来るが、再接続までの受信データをロストするなどの問題はある。
- スマホのfitbit appを立ち上げてスリープさせない方が良い。スリープ状態になると、websocketの通信が途絶えることがある。
fitbitデバイスとスマートフォンで動作するfitbit app内のアプリの開発

fitbit studioによるアプリ開発

fitbit studioにアクセスし、fitbitアカウントでログインする。
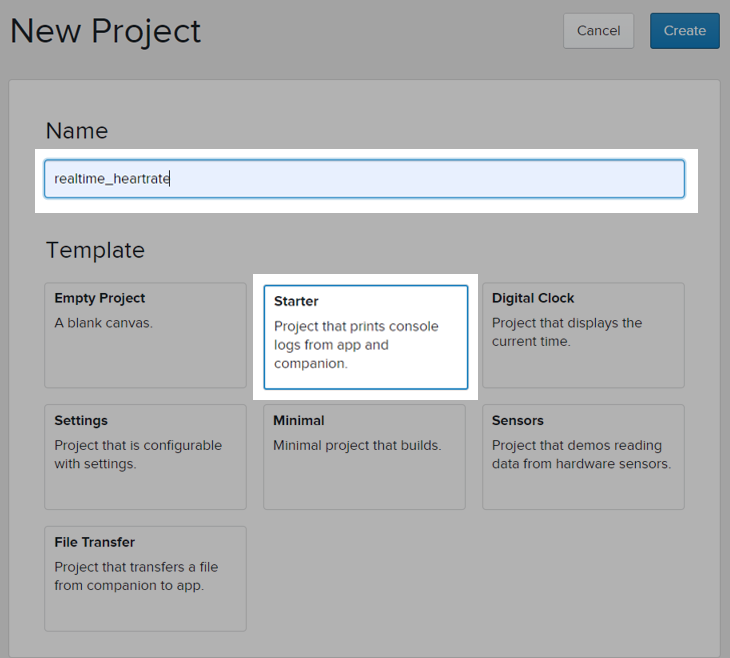
Starterテンプレートを用いて新規プロジェクトを作成する。

左側のappはfitbitデバイスで動作するもの、companionはスマートフォンのfitbit appの中で動作するもの。resourcesはスタイル等の設定である。

左側で app / index.js を選択して、以下のコードを入力する。
/*
  fitbitデバイスで動作する。
*/
import * as messaging from "messaging";
import { HeartRateSensor } from "heart-rate";
import { me } from "appbit";

// fitbit appとの通信を開始する。
messaging.peerSocket.addEventListener("open", (evt) => {
  start_heartRateSensor();
});
messaging.peerSocket.addEventListener("error", (err) => {
  console.error(`Connection error: ${err.code} - ${err.message}`);
});
// fitbit appと接続後に、心拍データの取得を行う。
function start_heartRateSensor(){
  const hrm = new HeartRateSensor({ frequency: 1, batch: 1 });
  hrm.addEventListener("reading", () => {
    sendMessage({
      heartRate: hrm.heartRate ? hrm.heartRate : 0
    });
  });
  hrm.start();
  //なぜか効かない。
  //me.appTimeoutEnabled = false;
}
// fitbit appに心拍データを送信する。
function sendMessage(data) {
  if (messaging.peerSocket.readyState === messaging.peerSocket.OPEN) {
    messaging.peerSocket.send(data);
  }
}
importされているmessagingは、スマートフォン fitbit appとの通信を行う、HeartRateSensorは心拍の取得、meはこのアプリのタイムアウトの設定を行うためのものである。ただし、meを用いたタイムアウトの設定はなぜか効果がないため、現在はコメントアウトして使用していない。
HeartRateSensorの生成時に frequencyで心拍取得の間隔を指定している。現在は1秒間隔で心拍情報を取得する。心拍情報とは、1分間に波打つ回数である。

次に、companion / index.jsを選択する。
/*
  スマートフォンのfitbit app内で動作する。
*/
import * as messaging from "messaging";

// websocketの接続先
const wsUri = "wss://_______________________________________/xx";
const websocket = new WebSocket(wsUri);

// それぞれのリスナを設定する。
websocket.addEventListener("open", onOpen);
websocket.addEventListener("close", onClose);
websocket.addEventListener("message", onMessage);
websocket.addEventListener("error", onError);
function onOpen(evt) {
  console.log("CONNECTED");
  websocket.send("connected")
}
function onClose(evt) {
  console.log("DISCONNECTED");
}
function onMessage(evt) {
  console.log(`from websocket server: ${evt.data}`);
}
function onError(evt) {
  console.error(`ERROR: ${evt.data}`);
}

// デバイスからのデータを受信したときに、同データをwebsocketサーバに送信する。
messaging.peerSocket.addEventListener("message", (evt) => {
  if(websocket.readyState===WebSocket.OPEN){
    const data = JSON.stringify(evt.data);
    websocket.send(data);
  }
});
import の messagingは、fitbitデバイスのアプリと通信を行う。wsUriにwebsocketのサーバのアドレスとエンドポイントを設定する。デバイスからの心拍情報を取得したら、そのままwebsocketでサーバに送信するというプログラムになっている。
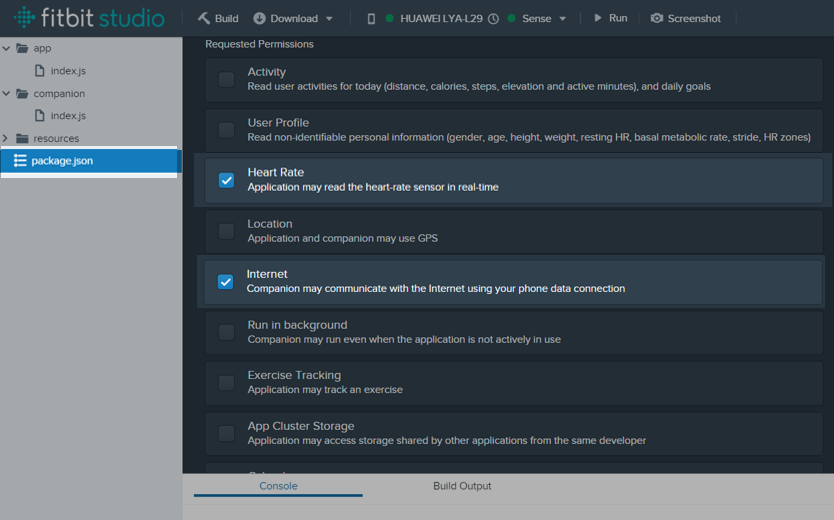
最後に、package.jsonにて Heart RateとInternetのRequested Permissionsのチェックを付ける。
アプリのデプロイと実行確認
スマートフォンでの設定
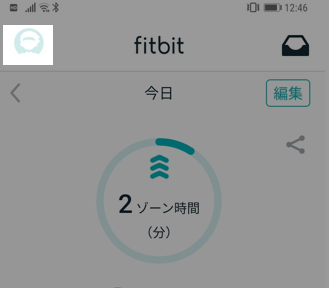
スマートフォンのfitbitアプリを起動して、左上のアカウントをタップする。
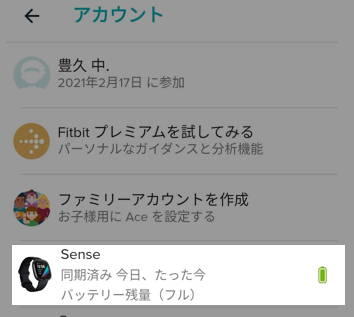
心拍を取るデバイスをタップする。
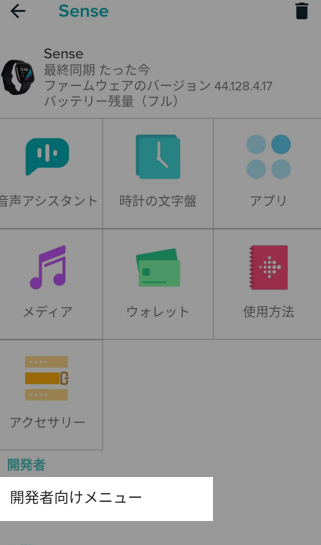
開発者メニューをタップする。
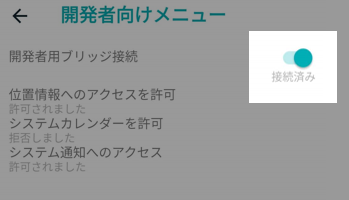
開発者用ブリッジ接続をONにする。
fitbitデバイスでの設定

画面を横にスライドする。

設定をタップする。

開発者用ブリッジ接続をタップする。
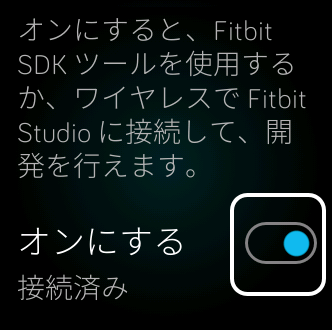
オンにする。
fitbit studioでの設定
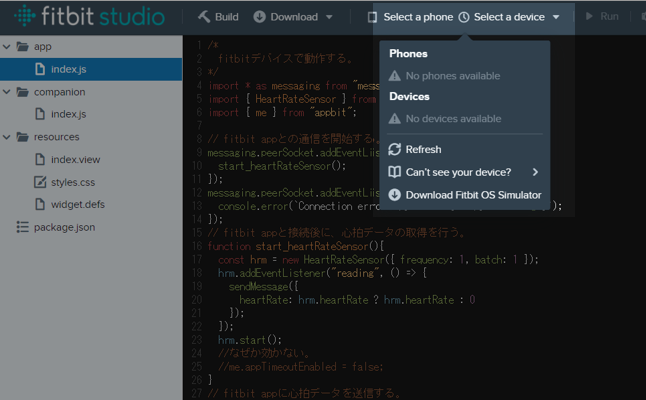
fitbitデバイス、スマートフォンのfitbit appと接続するために、Select a phone Select a deviceメニューを開く。Phones Devicesが見えていなければ、Refreshを選択し、表示されるそれぞれのデバイスをクリックして接続する。
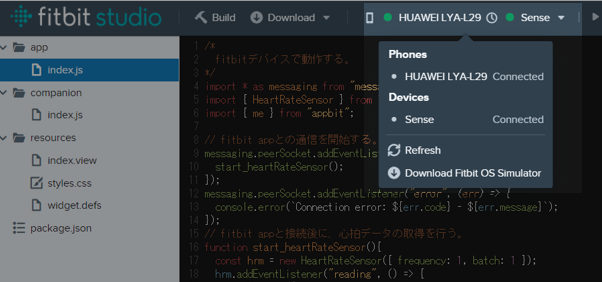
接続すると、それぞれのデバイス名の横に Connectedと表示される。
実行確認

fitbit studioの Runボタンを押すと、コンソールに心拍情報が表示される。ただし、現時点での制限で述べたように約2分間で、アプリは終了する。その時には、もう一度 Runボタンを押す必要がある。
またfitbitデバイスには、fitbit studioのresourcesで設定したデフォルトのHello World!が表示されている。
一度、fitbit studioでアプリをデプロイした後には、fitbitデバイスからアプリを起動することができる。この際に、スマートフォンのfitbit appは、起動しておいた方が良い。
fitbitデバイスで横にスクロールさせていくと、最後にデプロイしたアプリが表示される。

このアプリをタップすると、起動する。この時に、自動的にスマートフォンのfitbit app内の開発したアプリも起動する。
dockerによるwebsocketサーバの構築

windows 10 homeへの dockerのインストール

Docker DesktopからDownload for Windowsをクリックしてダウンロード、インストールを開始する。インストールオプションは、基本デフォルトで行う。
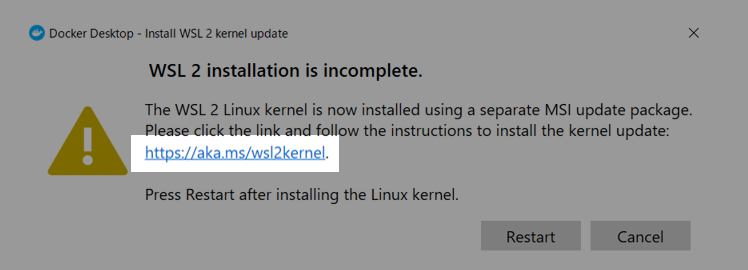
インストール終了後にWSL 2のインストールができていないとのメッセージが表示されるので、そのメッセージにあるURLをクリックする。
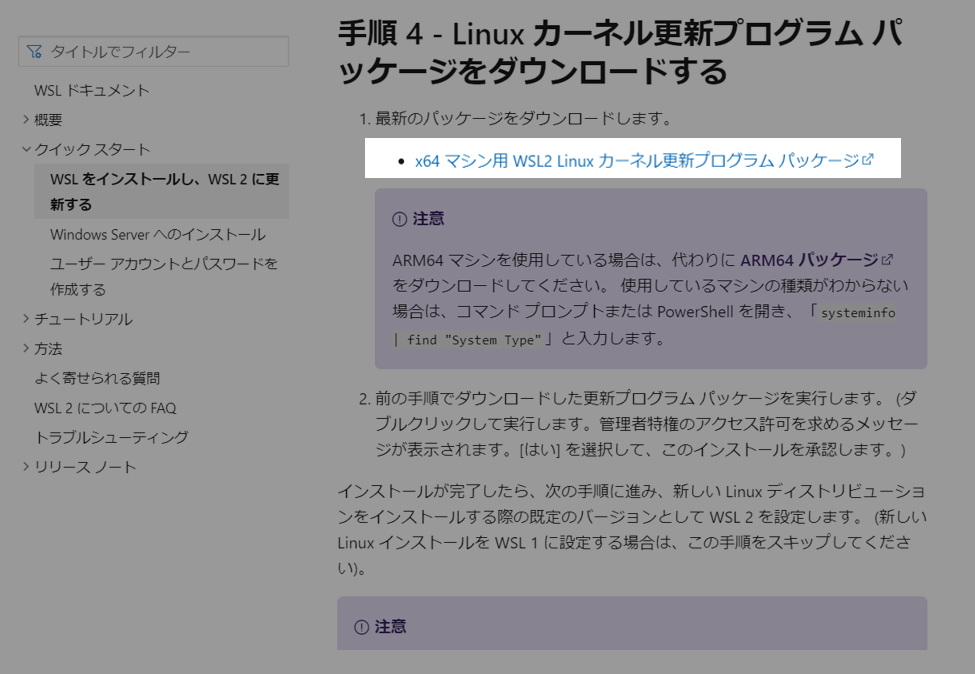
表示されるサイトのx64マシン用 WSL2 Linuxカーネル更新プログラム パッケージをクリックし、インストールする。

Dockerが立ち上がるとチュートリアルの開始となるが、とりあえずスキップして問題はない。
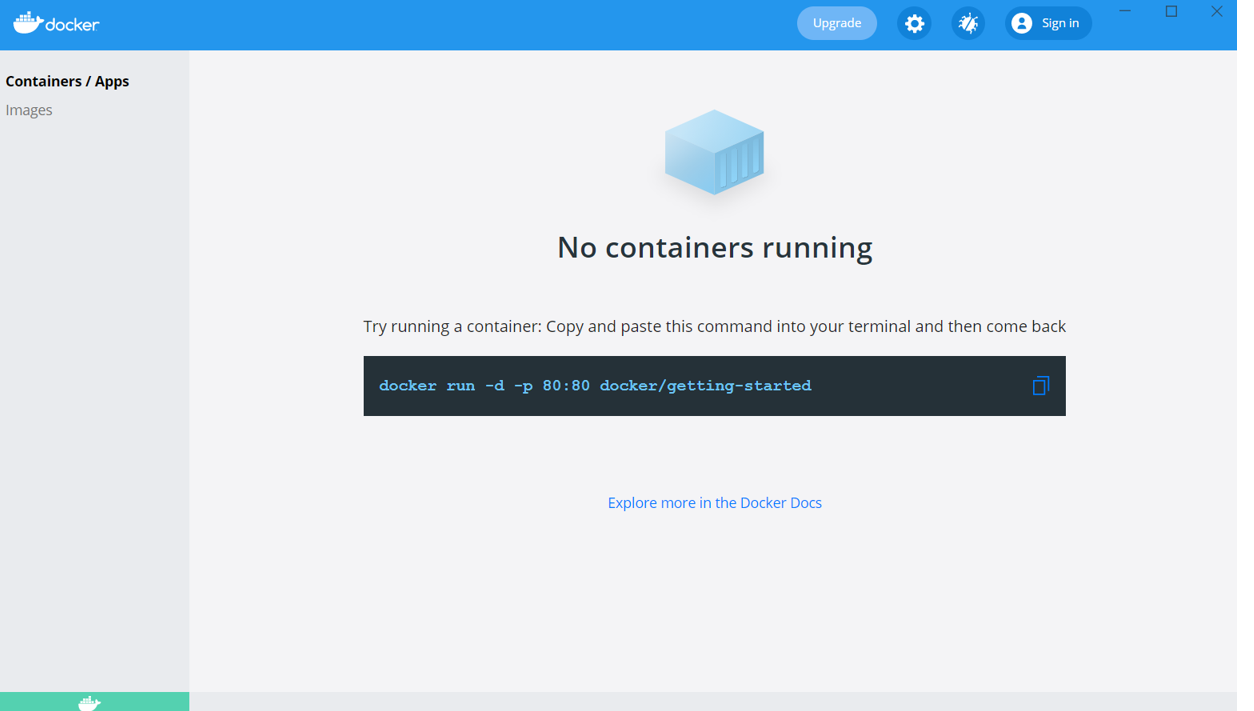
インストールが完了する。左側のContainers / Appsは、それぞれのコンピューティング環境、Imagesはその環境を構築するための元(昔のインストールCDのようなもの)である。
websocketサーバの構築
適当なフォルダを作成して、次に示す3つのファイルを作成する。

FROM python:3.8-alpine

WORKDIR /usr/src/app

COPY requirements.txt ./
RUN apk add --no-cache build-base \
 && pip install --no-cache-dir --trusted-host pypi.python.org -r requirements.txt \
 && apk del build-base

COPY . .

CMD [ "uvicorn", "simple_main:app", "--reload", "--host", "0.0.0.0", "--port", "8080" ]
Dockerによるコンピューティング環境構築用のDockerファイルであり、FROM python:3.8-alpineという指定によってdocker hubのpythonの上に構築している。このpythonは、DebianディストリビューションのlinuxをOSとし、pythonをインストールしてくれる。タグと呼ばれる3.8-alpineは、pythonのバージョンを3.8とし、alpineというタグ付けされたpythonの最小構成を作るものである。
最後のCMDで指定された uvicornの実行は、ポート番号を 8080 にする必要がある。これは、このwebsocketサーバを最終的にはgoogle cloud runで実行するために必要なことであり、cloud runはデフォルトで8080ポートを使用するために、これに合わせるものである。cloud runは、外向きのインターフェースは、https / wss の433であるが、そこに到達したデータは、内部の8080に転送されるという仕組みになっている。よって開発するサーバは、8080ポートで待っている必要がある。
uvicorn[standard]
fastapi
requirements.txtファイルはDockerファイルから参照されて、必要なpythonコンポーネントを記述しておく。
from fastapi import FastAPI
from starlette.websockets import WebSocket, WebSocketDisconnect

# fast app
app = FastAPI()

# client websockets list
clients = []

# notify to all clients
async def notify(msg:str):
  for websocket in clients:
    await websocket.send_text(msg)

# notification generator
async def notification_generator():
  while True:
    msg = yield
    await notify(msg)
notification = notification_generator()

# websocket endpoint
@app.websocket("/ws")
async def websocket_endpoint(websocket: WebSocket):
  await websocket.accept()
  clients.append(websocket)
  try:
    while True:
      data = await websocket.receive_text()
      await notification.asend(data)
  except WebSocketDisconnect:
    clients.remove(websocket)

# startup (preparing notification generator)
@app.on_event("startup")
async def startup():
  await notification.asend(None)
Websocketサーバのプログラムで、fastapiと呼ばれるpythonのwebフレームワーク、uvicornというASGI(Asynchronous Server Gateway Interface) :非同期サーバーゲートウェイインターフェイスのインプリメンテーションを使用する。
Websocketの接続先であるエンドポイントは、 @app.websocket("/ws")で指定した /ws とし、そこに接続されるwebsocketをすべて保存し、あるwebsocketから送られてきたデータは、その送信元websocketも含めて、全ての接続先websocketへ配信するようになっている。
docker build
Dockerfileのあるフォルダで、次のコマンドを実行してdocker imageを作成する。
docker build -t websocket_server .
-tオプションのwebsocket_serverは作成するdocker imageの名前である。
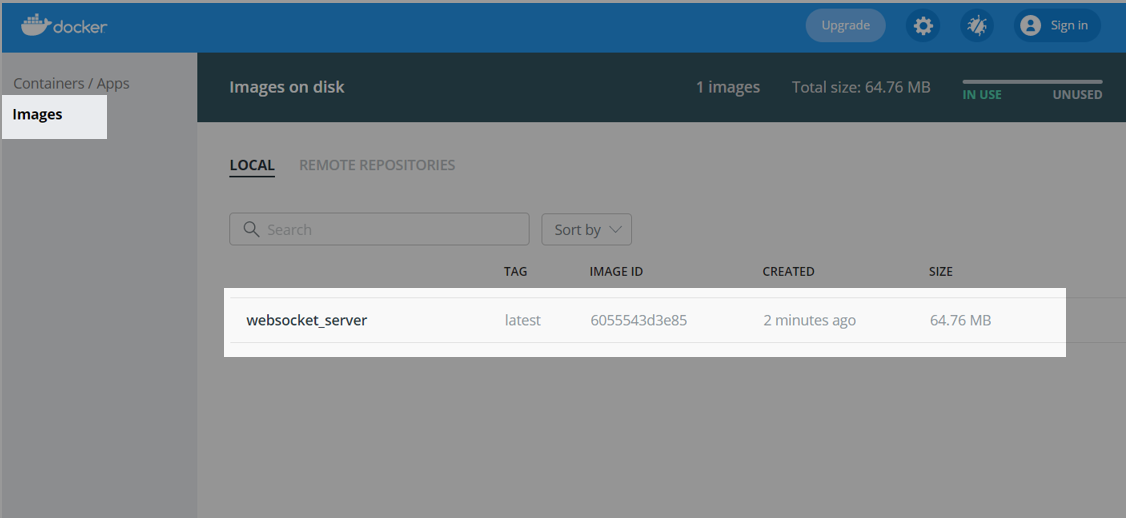
ビルドが成功すると、Docket画面のimagesに、websocket_serverというイメージが作成されている。
実行確認
次のコマンドを実行すると、websocket_server イメージからコンテナが作成されてコンピューティング環境が実行される。
docker run -p 80:8080 websocket_server
オプションの -p は、dockerの外であるwindowsPCからdockerの中にあるアプリに接続するためにポートを転送する設定であり、この場合は、windows pcの80ポートを、dockerの8080ポートに転送するとなる。
<!DOCTYPE html>
<!--------------------------
    websocket client html
    ・フォームからサーバにデータを送信できる。
    ・サーバから受信したデータを表示する。
-->
<html>
    <head>
        <title>My Heart Rate</title>
    </head>
    <body>
        <label for="test_form">テストデータの送信</label>
        <form action="" onsubmit="sendMessage(event)" id="test_form">
            <input type="text" id="messageText" autocomplete="off"/>
            <button>Send</button>
        </form>
        <ul id='messages'>
        </ul>
        <script>
            //const ws = new WebSocket("wss://_______________________________________/xx");
            const ws = new WebSocket("ws://localhost/ws");
            ws.onmessage = function(event) {
                const messages = document.getElementById('messages')
                const message = document.createElement('li')
                const content = document.createTextNode(event.data)
                message.appendChild(content)
                messages.appendChild(message)
            };
            function sendMessage(event) {
                const input = document.getElementById("messageText")
                ws.send(input.value)
                event.preventDefault()
            }
        </script>
    </body>
</html>
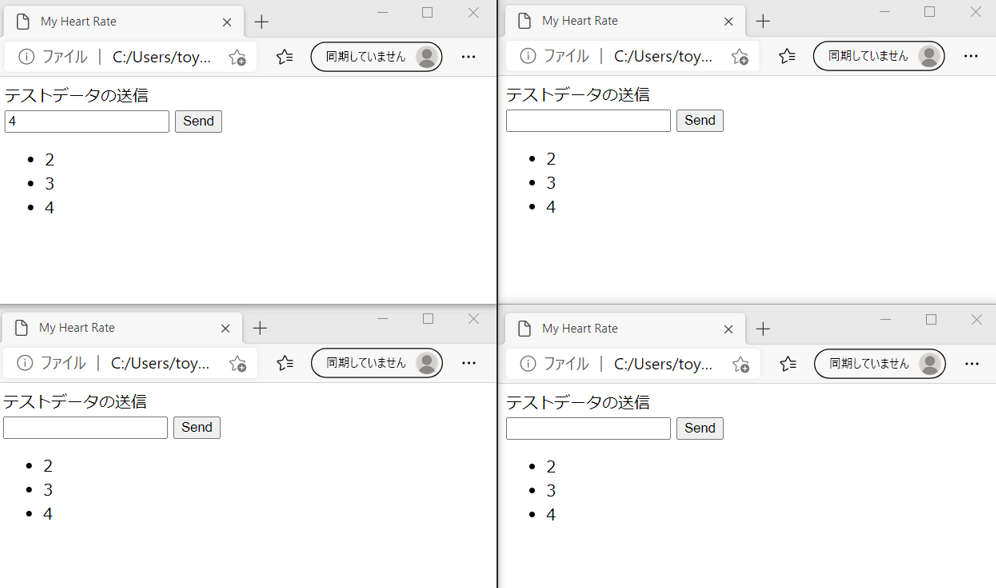
localhostのwsに接続するhtml, javascriptを作成し、ブラウザで表示する。
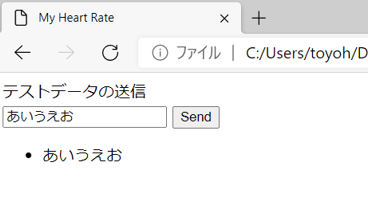
サーバに送信したデータがループバックで戻ってきて、リスト表示される。同時に複数のブラウザを開けば、1つのブラウザから送信したデータは、全てのブラウザに戻ってくることが確認できる。

この時に、dockerのコンソールには、このような感じで表示されている。
Google Cloud Runによるwebsocketサーバの公開

Google Cloud Platformでプロジェクトの作成
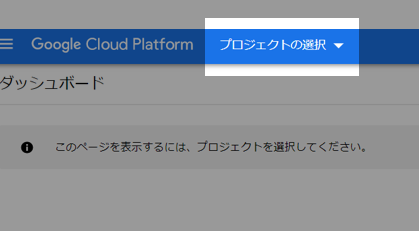
Google Cloud Platformのプロジェクト選択から新規プロジェクトを作成する。もちろん、既にあるプロジェクトに新たなサービスを追加する場合は、その既存プロジェクトを選択してもよい。
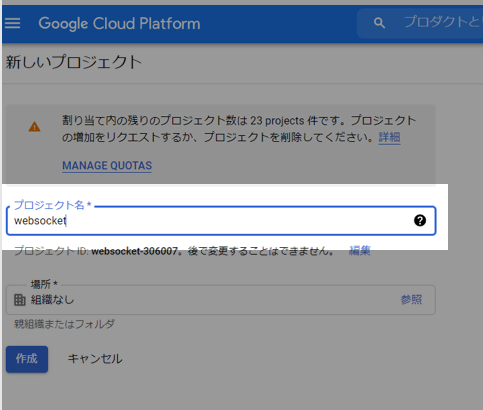
プロジェクト名を入力して作成する。
おそらく課金の設定についてもする必要がある。
Container Registryの設定
直接、Cloud Runを操作してdocker imageからアプリを起動することも可能であるが、ここでは、docker imageのcontainer registryへのアップロード、そしてcontainer registryにあるimageからcloud runのアプリを生成、と段階を踏んで行っていくこととする。

左側からContainer Registryを選択する。

Container registryを有効化する。
docker tag [docker image id] gcr.io/[google cloud project id]/[docker image name]
dockerコマンドによって、先に作成したdocker imageにタグ付けを行う。image id, project id, image nameの確認方法は、次に示す。またgcr.ioは、とりあえずcloud runのデプロイ先をus-central1 (アイオア)にすることを前提としている。
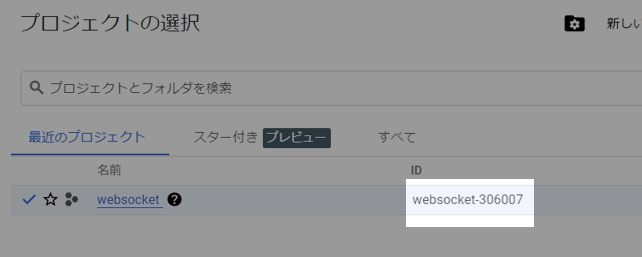
google cloud project idの確認は、google cloud platformのプロジェクトの選択等で行うことができる。
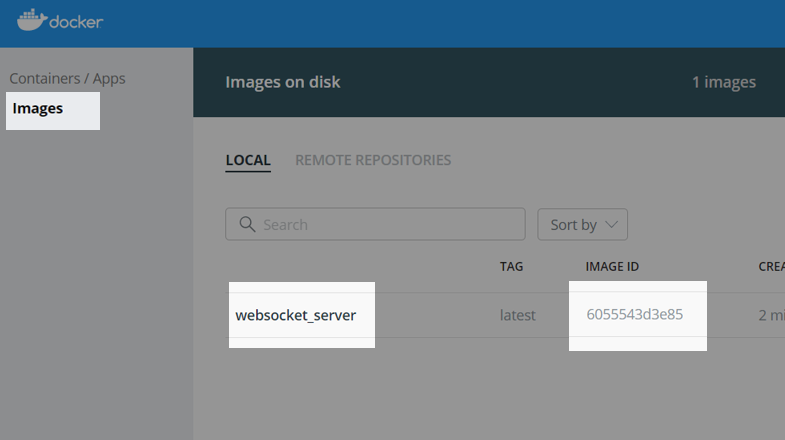
docketのイメージ名、image idの確認は、docker画面の左側のimagesタブから行う。

docker imageへのタグ付けが成功すると、docker画面ではこのように表示されている。
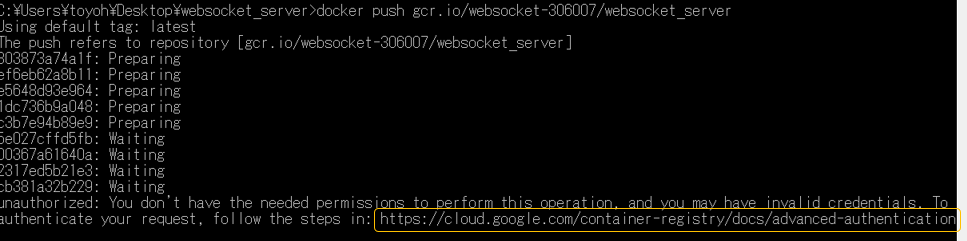
docker push gcr.io/[google cloud project id]/websocket_server
タグ付けされたimageをdocker pushでgoogleにアップしようとすると、以下のように権限が無いとのエラーが表示される。
次に、権限付与のためにGoogle Cloudの認証方法のサイトの説明に従ってまず、Google Cloud SDKのインストールを行う。
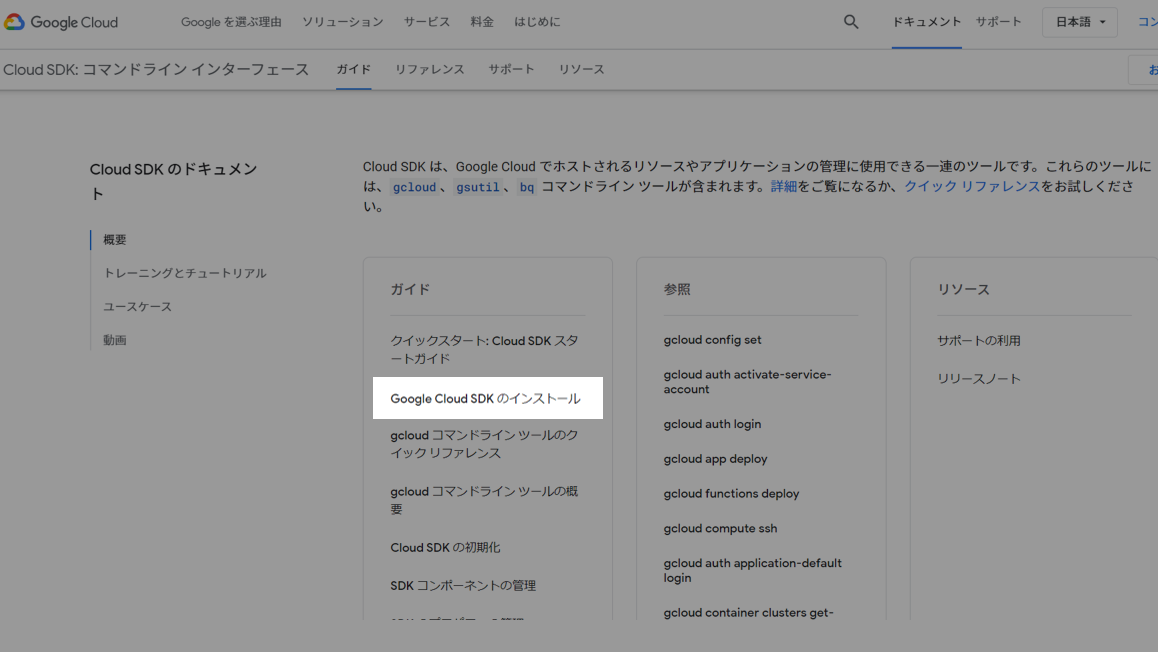
Cloud SDKのドキュメントに接続し、Google Cloud SDKのインストールを選択する。
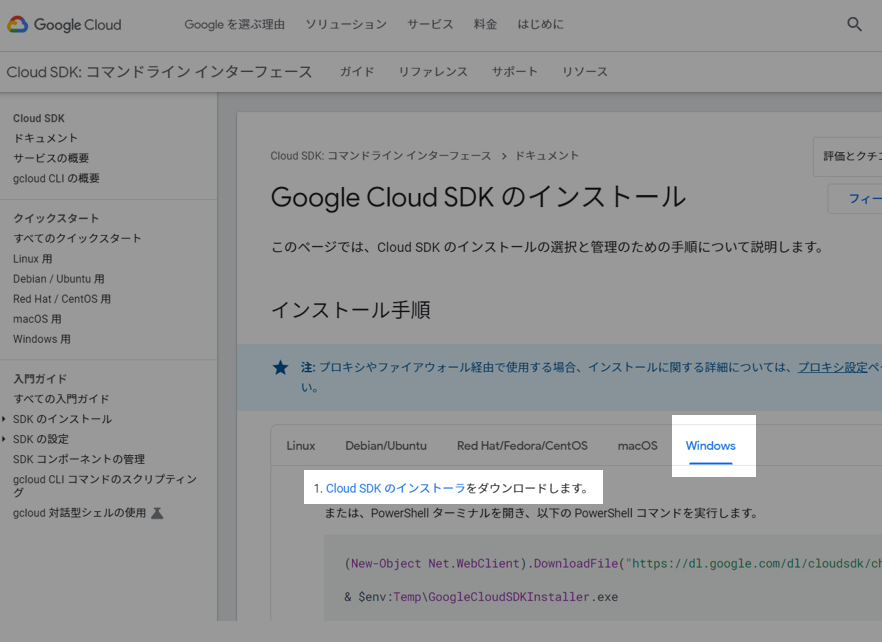
windowsのタブを選択し、Cloud SDKをダウンロードしてインストールする。インストールは基本的にデフォルト設定のままで行う。

インストール後に、Start Google Cloud SDK ShellとRun gcloud init to configure the Cloud SDKのチェックを付けてFinishボタンを押す。

コンソールでログインを要求されるので、 y を入力して enterを押す。
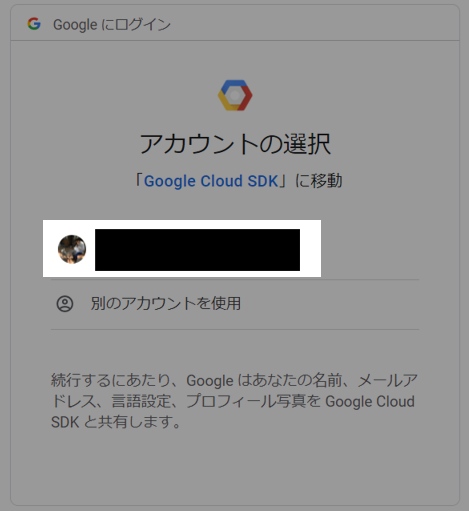
ブラウザが表示されて許可を求めるためにGoogleアカウントの選択が表示される。使用するアカウントを選択する。
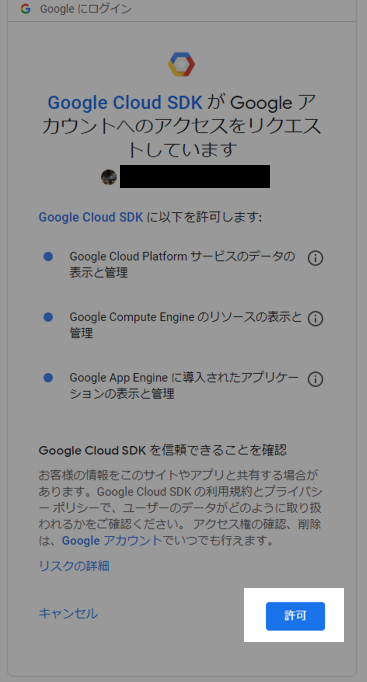
次に表示される画面で許可を押す。

コンソールでは、プロジェクトを選択するところで止まっているので、先に作成したプロジェクトを選択する。
次に、container registryにアップロードをするdockerにgoogleの権限を与えるために、gcloud 認証情報ヘルパーを参考に設定を進めていく。
gcloud auth login
gcloudにログインするために、上記のコマンドを実行する。表示されるブラウザでは、先ほどと同様にgoogleアカウントを選択して、許可を押す。
gcloud auth configure-docker
gcloudコマンドで、dockerを構成する。

このような感じに実行できていれば、たぶん、大丈夫。
docker push gcr.io/[google cloud project id]/[docker image name]
あらためてdockerコマンドでdocker imageをcontent registryにアップロードする。

docker pushコマンドの結果として、このような感じで表示される。

Google Cloud Platformのcontainer regstryで確認すると、websocket_serverという名前のimageが追加されている。
Cloud Runの設定
gcloud run deploy websocket-server --image gcr.io/[google cloud project id]/websocket_server
gcloudコマンドによって、container regstryにアップしたdocker imageからサービスを構成する。deploy websocket-serverのwebsocket-serverはcloud run上のサービス名となる。このサービス名では _ (アンダースコア)が使用できないため、- (ハイフン) としている。
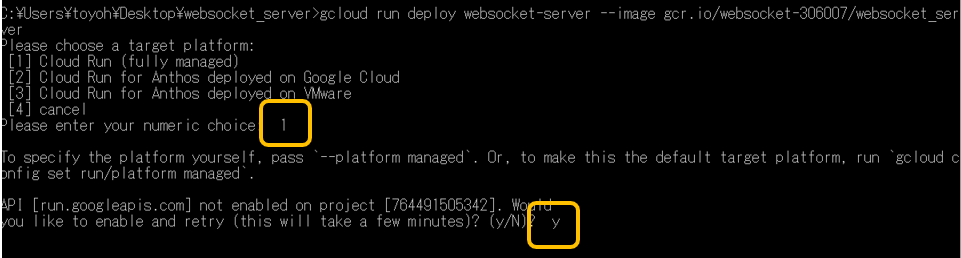
target platformは[1] Cloud Run (fully managed)を、projectを有効化するかには y を回答する。
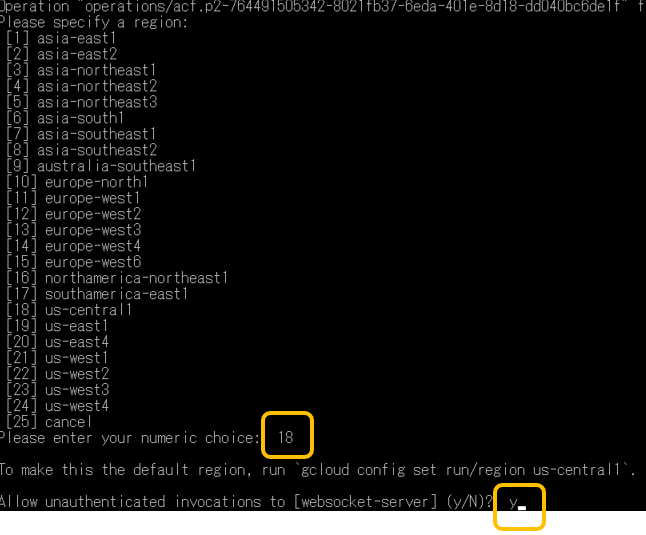
リージョンにはus-central1を、unauthenticated invocationsを聞かれた場合には y を選択する。

google cloud platformのcloud runで確認すると、websocket-serverという新しいサービスが登録されている。この時点で既に動作している。URLがサービスのURLであるため、動作確認のために控えておく。
実行確認
websocketの送受信

先に示したwebsocketクライアント用のhtmlファイルの接続先urlを、cloud runのサービスurlに変更し、プロトコルもwsからwssに変えてブラウザで表示する。
送信したデータが、全てのクライアントに返ってくることを確認する。また、クラウド上のwebsocketサーバなので、例えば、スマートフォンから参照しても同様の結果を得ることができる。
心拍データの送受信

fitbit studioのcompanion / index.js の wsUriを cloud runのサービスURLに変更する。
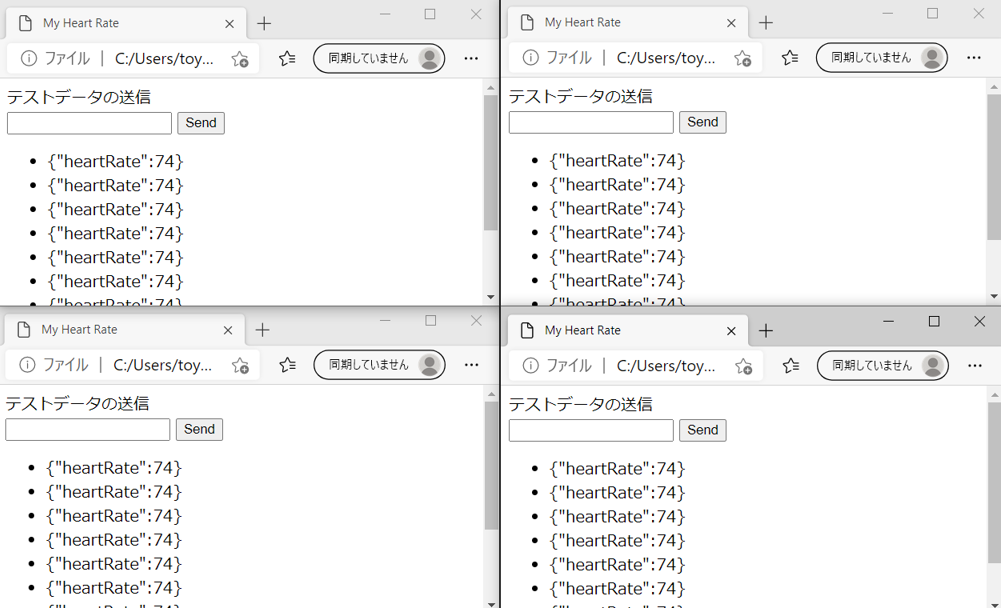
fitbit studioでfitbitデバイス、fitbit appのcompanionを起動すると、websocketサーバ経由でリアルタイムに心拍データを取得することができる。
Cloud Runのタイムアウト対策
次のは、websocketが5分でタイムアウトしたときにクライアント側から接続し直すjavascriptである。ついでに、受信時にリストを下に増やすのではなく、上に追加する形で最新が常に一番上になるように変更している。
<!DOCTYPE html>
<!--------------------------
    websocket client html
    ・フォームからサーバにデータを送信できる。
    ・サーバから受信したデータを表示する。
-->
<html>
<head>
    <title>My Heart Rate</title>
</head>

<body>
    <label for="test_form">テストデータの送信</label>
    <form action="" onsubmit="sendTextInput(event)" id="test_form">
        <input type="text" id="messageText" autocomplete="off" />
        <button>Send</button>
    </form>
    <ul id='messages'>
    </ul>
    <script>
        const url = "wss://_______________________________________/xx";
        //const url = "ws://localhost/ws";

        function sendTextInput(event) {
            const input = document.getElementById("messageText");
            sock.send(input.value);
            event.preventDefault();
        }
        const sock = new function () {
            const self = this;
            let ws = undefined;
            self.init = () => {
                if (ws && ws.readyState === WebSocket.OPEN) {
                    ws.close();
                }
                ws = new WebSocket(url);
                ws.onmessage = (event) => {
                    const messages = document.getElementById('messages');
                    const message = document.createElement('li');
                    const content = document.createTextNode(event.data + " [" + (new Date()) + "]");
                    message.appendChild(content);
                    messages.prepend(message);
                };
                ws.onclose = (event) => {
                    console.log("closed and re-init");
                    self.init();
                };
            }
            self.send = (msg) => {
                if (ws.readyState === WebSocket.OPEN) {
                    ws.send(msg);
                } else {
                    console.log("cannot send " + msg + " [" + ws.readyState + "]");
                }
            };
            self.init();
        }
    </script>
</body>
</html>
sock変数では、wsという名前のwebsocketのインスタンスを保持し、それをサーバに接続するinitという名称のメソッドを有する。そのinitメソッドは、websocketが接続断されたときのイベント onclose の中で再度呼び出される。
参考にさせて頂いたサイト
Windows 10 HomeへのDocker Desktop (ver 3.0.0) インストールが何事もなく簡単にできるようになっていた (2020.12時点)