2020/05/06 追記
- WindowsでNervesをはじめられる方は、@takasehideki 先生のElixirでIoT#4.1.1:WSL 2でNerves開発環境を整備する を参考にすすめることをオススメします
- 私もWSL2で
$ mix firmware、$ mix firmware.burnができました 🚀🚀🚀
はじめに
- NervesはElixirのIoTでナウでヤングなcoolなすごいヤツです🚀
-
Windows + Virtual Box(Ubuntu18.04)でNervesの環境構築に挑戦した
- こちらを読んでWindowsでNervesをやってみたくなりました
- なぜなら私はMacで楽して環境構築したからです
- この記事からリンクされている記事、特に@TAKASEhidek先生のElixirでIoT#4.1:Nerves開発環境の準備(2019年12月版)にいろいろヒントをいただきました
- ありがとうございます!
-
VirtualBoxとVagrantを使います
- VirtualBox is a powerful x86 and AMD64/Intel64 virtualization product for enterprise as well as home use.
- Vagrant is a tool for building and managing virtual machine environments in a single workflow.
- 私はちゃんと説明できませんので、それぞれのドキュメントの一行目の説明を書いておきます

- すごく乱暴にいいますと、Windows 10を動かしたままUbuntuを動かせます
- というか、私にはこうとしか説明できません

Windows 10スペック
- Microsoft Windows 10 Home
- 10.0.18362 ビルド 18362
- Dell Inc.
- Inspiron 5767
- x64-ベース PC
- プロセッサ: Intel(R) Core(TM) i7-7500U CPU @ 2.70GHz、2901 Mhz、2 個のコア、4 個のロジカル プロセッサ
- インストール済の物理メモリ: 16.0 GB
他につかうモノ
- Raspberry Pi 2
- このページにあるものでしたら他のものでも大丈夫です
- 私はRaspberry Pi 2しかもっていません

- microSD
- microSDカードアダプタ(USBでWindowsに挿せるもの)
VirtualBoxのインストール
- VirtualBox 6.0
- をインストールします
- 2020/1/4現在、このあとインストールする「Vagrant 2.2.6」がVirtualBox 6.0まで対応しています
- インストーラをダウンロードして、.exeをダブルクリックしてNext、Nextです
Vagrantのインストール
- vagrant_2.2.6_x86_64.msi
- をダウンロードして、.msiをダブルクリックしてNext、Nextです
Ubuntuのセットアップ
Vagrantfile
Vagrantfile
# -*- mode: ruby -*-
# vi: set ft=ruby :

# All Vagrant configuration is done below. The "2" in Vagrant.configure
# configures the configuration version (we support older styles for
# backwards compatibility). Please don't change it unless you know what
# you're doing.
Vagrant.configure("2") do |config|
  config.vm.box = "ubuntu/xenial64"

  config.vm.provider "virtualbox" do |vb|
    vb.cpus = 2
    vb.memory = "4096"
  end

  config.vm.provision "shell", inline: <<-SHELL
    apt-get update
    apt install -y build-essential automake autoconf git squashfs-tools ssh-askpass libssl-dev libncurses5-dev fop xsltproc libxml2-utils openjdk-8-jdk unixodbc-dev libwxgtk3.0-dev unzip
    wget https://github.com/fhunleth/fwup/releases/download/v1.5.1/fwup_1.5.1_amd64.deb
    dpkg -i fwup_1.5.1_amd64.deb
  SHELL
end
- 適当なフォルダーに
Vagrantfileを置いてください -
vb.cpusやvb.memoryの値はお使いのマシンにあわせて調整してください - 公式ドキュメントに書いてあることをしています
- 違いは、
libssl-dev libncurses5-dev fop xsltproc libxml2-utils openjdk-8-jdk unixodbc-dev libwxgtk3.0-dev unzipを追加しています -
Vagrantfileがおいてあるフォルダーにコマンドプロンプトでcdしてたどりついたら
Windows
> vagrant up
- してください
- 私の場合、20分くらいでしたでしょうか
- 無事
vagrant upが終わったら
Windows
> vagrant ssh
- してください
- 以降Ubuntuでの操作になります
Ubuntu
$ git clone https://github.com/asdf-vm/asdf.git ~/.asdf --branch v0.7.6
$ echo -e '\n. $HOME/.asdf/asdf.sh' >> ~/.bashrc
$ echo -e '\n. $HOME/.asdf/completions/asdf.bash' >> ~/.bashrc
$ source ~/.bashrc
$ asdf plugin-add erlang
$ asdf plugin-add elixir
$ asdf install erlang 22.1.4
$ asdf install elixir 1.9.4-otp-22
$ asdf global erlang 22.1.4
$ asdf global elixir 1.9.4-otp-22
$ mix local.hex --force
$ mix local.rebar
$ mix archive.install hex nerves_bootstrap --force
$ ssh-keygen -t rsa -f ~/.ssh/id_rsa
-
asdf install erlang 22.1.4が一番時間がかかりますドキュメントまわりで警告でましたが私は無視しました- 公開当初は上記のような適当なこと書いていましたが、先人の方々の記事を参考にして警告がなくなるようにしました
- 私の場合、16分くらいでしたでしょうか
- もし進んでいるのかどうか不安になりましたら、もう一個コマンドプロンプトを立ち上げて、
vagrant sshして
Ubuntu
$ tail -f /home/vagrant/.asdf/plugins/erlang/kerl-home/builds/asdf_22.1.4/otp_build_22.1.4.log
- とでもすればちゃんとがんばっている様子がみれます
- 話が前後しますが、ErlangとElixir、Nervesをインストールしている感じです
- 公式ページの通り、だいたいそのままです
-
ssh-keygenしている理由は、お手持ちのハードウェア(Raspberry Pi等)のうえで動いているNervesにsshで接続できるようになるのですがその際に必要になります(この記事では扱いません) - 私はメモリを4GB確保できるマシンで環境構築しましたが、そうではない場合はErlangのインストールらへんが失敗するとおもわれます
- ここまでうまくいきましたらゴールは目の前です
サンプルプロジェクト
- 引き続きUbuntuでの作業です
Ubuntu
$ git clone https://github.com/nerves-project/nerves_examples.git
$ cd nerves_examples/hello_leds/
$ export MIX_TARGET=rpi2
$ mix deps.get
$ mix firmware
$ exit
- MIX_TARGETはTargetsをみながらお手元のハードウェアを指定してください
-
mix deps.getとmix firmwareは少し時間かかります - 一旦、UbuntuからぬけてmicroSDを認識させます
Windows
> vagrant halt
- Ubuntuを止めます
- firmwareを焼くmicroSDカードをUSBアダプタ経由でWindowsに挿します
- 私はこういうやつを使いました


- ↑こういうやつをダブルクリックして
- [設定] |> [USB]とすすんで

- こんな感じに設定します
- ふたたびUbuntuを起動しましょう
Windows
> vagrant up
> vagrant ssh
Ubuntu
$ lsusb
Bus 001 Device 002: ID 1307:0310 Transcend Information, Inc. SD/MicroSD CardReader [hama]
Bus 001 Device 001: ID 1d6b:0001 Linux Foundation 1.1 root hub
- こんな感じでmicroSDっぽいやつを認識していれば大丈夫です
$ cd nerves_examples/hello_leds/
$ export MIX_TARGET=rpi2
$ mix firmware.burn
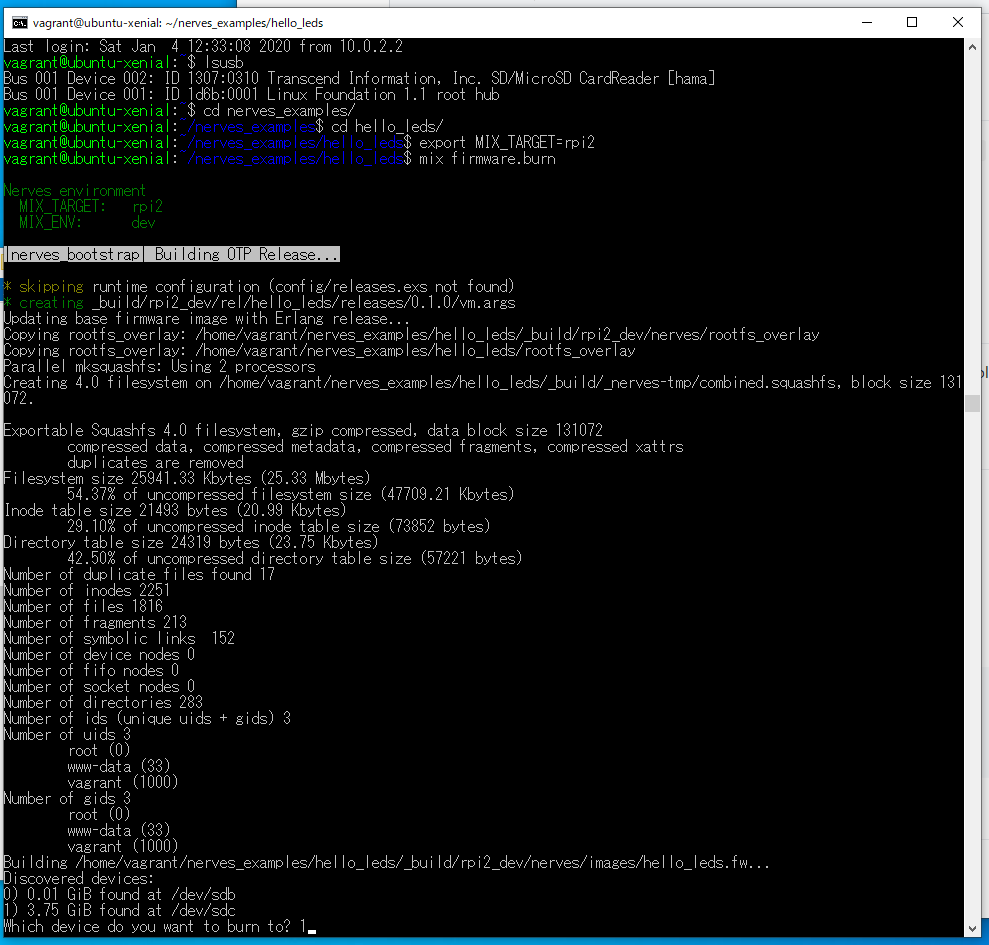
- 私は、microSDカードのサイズで
1を選びました - 一番緊張する瞬間であります
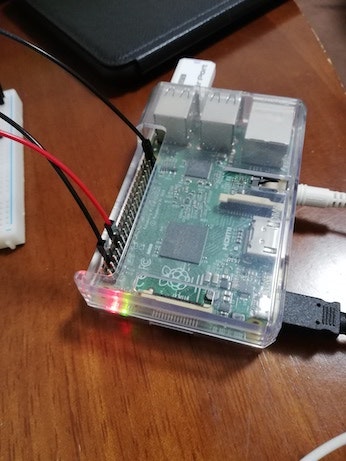
- こんがり焼きあがりましたら、ハードウェアにmicroSDカードをさしこんで電源ONです!

Tips
パソコンの電源を切るとき
# Ubuntu
$ exit
logout
Connection to 127.0.0.1 closed.

# Windows
> vagrant halt
また開発するぞ!
# Windows
> vagrant up
> vagrant ssh

# Ubuntu
$ mix nerves.new hello_nerves
-
Nervesの環境構築を題材にしたVirtualBoxとVagrantの使い方な記事になりました
