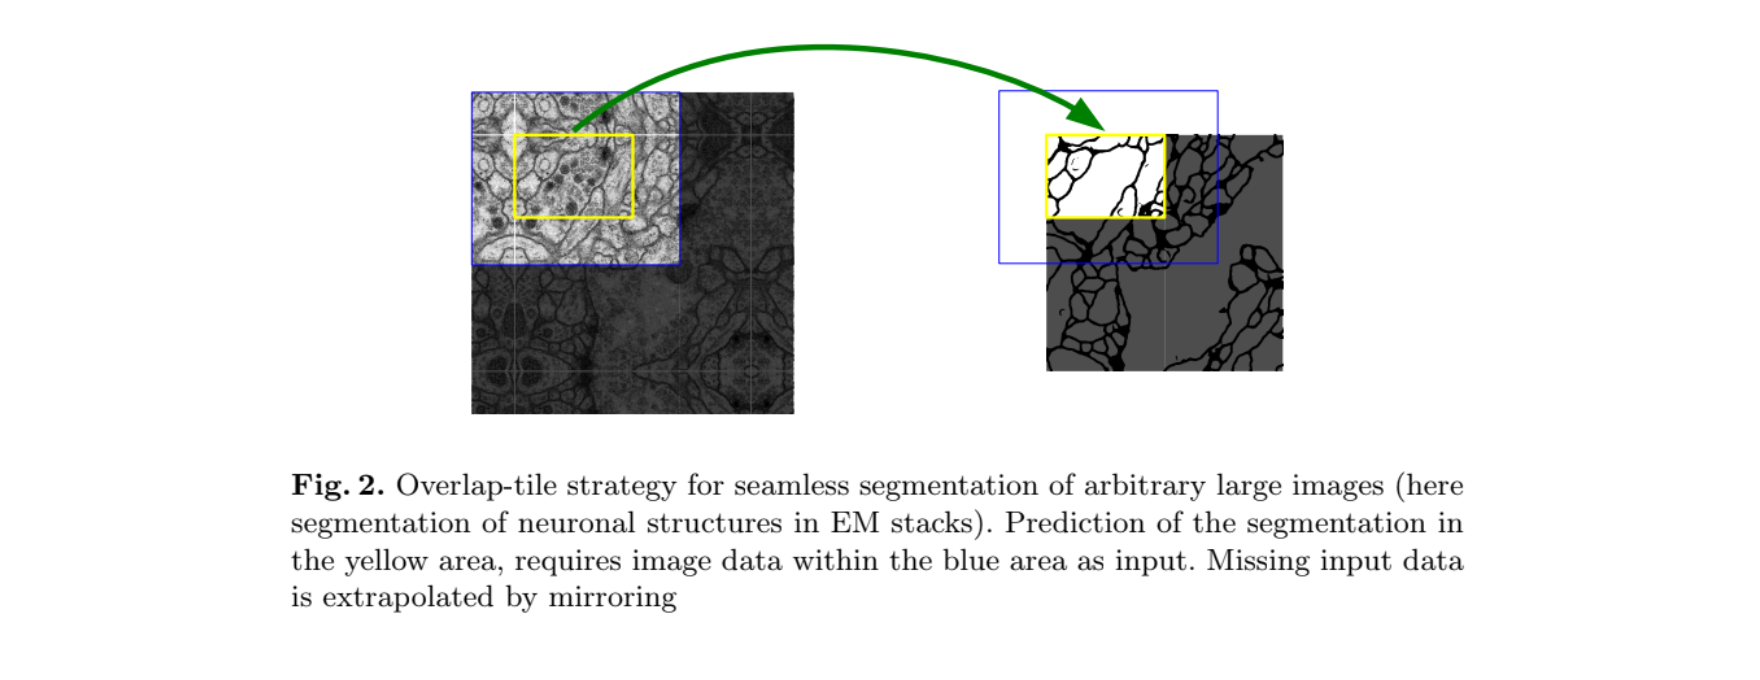
U-Netの論文を読んでいたところ、over-tile starategyという手法とaugumentation(データ拡張)としてelastic distortionが紹介されていて、
調べても具体的な実装がまとまっていなかったので、自分で解説、実装をすることにしました。
もし間違っていたらご教授ください。
#U-Netとは
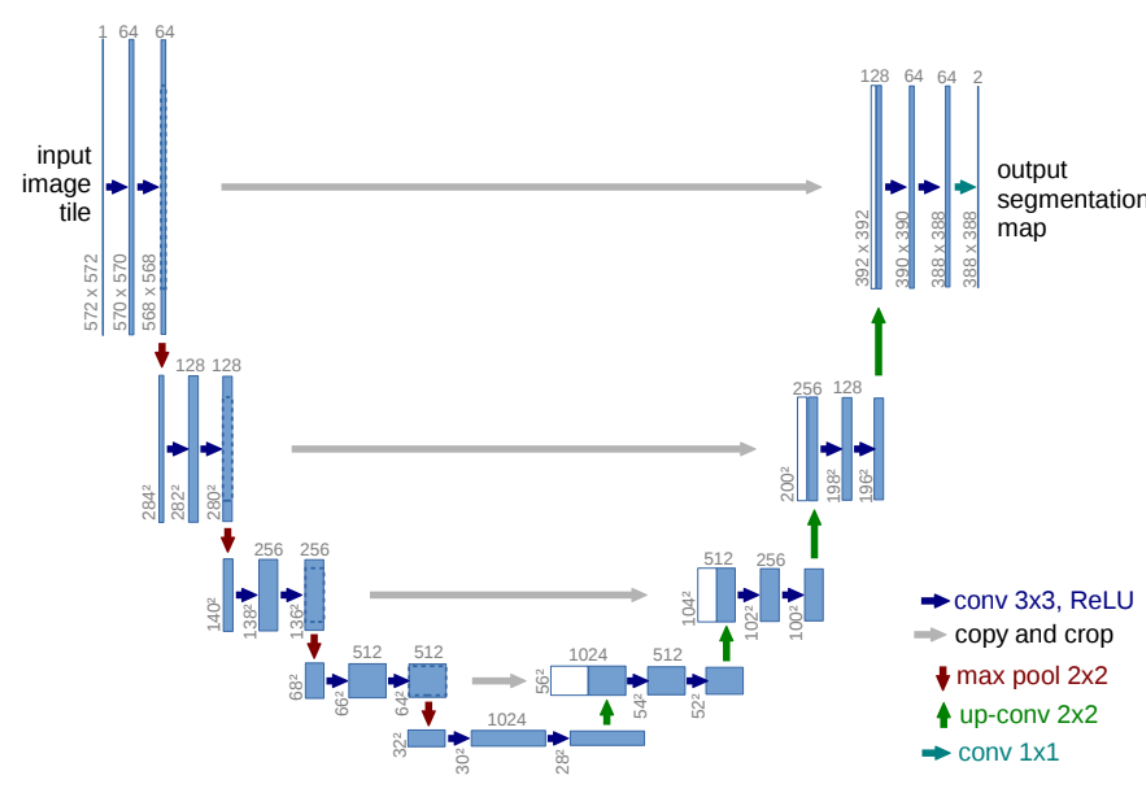
物体領域を検出するセマンティックセグメンテーションの一つです。
上の図のようにネットワークがU型になっていることからU-Netと呼ばれます。
手法的には少し古い気もしますが、その見栄えの良さと実装の簡単さで、領域検出ではよく使われるモデルです。
この論文では畳み込み層のpaddingが0なので、画像の縦横のサイズが徐々に小さくなっていってます。
先程の構造の図を見るとinput sizeは572572ですが、outputのクラスごとの確率mapは388388になってしまっています。
これでは訓練データと教師データであるセグメンテーションデータのサイズが同じだと(普通はそうですが...)そのまま訓練させることができません。
それに対応するために、教師データはそのままにして訓練データを拡張します。
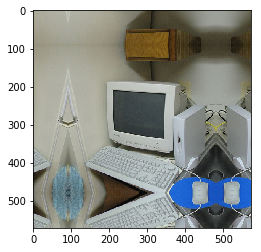
どのように拡張するかというと境界付近の画像をミラーリングします。
言葉ではわかりにくいと思うので下図を見てください。
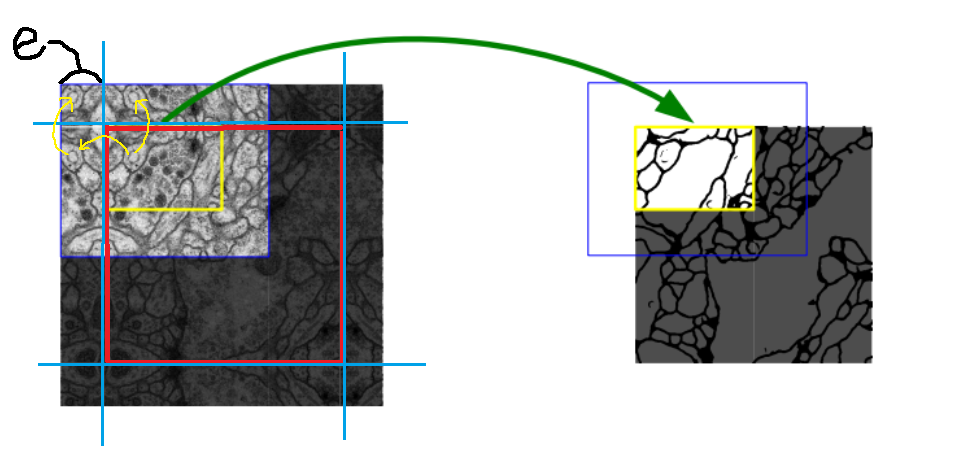
赤線で囲まれた部分が訓練するための元画像です。今回でいうと大きさは388*388です。
それを青線を境界線として反転させる長さeを決めて反転させます。今回ならばeは(572-388)/2 = 92となります。
(元論文ではpadding=0の畳み込み層を使っているのでこのように訓練データを拡張しなければならなければなりませんが、padding=1を使えば画像サイズが小さくなることもなく、実際そういう実装もたくさんあります。さらに、もしも医療画像等においてその訓練画像において割合的に1個程度しかない物体も境界にあったら2個、角にあったら3個と通常ではありえないような画像になるときもあると思います。
しかしこの論文においてもpadding=1のときも実験しているでしょうし、それと比べてoverlap-tile strategyのほうが結果出たということでしょう。)
###実装
import numpy as np

def overlap_tile_strategy(img, e):
    img_array = np.array(img)
    row2 = np.concatenate([np.flip(img_array[:e,:,:], axis=0), img_array, np.flip(img_array[(img_array.shape[0]-e):,:,:], axis=0)], axis=0)
    all_img = np.concatenate([np.flip(row2[:,:e,:], axis=1), row2, np.flip(row2[:,row2.shape[1]-e:,:], axis=1)], axis=1)
    return all_img
###結果
| 元画像 | overlap-tile strategy |
|---|---|
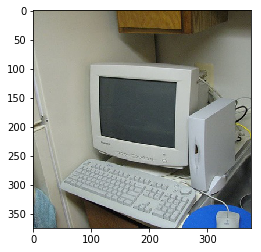 |
 |
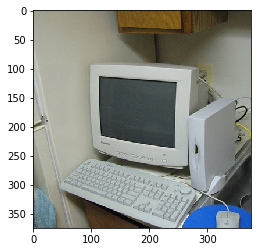
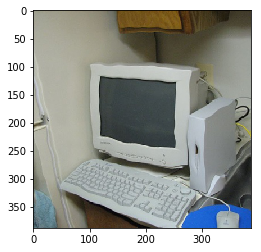
上の図は論文内のものではないですがイメージはこんな感じで、ゴムみたいにグニャグニャさせます。
細胞画像のようなゆがんだ物体が普通にあるようなデータセットに効果がありそうです。U-Netはもともと医療画像コンペで開発されているのでこのようなaugumentationを使っているのでしょう。
論文には3*3で標準偏差10のガウシアンカーネルを使うと書いてあり、deepyの実装ではそのように細かく設定できるようですが、今回は簡易的に実装していきます。
###実装
def Elastic_transform(image):
    image = np.array(image)
    alpha = random.randint(80,100)
    sigma = random.choice([8,9,10])
    shape_size = shape[:2]
    dx = gaussian_filter((np.random.random(shape) * 2 - 1), sigma) * alpha
    dy = gaussian_filter((np.random.random(shape) * 2 - 1), sigma) * alpha
    dz = np.zeros_like(dx)
    x, y, z = np.meshgrid(np.arange(shape[1]), np.arange(shape[0]), np.arange(shape[2]))
    indices = np.reshape(y+dy, (-1, 1)), np.reshape(x+dx, (-1, 1)), np.reshape(z, (-1, 1))
    return map_coordinates(image, indices, order=1, mode='reflect').reshape(shape)
###結果
| 元画像 | elastic distortion |
|---|---|
 |
 |
#最後に
U-netは人気ですが、この2つの手法が使われているのはあまり見たことがないので、やはり有名な論文でも手法の取捨選択が行われているのだなと感じました。
自分が使いたいデータセットに合うような手法を使うことが大切ですね。
#参考
https://github.com/hansbu/CSE527_FinalProject
https://www.kaggle.com/c/ultrasound-nerve-segmentation/discussion/22062
https://gist.github.com/chsasank/4d8f68caf01f041a6453e67fb30f8f5a
https://docs.scipy.org/doc/scipy/reference/generated/scipy.ndimage.gaussian_filter.html
