これは M5Stack Advent Calendar 2020 18日目 の記事です
はじめに
SONYの低電力・高性能なマイコンボードであるSPRESENSE( https://developer.sony.com/ja/develop/spresense/ )をM5Stackに内蔵し、M5StackのLCDディスプレイとWiFi機能・SPRESENSEのGNSS機能を共有してみました。
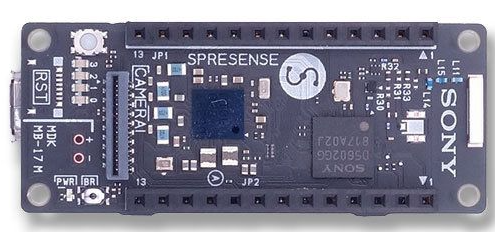
写真は Sony Developer World より引用
基板自体はスイッチサイエンスで委託販売をしていますので、ここでは具体的な使い方について説明していきます。
M-Bus Adapter for SPRESENSE
サポートページ
https://thousandiy.wordpress.com/2020/05/30/spresense-to-m5stack-adapter/
ハードウエア
M5Stackのモジュールサイズ(5cmx5cm)の基板にSPRESENSEのメインボードを搭載して、M-BUS経由でM5Stack とつなぐ拡張基板です。
IO電圧1.8V<->3.3Vの双方向レベルシフト回路と、SPRESENSEのI2Cとアナログ入力をGrove互換ポートを搭載しています。
3Dプリンタで専用ケースを作成し、M5Stackのモジュールとして「スタック」できるようにしました。
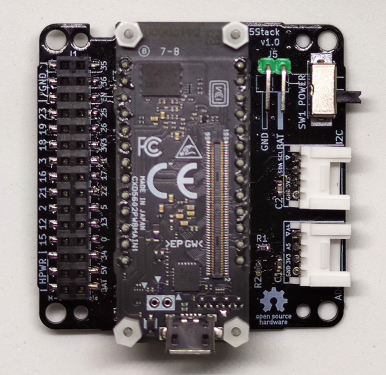
作成したプリント基板
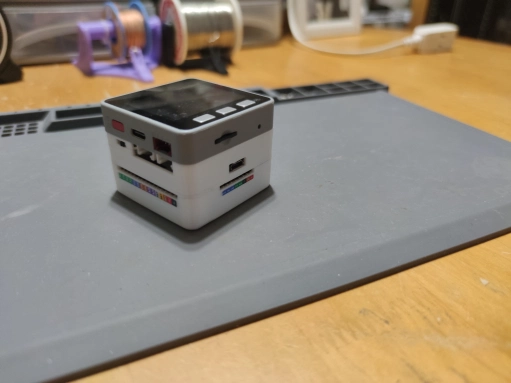
ケースに入れてスタックした状態
主な機能
- M5StackとSPRESENSEはSerial2で接続し、コマンドのやり取りで双方を制御可能
- 割り込み用にGPIOポートを接続、例えば「Deepsleepに入れたM5StackをSPRESENSEから起こす」という事が可能
- 拡張モジュールボード上にSPRESENSEのI2CとADコンバータのGrove互換コネクタを装備
- 標準ボトムとLoPoバッテリーを共用でき、物理スイッチでバッテリを切り離し可能
- 接続はSPRESENSEメインボード上面の低背ピンヘッダを使用。Hirose 100Pinコネクタを使用する拡張ボードと共存可能
- M5Stackの「USBコネクタを抜いた時のリセット回避回路」搭載
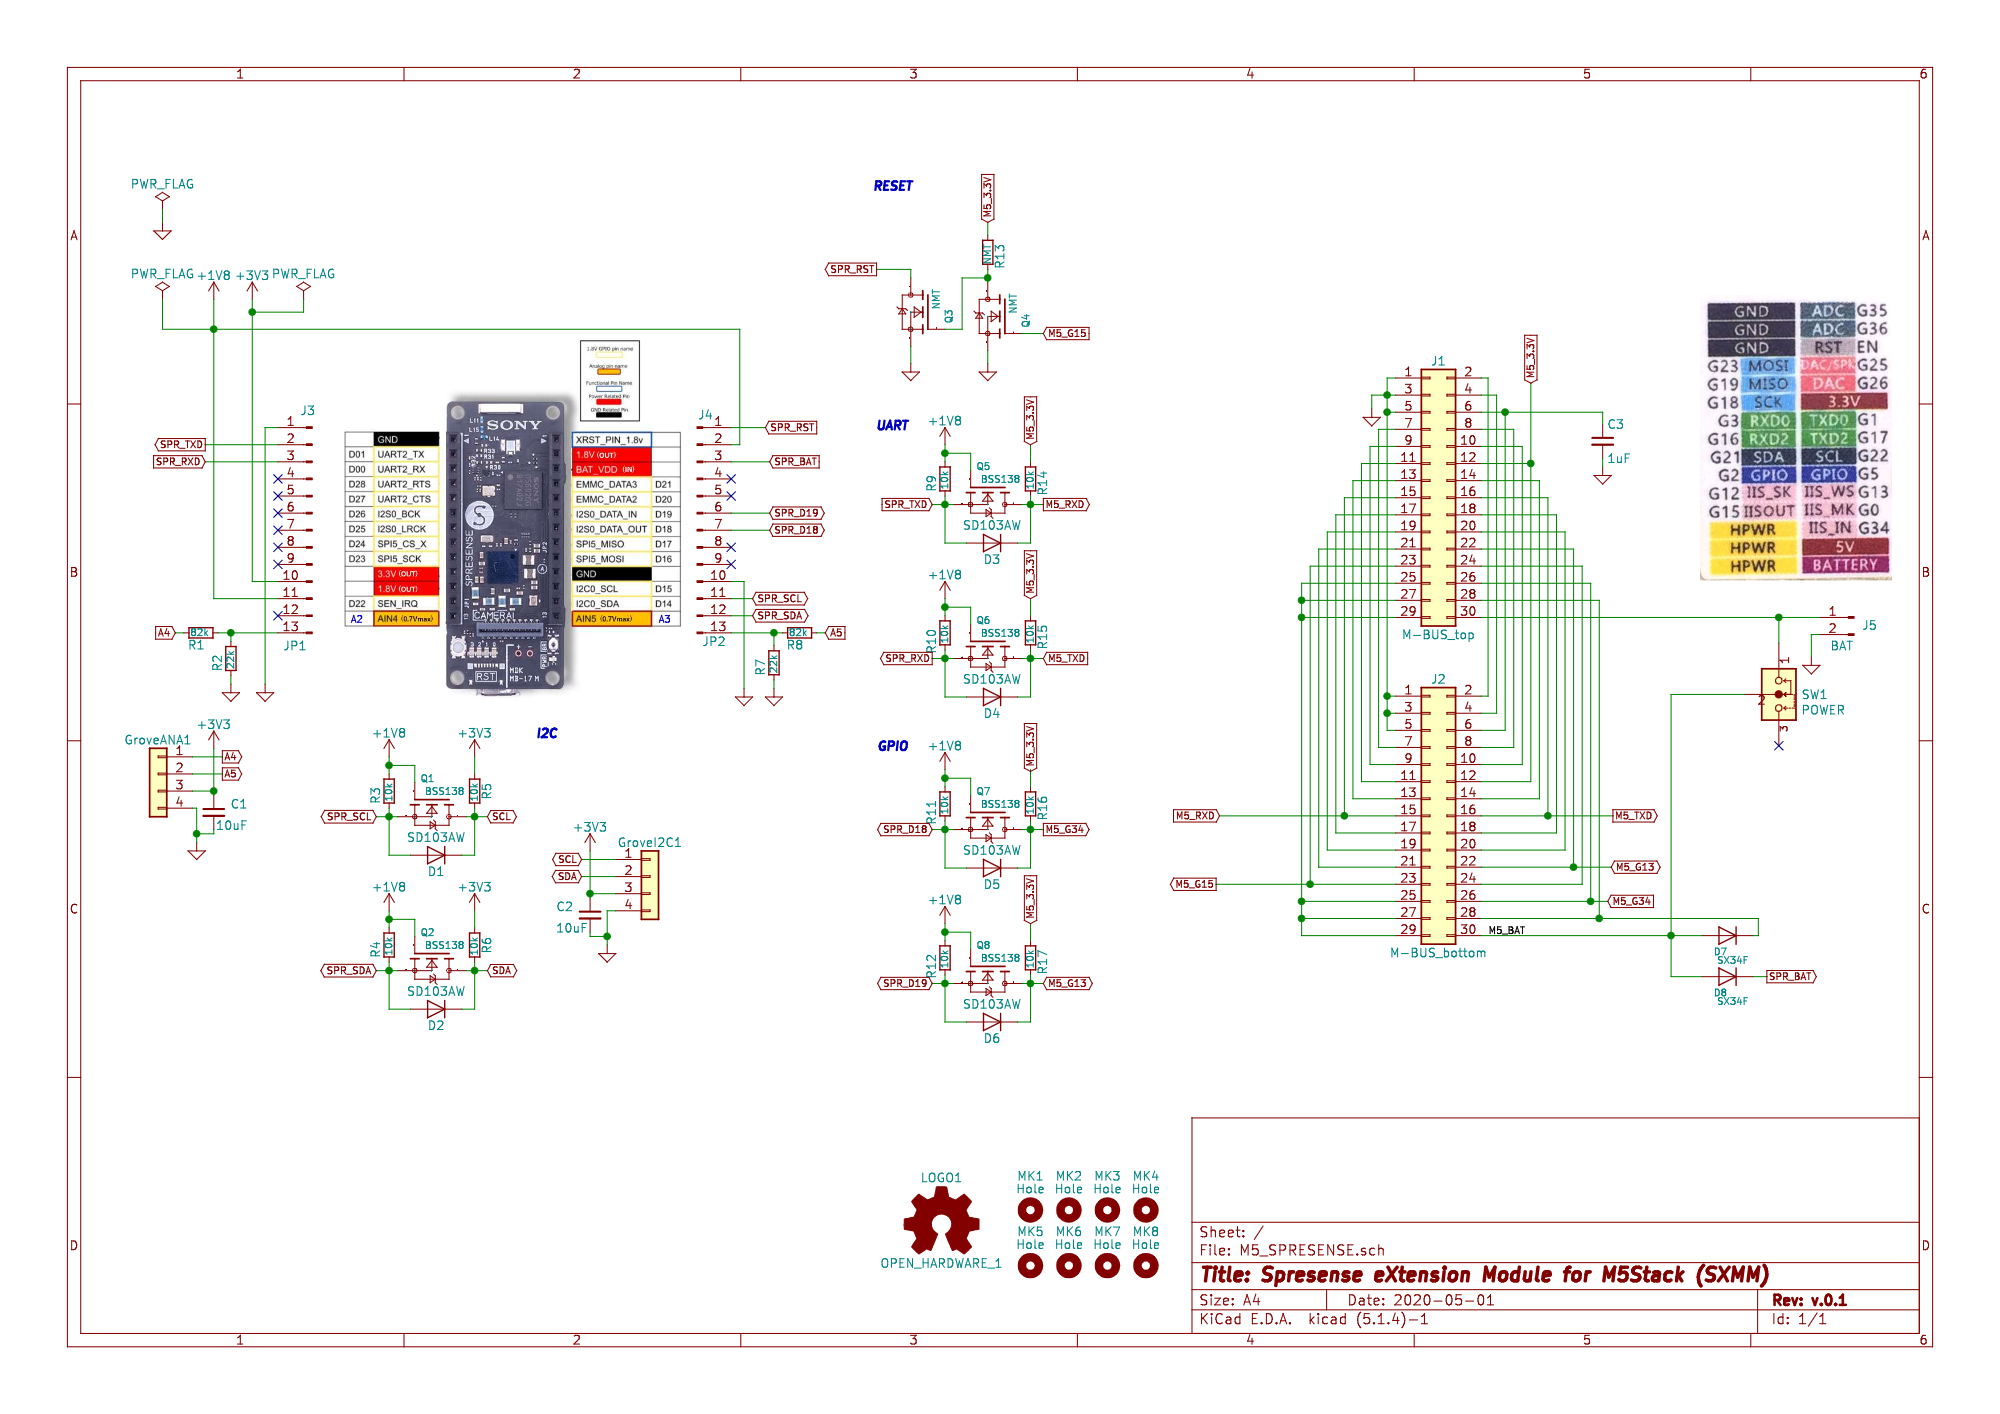
回路図および基板の設計データはオープンソースとして公開しています。
回路図
設計データ
ソフトウエア
SPRESENSEとM5Core2の間で、双方の機能を使用するための「コマンド」を規定してシリアルポート(Serial2)で経由で通信します。
今回は、LCDを利用するための専用ライブラリを作成しました。
専用ライブラリ
専用ライブラリはSerialTFTという名称でgithubで公開しています。
https://github.com/tomorrow56/SerialTFT
M5Stack側のソフトウエア
以下のスケッチをM5Stackに書き込みます。
https://github.com/tomorrow56/SerialTFT/tree/master/SerialTFT/examples/M5Stack_sketch/M5_SerialLCD
M5Stackのスケッチの仕様
以下はfillScreenコマンドの例です。
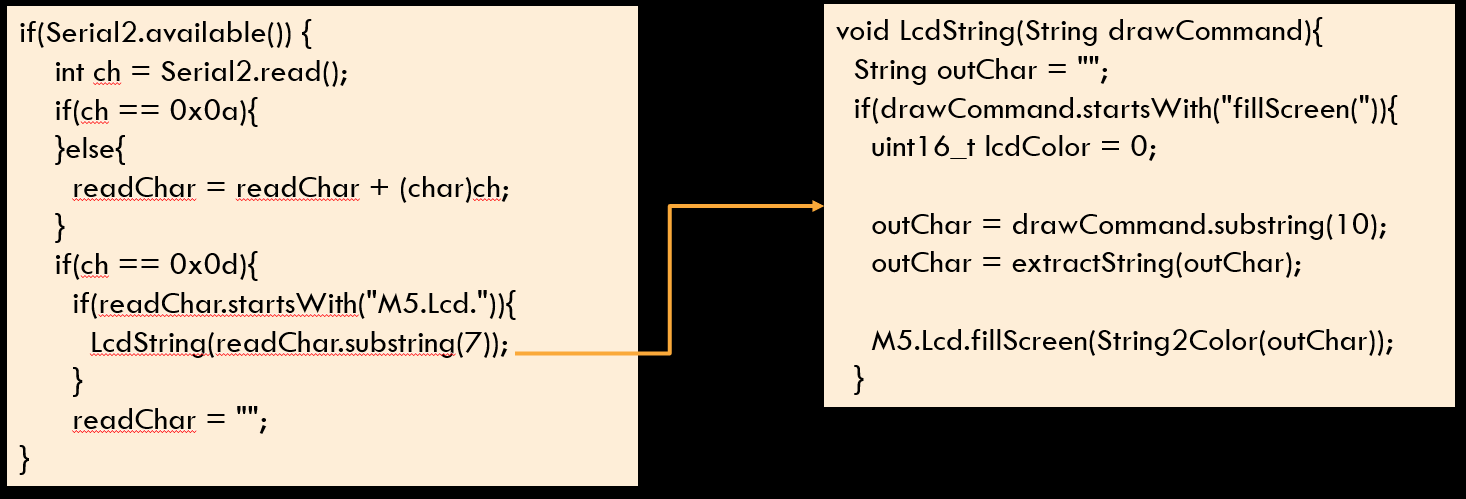
シリアルポートの入力を監視して、**"M5.lcd."**というコマンドが来たら、描画内容と引数と解析してM5Stackの描画コマンドに変換してLCDに描画しています。
SPRESENSE側のソフトウエア
SPRESENSEのソフトウエアとしては、ArduinoIDE環境におけるTFT LCDでは定番の描画ライブラリ**"TFT_eSPI"**とコマンド互換となる様なWrapper(SerialLCDライブラリ)を作成しました。
上記ライブラリをArduinoIDEのlibraryフォルダにコピーし、スケッチの最初のライブラリ定義を以下のように書き換えればTFT-eSPIと同じ様に使う事が出来ます。
# include "SerialTFT.h"
SerialTFT tft = SerialTFT();

void setup() {
  tft.begin(921600);
  tft.setRotation(1);
  tft.fillScreen(TFT_BLACK);
........
ライブラリの内部では描画コマンドをM5Stack側の仕様にあわせて変換し、Serial2に送信しています。
void SerialTFT::fillScreen(uint16_t color){
  Serial2.println("M5.Lcd.fillScreen(" + String(color, HEX) + ")");
  delay(comInterval);
}
2020年12月時点でサポートしている描画コマンドは以下になります。よく使うコマンドは一通りサポートしています。
サポートする描画コマンド一覧
描画系
- void drawPixel(int16_t x, int16_t y, uint16_t color);
- void drawLine(int16_t x0, int16_t y0, int16_t x1, int16_t y1, uint16_t color);
- void drawRect(int16_t x, int16_t y, int16_t w, int16_t h, uint16_t color);
- void drawCircle(int16_t x0, int16_t y0, int16_t r, uint16_t color);
- void drawCircleHelper(int16_t x0, int16_t y0, int16_t r, uint8_t cornername,uint16_t color);
- void drawTriangle(int16_t x0, int16_t y0, int16_t x1, int16_t y1, int16_t x2, int16_t y2, uint16_t color);
- void drawRoundRect(int16_t x0, int16_t y0, int16_t w, int16_t h, int16_t radius, uint16_t color);
- void drawChar(uint16_t x, uint16_t y, char c, uint16_t color, uint16_t bg, uint8_t size);
- void drawFastHLine(int32_t x, int32_t y, int32_t w, uint32_t color);
- void drawFastVLine(int32_t x, int32_t y, int32_t h, uint32_t color);
- void fillRect(int16_t x, int16_t y, int16_t w, int16_t h, uint16_t color);
- void fillScreen(uint16_t color);
- void fillCircle(int16_t x0, int16_t y0, int16_t r, uint16_t color);
- void fillCircleHelper(int16_t x0, int16_t y0, int16_t r, uint8_t cornername,int16_t delta, uint16_t color);
- void fillTriangle(int16_t x0, int16_t y0, int16_t x1, int16_t y1, int16_t x2, int16_t y2, uint16_t color);
- void fillRoundRect(int16_t x0, int16_t y0, int16_t w, int16_t h, int16_t radius, uint16_t color);
テキスト系
- void setCursor(uint16_t x0, uint16_t y0);
- void setTextColor(uint16_t color);
- void setTextColor(uint16_t color, uint16_t backgroundcolor);
- void setTextSize(uint8_t size);
- void setTextWrap(boolean w);
- void print(String text);
- void println(String text);
- void println();
- void drawCentreString(String text, int dX, int poY, int font);
- void drawRightString(String text, int dX, int poY, int font);
設定・その他
- void begin(int baud);
- void setBrightness(int8_t brightness);
- void setRotation(int angle);
- uint16_t color565(uint8_t r, uint8_t g, uint8_t b);
- uint8_t color16to8(uint16_t c);
- uint16_t color8to16(uint8_t color);
- void progressBar(int x, int y, int w, int h, uint8_t val);
- void qrcode(String text, uint16_t x, uint16_t y, uint8_t width, uint8_t version)
TFT-eSPIに付属のexampleでライブラリの入れ替えだけで動作確認ができているスケッチは以下にあります。
実際にGraphictestのサンプルもそこそこのスピードで動作します。
とりあえず、このくらいのスピードでは動くよ〜#SPRESENSE #M5Stack #Serial2接続 pic.twitter.com/QmZld77KgZ
— tomorrow56 (@tomorrow56) June 4, 2020

WiFiとGNSSを共有する
せっかくなので、M5StackのWiFi機能とSPRESENSEのGNSS機能を使って、GNSSで取得した位置情報からGoogleMapの地図を受信してM5StackのLCDに表示する機能を追加しました。
#ThousanDIY より
— tomorrow56 (@tomorrow56) August 16, 2020
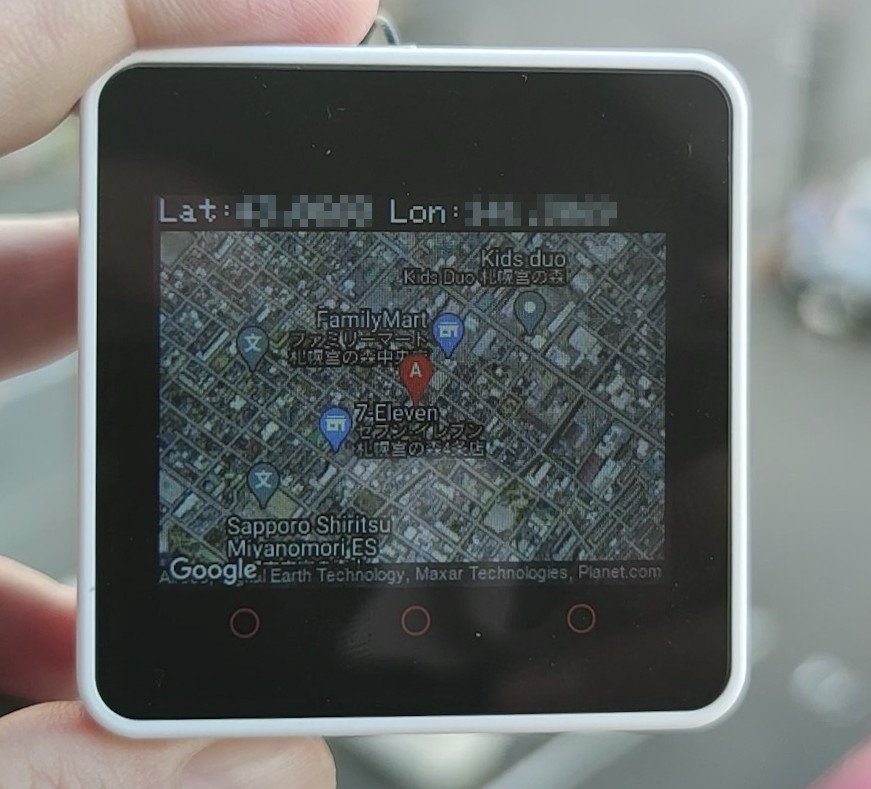
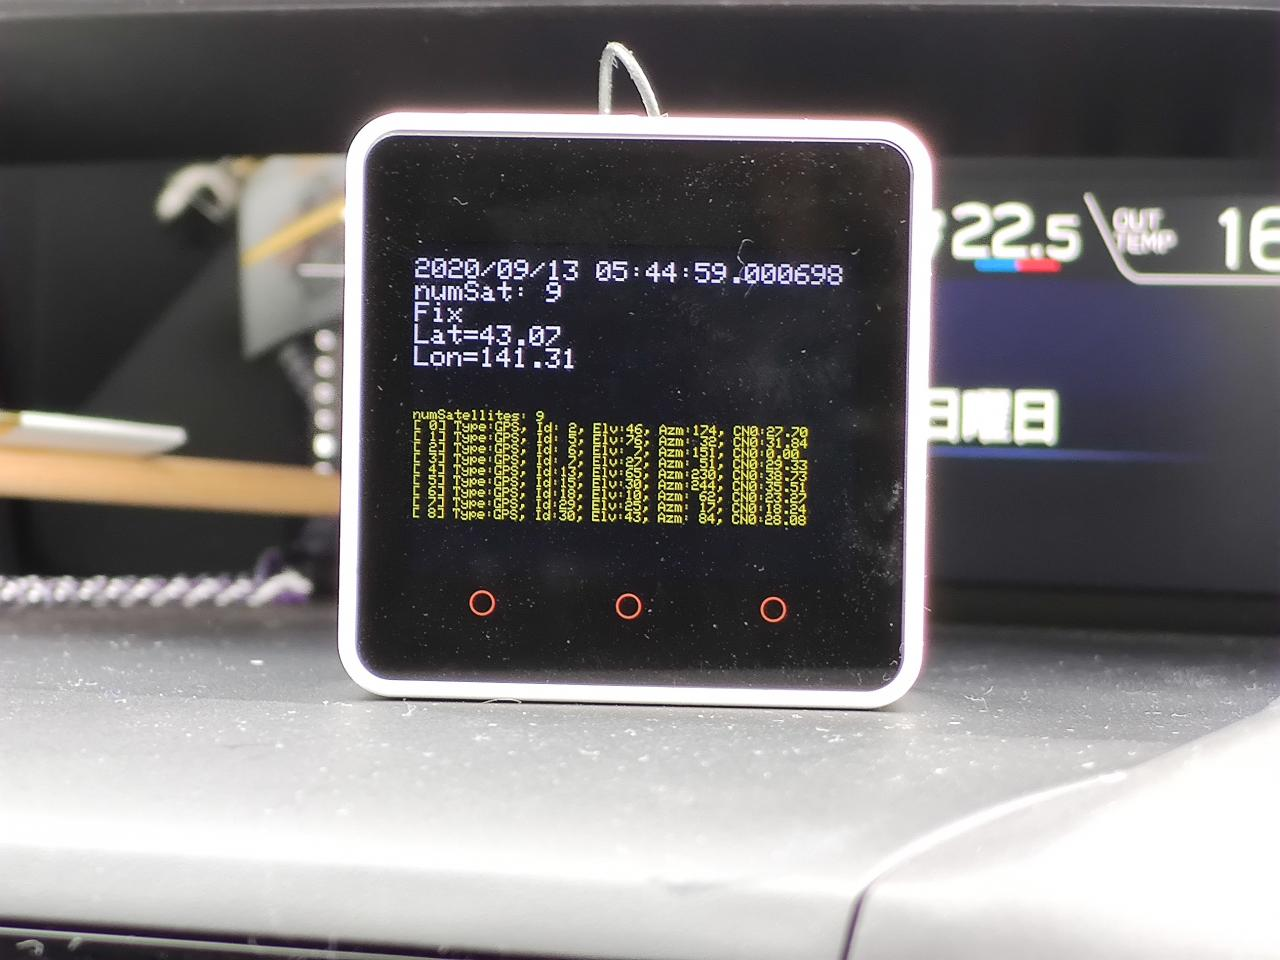
"M-Bus Adapter for SPRESENSE"のgithubに追加したgnssのサンプル、M5StackのLCD画面に取得した位置情報を表示した結果です。
屋外ならバッテリー駆動できちんと位置が取れてます。 pic.twitter.com/4iJuEbDCqM
最終的にはタッチパネルを内蔵したM5Core2を使用してライブラリを更新しました。
タッチパネル操作でWiFiに接続し、位置情報が取得出来たら自動でGoogle Mapにアクセスして受信した地図を表示しています。
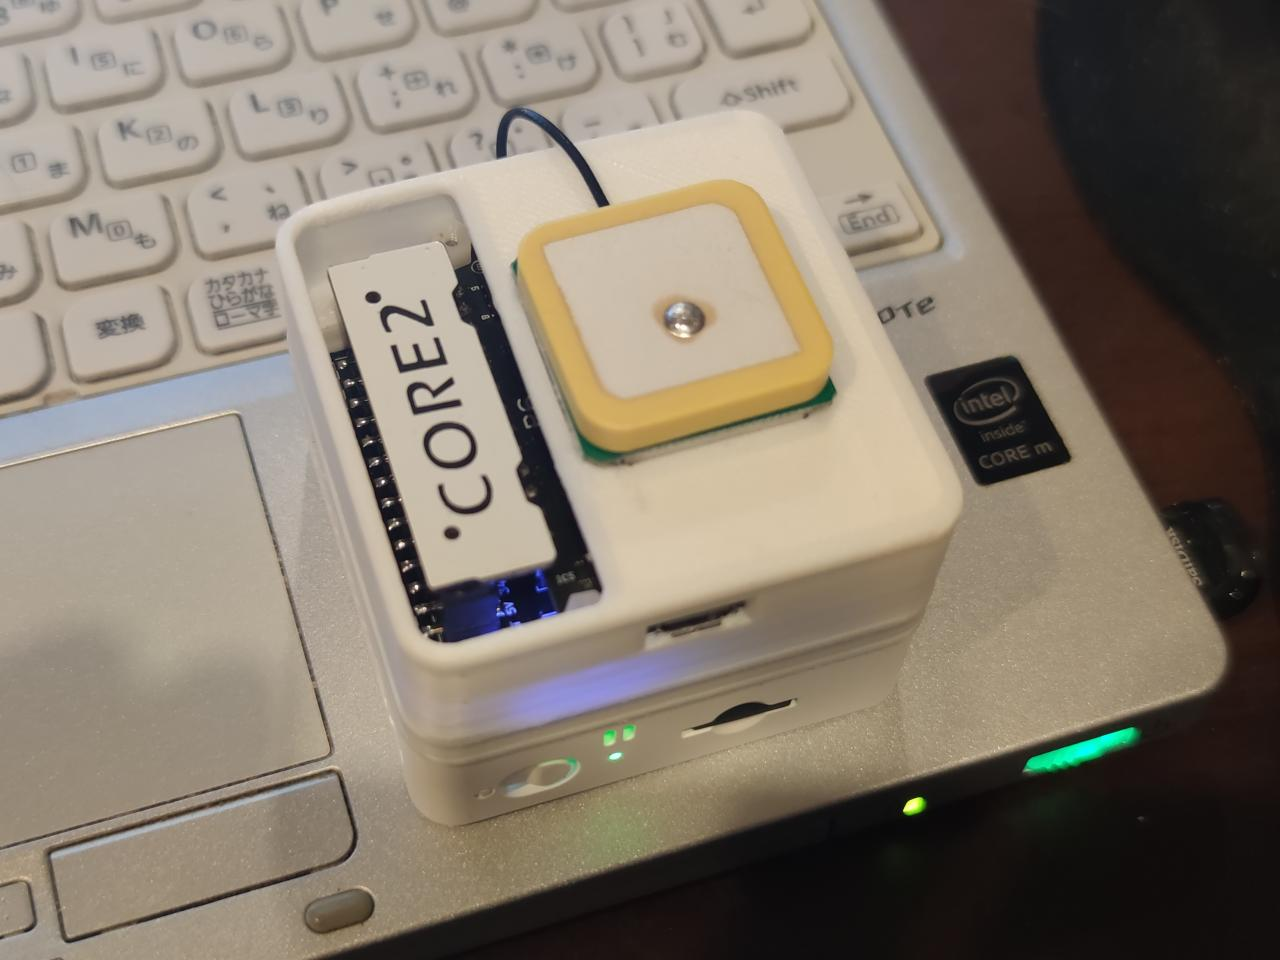
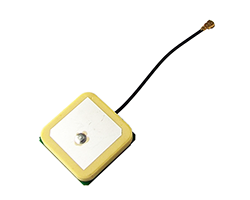
SPRESENSEのオンボードのGNSSアンテナは感度が良くないので、改造してアクティブアンテナを外付けしています。
改造の仕様はSpresenseハードウェアドキュメントの「1.20. GNSSの使用方法」に記述があります。
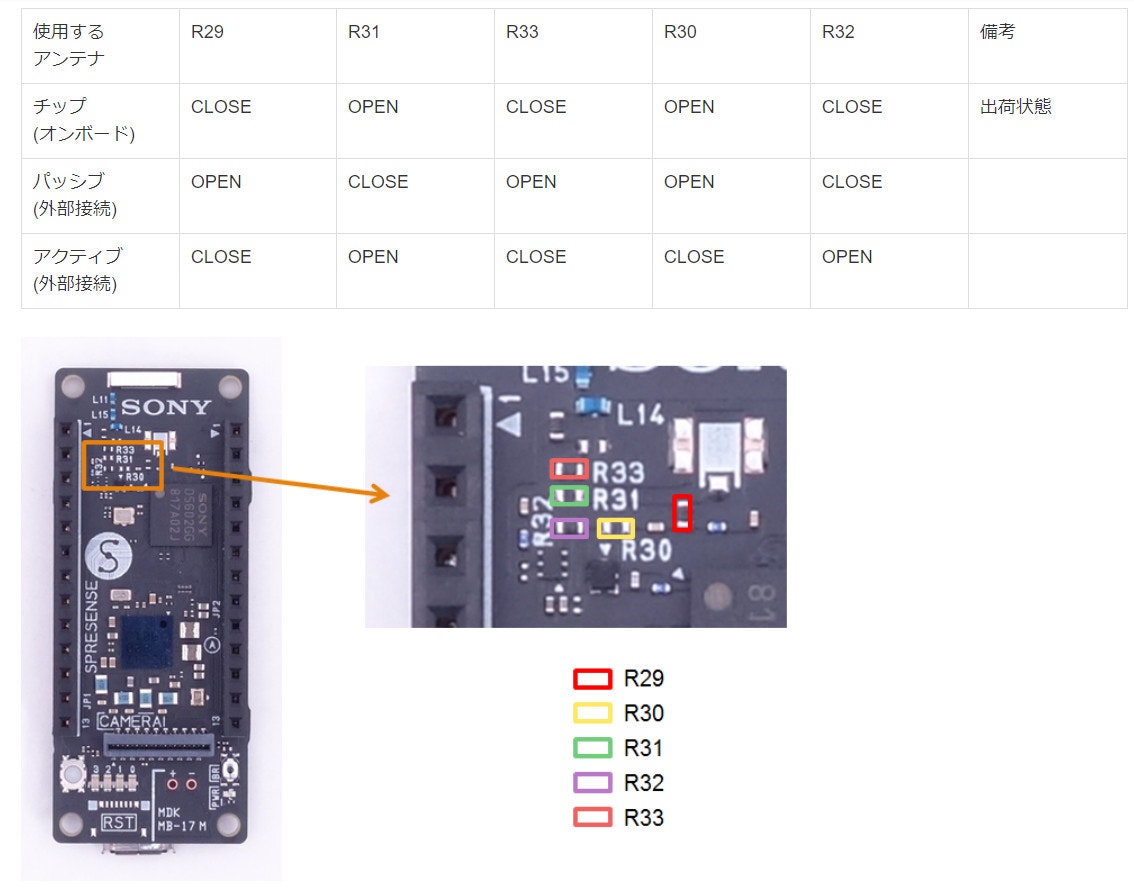
Spresenseハードウェアドキュメントより引用
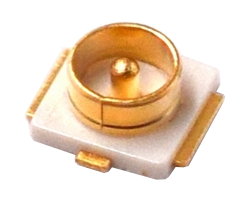
アンテナ接続用のCN3にはuFLコネクタをマウントします。uFLコネクタとアクティブアンテナはaitendoから購入しました。
U.FLコネクタ(5個入) U.FL-R-SMT: 100円(税別)
U.FL GPSアンテナ T25-30D50R-01: 750円(税別)
外部アンテナにすることで、走行中の車内でも現在位置を安定して取得することができる様になりました。
WiFi接続の機能をサポートしたM5Core2のスケッチは以下で公開しています。(SerialTFTライブラリに含まれています。)
https://github.com/tomorrow56/SerialTFT/tree/master/SerialTFT/examples/M5Stack_sketch/M5Core2_SerialLCD_with_WiFi
以下、スケッチの機能の概要です。
WiFi接続は"Aボタン"を押すことで行います。判別コードの抜粋は以下です。
 if(M5.BtnA.wasPressed()){
    Serial.println("M5.BtnA.wasPressed");
    Serial2.println("M5.BtnA.wasPressed");
    if(wifiStart == false){
      // Wifi and OTA setup
      uint64_t Chipid = GetChipid();
      sprintf(WiFiAPname, "%s%04X", WiFiAPPrefix, (uint16_t)Chipid);

      M5.Lcd.setTextSize(2);
      M5.Lcd.fillScreen(TFT_BLACK);
      M5.Lcd.setTextColor(CYAN);
      M5.Lcd.setCursor(0, 0);
      M5.Lcd.printf("AP: %s\n", WiFiAPname);
      M5.Lcd.println("IP: 192.168.4.1");

      WiFiMgrSetup(WiFiAPname);

      displayStatus("Wifi Connected!", GREEN);
      displayStatus("SSID:" + (String)WiFi.SSID(), GREEN);
      ipadr = WiFi.localIP();
      displayStatus("IP adrs: " + (String)ipadr[0] + "." + (String)ipadr[1] + "." + (String)ipadr[2] + "." + (String)ipadr[3], GREEN);

      #ifdef useOTA
        sprintf(OTAHostname, "%s%04X", OTAHostPrefix, (uint16_t)Chipid);
        OTASetup(OTAHostname);
        displayStatus("OTA: " + (String)OTAHostname, GREEN);
      #endif

      wifiStart = true;
      delay(1000);
    }else{
      displayStatus("WiFi & OTA is enabled", GREEN);
      displayStatus("SSID:" + (String)WiFi.SSID(), GREEN);
      displayStatus("IP adrs: " + (String)ipadr[0] + "." + (String)ipadr[1] + "." + (String)ipadr[2] + "." + (String)ipadr[3], GREEN);

      #ifdef useOTA
        displayStatus("OTA: " + (String)OTAHostname, GREEN);
      #endif
    }
  }
WiFi機能は現時点ではIFTTTとGoogle Mapをサポートしています。
IFTTT,GoogleMapのAPIKEY/EventKeyはSDから読み込む仕様ですので、スケッチの修正は不要です。
/********************************
* for Wifi Service config
*********************************/
File myFile;
String cfgFile = "/M5core2wifi.cfg";

// IFTTT key and event triggers are
const char* host_ifttt = "maker.ifttt.com";  // IFTTT Server URL
String makerKey = ""; // MakerKey of Webhooks
String Event[3];
String makerEvent;
String iftttData[3];

// Google static map
String mapkey = "";
String host_staticmap = "https://maps.googleapis.com/maps/api/staticmap?";
// #########################################################################
// load Service config from SD
// #########################################################################
void loadConfig(String cfgFile){

  String readLineDummy[100];
  String readLine = "";

  String eventDummy;
  String dataDummy;

  int i = 0;
  int lineCount;

  // open the file for reading:
  myFile = SD.open(cfgFile);

  if (myFile) {
    Serial.println(cfgFile + ":");

    // read from the file until there's nothing else in it:
    while (myFile.available()) {
      readLine.concat(char(myFile.read()));
      if(readLine.endsWith("\n")){
        readLineDummy[i] = readLine.substring(0, readLine.indexOf("\n", 0) - 1);
        readLine = "";
        i++;
      }
    }
    lineCount = i;
    // close the file:
    myFile.close();
  } else {
    // if the file didn't open, print an error:
    Serial.println("error opening " + cfgFile);
    M5.Lcd.setTextColor(TFT_RED, TFT_BLACK);
    M5.Lcd.setCursor(10, 25);
    M5.Lcd.print("error opening " + cfgFile);
  }

  for(i = 0; i < lineCount; i++){
    if(readLineDummy[i].length() > 0){
      eventDummy = readLineDummy[i].substring(0, readLineDummy[i].indexOf("=", 0) - 1);
      eventDummy.trim();
      dataDummy = readLineDummy[i].substring(readLineDummy[i].indexOf("=", 0) + 1, readLineDummy[i].length());
      dataDummy.replace("\"","");
      dataDummy.replace("'","");
      dataDummy.trim();

      if(eventDummy == "makerKey"){
        makerKey = dataDummy;
        Serial.println("makerKey = " + makerKey);
      }

      if(eventDummy == "Event0"){
        Event[0] = dataDummy;
        Serial.println("Event0 = " + Event[0]);
      }

      if(eventDummy == "Event1"){
        Event[1] = dataDummy;
        Serial.println("Event1 = " + Event[1]);
      }

      if(eventDummy == "Event2"){
        Event[2] = dataDummy;
        Serial.println("Event2 = " + Event[2]);
      }

      if(eventDummy == "mapkey"){
        mapkey = dataDummy;
        Serial.println("mapkey = " + mapkey);
      }

    }
  }
}
M5core2wifi.cfgはSDカードのルートに置きます。内容は以下のようになっています。
// maerKey of IFTTT
makerKey = xxxxxxxx

// EventName of IFTTT
Event0 = SendtoSheets
Event1 = SendtoLine
Event2 =

// API Key of Google Map
mapkey = xxxxxxxx
取得するGoogleMapの設定は変数となっていて、以下で選択できます。
// https://developers.google.com/maps/documentation/maps-static/start
// zoom level of Map
// 1: World
// 5: Landmass/continent
// 10: City
// 15: Streets
// 20: Buildings
int zoom = 12;

// Map type: roadmap, satellite, hybrid, terrain
String maptype = "hybrid";
SPRESENSE側のサンプルスケッチは以下にあります。
https://github.com/tomorrow56/SerialTFT/tree/master/SerialTFT/examples/SPRESENSE_M5LCD_gnss_map
GoogleMapを表示する場合は、SPRESENSEから以下のコマンドをM5Stackに送信します。
Serial2.print("M5.map(" + latitude + "," + longitude + "," + zoom + "," + maptype + ")");
IFTTTへデータを送信する場合は、SPRESENSEから以下のコマンドをM5Stackに送信します。
Serial2.print("M5.IFTTT(" + makerEvent + "," + iftttData[0] + "," + iftttData[1] + "," +iftttData[2] + ")");
Protopediaにも作品として登録していますのでよろしければ見てください。
最後に
SerialTFTライブラリ自体は普通のArduinoIDEでのSerial通信のWrapperなので、SPRESENSE以外のマイコンボードでもM5Stackを外部モニターとして使用可能ですので、いろいろと便利に使えると思います。