ESP32のWiFi設定をスケッチの書き換えをせずにブラウザ経由で設定する
以下のライブラリを使用する
WiFi Manager for ESP32
https://github.com/zhouhan0126/WIFIMANAGER-ESP32
このライブラリを使用するために以下のライブラリも導入する
WebServer
https://github.com/zhouhan0126/WebServer-esp32
DNSServer
https://github.com/zhouhan0126/DNSServer---esp32
2021/3/14更新
WebServer及びDNSServerライブラリはESP32ライブラリに取り込まれましたので最新版では個別のインストールは不要となりました。
今回もこのボードにOLEDを取り付けて動作確認をする。
Unopuino32s
https://www.switch-science.com/catalog/3456/
WifiBManagerのサンプルプログラムを参考に、OLEDにIPアドレス情報を表示する。
立ち上げた時にWiFi設定を表示するスケッチ
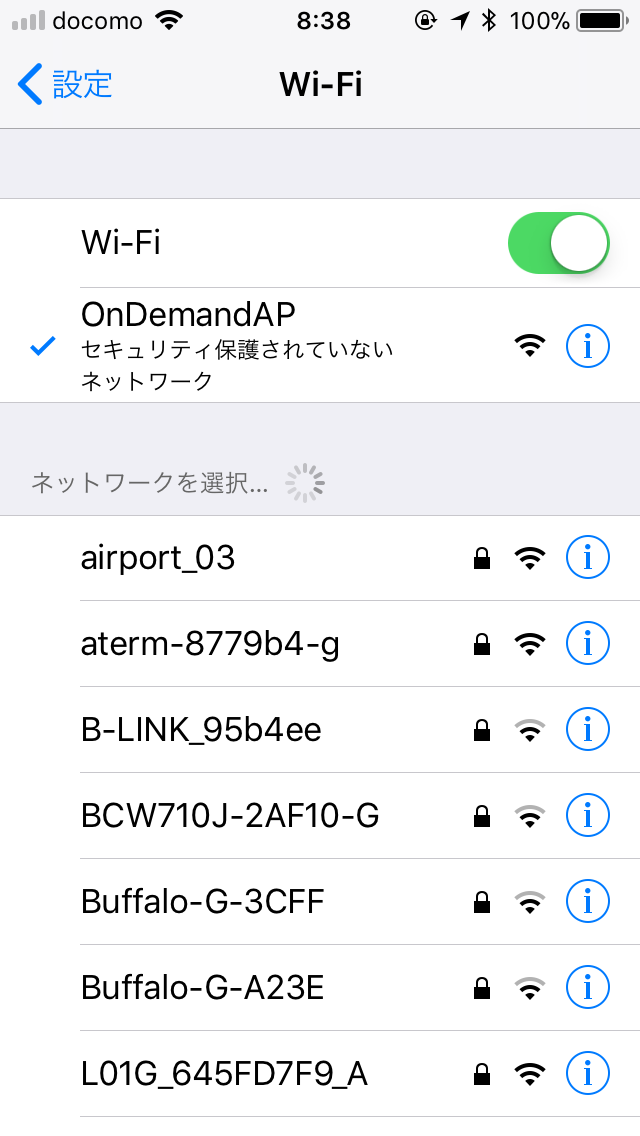
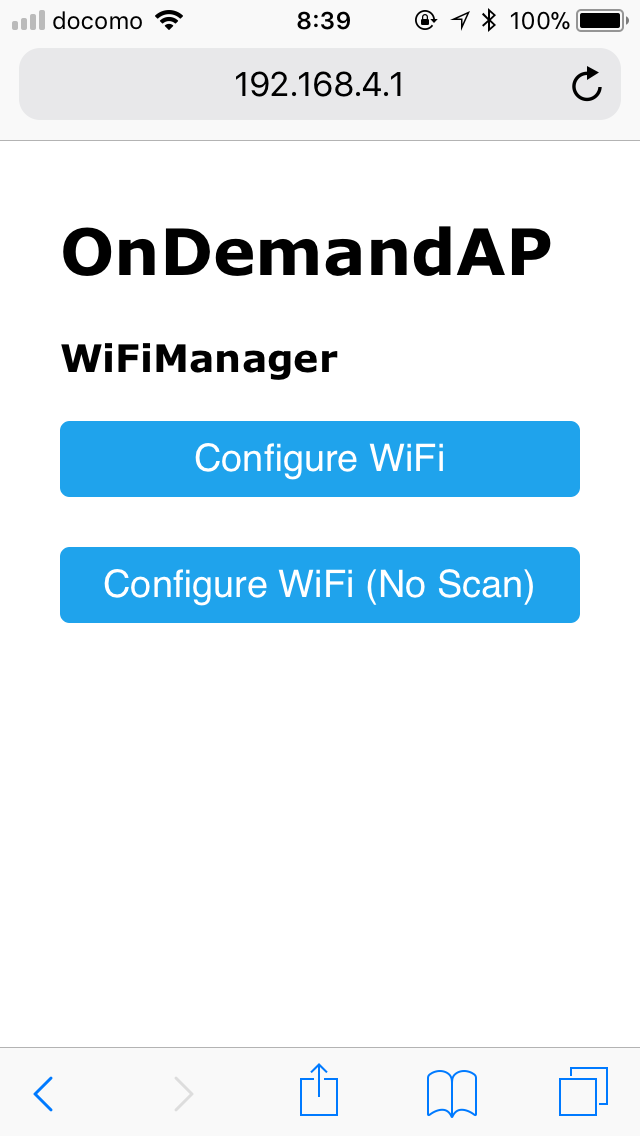
AP名: OnDemandAP にWiFiで接続し、ブラウザで"192.168.4.1"にアクセスするとWiFi設定が表示される。設定値はESP32のFlashに記憶される。
# include <WiFi.h>          //https://github.com/esp8266/Arduino
# include <WebServer.h>
# include <DNSServer.h>
# include <WiFiManager.h>          //https://github.com/tzapu/WiFiManager

// Include the correct display library
// For a connection via I2C using Wire include
# include "SSD1306.h" // alias for `#include "SSD1306Wire.h"`

// Include Unopuino32 pin definition
# include "Unopuino32.h"

// Initialize the OLED display using Wire library
SSD1306  display(0x3c, GPSDA, GPSCL);

void setup() {
    display.init();
    display.clear();

    display.flipScreenVertically();
    display.setFont(ArialMT_Plain_10);
    display.setTextAlignment(TEXT_ALIGN_LEFT);

    // put your setup code here, to run once:
    Serial.begin(115200);
    Serial.println("\n Starting");

    // is configuration portal requested?
    //WiFiManager
    //Local intialization. Once its business is done, there is no need to keep it around
    WiFiManager wifiManager;

    //reset settings - for testing
    //wifiManager.resetSettings();

    //sets timeout until configuration portal gets turned off
    //useful to make it all retry or go to sleep
    //in seconds
    //wifiManager.setTimeout(120);

    //it starts an access point with the specified name
    //here  "AutoConnectAP"
    //and goes into a blocking loop awaiting configuration

    //WITHOUT THIS THE AP DOES NOT SEEM TO WORK PROPERLY WITH SDK 1.5 , update to at least 1.5.1
    //WiFi.mode(WIFI_STA);

    display.drawString(0, 0, "AP mode: OnDemandAP");
    display.drawString(0, 10, "IP adrs: 192.168.4.1");
    display.display();

    if (!wifiManager.startConfigPortal("OnDemandAP")) {
      Serial.println("failed to connect and hit timeout");
      delay(3000);
      //reset and try again, or maybe put it to deep sleep
      ESP.restart();
      delay(5000);
    }

    //if you get here you have connected to the WiFi
    IPAddress ipadr = WiFi.localIP();

    Serial.println("connected(^^)");
    Serial.println("local ip");
    Serial.println(ipadr);
    Serial.println(WiFi.SSID());
    display.clear();
    display.drawString(0, 0, "connected (^^)");
    display.drawString(0, 10, "SSID: " + WiFi.SSID());
    display.drawString(0, 20, "IP adrs: " + (String)ipadr[0] + "." + (String)ipadr[1] + "." + (String)ipadr[2] + "." + (String)ipadr[3]);
    display.display();
}

void loop() {
  // put your main code here, to run repeatedly:
}
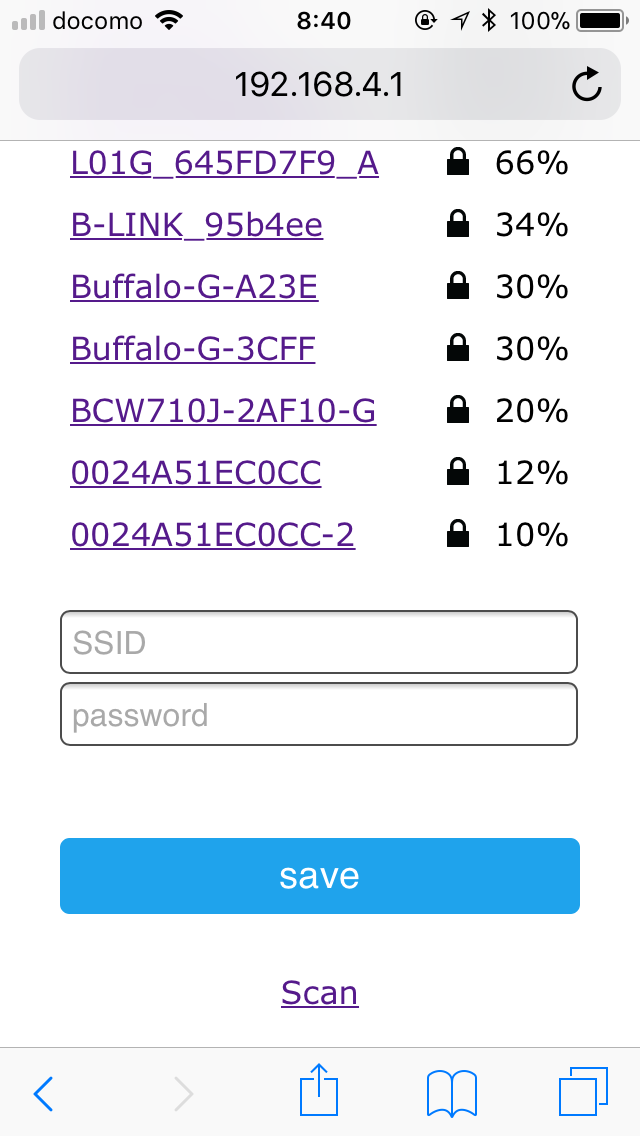
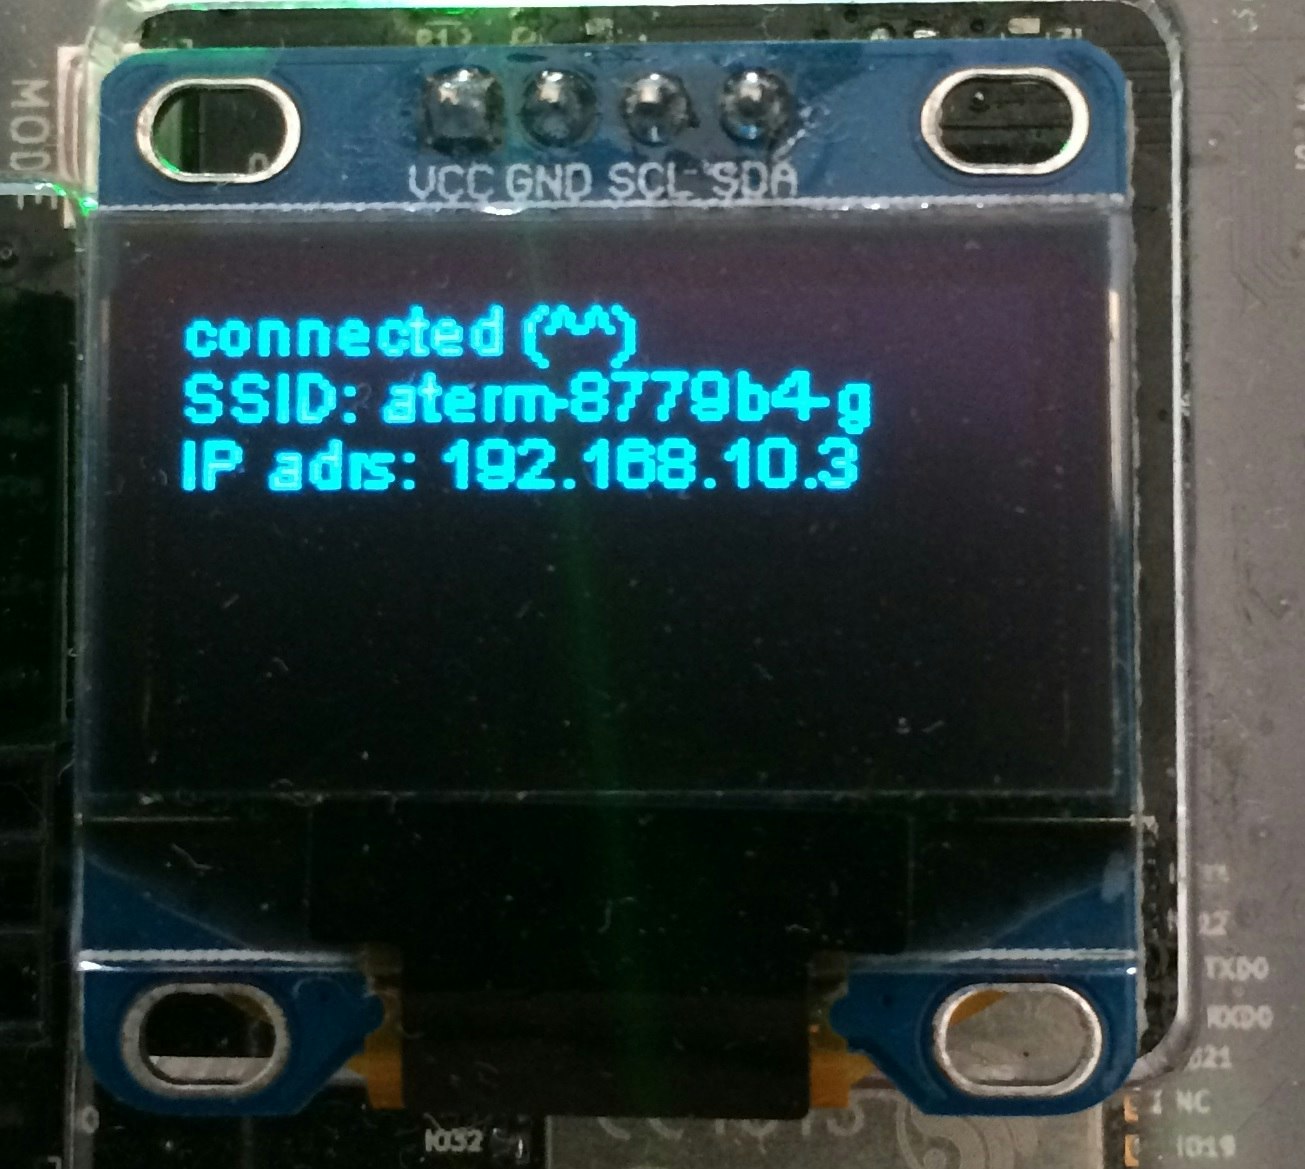
Wifi設定画面にアクセスするとAPの一覧が表示されるのでSSIDとパスワードを入力して接続する。接続が完了したらOLEDに接続先のAPと取得したIPアドレスを表示する。

WiFiに自動接続するスケッチ
既にEEPROMに設定情報が保存されたいたらそれを使いAPに自動で接続する。
接続できなかった場合はAP名: AutoConnectAP にWiFiで接続し、ブラウザで"192.168.4.1"にアクセスするとWiFi設定が表示される。
# include <WiFi.h>          //https://github.com/esp8266/Arduino
# include <DNSServer.h>
# include <WebServer.h>
# include <WiFiManager.h>         //https://github.com/tzapu/WiFiManager

// Include the correct display library
// For a connection via I2C using Wire include
# include "SSD1306.h" // alias for `#include "SSD1306Wire.h"`

// Include Unopuino32 pin definition
# include "Unopuino32.h"

// Initialize the OLED display using Wire library
SSD1306  display(0x3c, GPSDA, GPSCL);

void setup() {
    display.init();
    display.clear();

    display.flipScreenVertically();
    display.setFont(ArialMT_Plain_10);
    display.setTextAlignment(TEXT_ALIGN_LEFT);

    // put your setup code here, to run once:
    Serial.begin(115200);

    //WiFiManager
    //Local intialization. Once its business is done, there is no need to keep it around
    WiFiManager wifiManager;
    //reset saved settings
    //wifiManager.resetSettings();

    //set custom ip for portal
    //wifiManager.setAPStaticIPConfig(IPAddress(10,0,1,1), IPAddress(10,0,1,1), IPAddress(255,255,255,0));

    display.drawString(0, 0, "AP mode: AutoConnectAP");
    display.drawString(0, 10, "IP adrs: 192.168.4.1");
    display.display();

    //fetches ssid and pass from eeprom and tries to connect
    //if it does not connect it starts an access point with the specified name
    //here  "AutoConnectAP"
    //and goes into a blocking loop awaiting configuration
    wifiManager.autoConnect("AutoConnectAP");
    //or use this for auto generated name ESP + ChipID
    //wifiManager.autoConnect();

    //if you get here you have connected to the WiFi
    IPAddress ipadr = WiFi.localIP();
    Serial.println("connected(^^)");
    Serial.println(WiFi.SSID());

    display.clear();
    display.drawString(0, 0, "AutoConnectAP");
    display.drawString(0, 10, "SSID: " + WiFi.SSID());
    display.drawString(0, 20, "IP adrs: " + (String)ipadr[0] + "." + (String)ipadr[1] + "." + (String)ipadr[2] + "." + (String)ipadr[3]);
    display.display();
}

void loop() {
    // put your main code here, to run repeatedly:

}
任意のアクセスポイントを切替する場合は、これらをスイッチ等で切り替える様に実装すればよい。
EEPROMに記憶されたAP情報のクリア
記憶されたAP情報はESP32では以下のメンバ関数ではクリアできない。
wifiManager.resetSettings();
EEPROM情報をクリアする場合はESP-IDFのプロジェクトライブラリで以下のコマンドを実行する。
$ make erase_flash