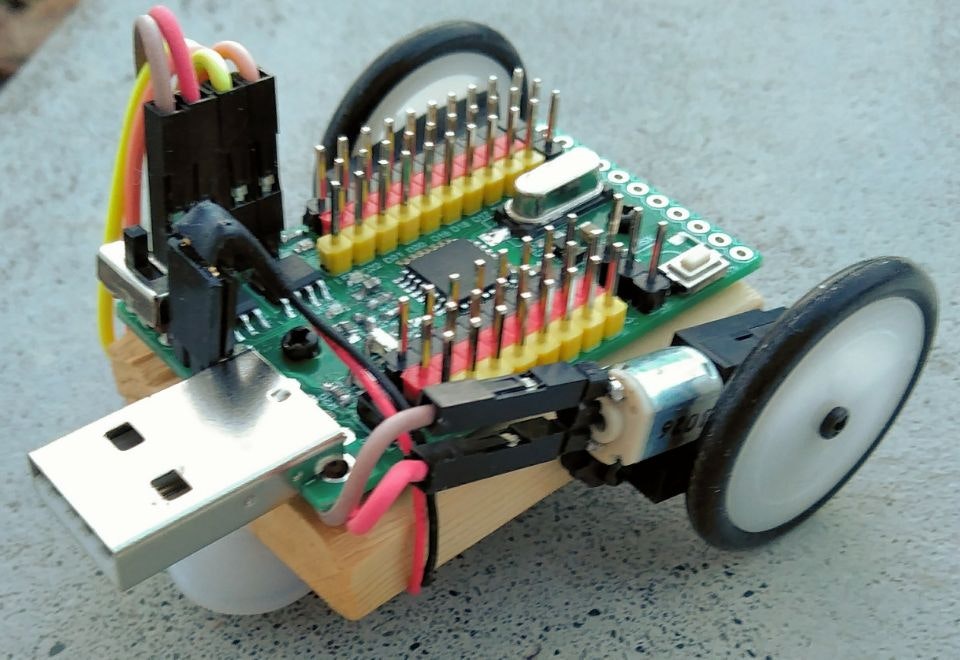
前記事「デバドラ不要usbhidでアップロードできる教育系arduino」で、とりあえず動作したドライバーレスArduino互換ボードの製品化に向けたブラッシュアップについて記述します。
まなぼ~ど改め「あそぼ~ど」
ボードの名前は、学ぶというより、遊ぶほうがしっくりくるかな~と
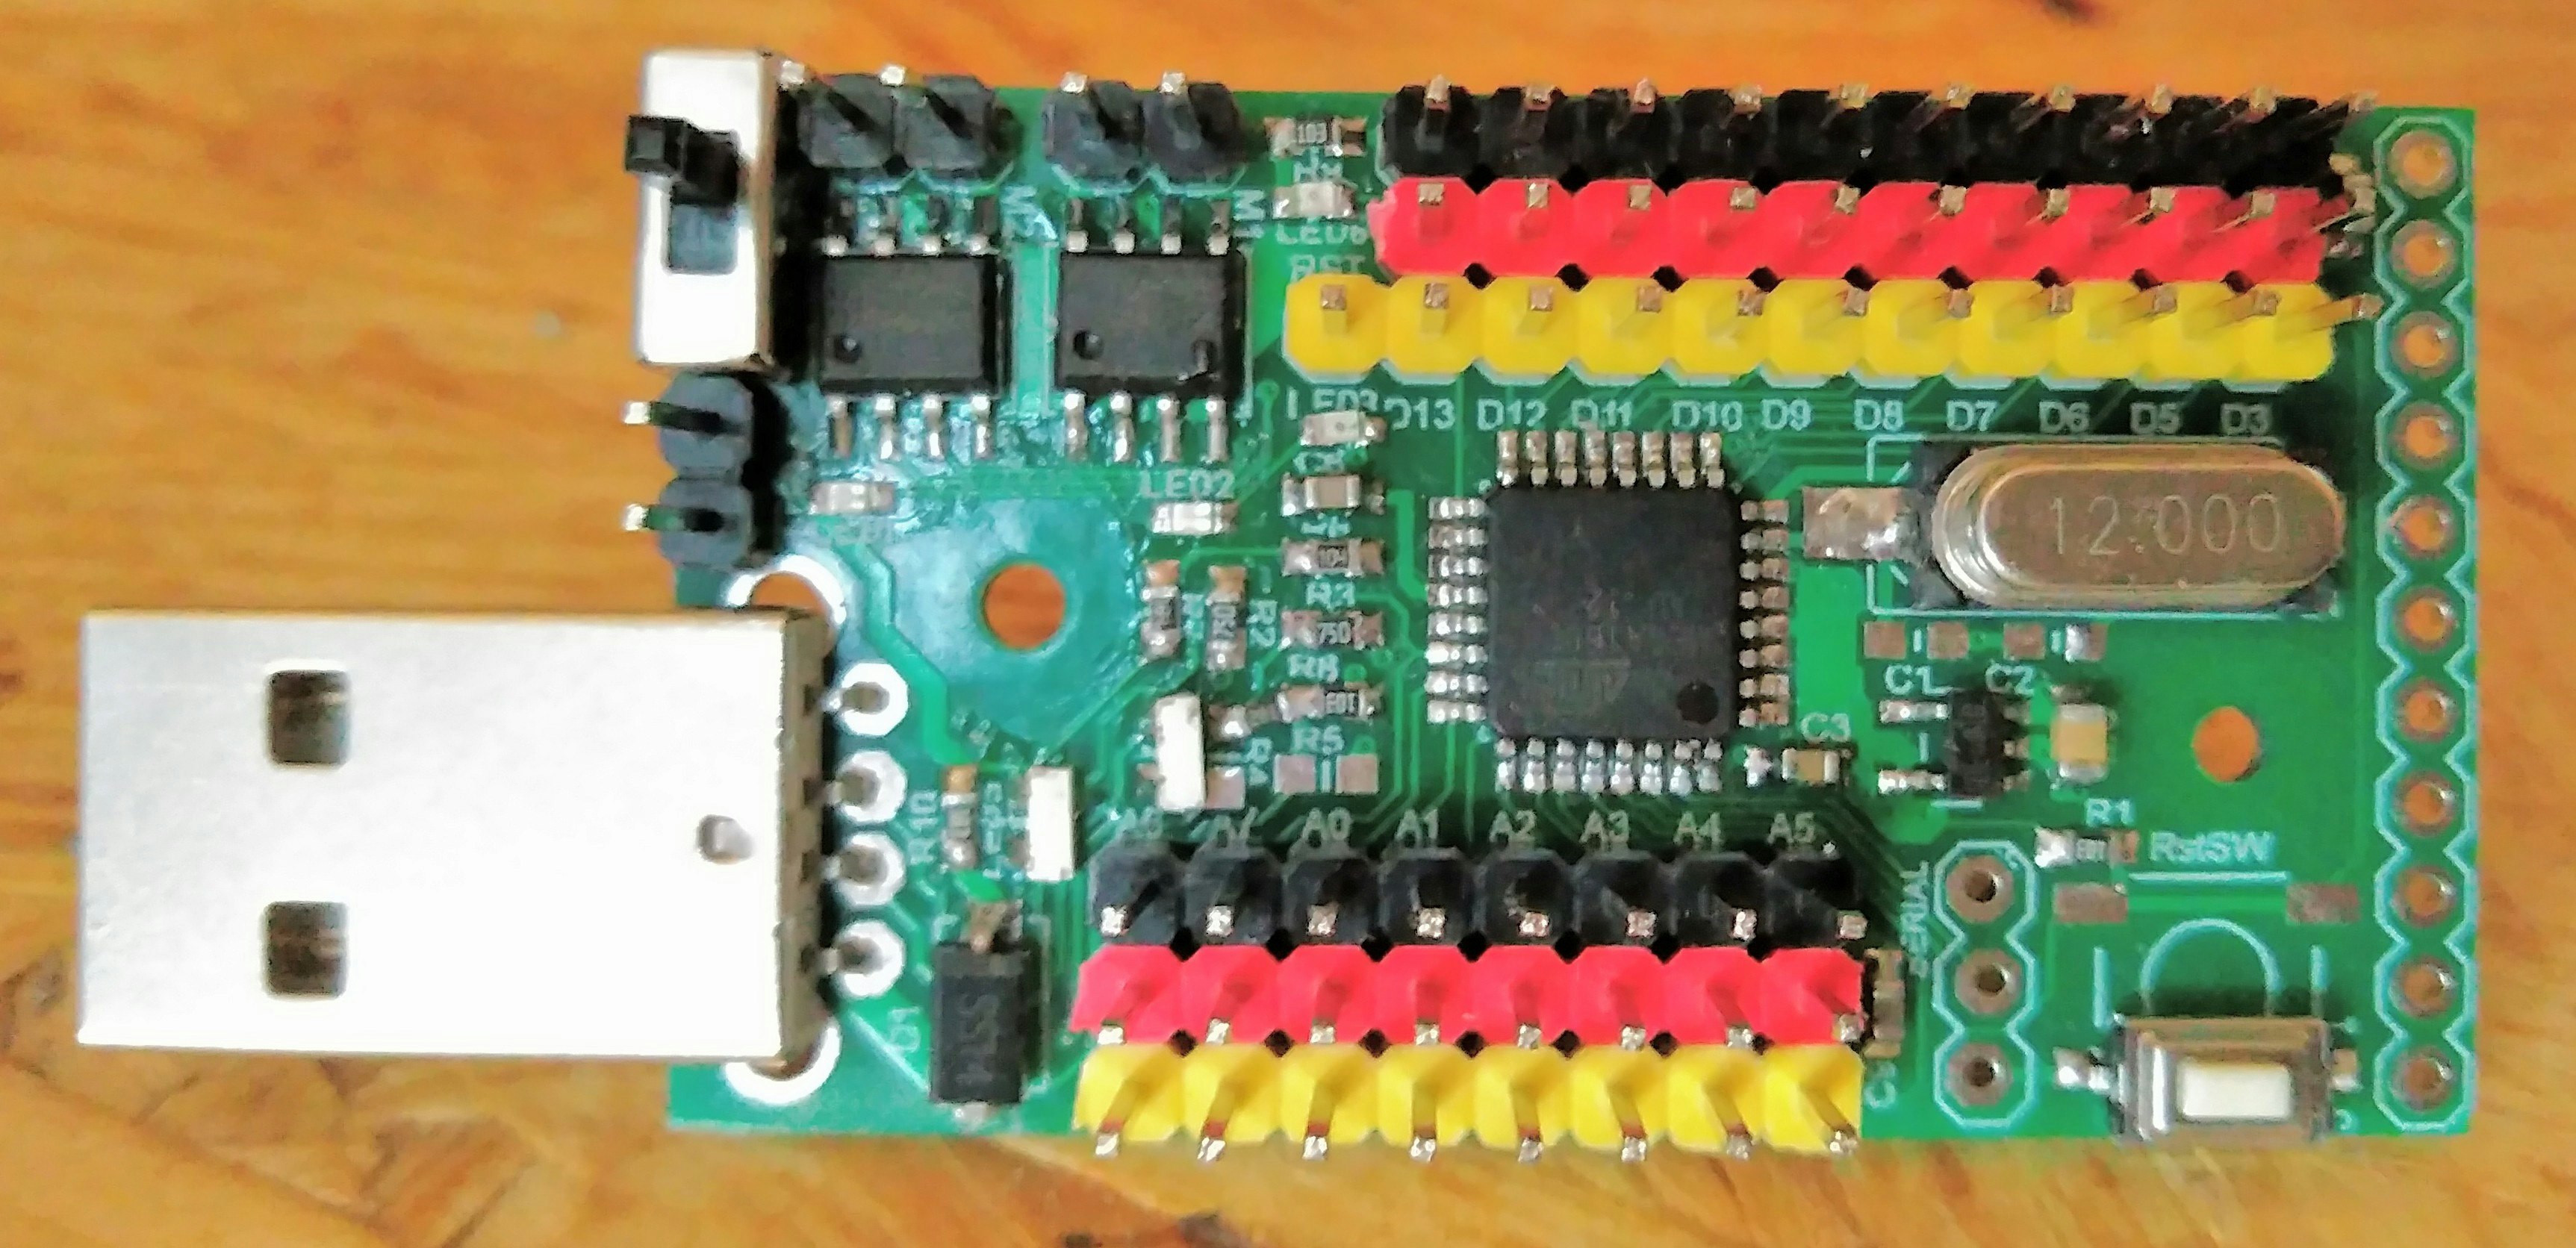
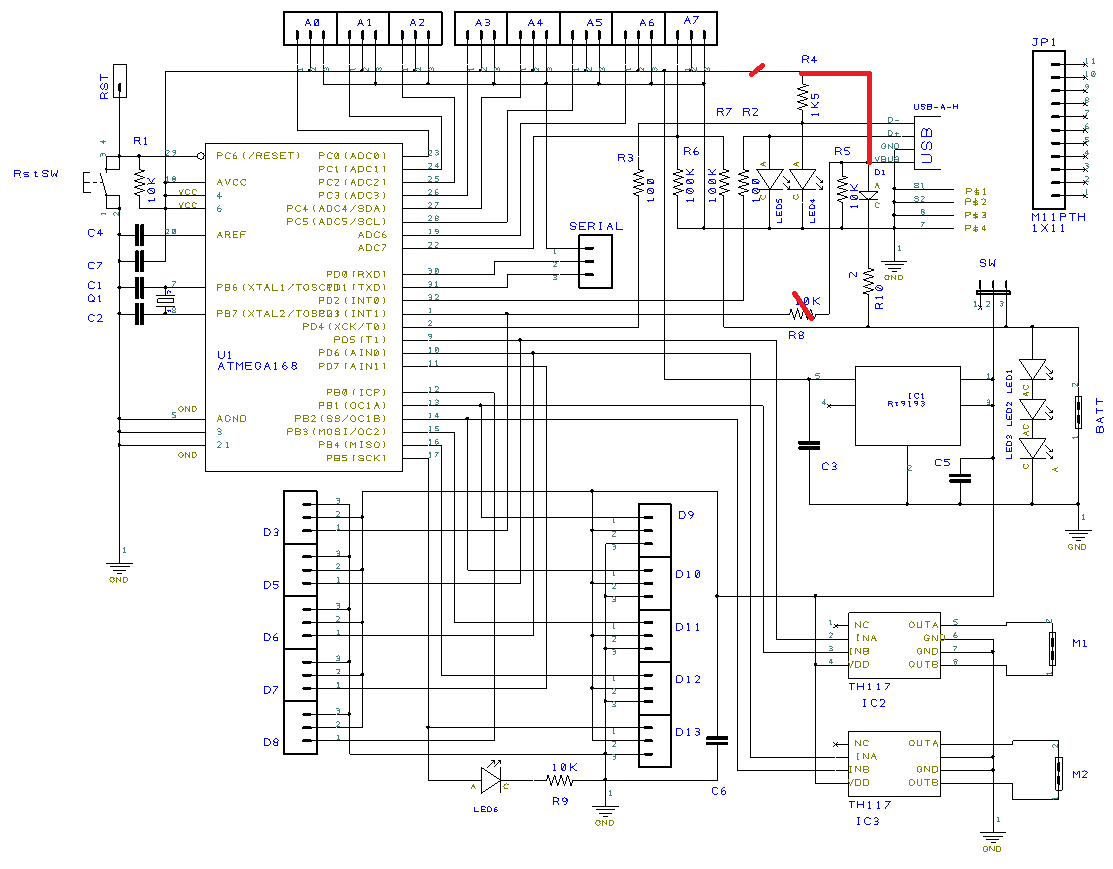
変更した部分
基になったbootmon-1127から変更したソフト・ハードについて以下で説明します。
ブートローダーとユーザーアプリの切換について
電源投入やリセットスイッチを押した時、ブートローダーかユーザーアプリを以下の条件で起動します。
・USB接続時はブートローダーを起動、ユーザーアプリのアップロード後にユーザーアプリを起動。
・USB未接続時は、ユーザーアプリを起動。
USB接続状態は、"USBDATA-"端子をUSB給電から1.8KΩプルアップ、10kΩプルダウンしてレベル判別しています。
	/* jump	to application if jumper is	set	*/
//	    if(bootLoaderCondition()){
	/* jump	to application if DMINUS_BIT is Low	*/
        if((PIND & (1 << USB_CFG_DMINUS_BIT)) ) {
充電池運用での操作手順です
1)USB未接続、電源スイッチONでユーザーアプリ起動
2)USB接続、リセットスイッチ押してユーザーアプリアップロード待ち
3)ArduinoIDE等でユーザーアプリをアップロード、完了後にユーザーアプリが起動
4)USB切り離してもユーザーアプリ継続、リセットスイッチ押すと、ユーザーアプリ再起動
5)利用終了時に電源スイッチOFF
電源周りとLipo充電池の電源制御
サーボやDCモータの給電はLipo充電池直結です。
MPUは3.3Vレギュレータから給電します。
USB給電から3Ω経由でLipoを充電します、充電完了でLipo内臓コントローラーが電池を回路から切り離すので3直列の赤LEDが点灯します。
電源スイッチでLipo電池を回路から切り離します。
頒布するために、VID/PIDライセンス入手
試作では、V-USBで許諾されているホビー自作ライセンスのUSB VID/PIDを使っていました。
頒布するためには、VID/PIDライセンスを確保する必要があります。少量(一万個まで)であればオープンソース向けのpid.codesやATMELMPU向けのmicrochip usblicensingで無料ライセンスを入手できます。
(参考)USBのベンダーIDとプロダクトIDの話
入手したVID/PIDやVENDOR_NAME,DEVICE_NAME等をソースコードに定義して、BOOTLOADHID.exeとbootloaderファームウエアを生成します。
/* -------------------------- Device Description --------------------------- */

# define  USB_CFG_VENDOR_ID       0xD8, 0x04
/* USB vendor ID for the device, low byte first. If you have registered your
 * own Vendor ID, define it here. Otherwise you use obdev's free shared
 * VID/PID pair. Be sure to read USBID-License.txt for rules!
 */
# define  USB_CFG_DEVICE_ID       0xXYXY
/* This is the ID of the product, low byte first. It is interpreted in the
 * scope of the vendor ID. If you have registered your own VID with usb.org
 * or if you have licensed a PID from somebody else, define it here. Otherwise
 * you use obdev's free shared VID/PID pair. Be sure to read the rules in
 * USBID-License.txt!
 */
# define USB_CFG_DEVICE_VERSION  0x00, 0x01
/* Version number of the device: Minor number first, then major number.
 */
# define USB_CFG_VENDOR_NAME     'T','i','i','s','a','i', 'D','i','p','J','p',
# define USB_CFG_VENDOR_NAME_LEN  11
/* These two values define the vendor name returned by the USB device. The name
 * must be given as a list of characters under single quotes. The characters
 * are interpreted as Unicode (UTF-16) entities.
 * If you don't want a vendor name string, undefine these macros.
 * ALWAYS define a vendor name containing your Internet domain name if you use
 * obdev's free shared VID/PID pair. See the file USBID-License.txt for
 * details.
 */
# define USB_CFG_DEVICE_NAME     'a','s','o','b','o','a','r','d'
# define USB_CFG_DEVICE_NAME_LEN  8
/* Same as above for the device name. If you don't want a device name, undefine
 * the macros. See the file USBID-License.txt before you assign a name if you
 * use a shared VID/PID.
 */
あそぼ~ど の使い方
基板レイアウト
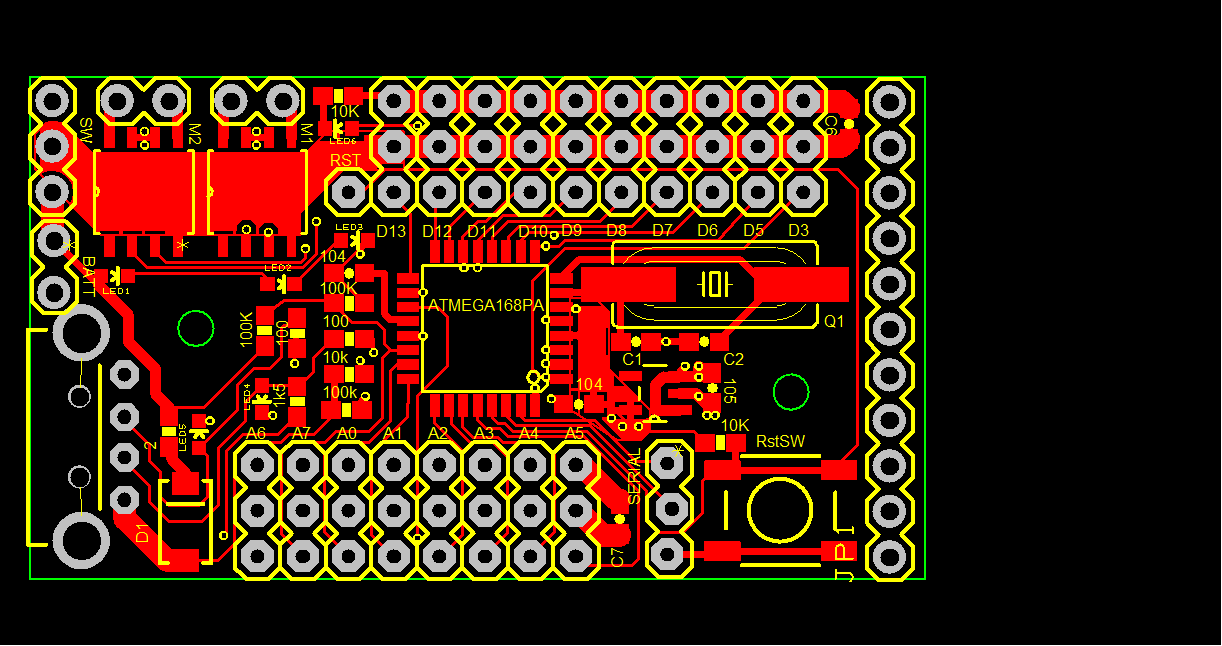
BATT: LIPO充電池端子でUSB端子側がマイナス(黒ケーブル)
SW: 電源スライドスイッチでUSB端子側が電源ON
RstSW: リセットボタン
M1: モーター1
M2: モーター2
LED6: D13に接続された動作確認用LED
LED1,2,3: Lipo充電完了時に点灯
LED4.5: USB通信時に点滅
デジタル端子(D3~D13)
黄色が信号線、黒が0V、赤色が3.3V(300mA)
アナログ端子(A0~A7)
黄色が信号線、黒が0V、赤色がLipo電池の電圧(4.2V~3V)
あそぼ~ど の起動手順
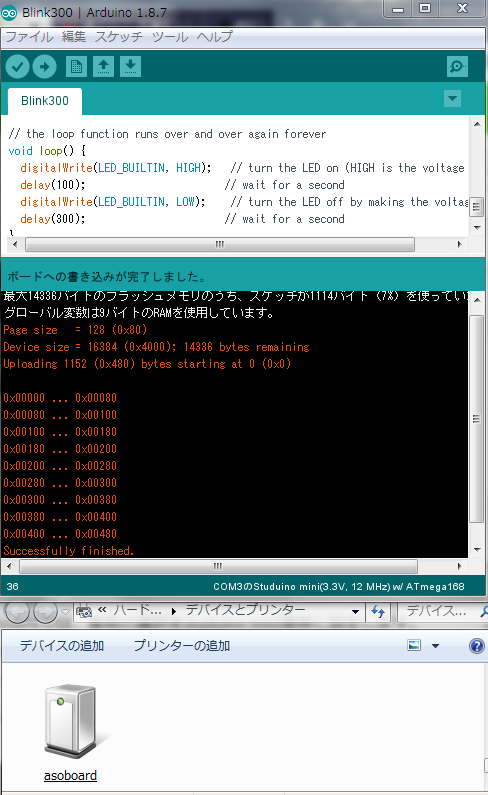
ボードをUSBに挿して電源スライドスイッチON(USB側),リセットボタンを押してブートローダーを起動、コントロールパネル-ハードウェアとサウンド-デバイスとプリンターを開いてUSBデバイス"asoboard"が追加されていることを確認します。
ArduinoIDE/Ardublockの使い方
ArduinoIDE/Ardublockでbootloadhid.exeを取り替えてから起動します。
変更済Arduino+Ardublockファイル一式 arduino-1.8.9_ASBorg.zipはこちら
ArduinoIDEでは、ボードをstuduino mini、書込装置をstuduino miniに設定します。シリアルポートは使わないので、ポート番号の設定は何番でもいいので何か設定しておきます。
Blink等のサンプルスケッチを開いて、アップロードします。
アップロード完了すると、ボード上でアプリが実行されます。
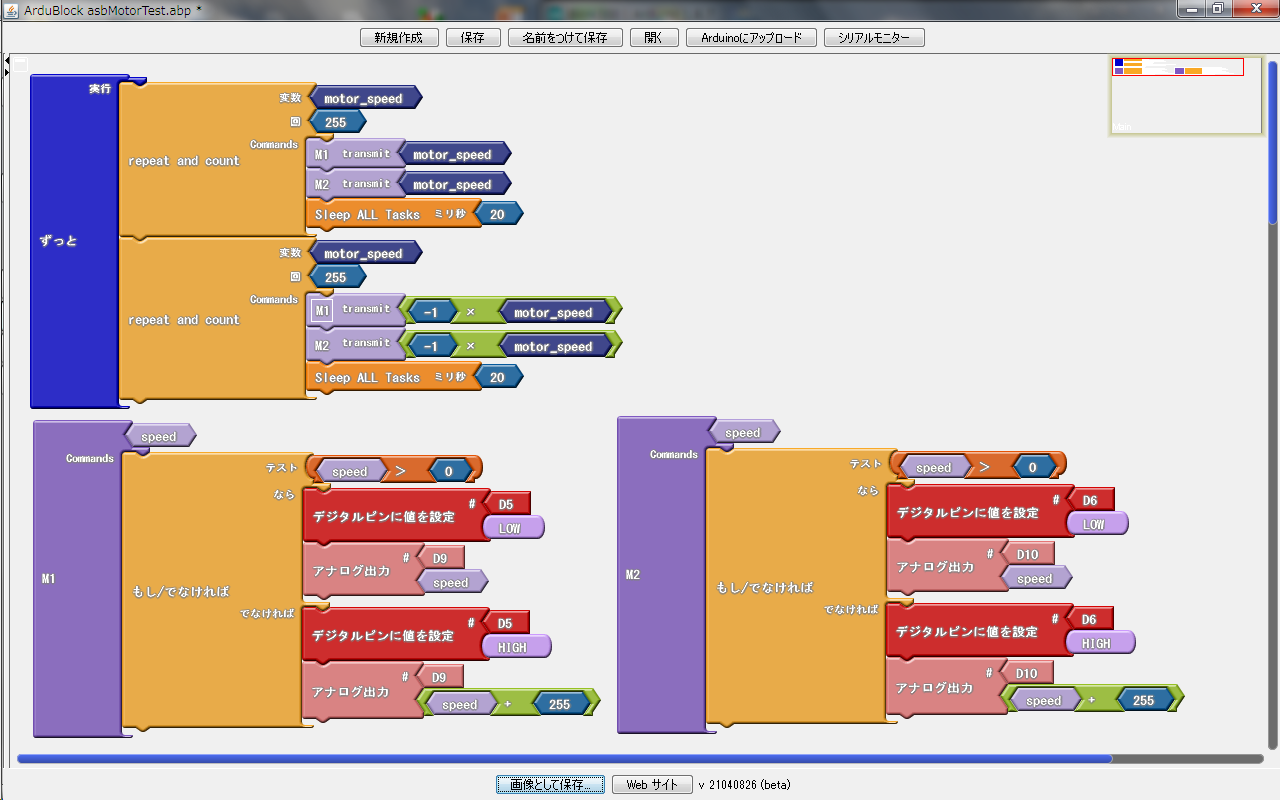
Ardublockではモーターブロックが用意されていないので、サブルーチンを作ってみました。
M1(speed),M2(speed)で2つのモータをスピード制御できます。
speedパラメーターは、正転0~255、逆転-1~-255 です。
StuduinoBPEの使い方
変更済StuduinoMiniBPEファイル一式 StuduinoMiniASB.zipはこちら
StuduinoBPEでは初回のみ、「編集-基板の選択」をstuduino mini単体に設定し、
「編集-入出力設定」で、「チェックを全てはずす」をクリックしてから、モーターのチェックボックス等をチェックします。
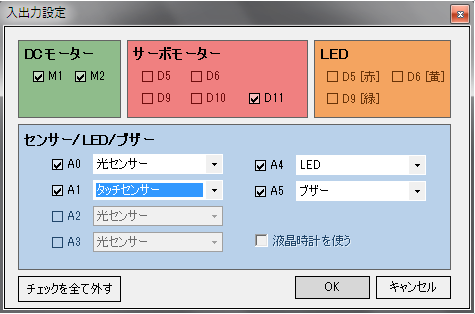
「実行-プログラムの作成・転送」の前にボードをUSBに挿して電源スイッチON,リセットスイッチを押してブートローダーを起動、USBデバイス"asoboard"が追加されていることを確認します。
アップロード完了すると、ボード上でアプリが実行されます。
最初のテストはモーターを回してみましょう。
ロボットカ~に仕立ててみました
かまぼこ板をボディにしてロボットカ~に仕立ててみました
ちびギアモーターを左右駆動前輪に、Lipo充電池とちびボールキャスターを裏面に両面テープで貼付けてあります
