はじめに
4月22日に行われたAWS主催の「さぁ!サーバーレスを始めよう!サーバーレスハンズオンもくもく会」に参加し、その際に行ったハンズオン「サーバーレス環境 構築自動化 編」の備忘録となります。
目的
AWSは触らないと忘れる!だから触る!!
ハンズオンの内容
AWS Hands-on for Beginners - Serverless #2 では、前回の Serverless #1 で構築した翻訳 Web API を AWS Serverless Application Model (AWS SAM) を用いてテンプレートから構築します。前回のハンズオンでは全ての工程を手作業で(マネージメントコンソール上で)構築していきました。今回のハンズオンではこの構築作業をテンプレート化し、作成したテンプレートから AWS リソースを構築していきます。テンプレート化することで、そのテンプレートをバージョン管理できるようになる、チーム内でレビューがしやすくなる、といった利点があり、プロダクト開発をより効率的に進めることができます。
すごい充実度・・・
やってみた
前回のハンズオンの復習
Lambdaの特徴
1. サーバのプロビジョニング・管理なしでプログラムを実行できるサービス
2. リクエストベースの料金体系
Amazon API Gatewayの特徴
- サーバのプロビジョニング・管理なしでAPIを作成・管理できるサービス
- REST・WebSocketに対応
- リクエストベースの料金体系
DynamoDBの特徴
- フルマネージド型のNoSQLデータベースサービス
- データが三つのAZに保存されるので信頼性が高い
- ストレージの容量制限がない
AWS SAM の紹介と AWS Cloud9 の紹介
AWS CloudFormationの特徴
- AWSリソースのモデル化、セットアップが可能
- テンプレートに利用するAWSリソースを記述すると、各リソーのプロビジョニング、設定をCloudFormationがやってくれる
- テンプレートに情報を集約されるので、現状の把握、変更の追跡が容易に
- YAML or JSON
AWS SAMの特徴
- サーバレスアプリケーション構築用のオープンソースフレームワーク
- CloudFormationの拡張機能
- SAM CLIも提供されている
SAMテンプレートの書き方 - リソースタイプを選択
- AWS::Serverless::Function
- AWS::Serverless::Api
- AWS::Serverless::SimpleTable
等の6種類
- リソースタイプ毎に必要なプロパティを記述
- AWS::Serverless::FunctionだったらHandler,Runtime,CodeUri等
SAM利用の流れ
- SAMテンプレート書き書き
- パッケージングする
- デプロイする
AWS Cloud9の特徴
- ブラウザのみでコード記述できるIDE
- 複数人リアルタイムにコーディング可能、チャット機能もあるよ
Cloud9 のセットアップ + [Option] Cloud9 で簡単な Lambda 関数を作成する
Cloud9の環境を作成する
- Cloud9開いて、CreateEnviromentをクリック
- 適当な名前を入力して次
- 環境の情報を入力する(今回はデフォルト通り)
- 次行って環境情報確認して作成!
LambdaFunction作成する
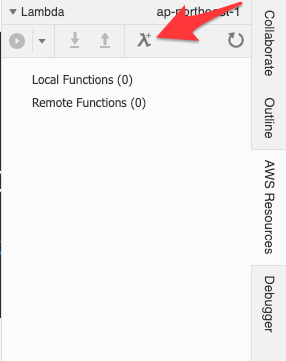
- 画面右AWSResourcesからλ+となっている部分をクリック
- FunctionName→Runtime→Trigger→MemorySize・IAMRoleの順に選択する。Python3.6,他はデフォルトで作成
- コンソールで作成されていることを確認
SAM で Lambda 関数を作成する
AWSバージョン確認
S3にハンズオン用のバケット作成
aws s3 mb s3://handson-serverless2
lambdaの環境準備
cd hands-on-serverless-2
mkdir translate-function
touch translate-function/translate-function.py
touch template.yaml
該当ファイルに記述
AWSTemplateFormatVersion: '2010-09-09'
Transform: AWS::Serverless-2016-10-31
Description: AWS Hands-on for Beginners - Serverless 2
Resources:
  TranslateLambda:
    Type: AWS::Serverless::Function
    Properties:
      FunctionName: translate-function-2
      CodeUri: ./translate-function
      Handler: translate-function.lambda_handler
      Runtime: python3.7
      Timeout: 5
      MemorySize: 256
import json
import logging

logger = logging.getLogger()
logger.setLevel(logging.INFO)

def lambda_handler(event, context):

    logger.info(event)

    return {
        'statusCode': 200,
        'body': json.dumps('Hello Hands on world!')
         }
CloudformationのCLIコマンドを使用してデプロイを行う
パッケージング
aws cloudformation package
--template-file template.yaml
--s3-bucket handson-serverless2
--output-template-file packaged-template.yaml
デプロイ
aws cloudformation deploy
--template-file ./packaged-template.yaml
--stack-name hands-on-serverless-2
--capabilities CAPABILITY_IAM
Lmabdaが作成されているか確認する。
template.yamlとtranslate-function.pyを更新して再度デプロイする。
SAM で APIを作成する
APIをSAMで定義する
下記をtemplate.yamlに追記
      Events:
        GetApi:
          Type: Api
          Properties:
            Path: /translate
            Method: get
            RestApiId: !Ref TranslateAPI
  TranslateAPI:
    Type: AWS::Serverless::Api
    Properties:
      Name: translate-api-2
      StageName: dev
      EndpointConfiguration: REGIONAL
- TranslateAPIを作成
- RestApiId: !Ref TranslateAPI で論理名を受け取る
translate-function.pyをAPIに合うように配布されている公式資料をもとに更新する
SAM で DynamoDBを作成する
DynamoDBをSAMで定義する
下記をtemplate.yamlに追記
  TranslateDynamoDbTbl:
    Type: AWS::Serverless::SimpleTable
    Properties:
      TableName: translate-history-2
      PrimaryKey:
        Name: timestamp
        Type: String
      ProvisionedThroughput:
        ReadCapacityUnits: 1
        WriteCapacityUnits: 1
translate-function.pyを配布されている公式資料をもとに更新する
SAM CLIを使ってみる
SAMCLIの特徴
- ローカル環境で利用する便利CLI
- テンプレートを使ってアプリケーションを初期化
sam init - ローカル環境でビルド
sam build - AWS環境へデプロイ
sam deploy --guided - SAMテンプレートの事前検証
sam validate - LambdaローカルエンドポイントやAPIエンドポイントを起動してテスト
sam local start-lambda/start-api
SAM CLIのインストール手順
CLIを使用してアプリデプロイしてみる
sam init便利すぎてびっくり☺️
作りたい環境ぽちぽち選べばできてる・・・
tomoki.koike:~/environment $ sam init

        SAM CLI now collects telemetry to better understand customer needs.

        You can OPT OUT and disable telemetry collection by setting the
        environment variable SAM_CLI_TELEMETRY=0 in your shell.
        Thanks for your help!

        Learn More: https://docs.aws.amazon.com/serverless-application-model/latest/developerguide/serverless-sam-telemetry.html

Which template source would you like to use?
        1 - AWS Quick Start Templates
        2 - Custom Template Location
Choice: 1

Which runtime would you like to use?
        1 - nodejs12.x
        2 - python3.8
        3 - ruby2.7
        4 - go1.x
        5 - java11
        6 - dotnetcore3.1
        7 - nodejs10.x
        8 - python3.7
        9 - python3.6
        10 - python2.7
        11 - ruby2.5
        12 - java8
        13 - dotnetcore2.1
        14 - dotnetcore2.0
        15 - dotnetcore1.0
Runtime: 9

Project name [sam-app]:

Cloning app templates from https://github.com/awslabs/aws-sam-cli-app-templates.git

AWS quick start application templates:
        1 - Hello World Example
        2 - EventBridge Hello World
        3 - EventBridge App from scratch (100+ Event Schemas)
Template selection: 1

-----------------------
Generating application:
-----------------------
Name: sam-app
Runtime: python3.6
Dependency Manager: pip
Application Template: hello-world
Output Directory: .

Next steps can be found in the README file at ./sam-app/README.md
作成したアプリ配下のフォルダに移動してsam validateした後sam buildを行う
tomoki.koike:~/environment/sam-app $ sam validate
/home/ec2-user/environment/sam-app/template.yaml is a valid SAM Template
tomoki.koike:~/environment/sam-app $ sam build
Building resource 'HelloWorldFunction'
Running PythonPipBuilder:ResolveDependencies
Running PythonPipBuilder:CopySource

Build Succeeded

Built Artifacts  : .aws-sam/build
Built Template   : .aws-sam/build/template.yaml

Commands you can use next
=========================
[*] Invoke Function: sam local invoke
[*] Deploy: sam deploy --guided
sam deploy --guidedを使用してAWS環境にデプロイする
tomoki.koike:~/environment/sam-app $ sam deploy --guided

Configuring SAM deploy
======================

        Looking for samconfig.toml :  Not found

        Setting default arguments for 'sam deploy'
        =========================================
        Stack Name [sam-app]:
        AWS Region [us-east-1]: ap-northeast-1
        #Shows you resources changes to be deployed and require a 'Y' to initiate deploy
        Confirm changes before deploy [y/N]: y
        #SAM needs permission to be able to create roles to connect to the resources in your template
        Allow SAM CLI IAM role creation [Y/n]: y
        Save arguments to samconfig.toml [Y/n]: y

        Looking for resources needed for deployment: Not found.
        Creating the required resources...

        Successfully created!

                Managed S3 bucket: aws-sam-cli-managed-default-samclisourcebucket-wpaotjlm43x1
                A different default S3 bucket can be set in samconfig.toml

        Saved arguments to config file
        Running 'sam deploy' for future deployments will use the parameters saved above.
        The above parameters can be changed by modifying samconfig.toml
        Learn more about samconfig.toml syntax at
        https://docs.aws.amazon.com/serverless-application-model/latest/developerguide/serverless-sam-cli-config.html

        Deploying with following values
        ===============================
        Stack name                 : sam-app
        Region                     : ap-northeast-1
        Confirm changeset          : True
        Deployment s3 bucket       : aws-sam-cli-managed-default-samclisourcebucket-wpaotjlm43x1
        Capabilities               : ["CAPABILITY_IAM"]
        Parameter overrides        : {}

Initiating deployment
=====================
Uploading to sam-app/b2b069be741f52a29010df8530645516  262Uploading to sam-app/b2b069be741f52a29010df8530645516  524Uploading to sam-app/b2b069be741f52a29010df8530645516  534640 / 534640.0  (100.00%)
Uploading to sam-app/a6a0d26fbbf4b9d2fb0236076e14daf8.template  1089 / 1089.0  (100.00%)

Waiting for changeset to be created..

CloudFormation stack changeset
------------------------------------------------------------------------------------------------
Operation                        LogicalResourceId                ResourceType
------------------------------------------------------------------------------------------------
+ Add                            HelloWorldFunctionHelloWorldPe   AWS::Lambda::Permission
                                 rmissionProd
+ Add                            HelloWorldFunctionRole           AWS::IAM::Role
+ Add                            HelloWorldFunction               AWS::Lambda::Function
+ Add                            ServerlessRestApiDeployment47f   AWS::ApiGateway::Deployment
                                 c2d5f9d
+ Add                            ServerlessRestApiProdStage       AWS::ApiGateway::Stage
+ Add                            ServerlessRestApi                AWS::ApiGateway::RestApi
------------------------------------------------------------------------------------------------

Changeset created successfully. arn:aws:cloudformation:ap-northeast-1:438246805061:changeSet/samcli-deploy1587537238/dc77996a-b275-47e8-a719-063287c95f98
sam local start-lambda、sam local start-apiを使用してローカル環境でコードを試すことができる
クリーンアップ
AWS SAMで作成したので、CloudFormationから削除可能(便利!)
感想
テンプレートでアプリケーションを作成・管理することで複数名またはそれ以上の開発でも共通の前提を持って開発に臨めるのが素晴らしいと感じた。
特にサーバレスはじめたい人に是非おすすめしたいハンズオンになっていた。
Enjoy Serverless!!