この記事は、fukuoka.ex Elixir/Phoenix Advent Calendar 2019 の 9日目です。 昨日は @koyo-miyamura さんの「PhoenixでRedisを使った簡単ランキングの実装」でした。
この記事では、Elixir で OAuth2 の認証をやってみようと思います。
書いていたら、だんだんカオスになってきたので、今回は動作の準備という事で、tokenの取得までをゴールとします。
※ 12/10 続編書きました
Elixir で OAuth2 を使って、 STRAVA のApiを叩いてみたい ②
書いてる人
Elixir初心者のRails経験者のおっさん。
小倉のとあるもくもく会でご本人曰く、エンジニアもやるパン屋さん?に出会い、kokuraex に参加させて頂くようになりました。
はじめに
脳筋エンジニアの皆さん、こんにちは。突然ですが、STRAVA使ってますか?
サイコンを忘れても、スマホさえあればアクティビティログが取れる便利グッズですので、運動を渇望するエンジニアにはもはや必須アイテムでしょう。
そして、そこにApiがあるのであれば、取得したくなるのが性というもの。
まずは、以下のサイトを参考に考えてみました。
参考サイト
- STRAVAのリファレンス(結構親切)
- https://developers.strava.com/docs/getting-started/
- curlでアクセストークンを取得している先駆者様
- http://hhhhhskw.hatenablog.com/entry/2018/11/06/014206
- phoenix 立ち上げまで
- https://qiita.com/piacerex/items/b7787580fce5f148242f#_reference-15d862e0dedbe9d9069e
- OAuth2 を使ってGithubのソーシャルログインをされています。
- https://qiita.com/mserizawa/items/32c6ff17a7cdd51b1975
環境
$ mix -v
Erlang/OTP 22 [erts-10.5.6] [source] [64-bit] [smp:4:4] [ds:4:4:10] [async-threads:1] [hipe]

Mix 1.9.4 (compiled with Erlang/OTP 22)
前提
phenixがインストールされている状況からスタートとなります。
もし、まだの方や、初めて触る方には、上でも紹介しましたが、
こちらのエントリーを最低②まで進めていただくとスムーズです。
1.アプリケーションの作成
任意のディレクトリから開始します。
$ mix phx.new oauth_test --no-webpack --no-ecto
phoenix で新しいアプリケーションを作るコマンドです。
--no-webpack は そのままなのですが、 webpack を使用しないモードです。
こちらは、なくても phoenix には node.js が組み込まれており、リアルタイムでレンダリングされる機能は使えます。
--no-ecto は DB を使用しないモードです。
今回は Api を叩く所が目的ですので、外しておきます。
外さないと、DB由来のエラーが出るので気を付けて下さい。
では、上記の実行結果ですが、以下のようになります。
.
(略)
.
.
* creating oauth_test/priv/static/images/phoenix.png
* creating oauth_test/priv/static/favicon.ico

Fetch and install dependencies? [Yn] y
* running mix deps.get
* running mix deps.compile

We are almost there! The following steps are missing:

    $ cd oauth_test

Start your Phoenix app with:

    $ mix phx.server

You can also run your app inside IEx (Interactive Elixir) as:

    $ iex -S mix phx.server

$
出来ました。
ログにアプリのスタート方法が出ていますね。
$ cd oauth_test
でプロジェクトに移動して、
$ mix phx.server
でサーバースタートです。
※(一番下に書いてある、 $ iex -S mix phx.server は iex を phoenix のライブラリを読み込んだ状態で起動しつつ、サーバー起動に移行出来るモードです。後で使います。)
起動すると、以下のようなログが出てきます。
09:13:Desktop$ cd oauth_test/
09:13:oauth_test$ mix phx.server
[info] Running OauthTestWeb.Endpoint with cowboy 2.7.0 at 0.0.0.0:4000 (http)
[info] Access OauthTestWeb.Endpoint at http://localhost:4000
ポート番号は 4000 番ですね。
ですので、 ブラウザに localhost:4000 と打てばトップページが見られます。

サーバーを止めるには、 ctrl + c を2回押します。
一旦止めましょう。
^C
BREAK: (a)bort (c)ontinue (p)roc info (i)nfo (l)oaded
       (v)ersion (k)ill (D)b-tables (d)istribution
^$
入力画面に戻ればOKです。
2.OAuth2 のインストール
次に、ライブラリをインストールします。
認証用のライブラリ、OAuth2 を入れていきましょう。
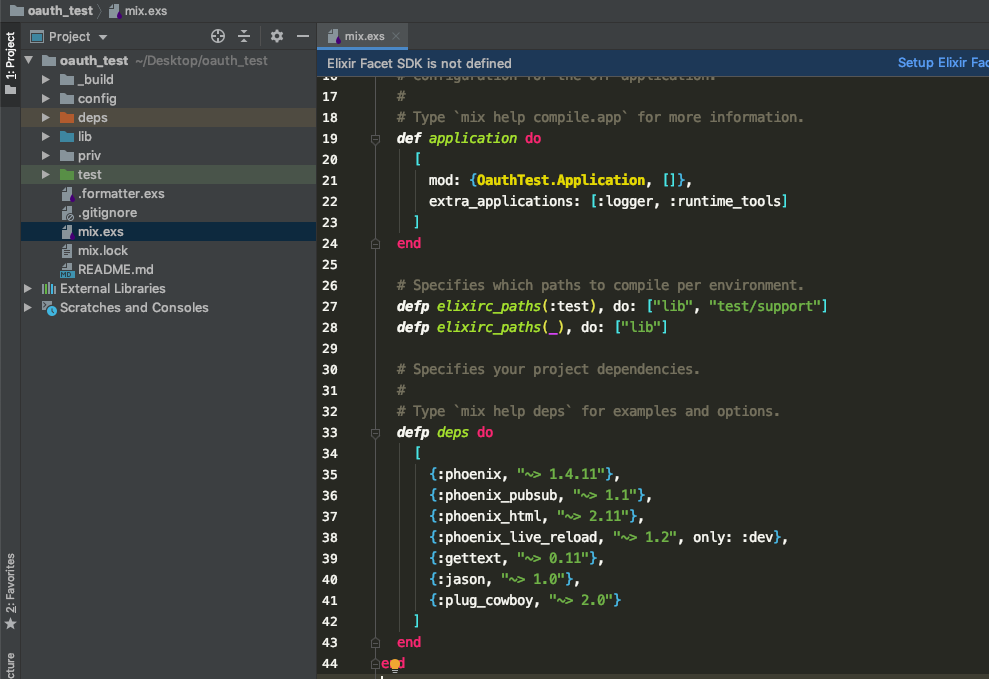
2.1 mix.exs
プロジェクト直下にある、mix.exs というのがどうやら、ライブラリの管理をしているようです。
/mix.exs
  # Type `mix help compile.app` for more information.
  def application do
    [
      mod: {OauthTest.Application, []},
      extra_applications: [:logger, :runtime_tools]
    ]
  end

  # Specifies which paths to compile per environment.
  defp elixirc_paths(:test), do: ["lib", "test/support"]
  defp elixirc_paths(_), do: ["lib"]

  # Specifies your project dependencies.
  #
  # Type `mix help deps` for examples and options.
  defp deps do
    [
      {:phoenix, "~> 1.4.11"},
      {:phoenix_pubsub, "~> 1.1"},
      {:phoenix_html, "~> 2.11"},
      {:phoenix_live_reload, "~> 1.2", only: :dev},
      {:gettext, "~> 0.11"},
      {:jason, "~> 1.0"},
      {:plug_cowboy, "~> 2.0"}
    ]
  end
ここにライブラリの情報を入れます。
/mix.exs
  # Type `mix help compile.app` for more information.
  def application do
    [
      mod: {OauthTest.Application, []},
      extra_applications: [:logger, :runtime_tools, :oauth2]
    ]
  end

  # Specifies which paths to compile per environment.
  defp elixirc_paths(:test), do: ["lib", "test/support"]
  defp elixirc_paths(_), do: ["lib"]

  # Specifies your project dependencies.
  #
  # Type `mix help deps` for examples and options.
  defp deps do
    [
      {:phoenix, "~> 1.4.11"},
      {:phoenix_pubsub, "~> 1.1"},
      {:phoenix_html, "~> 2.11"},
      {:phoenix_live_reload, "~> 1.2", only: :dev},
      {:gettext, "~> 0.11"},
      {:jason, "~> 1.0"},
      {:plug_cowboy, "~> 2.0"},
      {:oauth2, "~> 2.0"}
    ]
  end
extra_applications: [:logger, :runtime_tools, :oauth2]
{:oauth2, "~> 2.0"}
この2行が追加箇所となります。
2.2 インストール
ライブラリのインストールには、 deps.get を使います。
$ mix deps.get
Resolving Hex dependencies...
Dependency resolution completed:
Unchanged:
  cowboy 2.7.0
  cowlib 2.8.0
  file_system 0.2.7
  gettext 0.17.1
  jason 1.1.2
  mime 1.3.1
  phoenix 1.4.11
  phoenix_html 2.13.3
  phoenix_live_reload 1.2.1
  phoenix_pubsub 1.1.2
  plug 1.8.3
  plug_cowboy 2.1.0
  plug_crypto 1.0.0
  ranch 1.7.1
  telemetry 0.4.1
New:
  certifi 2.5.1
  hackney 1.15.2
  idna 6.0.0
  metrics 1.0.1
  mimerl 1.2.0
  oauth2 2.0.0
  parse_trans 3.3.0
  ssl_verify_fun 1.1.5
  unicode_util_compat 0.4.1
* Getting oauth2 (Hex package)
* Getting hackney (Hex package)
* Getting certifi (Hex package)
* Getting idna (Hex package)
* Getting metrics (Hex package)
* Getting mimerl (Hex package)
* Getting ssl_verify_fun (Hex package)
* Getting unicode_util_compat (Hex package)
* Getting parse_trans (Hex package)
フレームワークではお馴染みの方式ですが、予め書いてあるmix.exsの内容を読んで自動でHexからインストールしてくれます。
New: の箇所が新たに追加されたライブラリです。
3.STRAVA の設定
3.1 STRAVA API
詳しくは、
こちらのリファレンスを見ていただくと良いですが、最低限必要なものは以下の通りです。
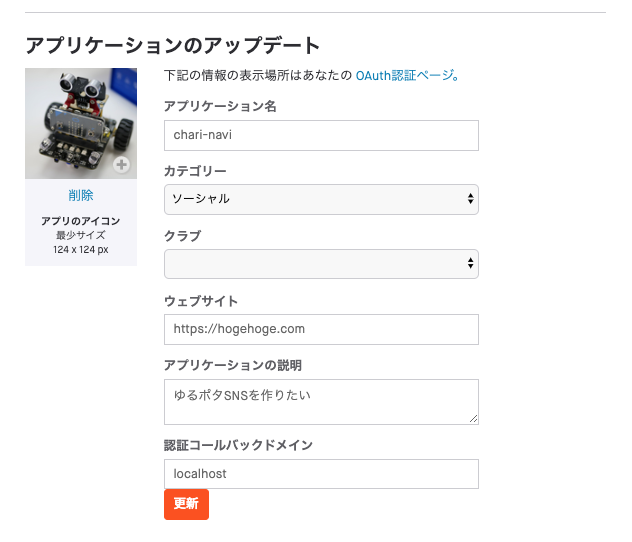
下記の画像では、
- クライアントID
- クライアントシークレット(なぜかシートになってますが・・)
この2点の値を後ほど使います。

さらに画面の下に行き、下記の部分、
- 認証コールバックドメイン
- ウェブサイト
こちらの2点の設定が必要です。
認証コールバックドメイン は、ローカルでの開発環境においては、 localhost としておいて下さい。(ポート番号は不要ですし、入れられません)
また、設定を行う為には、
ウェブサイト に何らかの URL を入力しますが、これは、 http(s):// と、.com など(comじゃなくても可)の文字があれば存在しない URLでも何でも良いようです。
3.2 iex での検証
では、一旦ここで、メモでも何でも良いので、文字化けしない環境で以下の設定を書いておきましょう。
client = OAuth2.Client.new([
  strategy: OAuth2.Strategy.AuthCode,
  client_id: "クライアントID",
  client_secret: "クライアントシークレット",
    site: "https://www.strava.com",
    redirect_uri: "http://localhost:4000/auth",
    authorize_url: "https://www.strava.com/oauth/authorize",
    token_url: "https://www.strava.com/oauth/token",
    token_method: :post,
    params: %{"grant_type": "authorization_code"}
  ])
uri = OAuth2.Client.authorize_url!(client, scope: "activity:read_all")
uri = URI.decode(uri)
クライアントID クライアントシークレット は、STRAVAの設定ペーじより、ご自身の設定を書き入れて下さい。
準備が出来たら、以下のコマンドで、iex を起動します。
$ iex -S mix phx.server
起動したら、上でメモった設定と変数をコピペして下さい。
Erlang/OTP 22 [erts-10.5.6] [source] [64-bit] [smp:4:4] [ds:4:4:10] [async-threads:1] [hipe]

[info] Running OauthTestWeb.Endpoint with cowboy 2.7.0 at 0.0.0.0:4000 (http)
[info] Access OauthTestWeb.Endpoint at http://localhost:4000
Interactive Elixir (1.9.4) - press Ctrl+C to exit (type h() ENTER for help)

iex(1)>     client = OAuth2.Client.new([
...(1)>       strategy: OAuth2.Strategy.AuthCode,
...(1)>       client_id: "xxxxxx",
...(1)>       client_secret: "xxxxxxxxxxxxxxxxxxxxxxxxxxxx",
...(1)>       site: "https://www.strava.com",
...(1)>       redirect_uri: "http://localhost:4000/auth",
...(1)>       authorize_url: "https://www.strava.com/oauth/authorize",
...(1)>       token_url: "https://www.strava.com/oauth/token",
...(1)>       token_method: :post,
...(1)>       params: %{grant_type: "authorization_code"}
...(1)>     ])
%OAuth2.Client{
  authorize_url: "https://www.strava.com/oauth/authorize",
  client_id: "xxxxxx",
  client_secret: "xxxxxxxxxxxxxxxxxxxxxxxxxxxxxxx",
  headers: [],
  params: %{grant_type: "authorization_code"},
  redirect_uri: "http://localhost:4000/auth",
  ref: nil,
  request_opts: [],
  serializers: %{},
  site: "https://www.strava.com",
  strategy: OAuth2.Strategy.AuthCode,
  token: nil,
  token_method: :post,
  token_url: "https://www.strava.com/oauth/token"
}


iex(2)>uri = OAuth2.Client.authorize_url!(client, scope: "activity:read_all")
"https://www.strava.com/oauth/authorize?approval_prompt=auto&client_id=xxxxx&redirect_uri=http%3A%2F%2Flocalhost%3A4000%2Fauth&response_type=code&scope=activity%3Aread_all"

iex(3)>uri = URI.decode(uri)
"https://www.strava.com/oauth/authorize?approval_prompt=auto&client_id=xxxxx&redirect_uri=http://localhost:4000/auth&response_type=code&scope=activity:read_all"
こんな感じでコピペして下さい。
最後の、URL
このURLにアクセス出来る事を確認して下さい。
(client_id=xxxxx の部分はご自身のクライアントIDが入っているはずです)
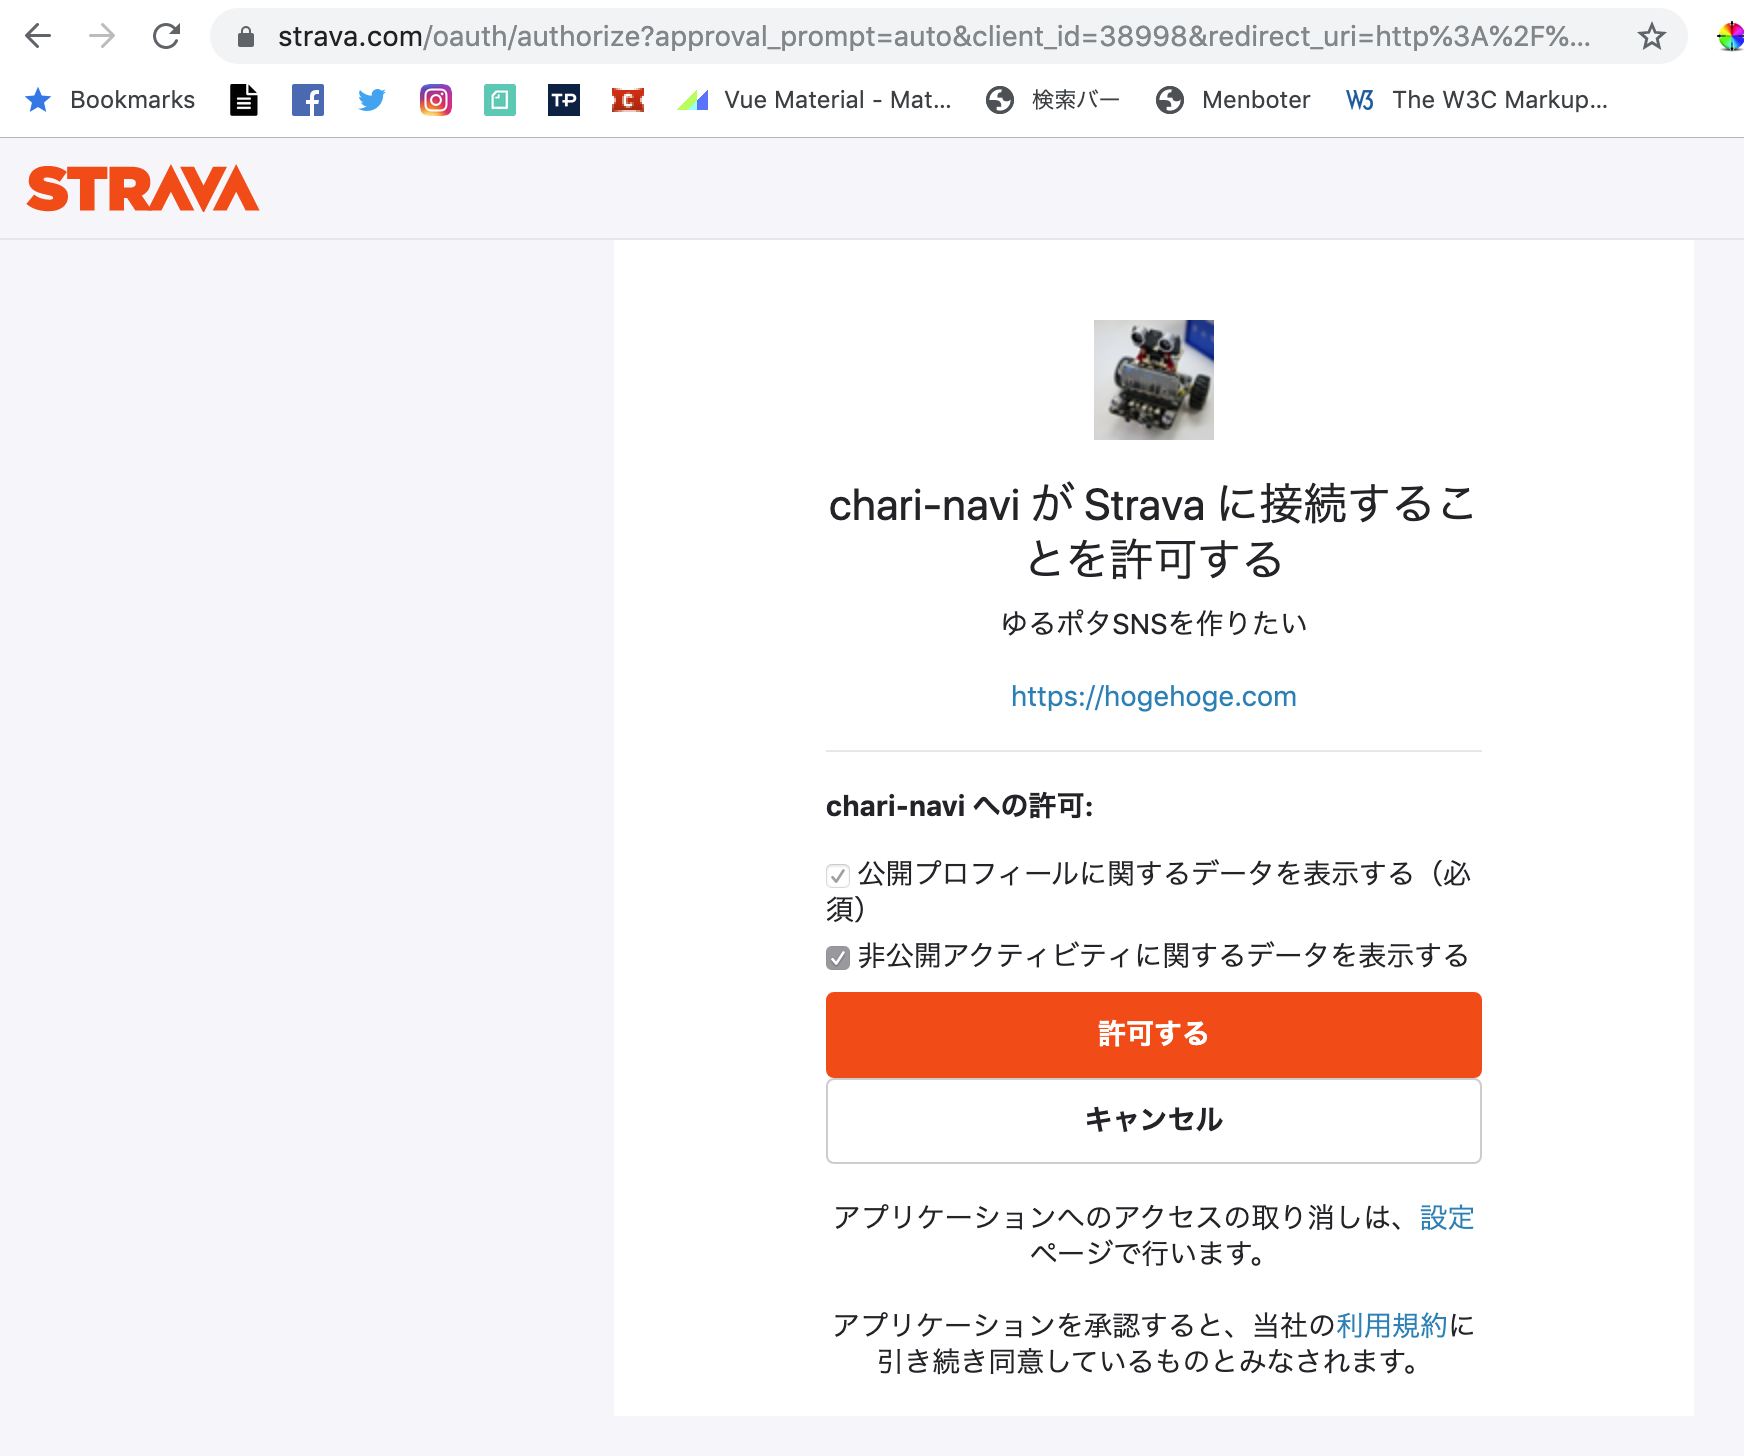
この画面が出てきたら、準備OKです。
ちなみにですが、 activity:read_all の部分は、見る事が出来る権限の設定となっています。今回は、アクティビティを読み込む事の出来る設定となっています。
4.ルーティング
今回使うページを設定しておきましょう。
今回使うのは、とりあえずで2ページ
ルーティング用のファイルは、 lib/oauth_test/ 直下にあります。
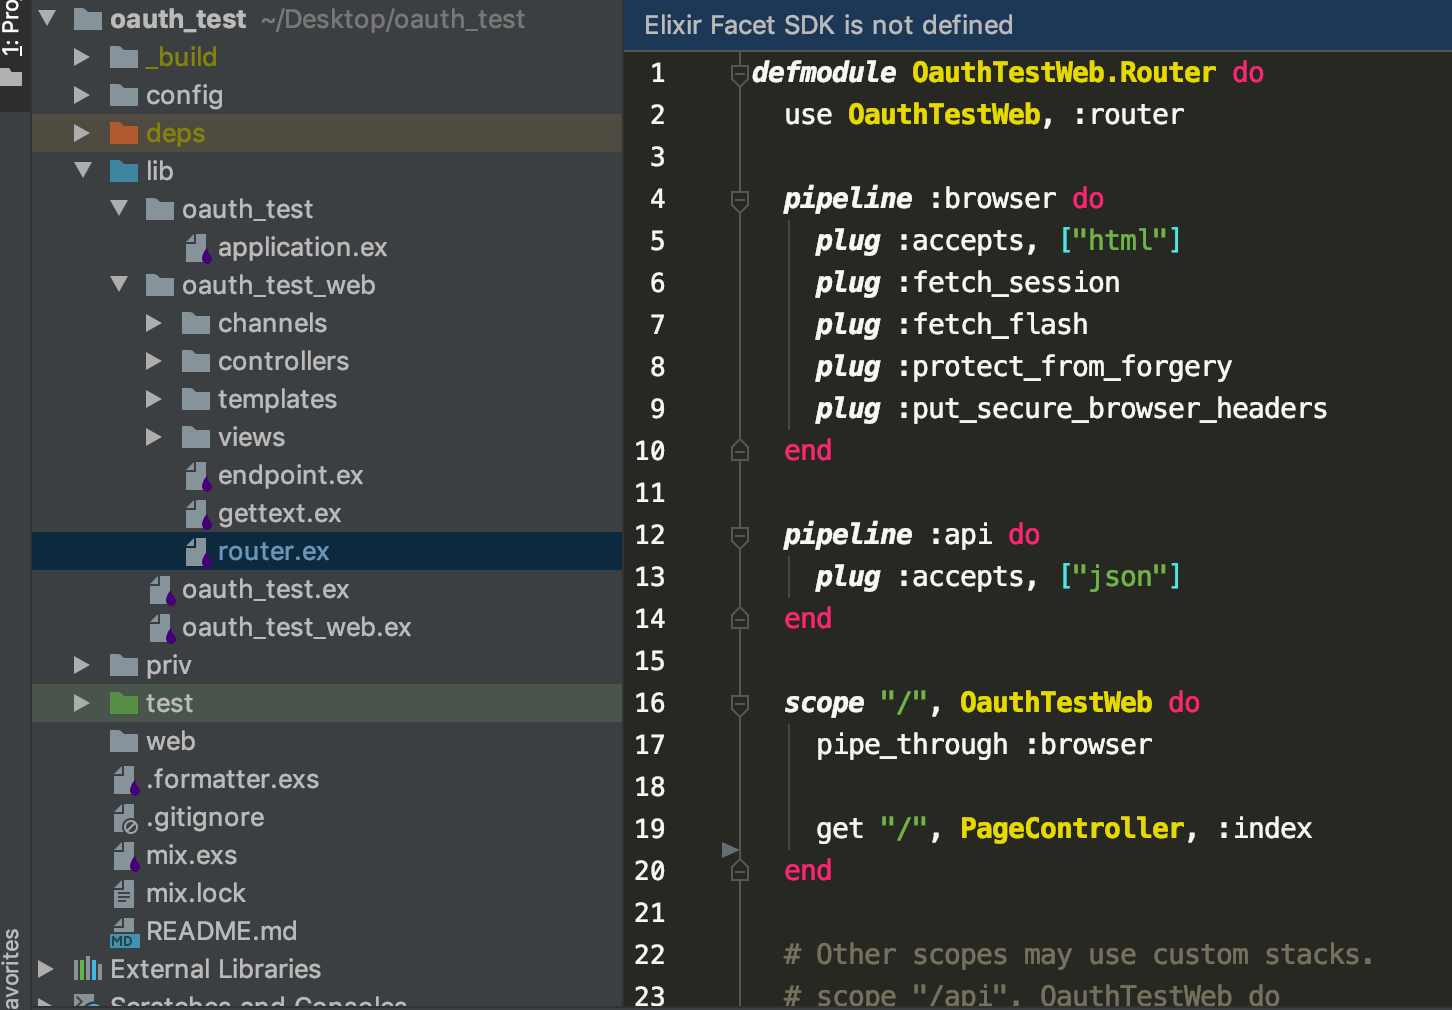
/lib/oauth_test/router.ex
  scope "/", OauthTestWeb do
    pipe_through :browser

    get "/", PageController, :index
  end
この部分を
  scope "/", OauthTestWeb do
    pipe_through :browser

    get "/", PageController, :index
    get "/auth", PageController, :auth
  end
このように書き足して下さい。
これで、初期ページに加えて、1ページ追加されました。
確認は mix phx.routes で行います。
$ mix phx.routes
Compiling 2 files (.ex)
page_path  GET  /                  OauthTestWeb.PageController :index
page_path  GET  /auth              OauthTestWeb.PageController :auth
websocket  WS   /socket/websocket  OauthTestWeb.UserSocket
5.コントローラー
ここからは、下の3つの画像の流れで、トークン取得に必要な認証コードを取得する所までやっていきます。
- トップページに認証用のリンクを貼る

- アプリの連携を許可する
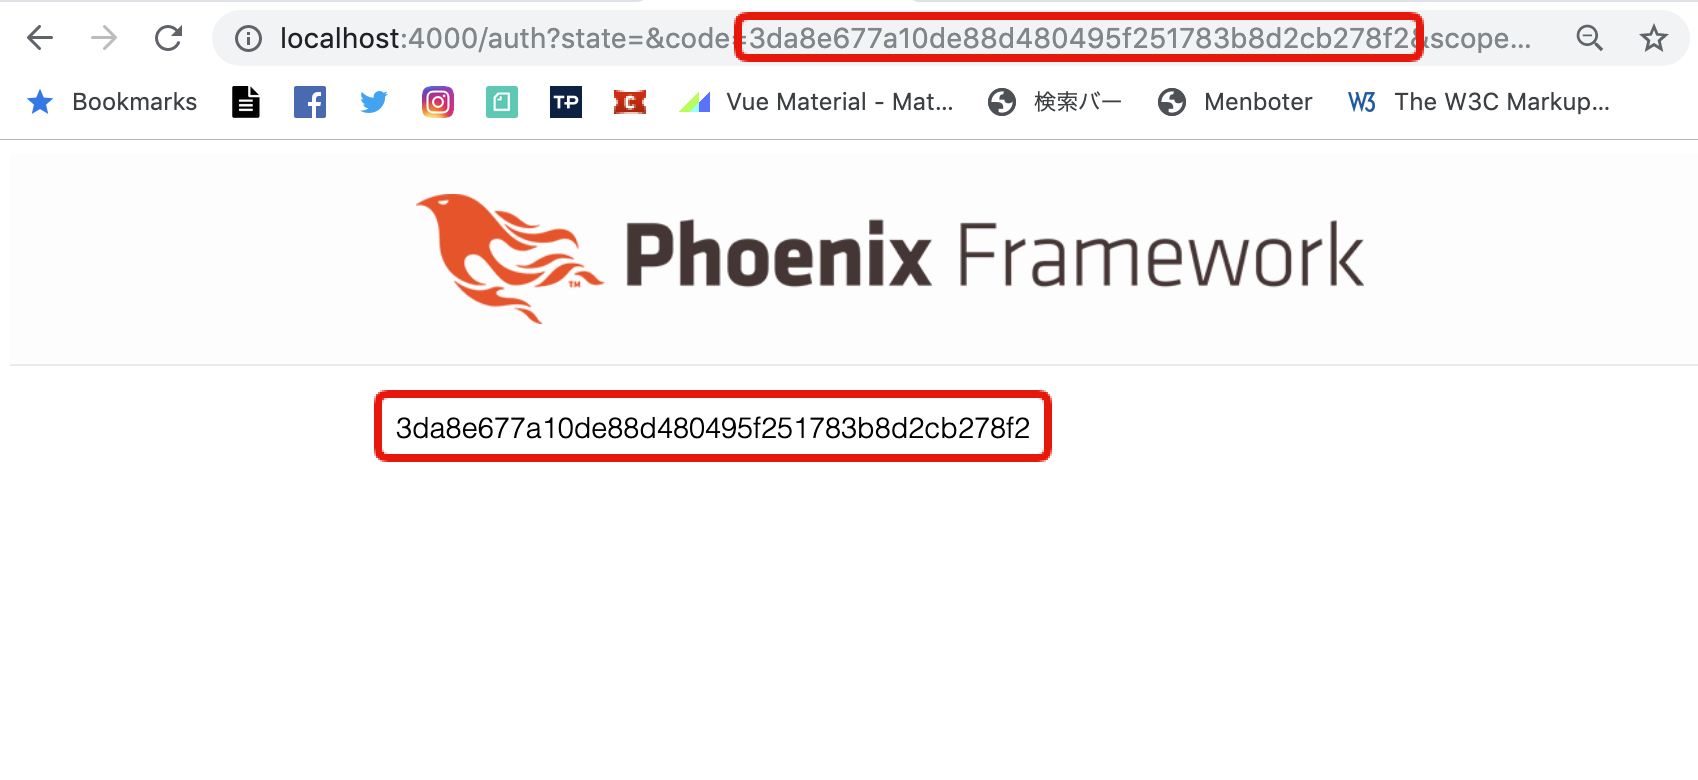
3)認証コードの取得とパラメーターの抜き出し。
では、実装に入りましょう。
コントローラーは lib/auth_test_web/controllers/ 以下になります。

今回はデフォルトで生成されていたコントローラーを使います。
/lib/oauth_test_web/contorollers/page_controller.ex
defmodule OauthTestWeb.PageController do
  use OauthTestWeb, :controller

  def index(conn, _params) do
    render(conn, "index.html")
  end
end
この記述を以下のように編集して下さい。
defmodule OauthTestWeb.PageController do
  use OauthTestWeb, :controller

  def index(conn, _params) do
    client = OAuth2.Client.new([
      strategy: OAuth2.Strategy.AuthCode,
      client_id: "xxxxxxxx",
      client_secret: "xxxxxxxxxxxxxxxxxxxxxxxxxxxxxxxx",
      site: "https://www.strava.com",
      redirect_uri: "http://localhost:4000/auth",
      authorize_url: "https://www.strava.com/oauth/authorize",
      token_url: "https://www.strava.com/oauth/token",
      token_method: :post,
      params: %{grant_type: "authorization_code"}
    ])

    uri = OAuth2.Client.authorize_url!(client, scope: "activity:read_all")
    uri = URI.decode(uri)
    render(conn, "index.html", uri: uri)
  end

  def auth(conn, %{"code" => code}) do
    render(conn, "auth.html", code: code)
  end
end
indexアクションの記述ですが、こちらは先程 iex で実験をした時のメモから作っています。
authアクションでは、コールバックで戻ってきたトークン、3)画像の赤枠の部分 の値を テンプレート側で、 @code として使えるようにパラメーターを 変数にセットしています。
%{"code" => code} でパラメーターの値をアクション側の変数にセットし、
code: code で テンプレート側に @code として引き渡せるようでした。
6.テンプレート
6.1 index.html.eex
テンプレートは、lib/oauth_test_web/templates/ 以下です。
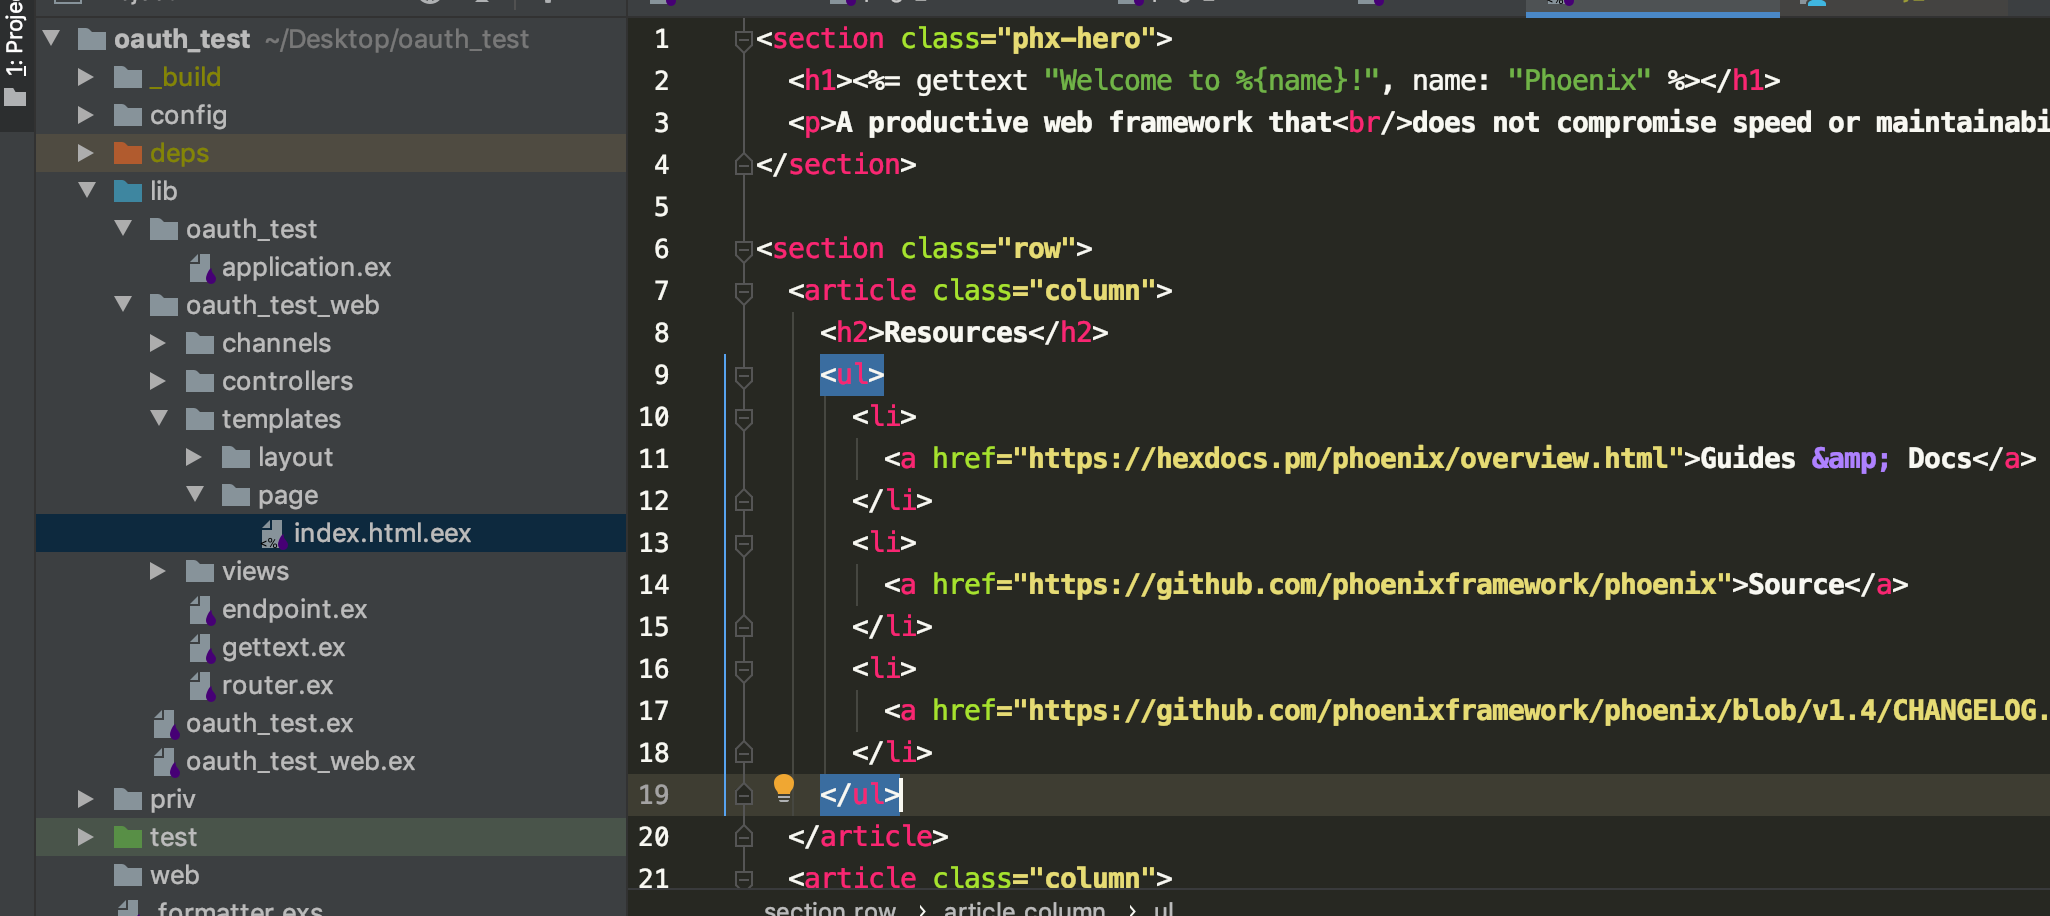
/lib/oauth_test_web/templates/page/index.html.eex
section class="phx-hero">
<h1><%= gettext "Welcome to %{name}!", name: "Phoenix" %></h1>
<p>A productive web framework that<br/>does not compromise speed or maintainability.</p>
</section>
<section class="row">
<article class="column">
<h2>Resources</h2>
<ul>
<li>
<a href="https://hexdocs.pm/phoenix/overview.html">Guides & Docs</a>
</li>
<li>
<a href="https://github.com/phoenixframework/phoenix">Source</a>
</li>
<li>
<a href="https://github.com/phoenixframework/phoenix/blob/v1.4/CHANGELOG.md">v1.4 Changelog</a>
</li>
</ul>
</article>
<article class="column">
<h2>Help</h2>
<ul>
<li>
<a href="https://elixirforum.com/c/phoenix-forum">Forum</a>
</li>
<li>
<a href="https://webchat.freenode.net/?channels=elixir-lang">#elixir-lang on Freenode IRC</a>
</li>
<li>
<a href="https://twitter.com/elixirphoenix">Twitter @elixirphoenix</a>
</li>
</ul>
</article>
</section>
現状では、初期画面の表示となっていますので、全て消して以下のように 書き換えて 下さい。
<%= link "データーを取得する", to: @uri %>
リンク1行だけです。
このリンクはコントローラー側で作った外部リンクとなります。
6.2 auth.html.eex
auth は新しいルートですので、ファイルを新規作成する必要があります。
$ touch lib/oauth_test_web/templates/page/auth.html.eex
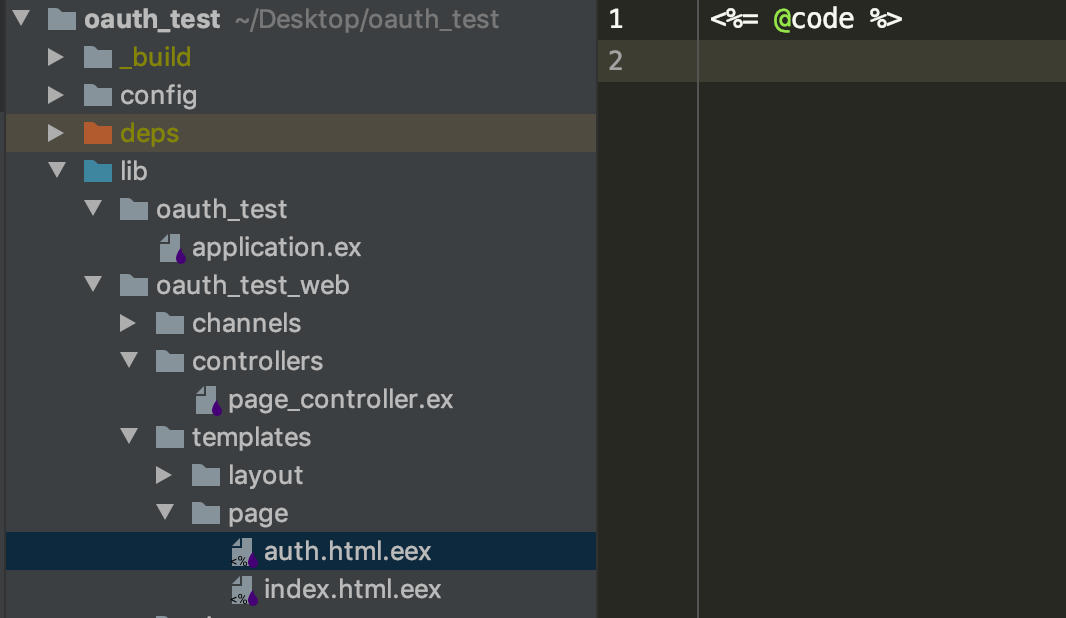
中身は、
/lib/oauth_test_web/templates/page/auth.html.eex
<%= @code %>
また、このように1行だけ実装します。
これで、一旦起動しましょう。
$ mix phx.server
サーバーを立ち上げ、
この通りに辿る事ができれば、一旦OKとします。
7.トークンの取得
7.1 コントローラーの変更
いよいよトークンの取得です。
/lib/oauth_test_web/contorollers/page_controller.ex
defmodule OauthTestWeb.PageController do
  use OauthTestWeb, :controller

  def index(conn, _params) do
    client = OAuth2.Client.new([
      strategy: OAuth2.Strategy.AuthCode,
      client_id: "xxxxx",
      client_secret: "xxxxxxxxxxxxxxxxxxxxxxxxxxxxxxxxxx",
      site: "https://www.strava.com",
      redirect_uri: "http://localhost:4000/auth",
      authorize_url: "https://www.strava.com/oauth/authorize",
      token_url: "https://www.strava.com/oauth/token",
      token_method: :post,
      params: %{grant_type: "authorization_code"}
    ])
    uri = OAuth2.Client.authorize_url!(client, scope: "activity:read_all")
    render(conn, "index.html", uri: uri)
  end

  def auth(conn, %{"code" => code}) do
    client = OAuth2.Client.new([
      strategy: OAuth2.Strategy.AuthCode,
      client_id: "xxxxx",
      client_secret: "xxxxxxxxxxxxxxxxxxxxxxxxxxxxxxxxxxx",
      site: "https://www.strava.com",
      redirect_uri: "http://localhost:4000/auth",
      authorize_url: "https://www.strava.com/oauth/authorize",
      token_url: "https://www.strava.com/oauth/token",
      token_method: :post,
      params: %{grant_type: "authorization_code"}
    ])
    client = OAuth2.Client.get_token!(client, code: code, client_id: client.client_id, client_secret: client.client_secret)
    access_token = client.token.access_token
    render(conn, "auth.html", access_token: access_token)
  end
end
7.2 テンプレートの変更
引き続きテンプレート側です。
/lib/oauth_test_web/templates/page/auth.html.eex
<%= inspect Poison.decode(@access_token) %>
この時点で Poison というライブラリを入れています。
取れる値がどうやらJSONのようでしたので、デコード出来るようにしておきます。
ですので、起動前に、mix.exsを、
/mix.exs
  defp deps do
    [
      {:phoenix, "~> 1.4.11"},
      {:phoenix_pubsub, "~> 1.1"},
      {:phoenix_html, "~> 2.11"},
      {:phoenix_live_reload, "~> 1.2", only: :dev},
      {:gettext, "~> 0.11"},
      {:jason, "~> 1.0"},
      {:plug_cowboy, "~> 2.0"},
      {:oauth2, "~> 2.0"},
      {:poison, "~> 4.0"}
    ]
  end
このように変更後、
$ mix deps.get
でインストールしておいて下さい。
では、起動します。
例のごとくボタンを辿ると、最後の画面が、
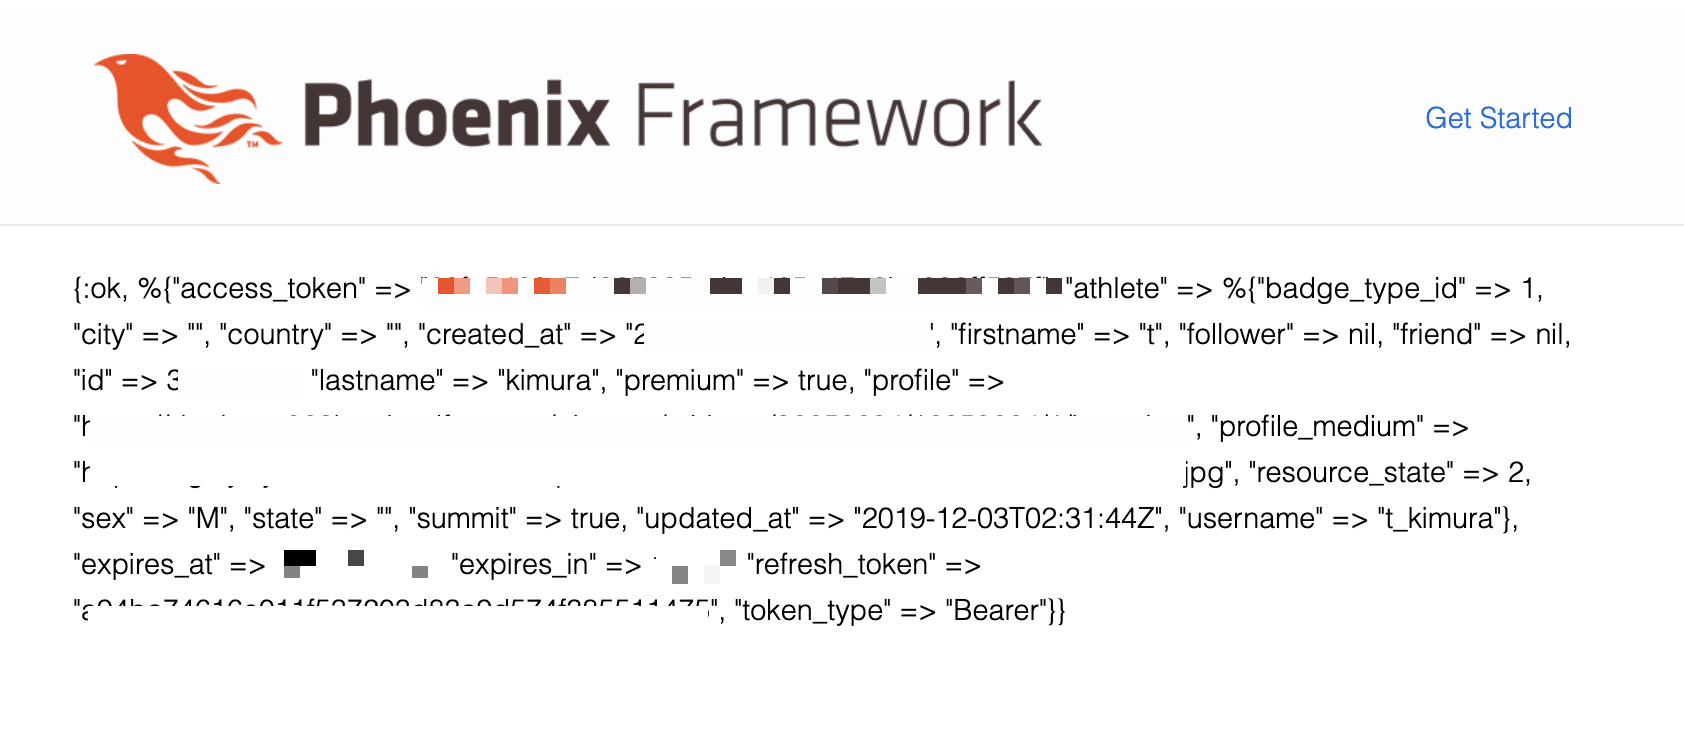
このように変更されて、 access_token が取得出来ていればOKです。
次回予告
さすがにちょっと・・・という事で、コントローラー周りのリファクタリングと、アクティビティデーターから、地図の表示までをやってみたいと思います。
正直、私のElixirレベルが上がらないと、厳しいです。せっかく良い環境にいるので、勉强しなくてはですね。