概要
ここ数年,Unityの既存の描画フロー(Built-in Render Pipelline)に代わりSRP(Scriptable Render Pipeline)にグラフィックス周辺のアップデートが多く入るようになりました.
SRPとは,これまである程度固定化されていたUnityの描画フローをC#ベースで独自に構築することができる機能です.(そのSRPを用いてUnity社が公式でメンテナンスしている描画フローのURP(Universal Render Pipeline), HDRP(High Definition Render Pipeline)の総称として使われることも多いです)
今回の記事では,シンプルな描画機能を持ったSRPを自作します.
作成した描画フロー
開発環境
- Windows 10 Pro 64bit
- Unity 2020.1.2f1
レンダリングパイプラインの作成
はじめに,今回の記事ではSRPの作成手順をなるべくシンプルに作成するため細かい描画処理の解説は省きます.
作業プロジェクトをGitHubで公開しますのでそちらをご覧いただくか,記事末尾に記載する参考記事を確認いただくと良いかと思います.
リポジトリ
RenderPipelineクラス作成
using UnityEngine.Rendering

  public sealed class ToonRenderPipeline : RenderPipeline
...
        public ToonRenderPipeline(ToonRenderPipelineAsset asset)
        {
            renderPipelineAsset = asset;

            // CommandBufferの事前生成
            for (int i = 0; i < commandBuffers.Length; i++)
            {
                commandBuffers[i] = new CommandBuffer();
                commandBuffers[i].name = "ToonRP";
            }
        }
まず,RenderPipelineを継承した独自のRenderPipelineクラスを作成します.
これは実際に描画を実行する際に使用するクラスです.
RenderPipelineAssetクラスの作成
using UnityEngine;
using UnityEngine.Rendering;

namespace Toguchi.Rendering
{
    [ExecuteInEditMode]
    [CreateAssetMenu(menuName = "ToonRenderPipelineAsset")]
    public class ToonRenderPipelineAsset : RenderPipelineAsset
    {
        [SerializeField]
        private float modelRenderResolutionRate = 0.7f;
        public float ModelRenderResolutionRate => modelRenderResolutionRate;

        protected override RenderPipeline CreatePipeline()
        {
            return new ToonRenderPipeline(this);
        }
    }
}
次にRenderPipelineAssetを継承したクラスを作成します.
これはScriptableObjectのためエディタでアセットとして作成でき,実際に動作させるRenderPipelineを指定する時に渡すことになります.
また,RenderPipelineで使用する設定値などを保持しておくこともできます.
Render関数の記述
using UnityEngine.Rendering

  public sealed class ToonRenderPipeline : RenderPipeline
...
       protected override void Render(ScriptableRenderContext context, Camera[] cameras)
        {
            for(int i = 0; i < cameras.Length; i++)
            {
                var camera = cameras[i];
                var commandBuffer = commandBuffers[i];

                // カメラプロパティ設定
                context.SetupCameraProperties(camera);

                // Culling
                if(!camera.TryGetCullingParameters(false, out var cullingParameters))
                {
                    continue;
                }
                cullingResults = context.Cull(ref cullingParameters);

                // RenderTexture作成
                CreateRenderTexture(context, camera, commandBuffer);

                // モデル描画用RTのClear
                ClearModelRenderTexture(context, camera, commandBuffer);

                // ライト情報のセットアップ
                SetupLights(context, camera, commandBuffer);

                // 不透明オブジェクト描画
                DrawOpaque(context, camera, commandBuffer);

                // Skybox描画
                if(camera.clearFlags == CameraClearFlags.Skybox)
                {
                    context.DrawSkybox(camera);
                }

                // 半透明オブジェクト描画
                DrawTransparent(context, camera, commandBuffer);

                // CameraTargetに描画
                RestoreCameraTarget(context, commandBuffer);

# if UNITY_EDITOR
                // Gizmo
                if (UnityEditor.Handles.ShouldRenderGizmos())
                {
                    context.DrawGizmos(camera, GizmoSubset.PreImageEffects);
                }
# endif

                // PostProcessing

# if UNITY_EDITOR
                // Gizmo
                if (UnityEditor.Handles.ShouldRenderGizmos())
                {
                    context.DrawGizmos(camera, GizmoSubset.PostImageEffects);
                }
# endif

                // RenderTexture解放
                ReleaseRenderTexture(context, commandBuffer);
            }

            context.Submit();
        }
SRPではRenderPipelineのRender関数で実際の描画処理を記述します.
Render関数には描画をするためのコマンド等を持つScriptableRenderContextとシーンに配置されているCameraの配列が渡され,基本的にはCamera1つ1つを回して描画処理を行うことになります.
ここには通常の描画処理に加え,EditorのGizmoの描画処理も挟む必要があります.
シェーダの記述
ここまでで描画フローの記述は完了したので,実際に描画をするために専用のシェーダを記述します.
ShaderTagId
        private const string FORWARD_SHADER_TAG = "ToonForward";
...
      private void DrawOpaque(ScriptableRenderContext context, Camera camera, CommandBuffer commandBuffer)
        {
            commandBuffer.Clear();

            commandBuffer.SetRenderTarget(renderTargetIdentifiers[(int)RenderTextureType.ModelColor], renderTargetIdentifiers[(int)RenderTextureType.ModelDepth]);
            context.ExecuteCommandBuffer(commandBuffer);

            // Filtering, Sort
            var sortingSettings = new SortingSettings(camera) { criteria = SortingCriteria.CommonOpaque };
            var settings = new DrawingSettings(new ShaderTagId(FORWARD_SHADER_TAG), sortingSettings);
            var filterSettings = new FilteringSettings(
                new RenderQueueRange(0, (int)RenderQueue.GeometryLast),
                camera.cullingMask
                );

            // Rendering
            context.DrawRenderers(cullingResults, ref settings, ref filterSettings);
        }
今回のパイプラインでは描画設定に"ToonForward"をShaderTagIdとして設定しています.
ここで設定したTagが記述されたシェーダのみが描画されるため,対応した専用のシェーダを記述する必要があります.
Unlitシェーダ
Shader "ToonRP/Unilt"
{
    Properties
    {
        _Color ("Color", COLOR) = (1, 1, 1, 1)
        _MainTex ("Texture", 2D) = "white" {}
    }
    SubShader
    {
        Tags { "RenderType"="Opaque" "Queue"="Geometry" }
        LOD 100

        Pass
        {
            Name "Unlit"
            Tags {"LightMode" = "ToonForward"}

            HLSLPROGRAM
            #pragma vertex vert
            #pragma fragment frag

            #pragma multi_compile _ ENABLE_DIRECTIONAL_LIGHT

            #include "UnityCG.cginc"

            struct appdata
            {
                float4 vertex : POSITION;
                float2 uv : TEXCOORD0;
            };

            struct v2f
            {
                float2 uv : TEXCOORD0;
                float4 vertex : SV_POSITION;
            };

            float4 _Color;

            sampler2D _MainTex;
            float4 _MainTex_ST;

# if ENABLE_DIRECTIONAL_LIGHT
            float4 _LightColor;
            float4 _LightVector;
# endif

            v2f vert (appdata v)
            {
                v2f o;
                o.vertex = UnityObjectToClipPos(v.vertex);
                o.uv = TRANSFORM_TEX(v.uv, _MainTex);
                return o;
            }

            fixed4 frag (v2f i) : SV_Target
            {
                // sample the texture
                fixed4 col = tex2D(_MainTex, i.uv);
                col *= _Color;

# if ENABLE_DIRECTIONAL_LIGHT
                col *= _LightColor;
# endif
                return col;
            }
            ENDHLSL
        }
    }
}
実際に作成したシェーダがこちらです.処理自体はただのUnlitシェーダになります.
前項の通り,Tags以下に "LightMode" = "ToonForward" が記述されています.
このタグでシェーダの絞り込みが行われているため,この記述が入ったシェーダのみが描画されます.
エディタにパイプラインを設定する
ここまでで描画フローを実行する準備が整ったので,実際に実効するRenderPipelineとして今回作成したものを登録します.
Asset作成
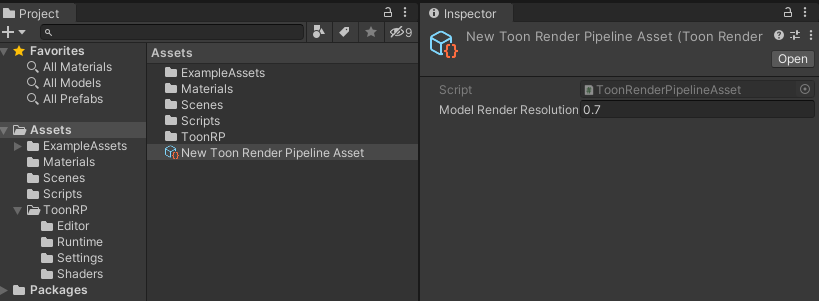
RenderPipelineAssetを作成します.
この作成したAssetからパイプラインの設定値を変更したりなどもできます.
GraphicsSettingsへの登録
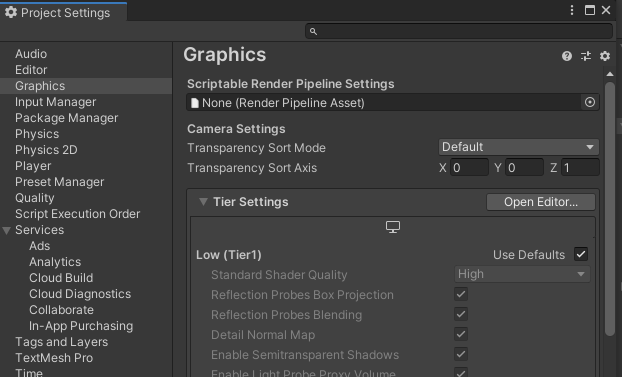
Edit/ProjectSettingsを開き,GraphicsSettingsを開きます.
ここでBuilt-in Render Pipelineを使っている(SRPを使っていない)場合Scriptable Render Pipeline Settingsの項目がNoneになっています.
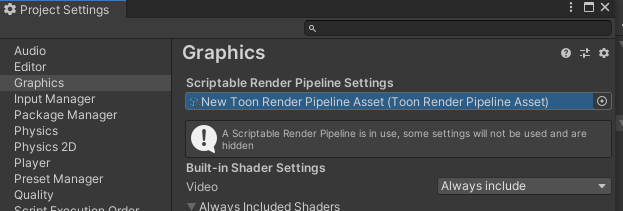
ここに先ほど作成したRenderPipelineAssetをアタッチします.
SRPが仕様中という表示に変わりBuilt-inで使用されていた描画用の設定がいくつか非表示になります.
これでUnityが使用するRenderPipelineとして自作したパイプラインが設定されました.
動作確認
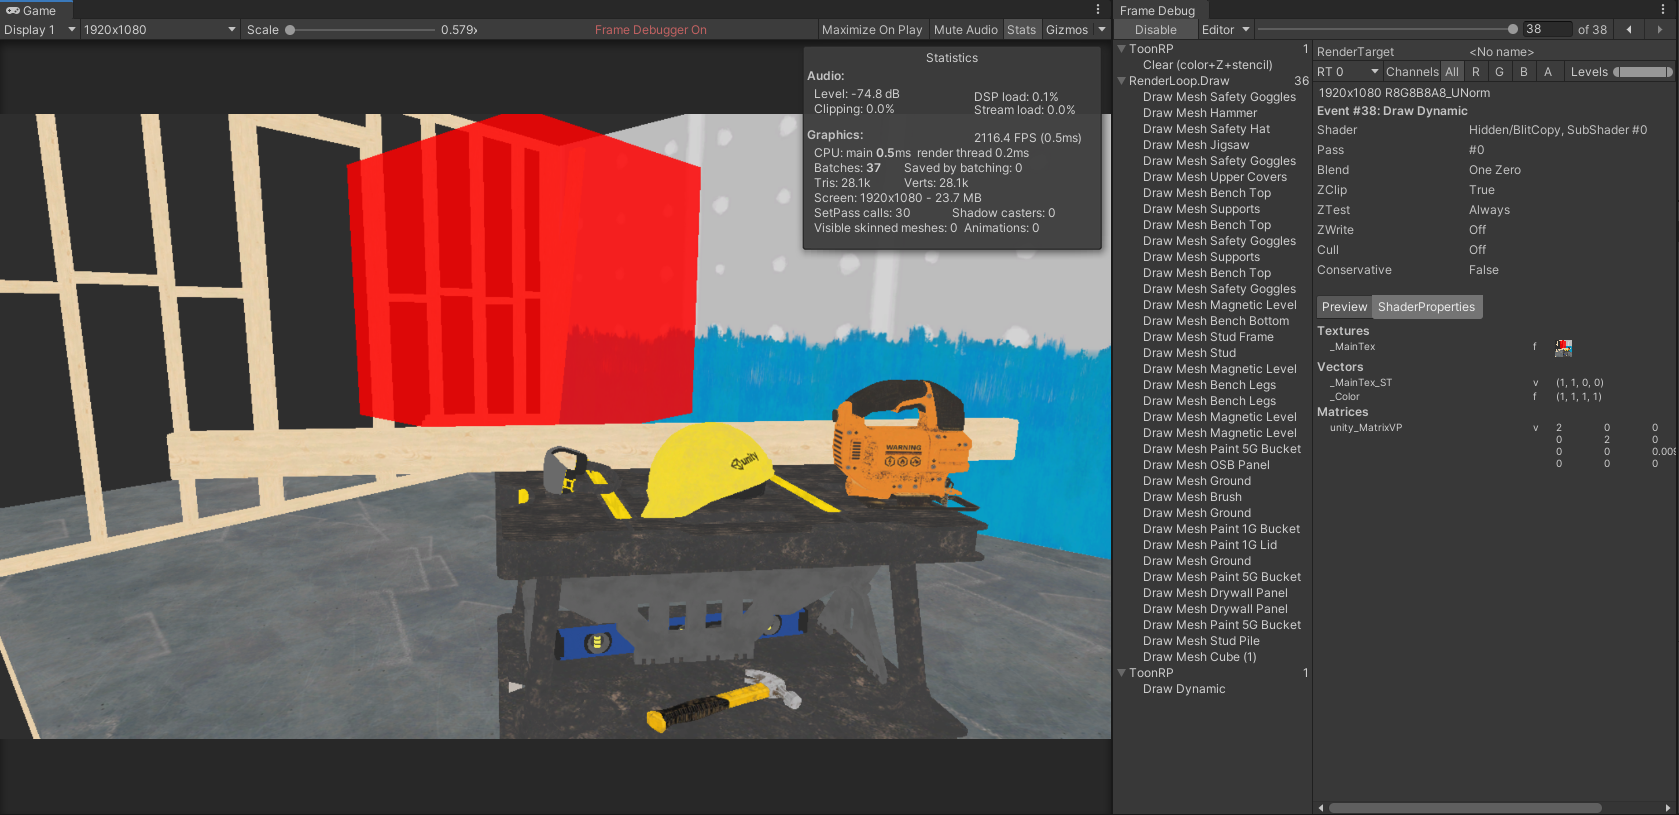
動作確認を行ったところ,不透明・半透明ともに正しく描画されました.
FrameDebuggerでも自作した描画フローが正しく動作していることが確認できます.
最後に
今回はシンプルなSRPを自作して動作確認まで行いました.
SRPを自作する場合は描画フローをほぼ1から作成することになるため,PBRベースで複雑な描画処理を組んだりするのには大きいコストがかかります.
ただ,その分描画負荷を切り詰めたり独自の工夫した表現を組み込む際には非常に便利なものだと思います.
実際のプロダクトでSRPを使用する際はURPをベースにするのが安定という意見が多く自分もそれには同意ですが,一度理解を深めるためにもSRPの自作を試してみて頂けると面白いと思います.
Tips
Built-inとSRPをランタイムで切り替える方法を書きました.
【Unity】SRPとBuilt-in Render Pipelineをランタイムで切り替える


