1. はじめに
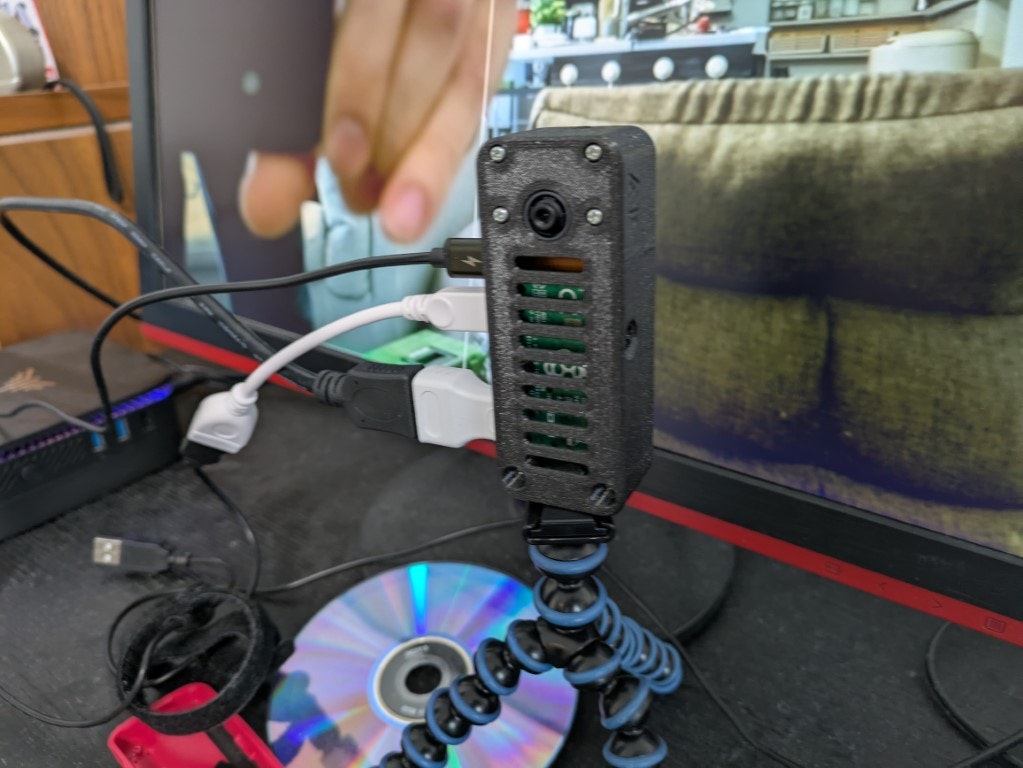
個人的な興味で、Raspberry Pi AI Cameraを購入しました。
このカメラは単体で画像認識・推論ができるエッジAIカメラなので、非力なRaspberry Pi Zero 2 Wを使って簡易的な小型エッジAIカメラを構築できるだけの可能性を秘めています。
この記事では、Raspberry Pi Zero 2 Wを用いてrpicam-vidを使用した映像出力・RTSP配信のコマンド、およびrpicam-stream.shとrpicam-stream.serviceを使用した自動実行の設定方法を説明します。
※なお、記事の執筆やコマンド・スクリプトの修正には、一部ChatGPT 4oを利用しています。
2024.12.22追記:こちらの方が配信での遅延が少なく安定しています。
4.1. セットアップまで完了したら以降はこちらを参考にすることをお勧めします。
2. ハードウェア
-
Raspberry Pi Zero 2 W
小型・省電力の仕様にしたかったので、Zero 2 Wを選定しています。 -
Raspberry Pi AI Camera
言わずもがな、これがないと始まりません。 -
RaspberryPi AIカメラ用 超小型PiZeroケース
別になくてもいいのですが、このケースがあったのがきっかけです。 -
短めのRaspberry Pi Zero用カメラケーブル
上記のケースを使用するなら、このケーブルも必要です。
3. ソフトウェア
-
Raspberry Pi OS
Zero 2 Wのスペックを考慮して、Raspberry Pi OS Lite (32bit) 2024-11-19 (2024.12.21時点の最新版)を使用しています。
2024.12.24追記:64bitでも問題ありませんでした。 -
imx500-all -
rpicam-vid -
VLC (
cvlc)
4. AI Cameraのセットアップ~RTSP配信の自動実行まで
4.1. セットアップ
まずはZero 2 W でRaspberry Pi AI Cameraを認識させるために、/boot/firmaware/config.txtを一部変更します。
#camera_auto_detect=1    <- コメントアウトで無効化します。

[all]
dtoverlay=imx500         <- imx500を[all]セクションで定義します。
以下のコマンドで必要なソフトをインストールし、一度再起動します:
sudo apt update && sudo apt full-upgrade
sudo apt install imx500-all
sudo apt install vlc
sudo reboot
再起動後にRaspberry Pi AI Cameraが認識できていればセットアップはOKです。
$ sudo dmesg | grep imx500
[    0.054487] platform 3f801000.csi: Fixed dependency cycle(s) with /soc/i2c0mux/i2c@1/imx500@1a
[    8.103568] platform 3f801000.csi: Fixed dependency cycle(s) with /soc/i2c0mux/i2c@1/imx500@1a
[   10.541866] imx500 10-001a: Device found is imx500
動作確認のため、下記のコマンドを実行しましょう。
CLI環境でもHDMIでディスプレイに接続していれば画面にカメラ映像とIMX500の推論結果が表示されるはずです。
なお、iIMX500自身の推論結果を表示するのには--post-process-fileオプションで指定している/usr/share/rpi-camera-assets/imx500_mobilenet_ssd.jsonを利用しているので、この部分を書き換えると別の推論結果やrpicam自身での映像処理機能を利用できたりします。
rpicam-hello -t 0s --post-process-file /usr/share/rpi-camera-assets/imx500_mobilenet_ssd.json --viewfinder-width 1920 --viewfinder-height 1080 --framerate 30
4.2. RTSP配信コマンド
動作確認ができたら、以下のコマンドを使用してRaspberry Piカメラの映像をRTSPで配信します。
rpicam-vid -t 0 --post-process-file imx500_mobilenet_ssd_annotate.json \
  --width 1280 --height 720 --framerate 30 --inline -o - | \
cvlc stream:///dev/stdin --sout '#rtp{sdp=rtsp://:8554/stream1}' :demux=h264
なお、配信時の映像に現在時刻を表示するために、imx500_mobilenet_ssd.jsonファイルには一部追記し作業ディレクトリと同じ場所に保存しています。
(作業ディレクトリは/home/{username}/を想定。なお、{username}は以降にも出現しますが各環境のユーザー名に置き換えてください。例えばpiユーザーなら{username}はpiになります。)
保存するにあたってわかりやすくするためにimx500_mobilenet_ssd_annotate.jsonにファイル名を変更しています。
※jsonファイルに追記じゃなく複数を同時使用できたら楽なんですけど、試してないのでわかりません。
{
    "annotate_cv" : {
        "text" : "%F %T %z",
        "fg" : 255,
        "bg" : 0,
        "scale" : 1.0,
        "thickness" : 2,
        "alpha" : 0.3
    },

    "imx500_object_detection":
    {
      ...(中略)...
    }
}
4.2.1. RTSP配信コマンドのオプション解説
-
rpicam-vid: 動画録画用のrpicamコマンドです。
動作確認で使用したrpicam-halloコマンドでは下記で説明している映像出力のオプションが使えないので、rpicam-vidに変更しています。 -
-t 0: 時間無制限で映像を配信します。 -
--post-process-file imx500_mobilenet_ssd.json: 画像処理設定ファイルを指定します。 -
--width 1280 --height 720: 解像度を指定します。
継続して動作し続けることを考慮してZero 2 Wの負荷を下げるための措置です。 -
--framerate 30: フレームレートを30fpsに設定します。
使用環境に応じてフレームレートは落としてしまってもいいと思います。 -
--inline: ストリーム ヘッダー情報をすべてのイントラ フレームに強制的に組み込みます。これにより、クライアントがストリームの先頭を見逃した場合でもストリームを理解できるようになります。 -
-o - |: |以降のコマンドで映像を出力します。 -
cvlc: VLCを使用してRTSP配信を行います。 -
--sout: 出力先をRTSPプロトコルで指定します。 -
:demux=h264: H.264形式でデータを処理します。
配信された映像は以下のURLで確認できます。
WindowsであればVLCやMPC-HCなどの動画再生ソフトが使えるはずです。
rtsp://<Raspberry PiのIPアドレス>:8554/stream1
4.3. 自動実行の設定方法
4.3.1. rpicam-stream.sh の作成
Raspberry PiカメラのRTSP配信コマンドを記述したスクリプトファイルを作成します。
このスクリプトは、カメラの映像を標準出力に出力し、それをVLCでRTSP配信するものです。
もしカメラの映像配信設定などを変更したい場合は、コマンドを直接編集することで配信の設定を変更できます。
sudo nano /home/{username}/rpicam-stream.sh
rpicam-stream.shには以下を記述します。
#!/bin/bash

rpicam-vid -t 0 --post-process-file imx500_mobilenet_ssd_annotate.json \
  --width 1280 --height 720 --framerate 30 --inline -o - | \
cvlc stream:///dev/stdin --sout '#rtp{sdp=rtsp://:8554/stream1}' :demux=h264
スクリプトに実行権限を付与します。
chmod +x /home/{username}/rpicam-stream.sh
4.3.2. rpicam-stream.service の作成
スクリプトをsystemdサービスとして登録します。
このsystemdサービスは、rpicam-stream.shを起動時に自動実行するためのものです。
サービスの設定を変更することで、リスタートポリシーや実行ユーザーを調整できます。
sudo nano /etc/systemd/system/rpicam-stream.service
rpicam-stream.serviceには以下を記述します。
[Unit]
Description=Raspberry Pi Camera RTSP Stream
After=network.target

[Service]
ExecStart=/home/{username}/rpicam-stream.sh
Restart=always
User=pi
WorkingDirectory=/home/{username}
StandardOutput=null
StandardError=journal

[Install]
WantedBy=multi-user.target
4.3.2.1 rpicam-stream.service の解説
-
Description: サービス名として記述します。 -
ExecStart: 実行するコマンドを指定します。パイプを使うために/bin/bash -cでコマンドを実行しています。 -
Restart=always: サービスが停止した場合に再起動します。 -
User={username}: 実行するユーザーを指定します。必要に応じて変更してください。 -
WorkingDirectory: 実行時の作業ディレクトリを指定します。
4.3.3. サービスを有効化
デーモンをリロードし、作成したサービスを認識させます。
sudo systemctl daemon-reload
サービスを起動します。
sudo systemctl start rpicam-stream.service
上記コマンドの実行後に状態を確認します。
sudo systemctl status rpicam-stream.service
このようにActive: activeと表示されていれば正常に動作しています。
● rpicam-stream.service - Raspberry Pi Camera RTSP Stream
     Loaded: loaded (/etc/systemd/system/rpicam-stream.service; disabled; preset: enabled)
     Active: active (running) since Sat 2024-12-21 22:11:56 JST; 4min 14s ago
   Main PID: 23198 (rpicam-stream.s)
      Tasks: 20 (limit: 388)
        CPU: 3min 9.149s
     CGroup: /system.slice/rpicam-stream.service
             ├─23198 /bin/bash /home/{username}/rpicam-stream.sh
             ├─23199 rpicam-vid -t 0 --post-process-file imx500_mobilenet_ssd.json --width 1280 --height 720 --framerate 30 --inline -o -
             └─23200 /usr/bin/vlc -I dummy stream:///dev/stdin --sout #rtp{sdp=rtsp://:8554/stream1} :demux=h264
サービスを停止させる(=カメラの撮影・画像認識・映像配信を止める)ときは下記のコマンドです。
sudo systemctl stop rpicam-stream.service
問題なければ、下記のコマンドで起動時に自動実行されるようサービスを有効にします。
再起動後、自動的にRTSP配信が開始されます。
sudo systemctl enable rpicam-stream.service
もし自動実行を中止するときは下記のコマンドです。
sudo systemctl disenable rpicam-stream.service
エラーや動作状況を確認する場合、以下のコマンドを使用してください:
journalctl -u rpicam-stream.service
5. トラブルシューティング
-
RTSP配信が確認できない
-
cvlcやrpicam-vidが正しくインストールされているか確認してください。 - ポート
8554がファイアウォールでブロックされていないか確認してください。
特にufwのファイアーウォールの設定をしている際は許可ポートに設定するなどの対応をしてください。
-
-
サービスが正常に動作しない
- サービスのステータスを確認してエラーを特定します。
bash
sudo systemctl status rpicam-stream.service
- サービスのステータスを確認してエラーを特定します。
-
配信された映像がカクつく
-
カメラ映像と推論結果をZero 2 WからHDMIで直接ディスプレイに表示すると遅延なく表示されるのですが、配信先のクライアント側では5秒程度の遅れとカクつきがあります。
https://forums.raspberrypi.com/viewtopic.php?t=354028#p2121994 によると、the pipe between libcamera-vid and cvlc is without timestamping, so a lot of framedrops with my usual 25 FPS
↓(日本語訳)
libcamera-vid と cvlc 間のパイプにはタイムスタンプがないので、通常の 25 FPS ではフレーム ドロップが頻繁に発生しますとあります。
いずれ、他の配信ソフトを使って改善できればと思っています。
cvlcに代わってMediaMTXとffmpegを使用することで改善できました!
-
以上で、Raspberry Piを使用したカメラ映像のRTSP配信と自動実行の設定が完了です!
6. 参考
Raspberry Pi AI Cameraについて
https://www.raspberrypi.com/documentation/accessories/ai-camera.html
Raspberry Pi Cameraでrpicamを使ったRTSP配信
https://zenn.dev/tttol/scraps/b3a859f6a6369c
rpicamのコマンドオプション(わかりやすい)
https://zenn.dev/ktamido/scraps/9205b00c79bc40
rpicamのコマンドオプション
https://www.raspberrypi.com/documentation/computers/camera_software.html
rtspストリーミング
https://www.raspberrypi.com/documentation/computers/camera_software.html#rtsp
