円の大きさを動的に変更できるようにします。
コード全文
<head>
  <script src="https://unpkg.com/vue"></script>
  <script src="https://d3js.org/d3.v4.min.js"></script>
</head>

<body>

  <div id="vue">
    <svg id="circle-002" :width="width" :height="height" style="border: 1px dotted"></svg>
    <div>r: {{ r }}</div>
    <div><input type="range" v-model="r" min="1" max="150" step="1"></div>
  </div>

  <script>

  new Vue({
    el: '#vue',
    data: {
      width: 800,
      height: 500,
      r: 75
    },
    mounted: function(){
      var svg = d3.select('#circle-002');
      this.circle = svg.append('circle')
                        .attr('cx', this.width/2)
                        .attr('cy', this.height/2)
                        .attr('r', this.r)
                        .style('fill','rgba(0, 0, 0, 0.8)')
    },
    watch: {
      r: function(newValue) {
        this.circle.attr('r', newValue)
      }
    }
  })

  // https://github.com/CorpGlory/d3vue
  </script>

</body>
結果
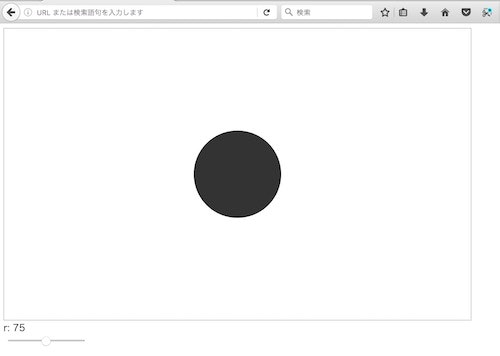
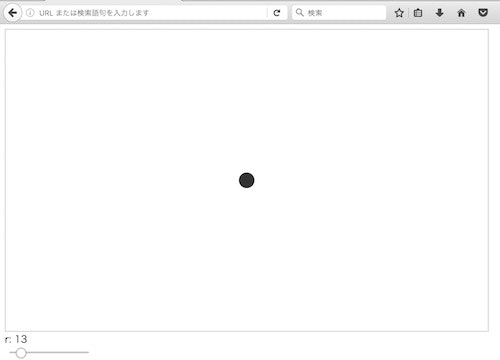
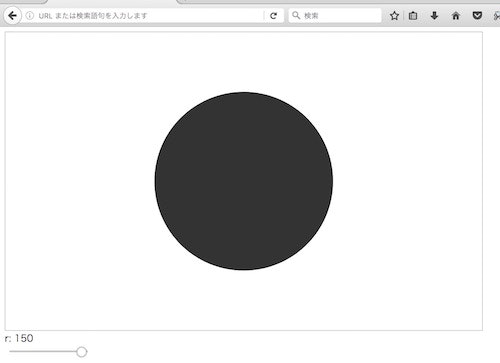
見づらいですが、svgエリア下のレンジ入力欄で円の大きさを変更できます。
コードの解説
①input(type="range")を追加
  <div id="vue">
    <svg id="circle-002" :width="width" :height="height" style="border: 1px dotted"></svg>
    <div>r: {{ r }}</div>
    <div><input type="range" v-model="r" min="1" max="150" step="1"></div>
  </div>
前回のコードから新たにinputタグを追加し、レンジ入力欄を作っています。
また、inputのv-modelに「r」を指定しています。
これでinputの値と円の半径「r」が連動するようになります。
(参考→ https://jp.vuejs.org/v2/api/#v-model )
半径の値は1から150までの範囲とします。
step="1"で、半径は1刻みで変更できるようにしています。
②watchを追加
<script>

new Vue({
  el: '#vue',
  data: {
    width: 800,
    height: 500,
    r: 75
  },
  mounted: function(){
    var svg = d3.select('#circle-002');
    this.circle = svg.append('circle')
                      .attr('cx', this.width/2)
                      .attr('cy', this.height/2)
                      .attr('r', this.r)
                      .style('fill','rgba(0, 0, 0, 0.8)')
  },
  watch: {
    r: function(newValue) {
      this.circle.attr('r', newValue)
    }
  }
})

</script>
前回のコードから新たに「watch」部分を追加しています。
watchには「更新されたことを検知したい変数」と
「その変数が更新されたら実行したい関数」を記述することができます。
関数は第一引数で更新された値を受け取ることができます。
ここでは「newValue」としていますが、別に「n」でも「v」でもなんでも構いません。
なお、上では使っていないですが第二引数を指定すれば更新前の値も受け取ることができます。
(参考→ https://jp.vuejs.org/v2/api/#watch )
上の例では「r」の変更を検知します。
また「r」の更新時に実行される関数では、
mounted内で作成した変数「this.circle」を使用して、
半径「r」に新しい値(newValue)がセットされるようにしています。
※watchが実行されるよりもmountedが実行される方が早い
(mountedはvueインスタンス作成完了時点くらいで実行される)ので、
後から実行されるwatchの中でthis.circleを参照できるという流れになります。
結果として、「r」が変更されるたび、
circleのrがゴリゴリ変わり、円の大きさが動的に変更されることになります。
※なお、watchでは「オブジェクト」や「配列」の変更を検知することはできません。
変更を検知できるのは「変数」のみですので気をつけて下さい。
(参考→ https://jp.vuejs.org/v2/api/#vm-watch )