なぜ
元々IftttでTwitterでいいねした画像をGoogleDriveにアップロードするものを使っていたが、いつの間にか使えなくなっていたのでこの際リハビリがてら作ってしまおうという考え
環境と使用履歴
・windows 10
・VScode←コードを書くときはたまに使う
・Heroku←全くわからない。はじめまして。
・Python←少し勉強した程度
実装予定の動き
①Herokuから一定時間ごとにTwitter APIを使ってアクセスし、いいねの更新があった場合そのツイート画像を取得し、DBに画像idを記憶するする。
②Herokuからリストを元に画像をOneDriveにアップロードする
*2回目以降はDBの画像idに取得したidがなければアップロードする
だいたいこんな感じ。
OneDriveにした理由はGoogleDriveの容量がほぼほぼなかったから
それ以上の理由はないのでもし、同じようなことをする場合はGoogleDriveなり自由に変えてもらって大丈夫だと思う。
構築
とりあえずローカルでテストするためにimportするファイルをインストールする
pip install python-twitter
↑Twitter https://pypi.org/project/python-twitter/
pip install microsoftgraph-python #使わなくなりました
↑OneDrive用 https://pypi.org/project/microsoftgraph-python/
pip3 install requests-oauthlib
↑OAuth1で認証するときに使うやつ https://pypi.org/project/requests-oauthlib/
<root>
├tmp                //画像の一時保存フォルダ
├main.py            //これから書き込んでいくファイル
├requirements.txt   //importするファイルの情報を書く
├runtime.txt        //pythonのバージョンを書く
└settings.yaml      //google driveの設定ファイル(後述)
現在の環境はこんな感じ
そしたら各ファイルを以下のように書き変えていきます
import twitter #twitter
import microsoftgraph #onedrive
import json
import os
from requests_oauthlib import OAuth1Session #Oauth
import psycopg2 #SQL
import urllib.error
import urllib.request
import glob
import tempfile
from time import sleep
python-3.7.6
python-twitter==3.5
requests-oauthlib==1.3.0
microsoftgraph-python==0.1.7
psycopg2==2.8.5
今回はHerokuにGitHubからデプロイするのでGitHubにリポジトリを作成しましょう

作成したらgit status git pushしましょう
自分はここでSSH関係でエラー吐いて2時間くらいかかりました()
GitHubでssh接続する手順~公開鍵・秘密鍵の生成から~
そしたらHerokuのDeploy欄からGitHubを接続しておきましょう

いいねの取得
まずいいねを取得するところからやっていきましょう
エンドポイントはhttps://api.twitter.com/1.1/favorites/list.jsonを使っていきます。
import twitter #twitter
import microsoftgraph #onedrive
import json
import os
from requests_oauthlib import OAuth1Session #Oauth
import psycopg2 #SQL
import urllib.error
import urllib.request
import glob
import tempfile
from time import sleep

# 後で環境変数に実装
consumer_key = '********'
consumer_secret = '********'
access_token = '********'
access_token_secret = '********'
# -------------------------------

CK = consumer_key
CS = consumer_secret
AT = access_token_key
ATS = access_token_secret
twitter = OAuth1Session(CK, CS, AT, ATS) #認証処理

# 取得したいユーザーのidを入れる
user_id = "*********"

def get_favorites():
    url = "https://api.twitter.com/1.1/favorites/list.json"
    params = {'user_id' : user_id,'count' : 5}
    res = twitter.get(url, params = params)

    if res.status_code == 200:
        favorites = json.loads(res.text)
        for favorites_list in favorites:
            print(favorites_list)
            print('--------------------------------------------')

    else: #正常通信出来なかった場合
        print("Failed: %d" % res.status_code)


get_favorites()
とりあえず、これでいいねしたjsonファイルが取得できます。params = {'count' : }を変更すると取得できるツイート数が増えます。
しかし、現在取得したデータはとても見づらいので整理していきます。
# ~~省略~~
    if res.status_code == 200:
        favorites = json.loads(res.text)
        for favorites_list in favorites:
            print(favorites_list['user']['name']+'::'+favorites_list['text'])
            print(favorites_list['created_at'])
            print('--------------------------------------------')
tomoi🌧::取得テスト
Thu Apr 23 09:45:47 +0000 2020
--------------------------------------------
[{'id': 1253260454891159552, 'id_str': '1253260454891159552', 'indices': [9, 32], 'media_url': 'http://pbs.twimg.com/media/EWR5vmDVAAA2iU-.png', 'media_url_https': 'https://pbs.twimg.com/media/EWR5vmDVAAA2iU-.png', 'url': 'https://t.co/qiksxV3aN7', 'display_url': 'pic.twitter.com/qiksxV3aN7', 'expanded_url': 'https://twitter.com/_tomoi/status/1253260505541521408/photo/1', 'type': 'photo', 'sizes': {'large': {'w': 535, 'h': 713, 'resize': 'fit'}, 'medium': {'w': 535, 'h': 713, 'resize': 'fit'}, 'thumb': {'w': 150, 'h': 150, 'resize': 'crop'}, 'small': {'w': 510, 'h': 680, 'resize': 'fit'}}}]
いい感じに取得できてますね。
画像URLの取得
ここまで来たらあとは簡単。jsonファイルからキー指定して取得していきましょう。
# ~~省略~~
def get_favorites():
    url = "https://api.twitter.com/1.1/favorites/list.json"
    params ={'user_id' : user_id,'count' : 7}
    res = twitter.get(url, params = params)

    if res.status_code == 200:
        favorites = json.loads(res.text)
        for favorites_list in favorites:
            print(favorites_list['user']['name']+'::'+favorites_list['text'])
            print(favorites_list['created_at'])
            print('--------------------------------------------')
            if  'media' in favorites_list['entities']:
                print('-------------true-------')
                print('--------------------------------------------')
                if 'photo' in favorites_list['entities']['media'][0]['type'] :
                    for media in favorites_list['extended_entities']['media']:
                        print(media['media_url'])
                        print('--------------------------------------------')
                    print('--------------------------------------------')
                else:
                    pass
    else: #正常通信出来なかった場合
        print("Failed: %d" % res.status_code)

get_favorites()
user_name::ツイート内容
Thu Apr 30 00:29:45 +0000 2020
--------------------------------------------
-------------true-------
--------------------------------------------
http://pbs.twimg.com/media/*************.jpg
--------------------------------------------
--------------------------------------------
画像のURLが取得できると思います
詳しく知りたい方向け
Herokuの環境変数
ベタ書きは危ないのでとっとと環境変数に入れておきましょう
heroku config:set TWITTER_CONSUMER_KEY='****************' --app "Herokuのアプリネーム"
heroku config:set TWITTER_CONSUMER_SECRET='****************' --app "Herokuのアプリネーム"
heroku config:set TWITTER_ACCESS_TOKEN_KEY='****************' --app "Herokuのアプリネーム"
heroku config:set TWITTER_ACCESS_TOKEN_SECRET='****************' --app "Herokuのアプリネーム"
heroku config:set TWITTER_USER_ID="****************" --app "Herokuのアプリネーム"
ここで全てにtwitter_と付いているのは、OneDriveのtokenを設定する予定があるから
# 後で環境変数に実装
consumer_key = '********'
consumer_secret = '********'
access_token = '********'
access_token_secret = '********'
# -------------------------------

CK = consumer_key
CS = consumer_secret
AT = access_token_key
ATS = access_token_secret
twitter = OAuth1Session(CK, CS, AT, ATS) #認証処理

# 取得したいユーザーのidを入れる
user_id = "*********"

↓

CK = os.environ["TWITTER_CONSUMER_KEY"]
CS = os.environ["TWITTER_CONSUMER_SECRET"]
AT = os.environ["TWITTER_ACCESS_TOKEN_KEY"]
ATS = os.environ["TWITTER_ACCESS_TOKEN_SECRET"]
twitter = OAuth1Session(CK, CS, AT, ATS)
user_id = os.environ["TWITTER_USER_ID"]
DBの作成
こちらの記事が見やすかったので参照して作成してください。
現在更新中なのか見れないためこちらから見てください。
このままではDBを動かせない
Herokuのコマンドすら使えなのでPostgerをインストールしてください。
PostgreSQLインストール
PostgreSQL公式ドキュメント読める人はこっちのほうがいいかも
DBにテーブルを作っていく
どのような構成にしたら便利か考えた結果↓のような構成にすることにしました。
Twitter_media_id 画像の固有ID
DB-Posting_time DBに登録した時間
Twitter_Posting-time Twitterに投稿された時間
Twitter_URL 画像のURL←この辺は使わないかも
CREATE TABLE Twitter_media_id (Twitter_media_id TEXT,DB_Posting_time TIMESTAMP,Twitter_Posting_time TIMESTAMP,Twitter_URL TEXT);
*Twitter_media_idという名前でカラムを作る際、テーブル名を決めておらず、脳死でテーブル名を決めていたらカラムと同名でテーブル名を作ってしまた()
取得してみるとちゃんと作成されていることがわかります。
***********::DATABASE=> SELECT * FROM twitter_media_id;
 twitter_media_id | db_posting_time | twitter_posting_time | twitter_url
------------------+-----------------+----------------------+-------------
(0 行)
ALTER TABLE twitter_media_id RENAME TO db;
テーブル名を変更したい場合は↑で変更してください
DBと接続する&ファイルのダウンロード
接続するためにheroku pg:credentials:url --app "Herokuのアプリネーム"を実行します。
Connection information for default credential.
Connection info string:
   "dbname=****** host=***-*-***-**-**.compute-*.amazonaws.com port=5432 user=********** password=********************** sslmode=********"
Connection URL:
   postgres://**************:*********************************@***-*-***-**-**.compute-*.amazonaws.com:5432/********
connection = psycopg2.connect("Connection URLで表示されたURL")#後で環境変数に追加する
cur = connection.cursor()

download_list =[]

def get_download_list():#ダウンロード済みのリストを取得する
    cur.execute("SELECT TWITTER_MEDIA_ID FROM DB;")
    for i in cur:
        download_list.append(str(i[0]))#tupleからstringに変換してlistに追加
        print(download_list)#[********,*********,*******]のように取得できる

def get_favorites():
    url = "https://api.twitter.com/1.1/favorites/list.json"
    params ={'user_id' : user_id,'count' : 7}
    res = twitter.get(url, params = params)

    if res.status_code == 200:
        favorites = json.loads(res.text)
        for favorites_list in favorites:
            print(favorites_list['user']['name']+'::'+favorites_list['text'])
            print(favorites_list['created_at'])
            print('--------------------------------------------')
            if 'media' in favorites_list['entities']:
                print('-------------true-------')
                i = 0
                print('--------------------------------------------')
                if 'photo' in favorites_list['entities']['media'][0]['type'] :
                    for media in favorites_list['extended_entities']['media']:
                        i += 1
                        download_file(media['media_url'],media['url'],i,favorites_list['created_at'])
                        print('--------------------------------------------')
                    print('--------------------------------------------')
                else:
                    pass
    else: #正常通信出来なかった場合
        print("Failed: %d" % res.status_code)

def download_file(url,path,number,t_post_time):
    try:
        with urllib.request.urlopen(url) as web_file:
            print(url)
            extension = url.split(".")[-1]
            print(number)
            Updated_path = path.split("/")[-1]
            file_path = Updated_path + "-" + str(number) + "." + extension#画像の名前兼固有IDの作成
            #ツイッターの短縮URLの後半(t.co/123456→123456) + - + 画像の枚数インデックス + . + 拡張子
            #123456-1.png
            i = SQL_Confirmation(file_path,t_post_time,url)
            if i == 0:#returnの値が0だった(SQLに登録されてない)場合に保存する
                urllib.request.urlretrieve(url,os.path.join("tmp",file_path))
                print("アップロード完了")
            else:
                pass
    except urllib.error.URLError as e:
        print(e)

def SQL_Confirmation(T_Media_ID,T_Posting_TIME,T_URL):#T_Media_ID:検索用
    if T_Media_ID not in download_list:#取得したリストにダウンロードしようとしているIDがあるか確認
        now_time = datetime.datetime.now()
        cur.execute("INSERT INTO DB (Twitter_media_id,DB_Posting_time,Twitter_Posting_time,Twitter_URL) VALUES (%s,%s,%s,%s)",[T_Media_ID,now_time,T_Posting_TIME,T_URL])#なかった場合DBに追加
        print("SQL true")
        return 0#リストに存在していなかったためダウンロードするようにする
    else:
        print("SQL false")
        return 1#リストに存在するためダウンロードしないようにする
        pass

def SQL_Close():#SQLの更新を保存する
    connection.commit()
    cur.close()
    connection.close()

get_favorites()
↑書いてて色々訂正する箇所が出てきたのでそのまま貼り付けてます。
プログラムの処理はコメントアウトに書いています。
ここで急転
ここまで作ってきましたが、OneDriveにアップロードするのがとてもめんどくさいことがわかってきたので急遽GoogleDriveに変更します。
pydriveのインストール
pip install pydrive
Googleアカウント側の設定
ここはざっくりと説明していきます。
詳細はこちらのサイトを参考に作成してください。
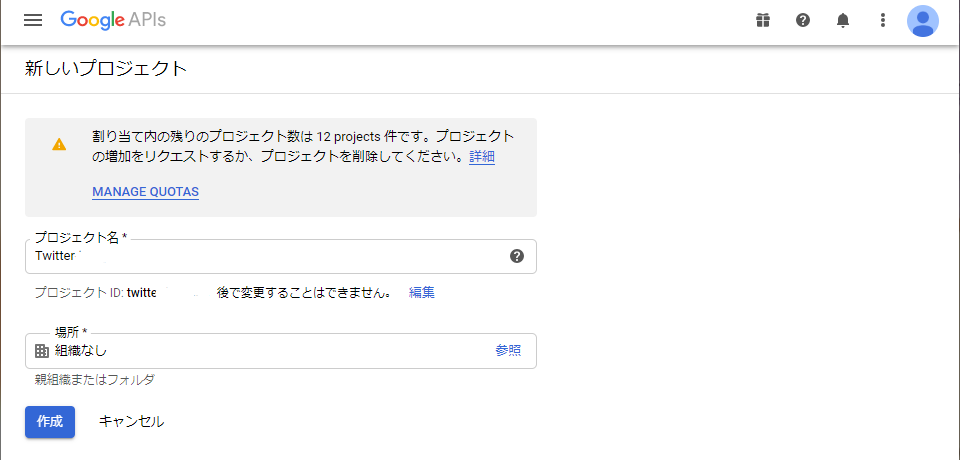
https://console.developers.google.com/から新規プロジェクトを作成してください。
ダッシュボード(作成後に戻ってきた場合はAPIライブラリ)から「Google Drive API」を検索し、「APIとサービスの有効化」をする。
認証情報を作成してください。
[外部]→アプリケーション名を適当につけて保存
認証情報を作成から「OAuth クライアント ID の作成」で名前つけて作成しましょう。

これでひとまず完成
Google認証
ここから別のファイルを作成して認証していきます。
「write_text.py」と「settings.yaml」というファイルを作成して以下を記述してください。
# 必要なライブラリのインポート
from pydrive.auth import GoogleAuth
from pydrive.drive import GoogleDrive
# OAuth認証を行う
gauth = GoogleAuth()
gauth.CommandLineAuth()
drive = GoogleDrive(gauth)
# テキストをGoogleドライブに書き込む
f = drive.CreateFile({'title': 'test.txt'})
f.SetContentString('賢い人に与えよ。彼はさらに賢くなる。')
f.Upload()
client_config_backend: settings
client_config:
  client_id: ★ここにOAuth クライアントID★
  client_secret: ★ここにクライアントシークレット★
save_credentials: True
save_credentials_backend: file
save_credentials_file: credentials.json
get_refresh_token: True
oauth_scope:
  - https://www.googleapis.com/auth/drive.file
  - https://www.googleapis.com/auth/drive.install
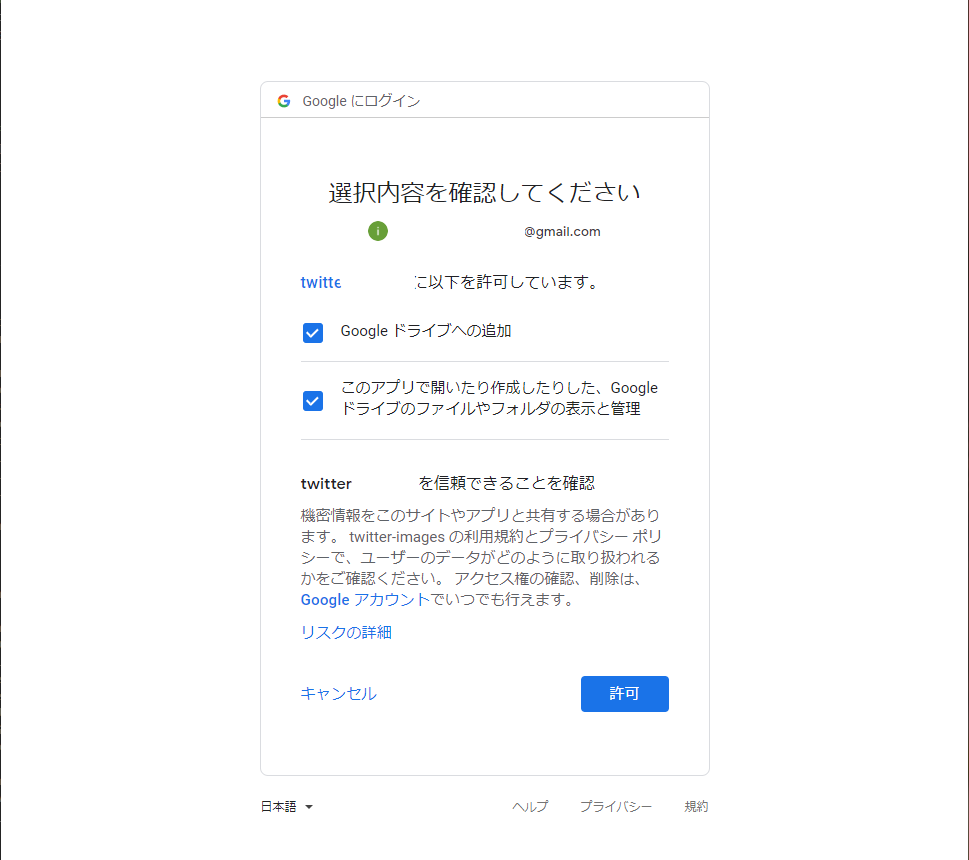
保存したら実行してください。するとURLが発行されるのでURLをブラウザに貼り付けて許可してください。
許可すると認証コードが発行されるのでターミナルに戻り、貼り付けてEnterで実行してください。

GoogleDriveの組み込み
from pydrive.auth import GoogleAuth #GoogleDrive
from pydrive.drive import GoogleDrive

gauth = GoogleAuth()
gauth.CommandLineAuth()
drive = GoogleDrive(gauth)
print("googledrive setup")

def GoogleDrive_Upload(file_path):
    print(file_path)
    f = drive.CreateFile()
    print(type(f))
    f.SetContentFile(file_path)
    print("----------------")
    print(f)
    f['title'] = os.path.basename(file_path)
    print("----------------")
    print(f)
    print("Uploading...")
    f.Upload()
    print("Uploaded!")
    print("----------------")
GoogleDrive_Upload()で引数にファイルパスを指定するとGoogleDriveにアップロードできる。
Heroku環境変数
heroku config:set GOOGLE_CLIENT_SECRET='****************' --app "Herokuのアプリネーム"
heroku config:set GOOGLE_CLIENT_ID='****************' --app "Herokuのアプリネーム"
heroku config:set DB='****************' --app "Herokuのアプリネーム"
追加し終わったらgit pushしてHerokuでデプロイしましょう。
※ここでpushするファイルは以下のものです。
<root>
├tmp                //画像を一時保存するフォルダ
|└.gitkeep          //これがないとからのフォルダをpushできない
├main.py            //これから書き込んでいくファイル
├requirements.txt   //importするファイルの情報を書く
├runtime.txt        //pythonのバージョンを書く
└settings.yaml      //google driveの設定ファイル
デプロイまで終わったらHerokuでもう一度Googleの認証をします。
Heroku→more→Run consoleからpython main.pyを実行しましょう
すると、URLが生成されるので認証してください。
🤔🤔🤔🤔
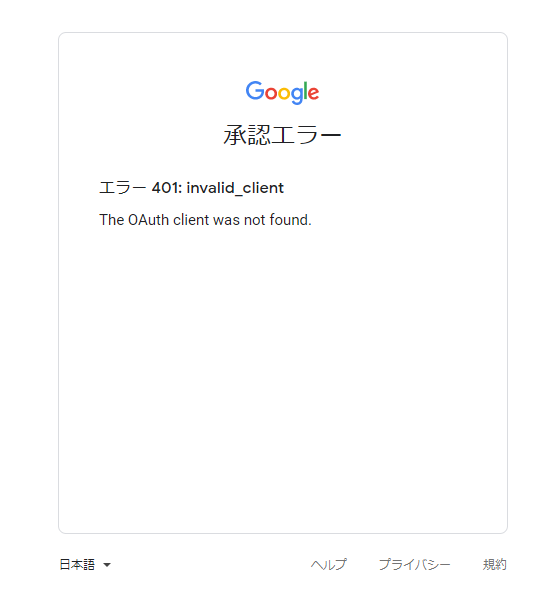
OAuth認証がエラー吐いた
すぐに出てきた考えはymlの環境変数の取得に失敗してること
と思ってローカル環境でidとsecretを削除して実行したらURLではなくエラーがしっかり出てきた。つまり環境変数の取得はできてそう。つまりOAuthがどこかで失敗してる。
正直精神的に死んできているので諦めて先ほど作成していたcredentials.jsonファイルをgit pushすることにする。
注意
今回は個人でしかもprivateリポジトリなのでcredentials.jsonをアップロードするという判断をしました。
基本的にアクセストークンなどをベタ書きでネットにアップロードするなどの行為は大変危険です。推奨は一切しません。それでもやりたいという方は自分で判断して実行してください。僕は一切責任を負いません。
僕は、また気が向いたら直したいとおもいます。
実行
あとは定期的に実行してくれれば良さそう。
Heroku Scheduler
参考元
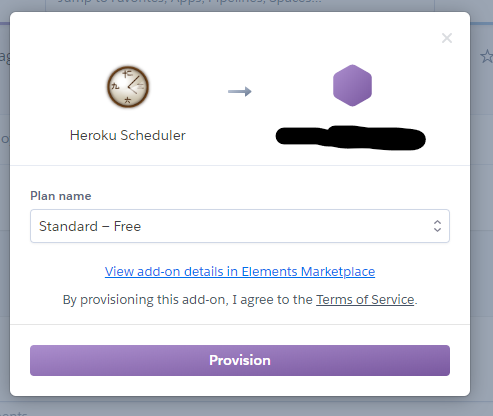
Resources→Add-onsからHeroku Schedulerを追加しましょう。
ちなみに追加する際にクレジットカードの登録が必須になっているらしいです。freeプランから変更しない限り課金はされないようです。
追加できたらHeroku Schedulerを開き、Create jpbで以下のように設定していきます。

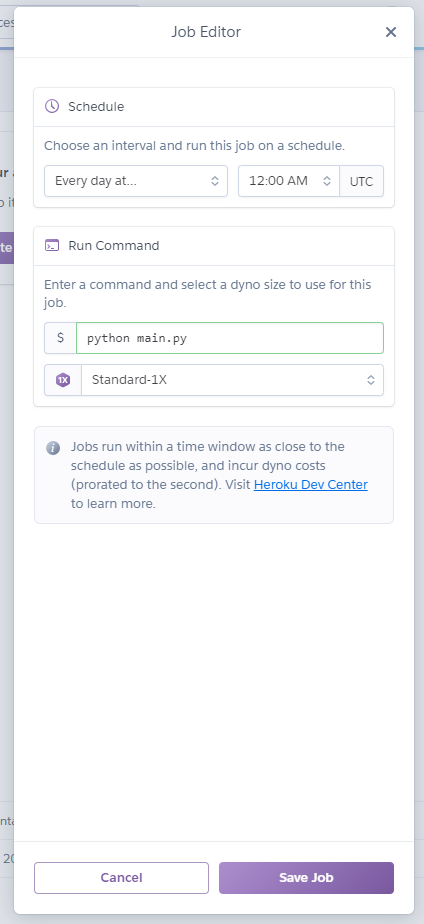
毎日午前9時にpython main.pyを実行する設定になっています。
時刻はUTC基準になっているので [設定したい時間] - [9時間] = [入力する時間] になります。
最終的なコード
import twitter #twitter
import json
import os
from requests_oauthlib import OAuth1Session #Oauth
import psycopg2 #SQL

import urllib.error
import urllib.request
import glob
import tempfile
from time import sleep
import datetime

from pydrive.auth import GoogleAuth #GoogleDrive
from pydrive.drive import GoogleDrive

CK = os.environ["TWITTER_CONSUMER_KEY"]
CS = os.environ["TWITTER_CONSUMER_SECRET"]
AT = os.environ["TWITTER_ACCESS_TOKEN_KEY"]
ATS = os.environ["TWITTER_ACCESS_TOKEN_SECRET"]
twitter = OAuth1Session(CK, CS, AT, ATS)
user_id = os.environ["TWITTER_USER_ID"]

db = os.environ["DB"]

connection = psycopg2.connect(db)
cur = connection.cursor()

download_list =[]

path = os.getcwd()
print(path)
file = os.listdir(path)
print(file)

gauth = GoogleAuth()
gauth.CommandLineAuth()
drive = GoogleDrive(gauth)
print("googledrive setup")

def SQL_get_download_list():
    cur.execute("SELECT TWITTER_MEDIA_ID FROM DB;")
    for i in cur:
        download_list.append(str(i[0]))
    print(download_list)

def SQL_Confirmation(T_Media_ID,T_Posting_TIME,T_URL):#Twitter_media_id:検索用
    if T_Media_ID not in download_list:
        now_time = datetime.datetime.now()
        cur.execute("INSERT INTO DB (Twitter_media_id,DB_Posting_time,Twitter_Posting_time,Twitter_URL) VALUES (%s,%s,%s,%s)",[T_Media_ID,now_time,T_Posting_TIME,T_URL])
        print("SQL true")
        return 0
    else:
        print("SQL false")
        return 1
        pass

def SQL_Close():
    connection.commit()
    cur.close()
    connection.close()

def GoogleDrive_Upload(file_path):
    print(file_path)
    f = drive.CreateFile()
    print(type(f))
    f.SetContentFile(file_path)
    print("----------------")
    print(f)
    f['title'] = os.path.basename(file_path)
    print("----------------")
    print(f)
    print("Uploading...")
    f.Upload()
    print("Uploaded!")
    sleep(0.5)
    print("----------------")

def get_favorites():
    url = "https://api.twitter.com/1.1/favorites/list.json"
    params ={'user_id' : user_id,'count' : 200}
    res = twitter.get(url, params = params)

    if res.status_code == 200:
        favorites = json.loads(res.text)
        for favorites_list in favorites:
            print(favorites_list['user']['name']+'::'+favorites_list['text'])
            print(favorites_list['created_at'])
            print('--------------------------------------------')
            if 'media' in favorites_list['entities']:
                print('-------------true-------')
                i = 0
                print('--------------------------------------------')
                if 'photo' in favorites_list['entities']['media'][0]['type'] :
                    for media in favorites_list['extended_entities']['media']:
                        i += 1
                        download_file(media['media_url'],media['url'],i,favorites_list['created_at'])
                        print('--------------------------------------------')
                    print('**********************************')
                else:
                    pass
    else: #正常通信出来なかった場合
        print("Failed: %d" % res.status_code)


def download_file(url,path,number,t_post_time):
    try:
        with urllib.request.urlopen(url) as web_file:
            print(url)
            extension = url.split(".")[-1]
            print(number)
            _url = url + ":orig"
            Updated_path = path.split("/")[-1]
            file_path = Updated_path + "-" + str(number) + "." + extension
            i = SQL_Confirmation(file_path,t_post_time,url)
            if i == 0:
                urllib.request.urlretrieve(_url,os.path.join("tmp",file_path))
                GoogleDrive_Upload(os.path.join("tmp",file_path))
                print("アップロード完了")
            else:
                pass
    except urllib.error.URLError as e:
        print(e)


def main():
    SQL_get_download_list()
    get_favorites()
    SQL_Close()
    print("完了")

main()
python-twitter==3.5
requests-oauthlib==1.3.0
PyDrive==1.3.1
psycopg2==2.8.5
google-api-python-client==1.7.11
google-auth==1.11.0
google-auth-httplib2==0.0.3
google-auth-oauthlib==0.4.1
python-3.7.6
client_config_backend: settings
client_config:
  client_id: ${GOOGLE_CLIENT_ID}
  client_secret: ${GOOGLE_CLIENT_SECRET}
save_credentials: True
save_credentials_backend: file
save_credentials_file: credentials.json
get_refresh_token: True
oauth_scope:
  - https://www.googleapis.com/auth/drive.file
  - https://www.googleapis.com/auth/drive.install
完走した感想
すごくダラダラと作ってしまったなという反省としっかり最後まで作りきった達成感が混ざってもやもやしてます。
改良する場所もすでに少しあって、GoogleDriveにアップロードする際にroot直下に保存しいるところをTwitterフォルダに入れておくことや、DBの最大保存数が10000件なので一定数以上保存されたら削除する処理を入れるなどやることがまだあって今は楽しいです。また、改良版ができたらgithubにでも上げてURL貼っておきます。
そして、HerokuのGoogle認証は本当に何もわからないのでなにか知っていることがあればコメントしてもらえると幸いです。
追記(5/11)
GoogleDriveの指定のフォルダにアップロード
フォルダのidを取得
アップロードしたいフォルダにアクセスしてURLの最後の部分をコピーする

↓
環境変数の追加
先程コピーしたidを環境変数に追加
heroku config:set FOLDER_ID='****************' --app "Herokuのアプリネーム"
↓コードの書き換え
folder_id = os.environ["FOLDER_ID
"]
def GoogleDrive_Upload(file_path):
    f = drive.CreateFile({"parents": [{"id": folder_id}]})
    f.SetContentFile(file_path)
    f['title'] = os.path.basename(file_path)
    print("----------------")
    print(f)
    print("Uploading...")
    f.Upload()
    print("Uploaded!")
DBの自動削除
def SQL_Delete():
    cur.execute("SELECT count(*) FROM DB;")
    count = int(cur.fetchone()[0])
    print(count)
    if count >= 1000:
        cur.execute("DELETE FROM db WHERE twitter_posting_time IN (SELECT twitter_posting_time FROM db ORDER BY twitter_posting_time ASC LIMIT 500);")
        print("削除完了")
PostgreSQLではDELETE FROM db ORDER BY twitter_posting_time ASC LIMIT 5;で実行できなので注意
その他参考元
python-OneDrive[microsoftgraph-python]
python-twitter
Twitter開発ドキュメント日本語訳
【GitHub】アプリのバージョン管理を行う
PostgreSQL型一覧
Python, PyDriveでGoogle Driveのダウンロード、アップロード、削除など
ゼロからはじめるPython 第16回 PythonからGoogleドライブを操作しよう(その1)
PyDrive OAuth

