はじめに
S3上にあるファイルを一時的に不特定多数に公開したい場合や、IAM Userアカウントを持っていない人に対して一時的にファイルのダウンロード/アップロードさせたい場合があります。このような場合に用いることができる手段として「S3 Presinged URL」があります。
ググってみると、このURLの生成方法、利用方法についての説明はあるものの、その仕組みについて触れたものはほとんどなかったため、記事にまとめました。
TL;DR
- Presigned URLは特定のIAM Entity(IAM User/IAM Roleなど、AWS API操作主体となるもの)の権限で発行される
- Presigned URLによるファイルのダウンロード/アップロードは、このURLを発行したIAM Entityの権限で実行される
- Presigned URLは有効期限を持たせることができる
- Presigned URLは、AWS Signature V2/V4に基づく署名がQuery stringsパラメータに付与されたURLであると言える
なお、本稿の目的とは少し外れますが、Signature V2は2019/6/24以降、利用できなくなりますのでご注意ください。
S3 Presigned URLとは
通常、S3上のファイルを操作するためには、必要なPermissionが付与されたIAM Userアカウントを持っているか、必要なPermissionが付与されたIAM RoleをAssumeRole出来る権限が必要です。
換言すると、有効なAWS Credentials(AccessKey/SecretAccessKeyのペア、もしくはTemporary Credentialsであれば、AccessKey/SecretAccessKey/SessionTokenのセット)を持っている必要があります。
Presigned URLとはこれが不要で、簡単に言うと、AWS Credentialsを持たないユーザに対してS3 Bucketに一時的にアクセスさせることを目的として発行する、一時的なURLといえます。
ポイントはTL;DRに上述した通りです。
実は、S3のPresigned URLそのものに関するドキュメントはあまり多くありません。敢えて挙げるとすればこのあたりでしょうか。
Uploading Objects Using Presigned URLs - Amazon Simple Storage Service
https://docs.aws.amazon.com/AmazonS3/latest/dev/PresignedUrlUploadObject.html
A presigned URL gives you access to the object identified in the URL, provided that the creator of the presigned URL has permissions to access that object. That is, if you receive a presigned URL to upload an object, you can upload the object only if the creator of the presigned URL has the necessary permissions to upload that object.
これは、一時的に有効なURLを発行して、ユーザにファイルをアップロードさせることを想定した利用方法です。会員制のWebサービスなどでユーザからのファイルを受け取る場合を想定したものとなります。
Presigned URLは、一定時間のみ有効です。生成から60秒間有効など、有効期間を短く設定しておくことで、セキュリティ上の脅威も発生しにくくなります。
また、AWS CLIを利用してPresigned URLを生成することもできます。
presign — AWS CLI 1.16.140 Command Reference
https://docs.aws.amazon.com/cli/latest/reference/s3/presign.html
S3 Presigned URLを試してみる
まずは実際に試してみたほうがイメージがつきやすいと思いますので、Presigned URLを生成してアクセスしてみます。
IAM Userを利用する場合/IAM Roleを利用する場合とで少し違いがありますので、両方試してみます。
検証した環境
利用した環境は以下の通りです。
- AWSアカウント
- アカウントID: 4**********8
- S3
- Bucket名: investigate-iot-jobs
- 対象ファイル: s3://investigate-iot-jobs/example.json
- IAM User
- ユーザ名: tmiki
- Permissions: 後述するinline policyを付与
- IAM Role
- Role名: role-ec2-readonly
- Permissions: 後述するinline policyを付与
{
    "Version": "2012-10-17",
    "Statement": [
        {
            "Effect": "Allow",
            "Action": "s3:GetObject",
            "Resource": "arn:aws:s3:::investigate-iot-jobs/*"
        }
    ]
}
S3にファイルをアップロードしておきます。内容は何でも構いません。
$ aws s3 ls s3://investigate-iot-jobs/example.json
2019-04-14 05:54:28         91 example.json
今回は以下のような内容でファイルをアップロードしました。
{
	"name": "example",
	"description": "To explain how an S3 Presigned URL works."
}
IAM Userの権限でPresigned URLを生成する
まずは当該IAM UserのAccessKey/SecretAccessKeyを発行します。
その後、AWS CLIがインストールされている適当なLinuxインスタンス(ローカルのVMでもEC2インスタンスでも何でも)で、AccessKeyとSecretAccessKeyの設定をします。
$ aws configure
AWS Access Key ID [****************EREA]:
AWS Secret Access Key [****************uRnj]:
Default region name [ap-northeast-1]:
Default output format [json]:
STSのget-caller-identityを実行して、先ほど設定したIAM Userの権限でAWS CLIが実行されることを確認します
$ aws sts get-caller-identity
{
    "Account": "4**********8",
    "UserId": "AIDA*****************",
    "Arn": "arn:aws:iam::4**********8:user/tmiki"
}
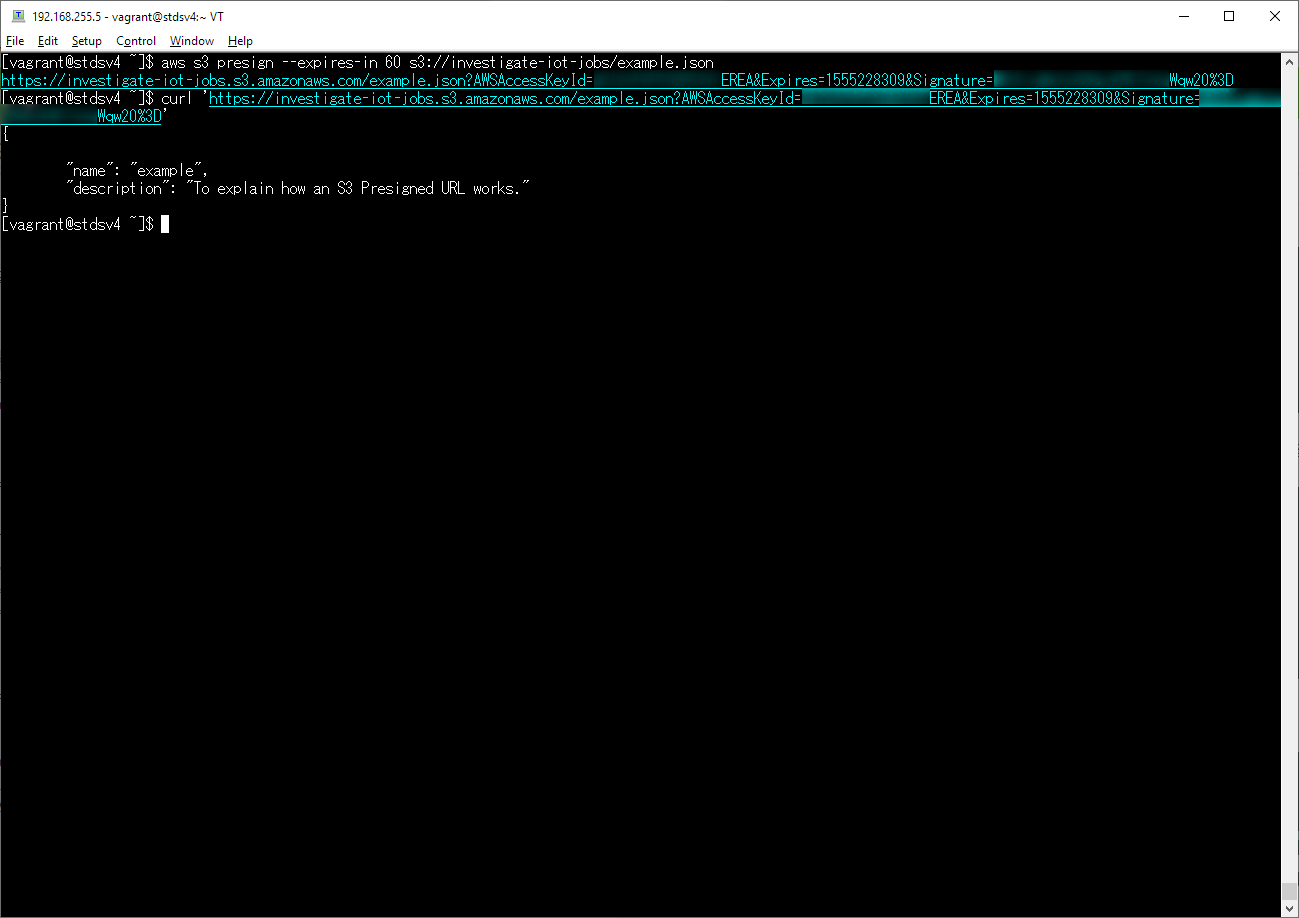
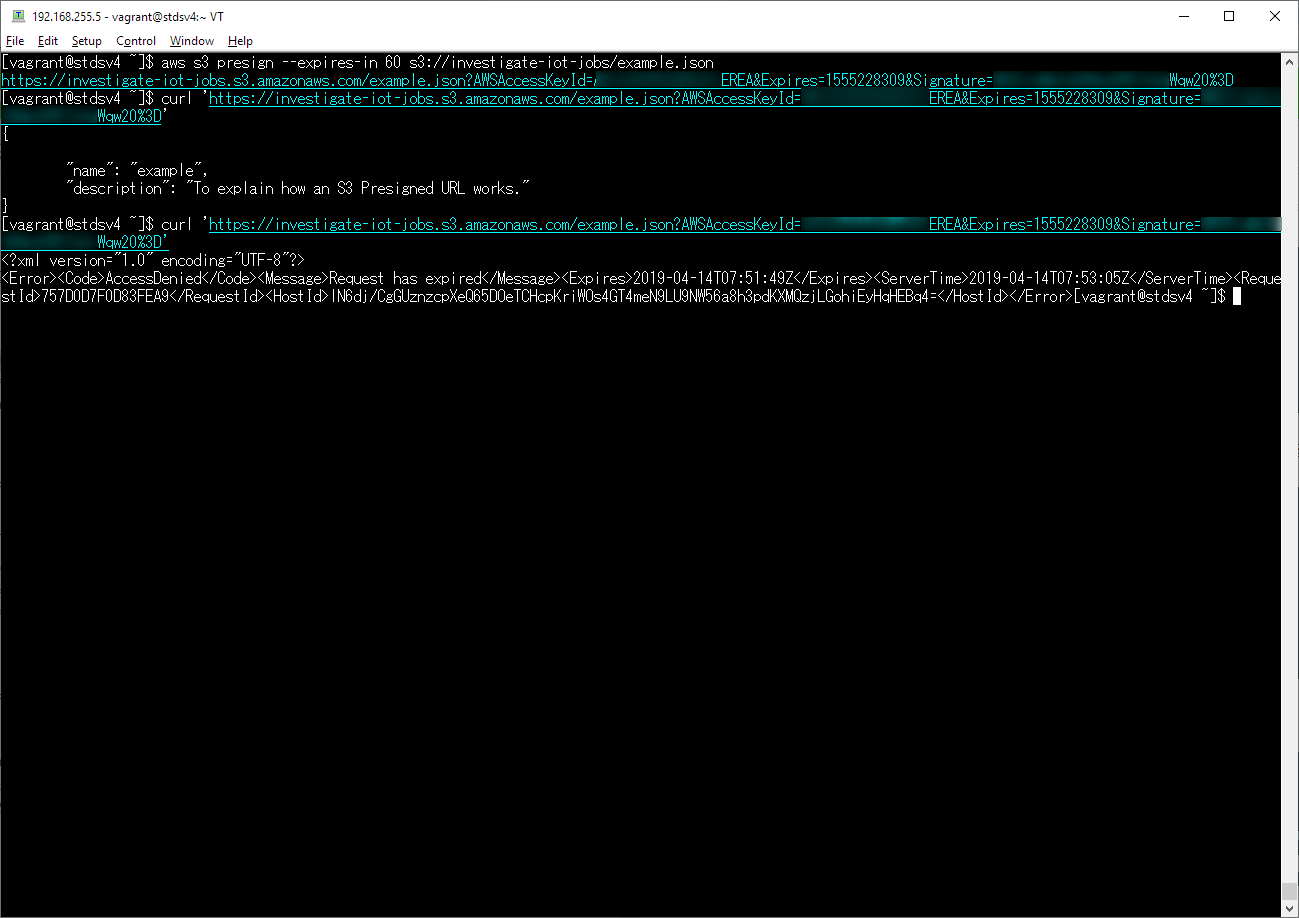
AWS CLIを使ってS3 Presigned URLを生成します。ここでは、有効期限は60秒としています。これは「--expires-in」オプションで指定できます。
生成されたURLに、先ほど指定したAccessKeyがそのまま入っていることが分かります。
$ aws s3 presign --expires-in 60 s3://investigate-iot-jobs/example.json
https://investigate-iot-jobs.s3.amazonaws.com/example.json?AWSAccessKeyId=****************EREA&Expires=1555228202&Signature=**********************Wqw20%3D
生成したURLをもとにHTTPリクエストを行うと、S3上のファイルを取得することができます。

60秒経ったのちに、再度HTTPリクエストを行うと、今度はHTTP StatusCode 403 Forbiddenが返却され、エラーとなります。

IAM Roleを利用してPresigned URLを生成する
次に、IAM Roleの権限を利用してPresigned URLを生成します。ここでは、EC2 Instance Profileを利用して試します。
まず、適当なEC2インスタンスを作成し、IAM Roleを付与します。ここでは「role-ec2-readonly」という名称にしています。
SSHログインし、AWS CLIの設定上、AccessKey/SecretAccessKeyが設定されていないことを確認します。
$ aws configure
AWS Access Key ID [None]:
AWS Secret Access Key [None]:
Default region name [None]:
Default output format [None]:
念のため、STSのget-caller-identityを実行して、当該APIを発行したUserId/Arnが、EC2インスタンスに付与されたIAM RoleをAssumeRoleしたものであることを確認します。
{
    "Account": "4**********8",
    "UserId": "AROA*****************:i-0de23d3f812c92abb",
    "Arn": "arn:aws:sts::4**********8:assumed-role/role-ec2-readonly/i-0de23d3f812c92abb"
}
次に、先ほどと同様、AWS CLIを利用してPresigned URLを生成します。先ほどとはうって変わって長いURLが発行されました。
$ aws s3 presign --expires-in 60 s3://investigate-iot-jobs/example.json
https://investigate-iot-jobs.s3.amazonaws.com/example.json?https://investigate-iot-jobs.s3.amazonaws.com/example.json?AWSAccessKeyId=ASIA****************&Expires=1555229059&x-amz-security-token=AgoJ........7MY%3D&Signature=********************4gjM%2BGM%3D

### ※上記URLは一部省略
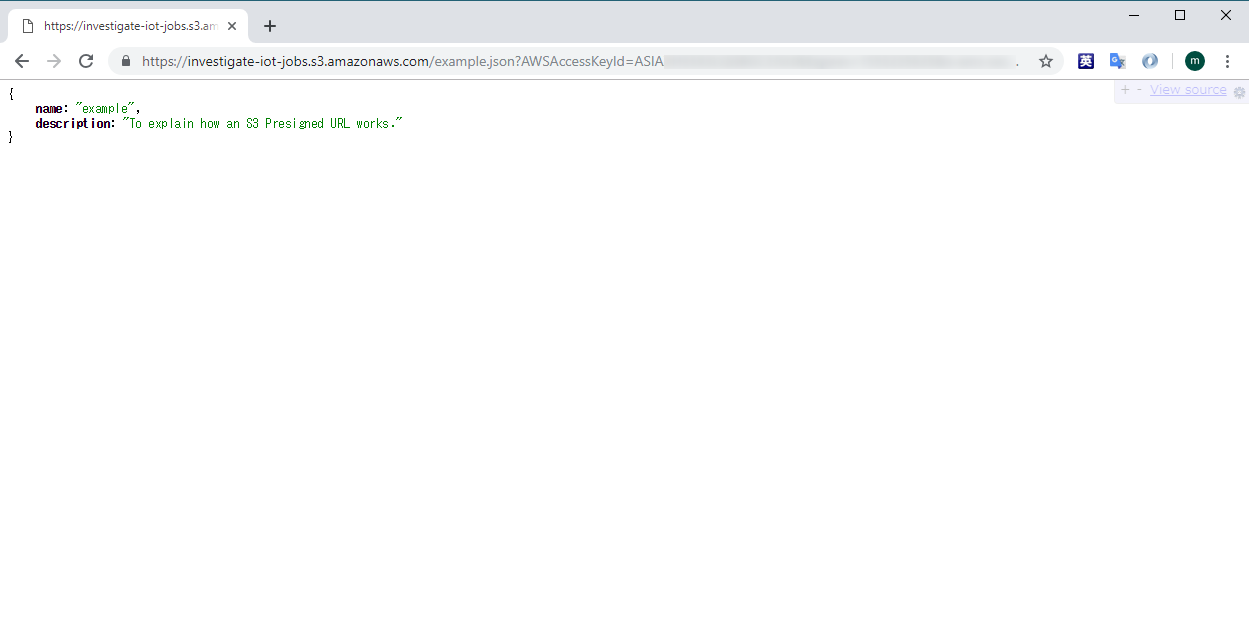
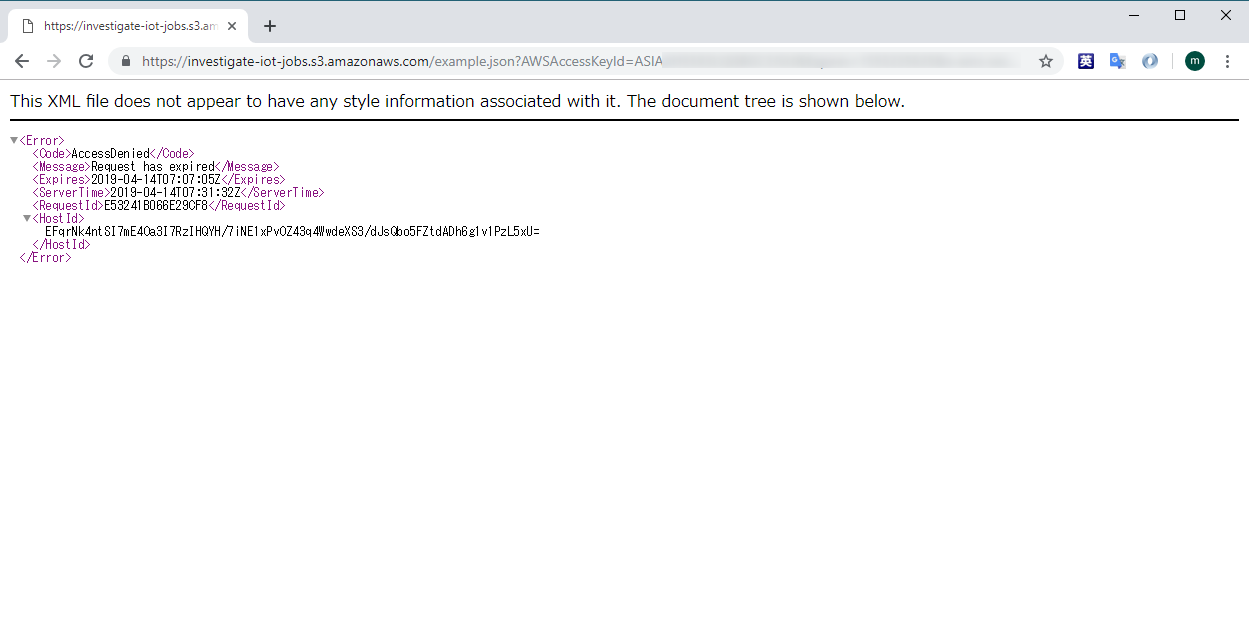
このURLも、先ほどと同様、ファイルをダウンロードすることができます。今度はWebブラウザから試してみますが、同様にコンテンツが表示されます。

60秒後、リロードして再度ダウンロードを試みるとやはりエラーとなり参照できなくなります。

ファイルをダウンロード中に有効期限を過ぎてしまったら
Presigned URLは有効期限付きですが、大きなファイルをダウンロード中に有効期限を過ぎてしまった場合はどうなるでしょうか。
結論としては、ダウンロード中に通信が切断されることはありません。
URLが有効かどうかのチェックは、AWS側でリクエストを受け付けたタイミングでおこなわれます。その瞬間に有効期限が過ぎていなければ、その後通信が遮断されない限りは、最後までファイルをダウンロードすることが可能です。
S3 Presigned URLの仕組み
ここまで、Presigned URLの利用方法についてみてきました。
以下から、少しその仕組みを説明します。
AWS Signature V2/V4とは
AWSは無数のサービスを提供しており、様々な機能がありますが、AWSに対する操作は最終的にはすべてAPIとなります。
たとえばS3を操作するAPIは、下記のAPI Referenceにすべてまとめられています。
対象がBucketであろうとObjectであろうと何であれ、Amazon S3 REST APIに基づくリクエスト/レスポンスで操作します。
Amazon S3 REST API Introduction - Amazon Simple Storage Service
https://docs.aws.amazon.com/AmazonS3/latest/API/Welcome.html
AWSはREST APIのリクエストを受け付けた際に、以下のようなチェックを行います。
- リクエストの内容が改ざんされていないこと(Integrity)
- 正統なユーザから発行されたこと(Authenticate)
- 当該ユーザは対象APIを実行する権限があること(Authorize)
これらチェックするために、APIリクエスト発行時に署名を付与する必要があります。
この署名を作る方法がAWS Signature V2/V4となります。
どのように署名を生成・付与するかについては、S3については下記公式ドキュメントに記載があります。
ただしこちらはSignature V2に基づく説明となります。先ほどまで試した手順もSignature V2を利用しています。
下記ドキュメントは大まかな概念、ステップを理解するには良いですが、Signature V2は2019/6/24以降、利用できなくなりますのでご注意ください。
Signing and Authenticating REST Requests - Amazon Simple Storage Service
https://docs.aws.amazon.com/AmazonS3/latest/dev/RESTAuthentication.html
Signature V4に関する説明は下記あたりを参照すると良いでしょう。
Signing AWS API Requests - Amazon Web Services
https://docs.aws.amazon.com/general/latest/gr/signing_aws_api_requests.html
Signature Version 4 Signing Process - Amazon Web Services
https://docs.aws.amazon.com/general/latest/gr/signature-version-4.html
Signing AWS Requests with Signature Version 4 - Amazon Web Services
https://docs.aws.amazon.com/general/latest/gr/sigv4_signing.html
詳細は割愛しますが、概ね以下のような仕組みとなっています。
- AWS APIを発行する際に、そのリクエスト内容を元に署名を作る。SecretAccessKeyを鍵として用いて署名を作成する。
- AWS APIに当該署名を付与してリクエストする。
- 当該リクエストを受け取ったAWSは、1と同一の手順で署名を生成し、リクエストに付与されたものと照合する。
生成した署名は、HTTPリクエストに「Authorization」ヘッダとして付与するか、URLのQuery stringパラメータとして付与することができます。
S3 Presinged URLとは、後者の手段を活用して、URLに署名を付与することだといえます。
下記ドキュメントにもこのような記載があります。
Authenticating Requests (AWS Signature Version 4) - Amazon Simple Storage Service
https://docs.aws.amazon.com/AmazonS3/latest/API/sig-v4-authenticating-requests.html#auth-methods-intro
Authentication Methods
You can express authentication information by using one of the following methods:HTTP Authorization header – Using the HTTP Authorization header is the most common method of authenticating an Amazon S3 request. All of the Amazon S3 REST operations (except for browser-based uploads using POST requests) require this header. For more information about the Authorization header value, and how to calculate signature and related options, see Authenticating Requests: Using the Authorization Header (AWS Signature Version 4).
Query string parameters – You can use a query string to express a request entirely in a URL. In this case, you use query parameters to provide request information, including the authentication information. Because the request signature is part of the URL, this type of URL is often referred to as a presigned URL. You can use presigned URLs to embed clickable links, which can be valid for up to seven days, in HTML. For more information, see Authenticating Requests: Using Query Parameters (AWS Signature Version 4).
※強調は引用者による
AWS CLIでSignature V4に基づくPresigned URLを生成する
古いAWS CLIを利用している場合、Signature V2による署名が生成されます。Signature V4で生成するには予め下記コマンドを実行しておく必要があります。
$ aws configure set default.s3.signature_version s3v4
Using the AWS SDKs, CLI, and Explorers - Amazon Simple Storage Service
https://docs.aws.amazon.com/AmazonS3/latest/dev/UsingAWSSDK.html
素朴な疑問
Presigned URLを使っていく中で下記のような疑問を覚えることがあると思いますが、これらはAWS Signature V2/V4を理解することで、理解することができます。
なぜ、IAM Userの権限/IAM Roleの権限を利用した場合とで、URLの長さが違うか
これは、署名に利用するAWS Credentialsが、PermanentなものかTemporaryなものか、という違いに起因します。
まず、AWS Credentialsには、PermanentなものとTemporaryなものがあります。
IAM Userそれぞれに対して発行されるAccessKey/SecretAccessKeyのペアは前者、IAM RoleをAssumeRoleした際などに得られるものは後者となります。後者の場合は、AccessKey/SecretAccessKeyに加えてSessionTokenというものが発行され、これをAWS APIリクエストに含める必要があります。
IAM Roleの権限を利用したPresigned URLは、Temporary Credentialsを利用したものとなるのでSessionTokenが必要となり、これをリクエストに含める必要があるため、URLが長くなります。
Task 4: Add the Signature to the HTTP Request - Amazon Web Services
https://docs.aws.amazon.com/general/latest/gr/sigv4-add-signature-to-request.html
Note
You can use temporary security credentials provided by the AWS Security Token Service (AWS STS) to sign a request. The process is the same as using long-term credentials, but requires an additional HTTP header or query string parameter for the security token. The name of the header or query string parameter is X-Amz-Security-Token, and the value is the session token (the string you received from AWS STS when you obtained temporary security credentials).
Presigned URLの有効期間中に、対象のIAM User/IAM Roleを削除した場合はどうなるか
結論としては、Presigned URLの有効期間中であっても、当該URLを利用したアクセスは拒否されます。
これまで見てきた通り、Presigned URLによるリクエスト=当該のIAM Entity(User/Role)によるリクエストですので、当然と言えます。
これは下記Knowledge Centerの記事にも記載があります。
他にも、対象のIAM User/IAM Roleから必要なPermissionsを除去した場合、Temporary Credentialsの有効期限が切れてしまった場合なども同様の結果になります。
S3 バケットの署名付き URL が、指定した有効期限より前に失効する
https://aws.amazon.com/jp/premiumsupport/knowledge-center/presigned-url-s3-bucket-expiration/
おわりに
S3 Presigned URLとは結局のところ、Amazon S3 REST APIを発行する1つの手段であると言えます。
AWS Signature V4の仕組みをきちんと理解することで、S3 Presinged URLの特性・制約を理解することができます。
あと、AWSソリューションアーキテクトの試験(アソシエイト/プロフェッショナルどっちだったかは忘れてしまいましたが)で範囲に入っていたように記憶しているので、当該試験の受験を予定している人は是非ともおさえておきましょう。