はじめに
Kong Gatewayについて学習する機会があったので、学習した内容をアウトプットします。
また、OSS版Kong Gatewayをローカル環境のk8sで実際に動かしてみます。
実行環境
OrbStackのバージョン2.0.5を利用します。
$ kubectl version
Client Version: v1.33.1
Kustomize Version: v5.6.0
Server Version: v1.33.5+orb1

$ helm version
version.BuildInfo{Version:"v4.0.1", GitCommit:"12500dd401faa7629f30ba5d5bff36287f3e94d3", GitTreeState:"clean", GoVersion:"go1.25.4", KubeClientVersion:"v1.34"}
Kongとは
Kongとは、APIの連携を簡単かつ高速に処理する高性能なAPIゲートウェイおよびAPI管理プラットフォームです。
以下のようなプロダクトで構成されています。
-
Kong Konnect
- SaaS型APIマネジメントプラットフォーム
-
Kong Gateway
- API Gateway
- AIプロバイダーのプロキシ
- 管理者用のGUI, Web API
-
Kong Event Gateway
- Kafkaクラスターへの通信を制御するプロキシ
-
Kong Mesh
- マルチクラウド対応のサービスメッシュ
-
Kong Insomnia
- API開発プラットフォーム
-
Kong Plugin
- 認証、キャッシュ、ロギングなどの機能追加・カスタマイズ
この記事で紹介するのは、Kong Gatewayになります。
Kong Gatewayとは
Kong GatewayはOSSのAPIゲートウェイであり、他製品(クラウド、Mulesoft...)と比較して以下のようなメリットがあります。
- 最大スループット、レイテンシに優れています
- マルチクラウド、オンプレミスを含むハイブリッド環境のフェデレーション構成を組むことができます
- Nginxベースで実装されているため消費リソースが少なく、スモールスタートが容易です
- 多くのOpenID Connect IdPと接続可能です(Kong Gateway Enterprise、Konnectのみ)
Kong Gatewayのアーキテクチャは以下のドキュメントが参考になります。
Kong Gatewayのデプロイ方法
Kong Gatewayをk8sにデプロイする方法はいくつか存在します。
Kong Gateway can be installed on Kubernetes in several different modes.
- DB-less mode, configured using Kubernetes resources and the Kong Ingress Controller
- Data Planes integrated with Kong Konnect
- Hybrid mode with the Control Plane and Data Plane in a Kubernetes cluster
- Traditional mode, where each node connects to a PostgreSQL database
今回はよりk8sネイティブなKong Ingress Controller(以下、KIC)を使ったデプロイを検証します。
KICの中にもデプロイ方法がいくつか存在します。
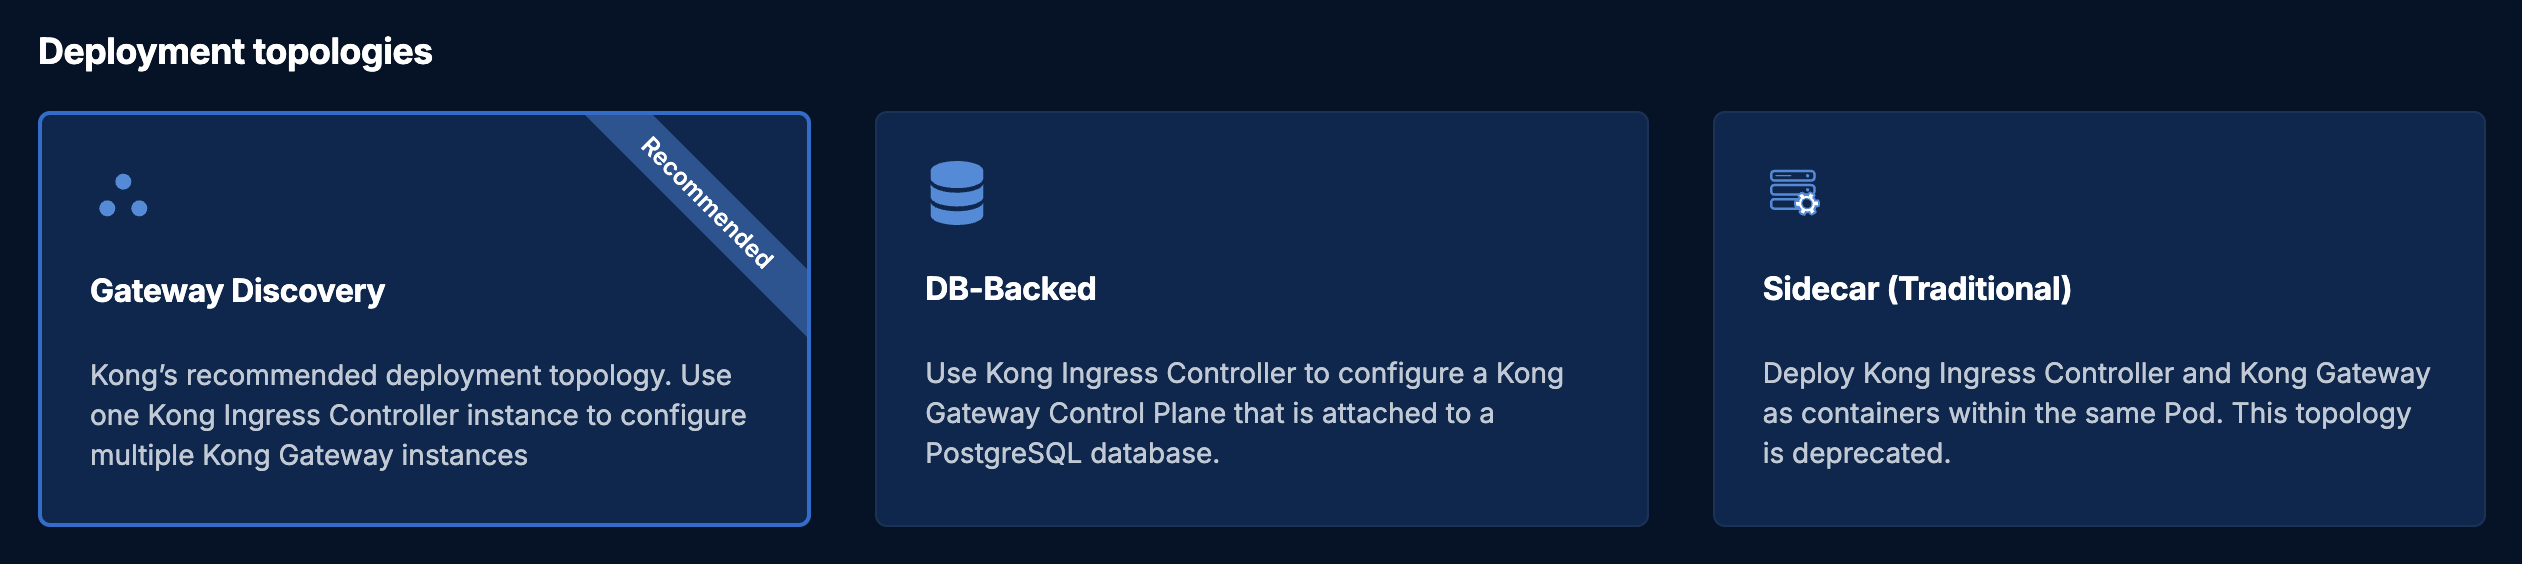
画像はKICの開発者ガイドより引用しています
上記のうち、RecommendedのGateway Discoveryで検証を進めます。
k8sマニフェストでKong Gatewayのルーティング設定を管理することができるため、Admin APIを直接実行する必要はありません。
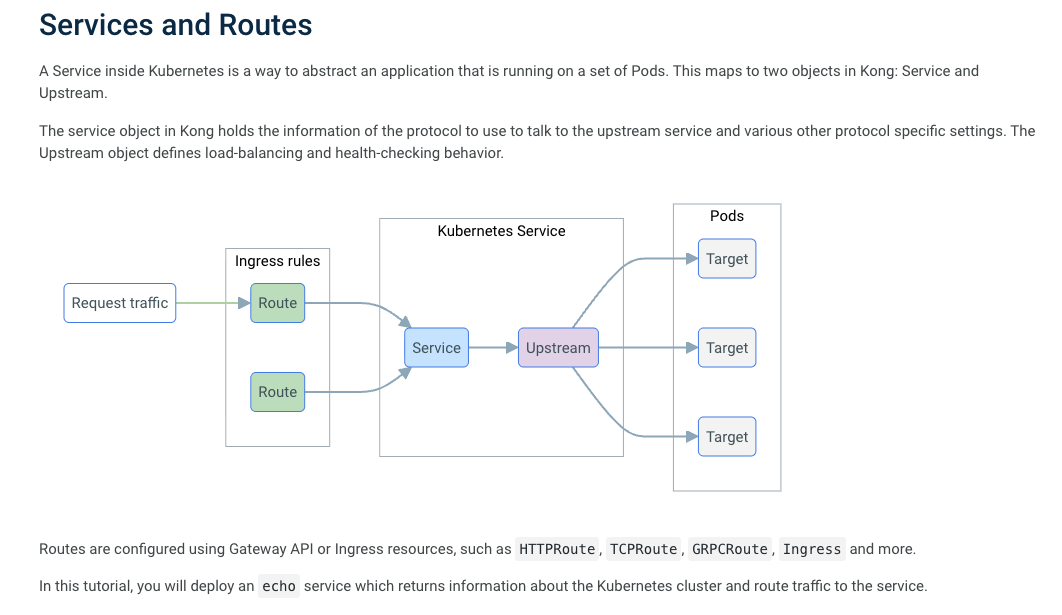
KICとは
KICとは、Kong Gatewayのエンティティオブジェクトをk8sのGatewayもしくはIngressと連携させて、外部からのトラフィックをクラスター内のPodにルーティング・管理するためのソフトウェアです。
Kong Ingress Controller がコントロールプレーン、Kong Gateway がデータプレーンに相当します。
それぞれDeploymentもしくはDaemonSetとしてデプロイされ、容易なスケーリングと耐障害性の向上を実現します。
また、Kongの設定がk8sマニフェストで管理できるようになります。
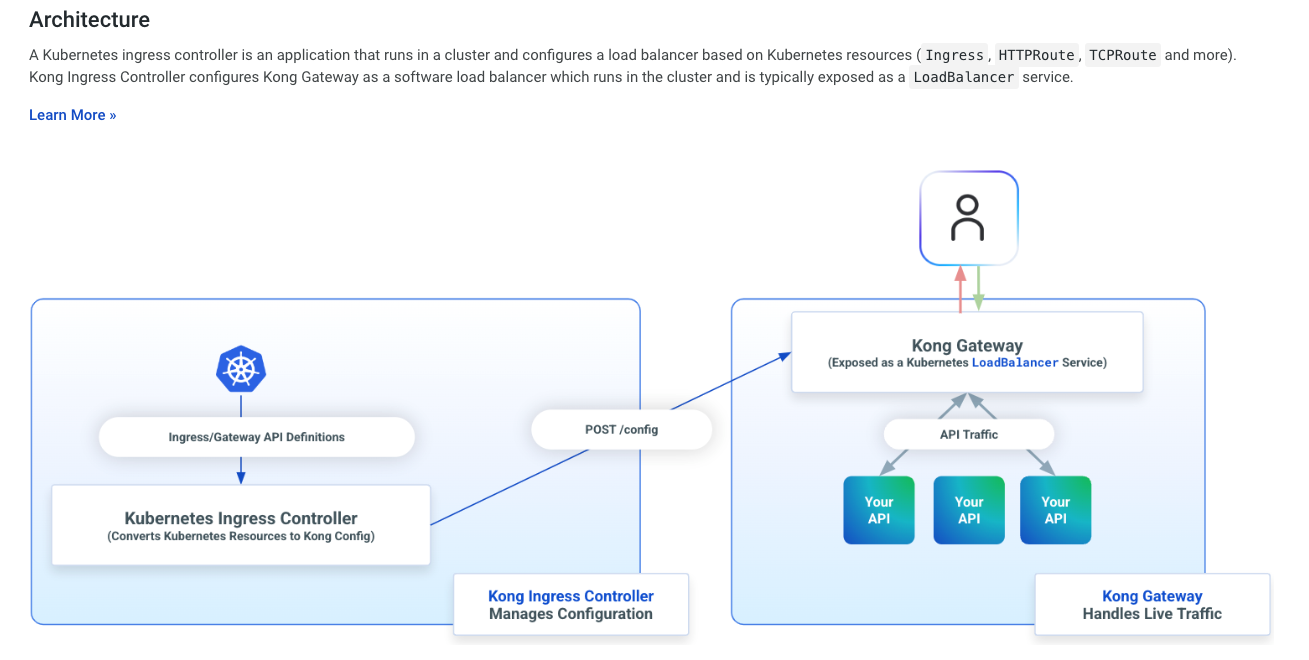
画像はKICの公式ドキュメントより引用しています
KICのインストール
公式ドキュメントのGet Startedを参考にインストールを進めます。
k8s Gateway APIについては以下を参照してください。
k8s Gateway APIのインストール
Gateway APIのドキュメントに記載のバージョンでデプロイします。
$ kubectl apply --server-side -f https://github.com/kubernetes-sigs/gateway-api/releases/download/v1.4.1/standard-install.yaml
Server-Side Applyについては、以下の記事が参考になります。
k8s GatewayClassの適用
controllerName にKICを指定して、GatewayClassをクラスタに適用します。
GatewayClassはクラスタースコープなので、namespaceの指定は不要です。
$ echo "
apiVersion: gateway.networking.k8s.io/v1
kind: GatewayClass
metadata:
  name: kong
  annotations:
    konghq.com/gatewayclass-unmanaged: 'true'

spec:
  controllerName: konghq.com/kic-gateway-controller
" | kubectl apply -f -
k8s Gatewayの適用
gatewayClassNameに先ほどのGatewayClassを指定して、Gatewayリソースを適用します。
namespaceはどこても良いのですが、今回は後述のKIC HelmChartと同じkongにします。
$ kubectl create namespace kong

$ echo "
apiVersion: gateway.networking.k8s.io/v1
kind: Gateway
metadata:
  name: kong
  namespace: kong
spec:
  gatewayClassName: kong
  listeners:
  - name: proxy
    port: 80
    protocol: HTTP
    allowedRoutes:
      namespaces:
        from: Selector
        selector:
          matchLabels:
            shared-gateway-access: "true"
" | kubectl apply -f -
HelmChartのインストール
kong/ingressのHelmChartをインストールします。
$ helm repo add kong https://charts.konghq.com
$ helm repo update

$ helm upgrade --install kong kong/ingress -n kong -f values.yml --create-namespace
values.ymlの設定内容は公式の charts/ingress/values.yaml をベースに charts/kong/values.yaml の内容を当てはめていくイメージになります。
ネストする箇所がちょっとわかりづらいです。
controller:
  ingressController:
    enabled: true
    image:
      repository: kong/kubernetes-ingress-controller
      tag: "3.5"

    gatewayDiscovery:
      enabled: true
      generateAdminApiService: true

  proxy:
    enabled: true

  watchNamespaces:
  - "sample-app"

gateway:
  manager:
    enabled: true
    http:
      # Enable plaintext HTTP listen for Kong Manager
      enabled: true
      servicePort: 8002
      containerPort: 8002
      nodePort: 32082
    tls:
      # Enable HTTPS listen for Kong Manager
      enabled: false
      servicePort: 8445
      containerPort: 8445
      nodePort: 32445

  admin:
    enabled: true
    type: NodePort
    http:
      # Enable plaintext HTTP listen for the admin API
      # Disabling this and using a TLS listen only is recommended for most configuration
      enabled: true
      servicePort: 8001
      containerPort: 8001
      nodePort: 32081
    tls:
      # Enable HTTPS listen for the admin API
      enabled: true
      servicePort: 8444
      containerPort: 8444
      nodePort: 32444

  env:
    # DBレスモードを選択
    database: "off"
    router_flavor: "traditional"
    nginx_worker_processes: "2"
    admin_gui_api_url: "http://localhost:32081"
    admin_gui_url: "http://localhost:32082"
    admin_api_cors_origins: "localhost:32081"
    # https://docs.konghq.com/enterprise/latest/kong-manager/authentication/sessions
    admin_gui_session_conf: '{"secret":"secret","storage":"kong","cookie_secure":false}'
PodがRunningになったらOKです。
$ kubectl get all -n kong
NAME                                   READY   STATUS    RESTARTS   AGE
pod/kong-controller-785678d7b9-8f57w   1/1     Running   0          6m51s
pod/kong-gateway-5f845cb86b-slrvh      1/1     Running   0          6m51s

NAME                                         TYPE           CLUSTER-IP        EXTERNAL-IP     PORT(S)                         AGE
service/kong-controller-metrics              ClusterIP      192.168.194.153   <none>          10255/TCP,10254/TCP             6m51s
service/kong-controller-validation-webhook   ClusterIP      192.168.194.186   <none>          443/TCP                         6m51s
service/kong-gateway-admin                   NodePort       192.168.194.239   <none>          8001:32081/TCP,8444:32444/TCP   6m51s
service/kong-gateway-manager                 NodePort       192.168.194.213   <none>          8002:32082/TCP                  6m51s
service/kong-gateway-proxy                   LoadBalancer   192.168.194.192   192.168.139.2   80:32216/TCP,443:32687/TCP      6m51s

NAME                              READY   UP-TO-DATE   AVAILABLE   AGE
deployment.apps/kong-controller   1/1     1            1           6m51s
deployment.apps/kong-gateway      1/1     1            1           6m51s

NAME                                         DESIRED   CURRENT   READY   AGE
replicaset.apps/kong-controller-785678d7b9   1         1         1       6m51s
replicaset.apps/kong-gateway-5f845cb86b      1         1         1       6m51s
service/kong-gateway-proxyのEXTERNAL-IPにアクセスすると、Kong Gatewayにアクセスできます。
$ curl -i http://192.168.139.2/
HTTP/1.1 404 Not Found
Date: Sat, 20 Dec 2025 06:18:23 GMT
Content-Type: application/json; charset=utf-8
Connection: keep-alive
Content-Length: 103
X-Kong-Response-Latency: 4
Server: kong/3.9.1
X-Kong-Request-Id: 6c76c05171690f7c2d189c1b4c7c0018

{
  "message":"no Route matched with those values",
  "request_id":"6c76c05171690f7c2d189c1b4c7c0018"
}
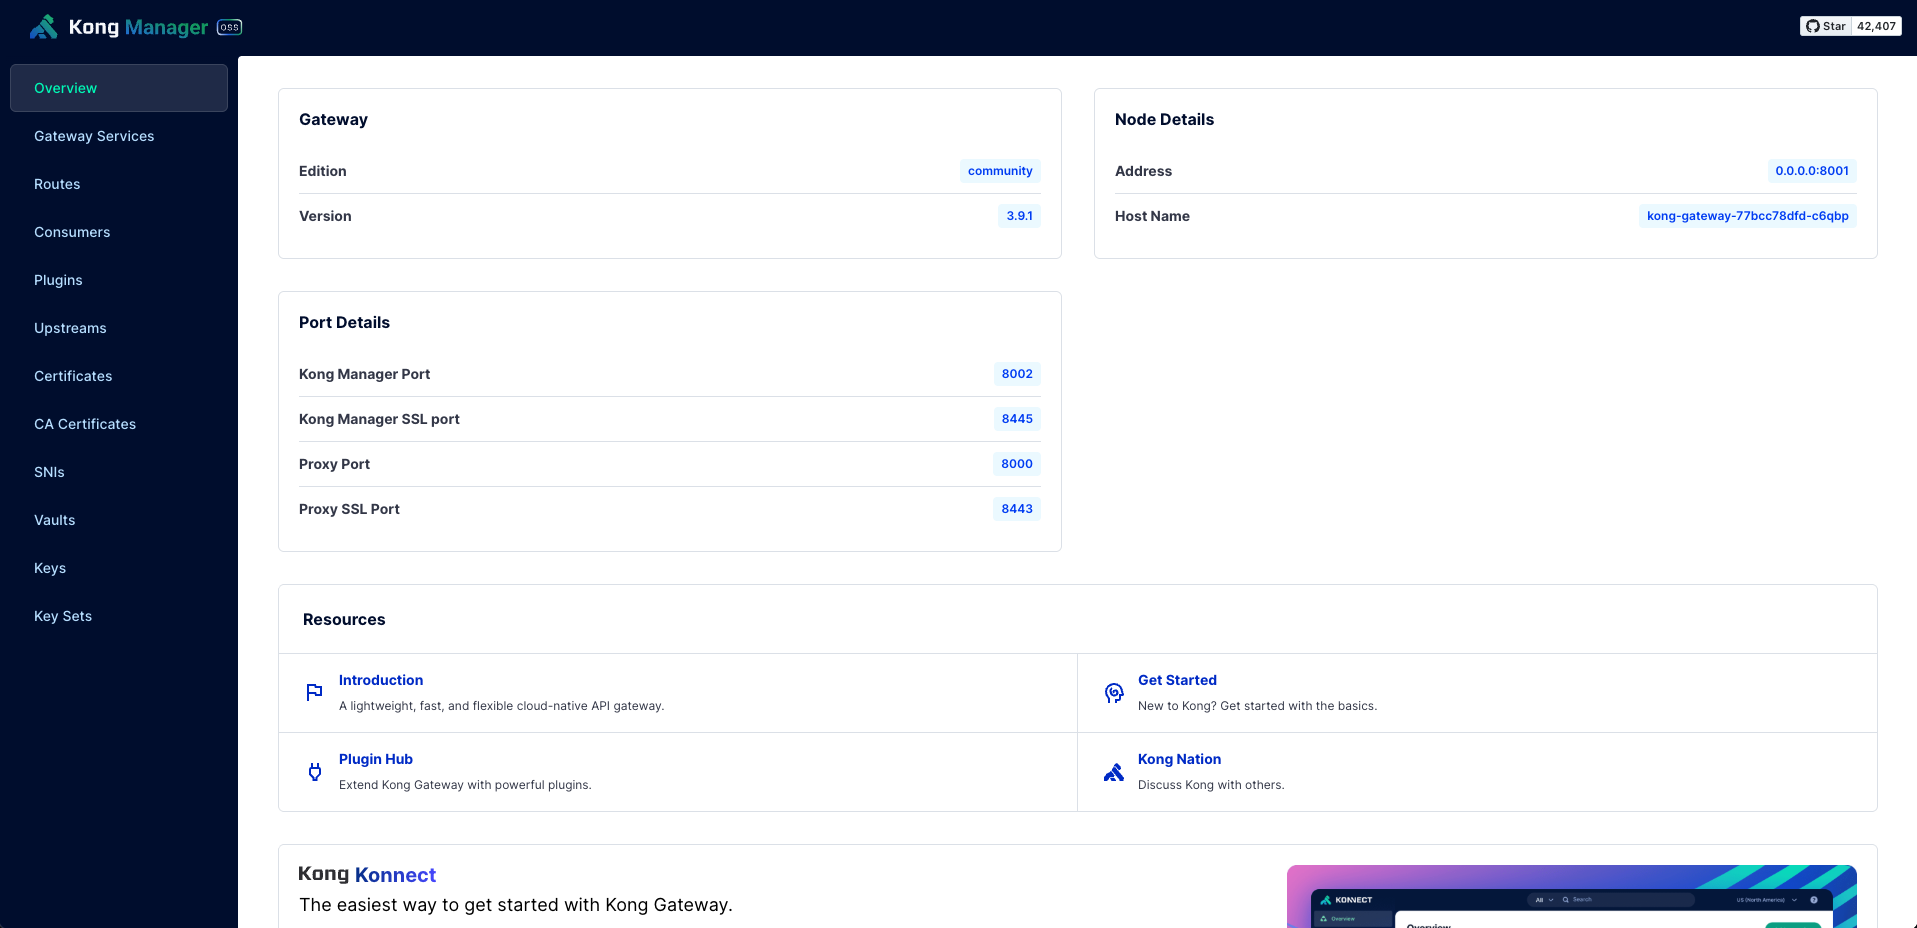
ブラウザでhttp://localhost:32082/にアクセスすると、Kong ManagerのGUIが表示されます。
サンプルアプリのデプロイ
Nginxをデプロイして、Kong Gateway経由で通信できることを確認します。
ConfigMapで/nginxのロケーションを追加しています。
$ kubectl apply -f sample-app.yml
apiVersion: v1
kind: Namespace
metadata:
  name: sample-app
  labels:
    shared-gateway-access: "true"
---
apiVersion: v1
kind: ConfigMap
metadata:
  name: nginx-conf
  namespace: sample-app
data:
  default.conf: |
    server {
        listen       8080;
        server_name  localhost;

        location / {
            root   /usr/share/nginx/html;
            index  index.html index.htm;
        }

        location /nginx {
            alias  /usr/share/nginx/html/;
            index  index.html index.htm;
        }

        error_page   500 502 503 504  /50x.html;
        location = /50x.html {
            root   /usr/share/nginx/html;
        }
    }
---
apiVersion: apps/v1
kind: Deployment
metadata:
  name: nginx
  namespace: sample-app
spec:
  replicas: 1
  selector:
    matchLabels:
      app: nginx
  template:
    metadata:
      labels:
        app: nginx
    spec:
      containers:
      - name: nginx
        image: nginxinc/nginx-unprivileged:latest
        ports:
        - containerPort: 8080
        volumeMounts:
        - name: nginx-config-vol
          mountPath: /etc/nginx/conf.d/default.conf
          subPath: default.conf
      volumes:
      - name: nginx-config-vol
        configMap:
          name: nginx-conf
---
apiVersion: v1
kind: Service
metadata:
  name: nginx-service
  namespace: sample-app
spec:
  selector:
    app: nginx
  ports:
  - port: 80
    targetPort: 8080
HTTPRouteの適用
HTTPRouteと適用すると、Kong Gatewayにルーティング設定が追加されます。
Nginxのロケーションに合わせて、/nginxのPathPrefixを指定します。
$ kubectl apply -f http-route.yml
apiVersion: gateway.networking.k8s.io/v1
kind: HTTPRoute
metadata:
  name: nginx-route
  namespace: sample-app
spec:
  parentRefs:
  - name: kong
    namespace: kong
  rules:
  - matches:
    - path:
        type: PathPrefix
        value: /nginx
    backendRefs:
    - name: nginx-service
      port: 80
NginxのPodがRunningになっていればOKです。
$ kubectl get all,httproute -n sample-app
NAME                         READY   STATUS    RESTARTS   AGE
pod/nginx-5f4599d966-8zp2p   1/1     Running   0          79s

NAME                    TYPE        CLUSTER-IP        EXTERNAL-IP   PORT(S)   AGE
service/nginx-service   ClusterIP   192.168.194.170   <none>        80/TCP    79s

NAME                    READY   UP-TO-DATE   AVAILABLE   AGE
deployment.apps/nginx   1/1     1            1           79s

NAME                               DESIRED   CURRENT   READY   AGE
replicaset.apps/nginx-5f4599d966   1         1         1       79s

NAME                                              HOSTNAMES   AGE
httproute.gateway.networking.k8s.io/nginx-route               79s
動作確認
Kong Gateway経由でNginxのPodに通信が転送されることを確認します。
$ curl -iL http://192.168.139.2/nginx/
HTTP/1.1 200 OK
Content-Type: text/html; charset=UTF-8
Content-Length: 615
Connection: keep-alive
Server: nginx/1.29.3
Date: Sat, 20 Dec 2025 06:32:16 GMT
Last-Modified: Tue, 28 Oct 2025 12:05:10 GMT
ETag: "6900b176-267"
Accept-Ranges: bytes
X-Kong-Upstream-Latency: 4
X-Kong-Proxy-Latency: 1
Via: 1.1 kong/3.9.1
X-Kong-Request-Id: 69639307fb7e52459a87e04cdcb09531

<!DOCTYPE html>
<html>
<head>
<title>Welcome to nginx!</title>
<style>
html { color-scheme: light dark; }
body { width: 35em; margin: 0 auto;
font-family: Tahoma, Verdana, Arial, sans-serif; }
</style>
</head>
<body>
<h1>Welcome to nginx!</h1>
<p>If you see this page, the nginx web server is successfully installed and
working. Further configuration is required.</p>

<p>For online documentation and support please refer to
<a href="http://nginx.org/">nginx.org</a>.<br/>
Commercial support is available at
<a href="http://nginx.com/">nginx.com</a>.</p>

<p><em>Thank you for using nginx.</em></p>
</body>
</html>
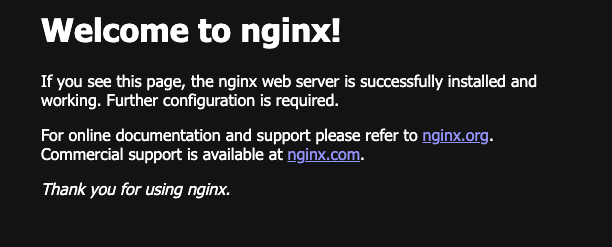
ブラウザでhttp://192.168.139.2/nginx/にアクセスすると、Nginxのデフォルトページが表示されます。
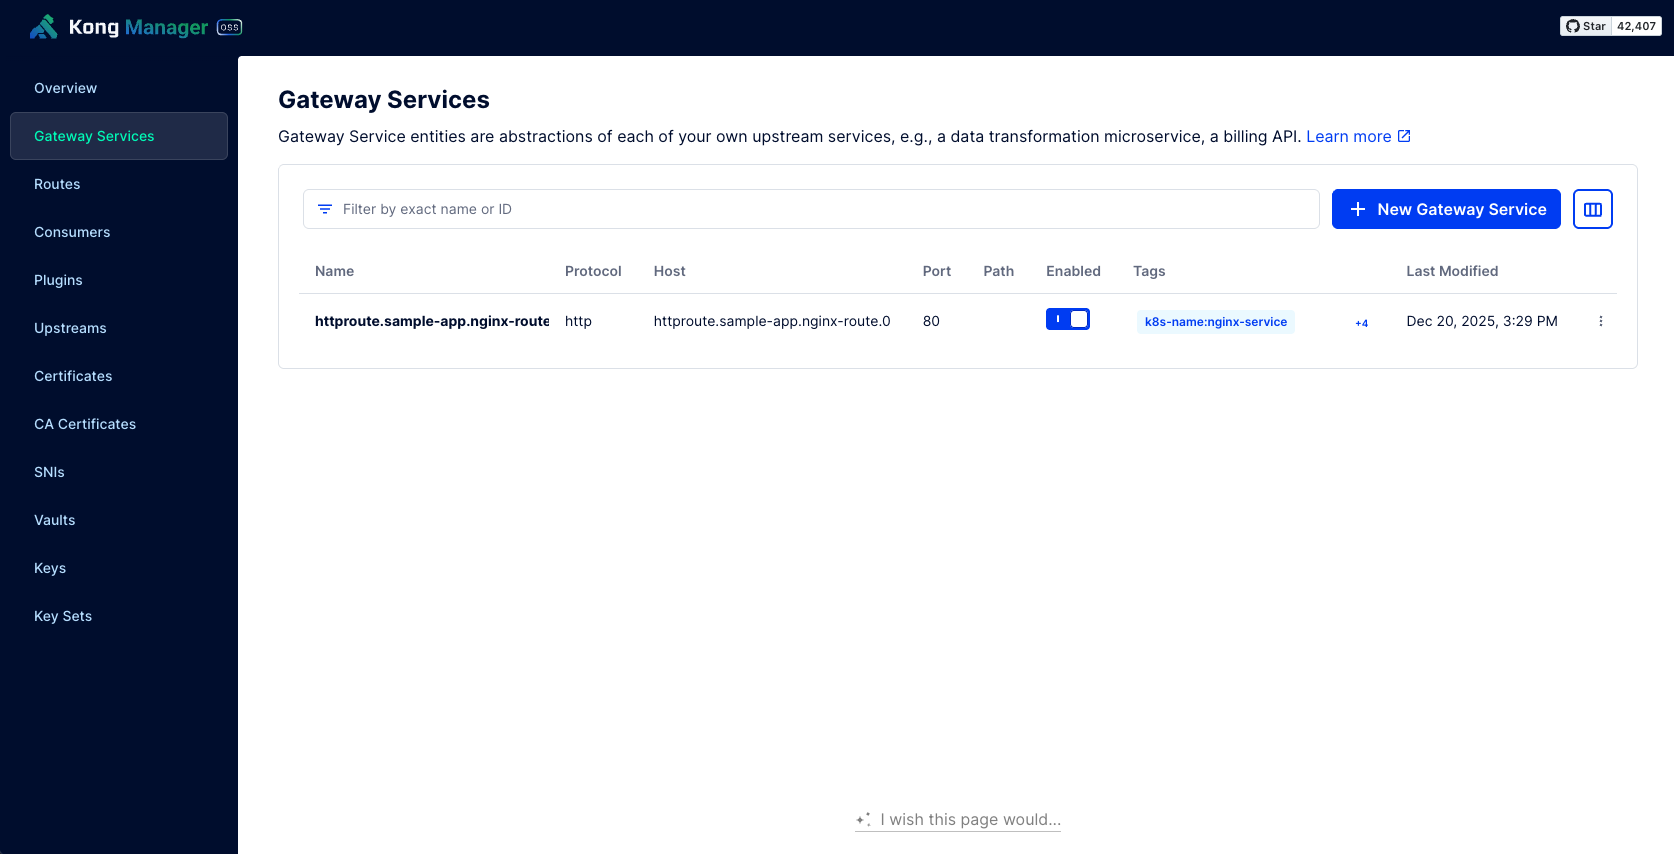
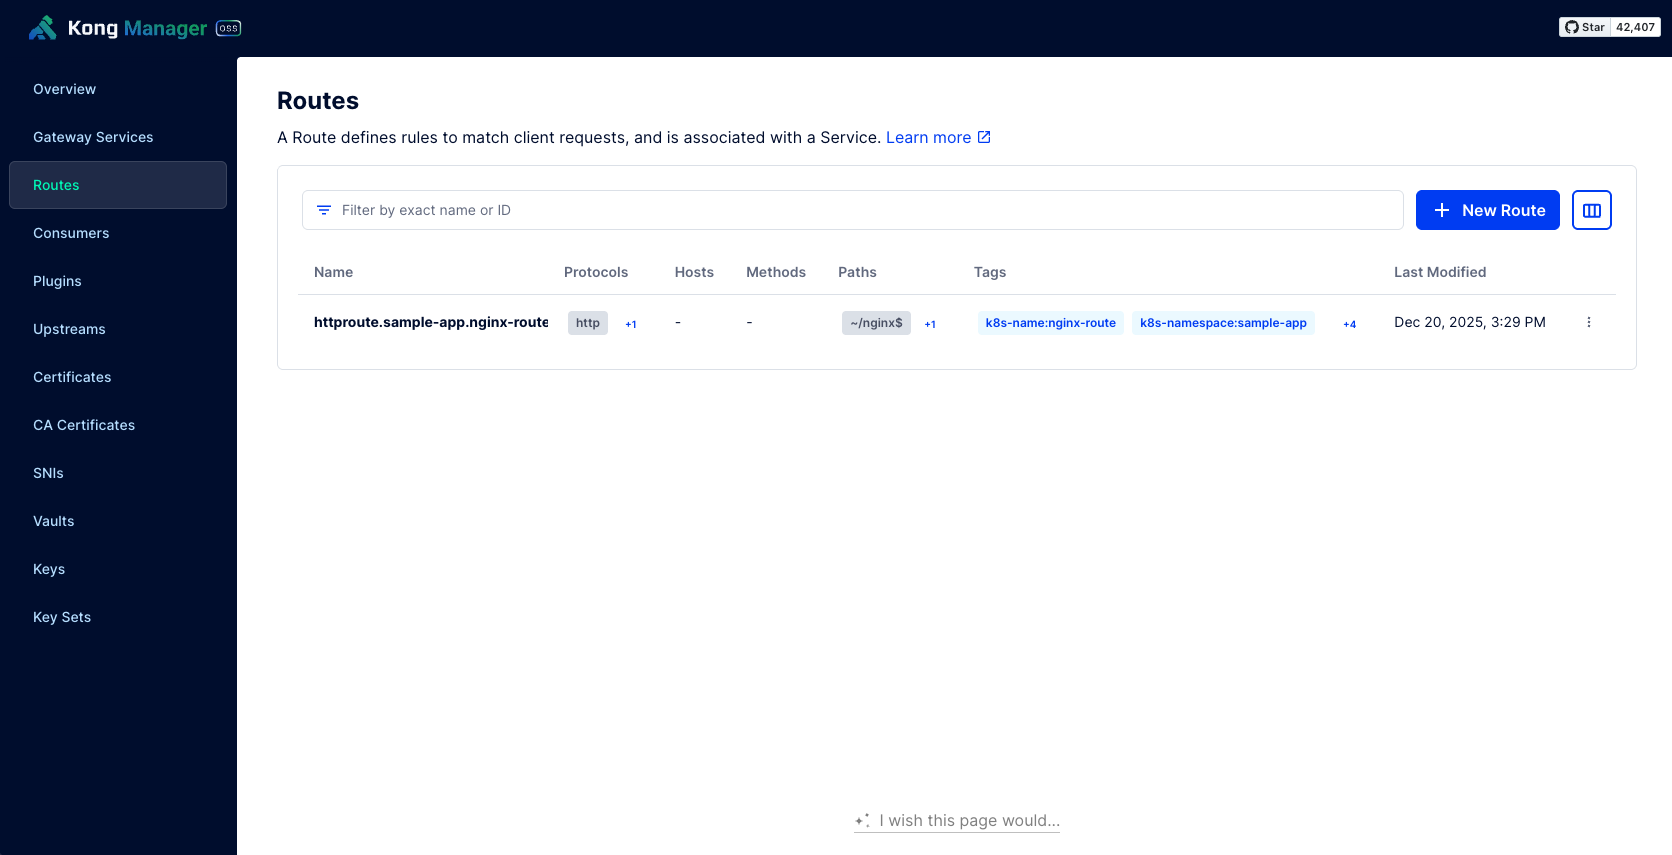
Kong Managerから、登録されたServicesとRoutesが確認できました。
まとめ
Kongのサービス紹介と、KICでKong Gatewayをデプロイを検証しました。
k8sマニフェストでルーティング設定を管理できるため、デプロイ方法がシンプルで、マルチテナントの管理もしやすそうな印象でした。
Kongには他にも様々な機能があるため、またの機会に色々試してみようと思います。
GitHubリポジトリ