はじめに
m5cameraで何かしたかった
けども以前の記事(https://qiita.com/tkyko13/items/e375db417e6b6fbde84d) でもあったとおり自分のm5cameraはなんかうまく動かなかった
jpegフォーマットじゃないパターンでfirebaseにカメラに移っている色の平均値を送ろうと思います
セットアップなど参考サイト
m5cameraセットアップ
https://www.mgo-tec.com/blog-entry-m5camera-arduino.html
firebase(realtime database)とは
https://qiita.com/seiya1121/items/1436fde30752843daa47
今回自分もrealtime databaseを使用します
realtime databaseセットアップ google公式がわかりやすいかな
https://firebase.google.com/docs/database/?hl=ja
m5cameraにgroveボタンをつける
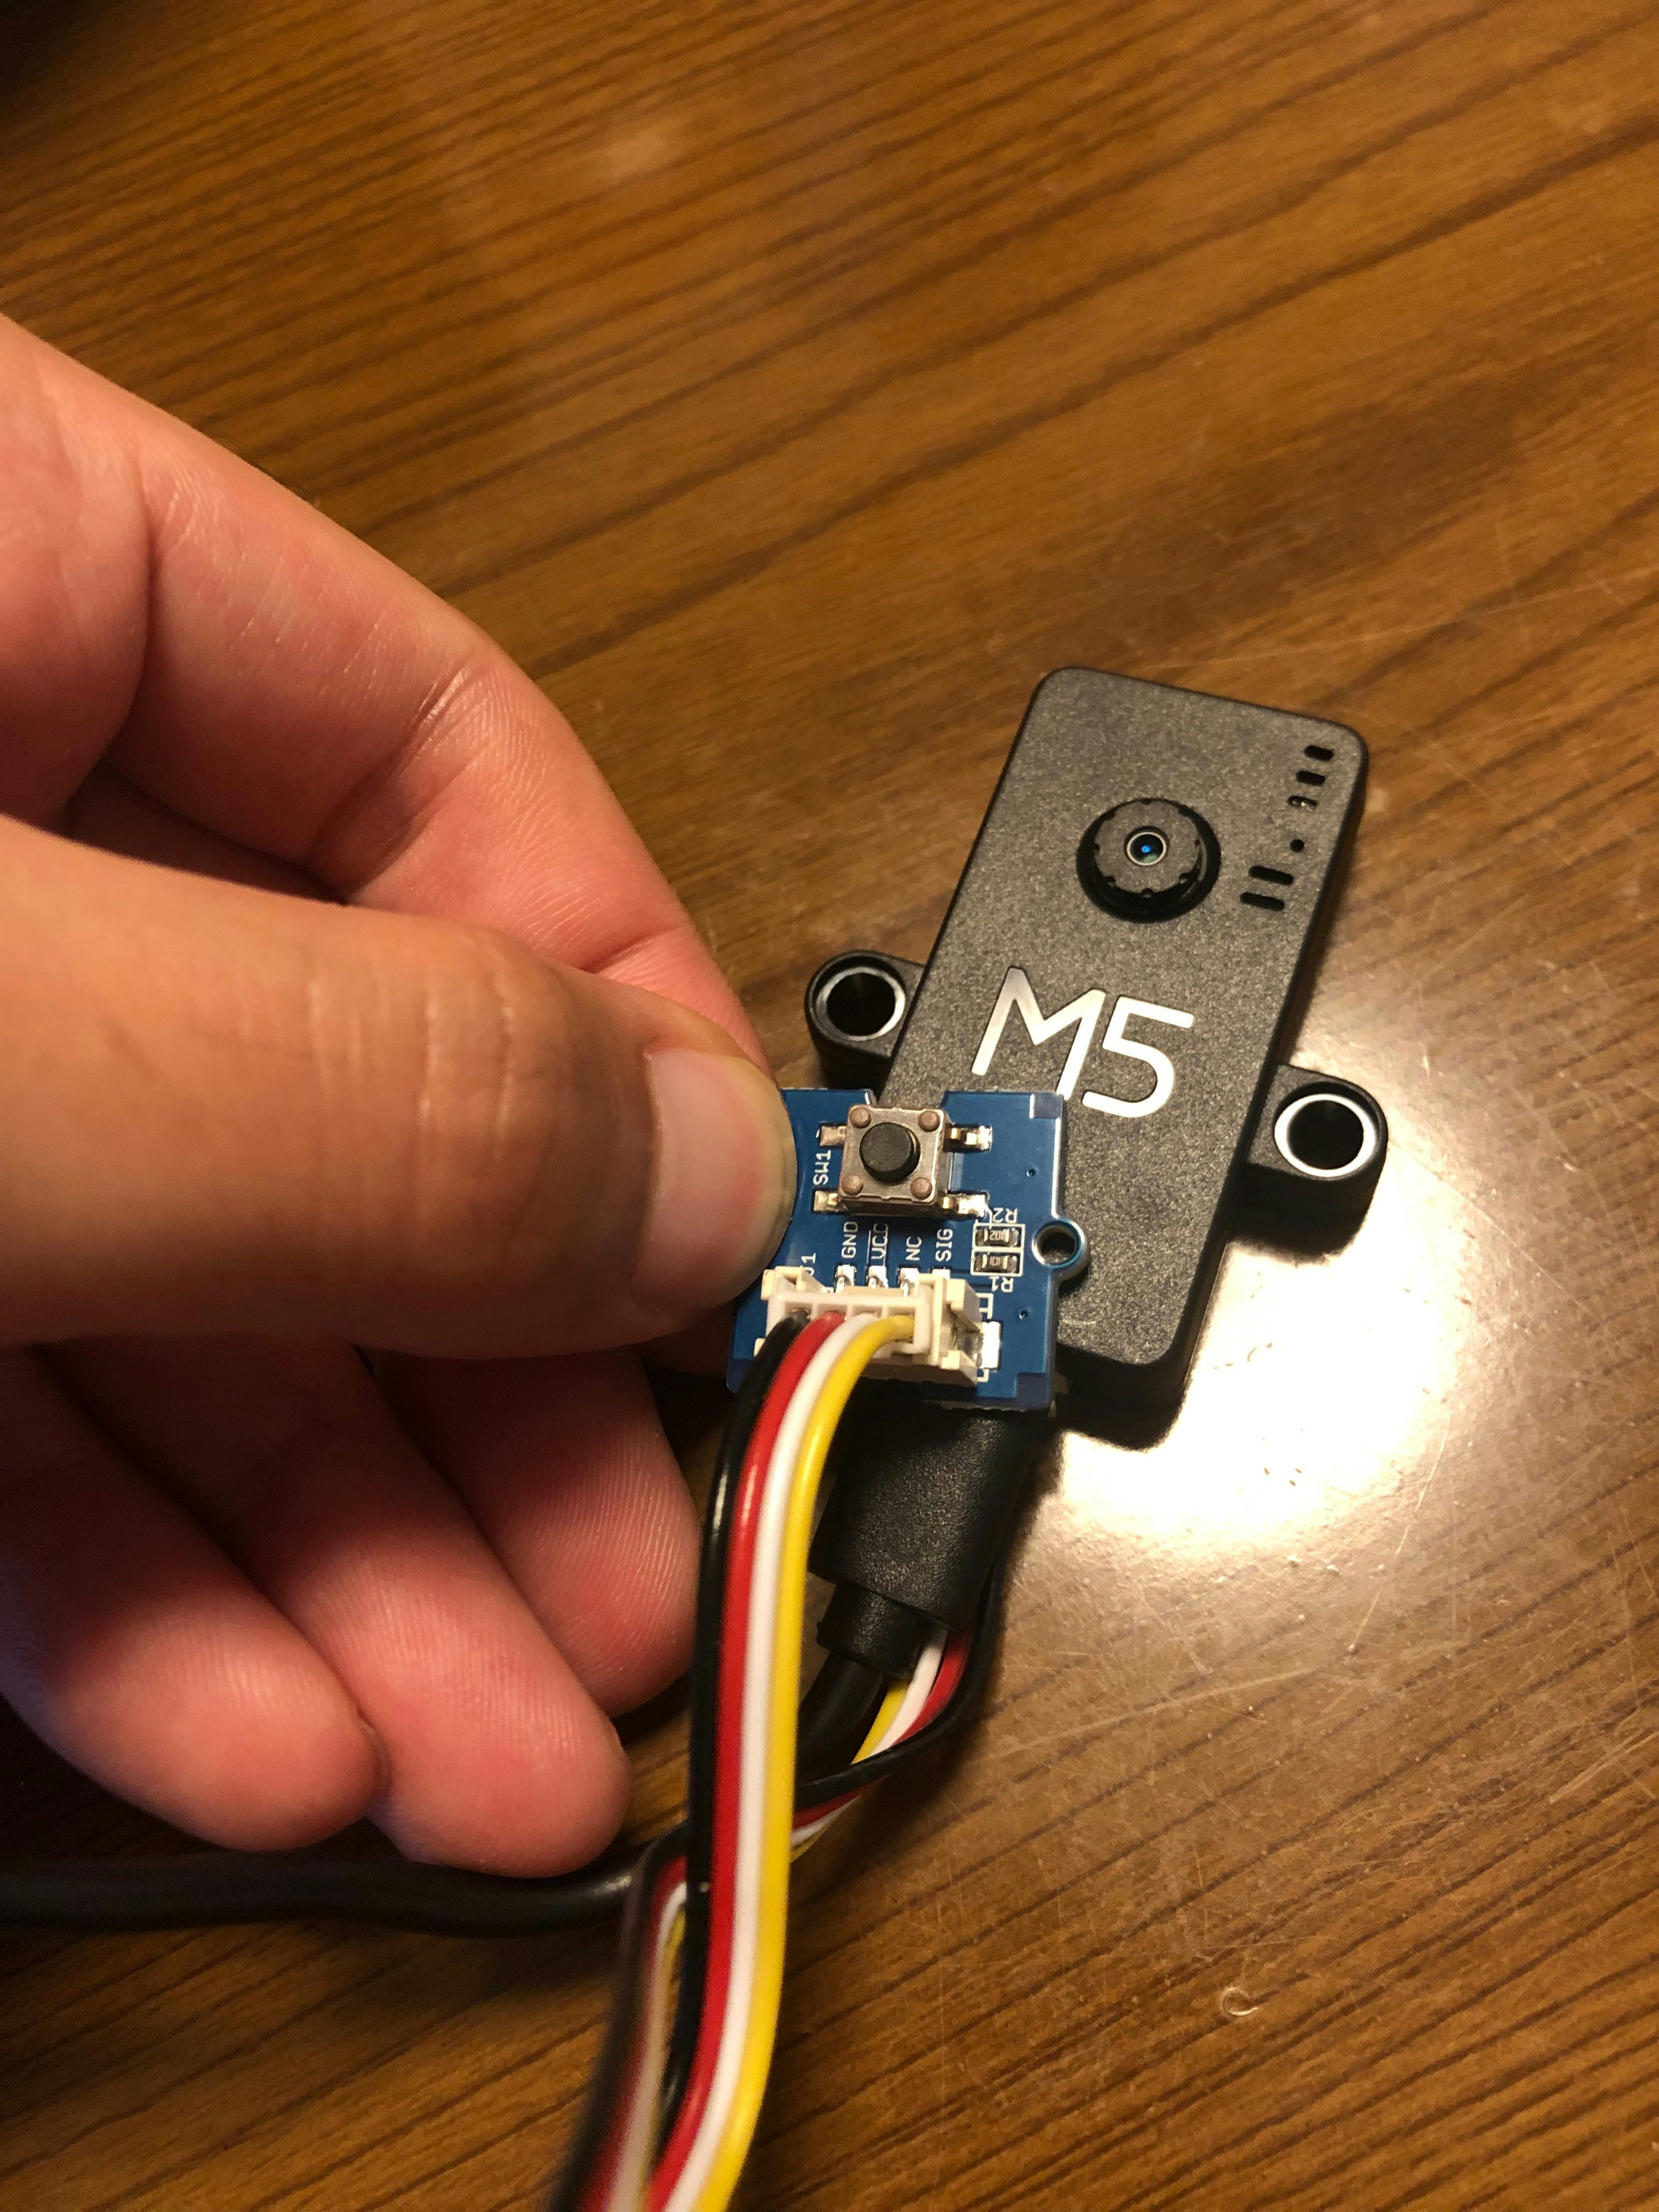
こんな風にくっつけました
m5cameraの裏にも書いてあるとおりgroveのpinの番号は13番で取得できました
サンプルコード
#include "esp_camera.h"

#define PWDN_GPIO_NUM     -1
#define RESET_GPIO_NUM    15
#define XCLK_GPIO_NUM     27
#define SIOD_GPIO_NUM     22
#define SIOC_GPIO_NUM     23

#define Y9_GPIO_NUM       19
#define Y8_GPIO_NUM       36
#define Y7_GPIO_NUM       18
#define Y6_GPIO_NUM       39
#define Y5_GPIO_NUM        5
#define Y4_GPIO_NUM       34
#define Y3_GPIO_NUM       35
#define Y2_GPIO_NUM       32
#define VSYNC_GPIO_NUM    25
#define HREF_GPIO_NUM     26
#define PCLK_GPIO_NUM     21

#define GROVE_PIN   13

int pVal = 0;

void setup() {
  Serial.begin(115200);
  Serial.println();

  camera_config_t config;
  config.ledc_channel = LEDC_CHANNEL_0;
  config.ledc_timer = LEDC_TIMER_0;
  config.pin_d0 = Y2_GPIO_NUM;
  config.pin_d1 = Y3_GPIO_NUM;
  config.pin_d2 = Y4_GPIO_NUM;
  config.pin_d3 = Y5_GPIO_NUM;
  config.pin_d4 = Y6_GPIO_NUM;
  config.pin_d5 = Y7_GPIO_NUM;
  config.pin_d6 = Y8_GPIO_NUM;
  config.pin_d7 = Y9_GPIO_NUM;
  config.pin_xclk = XCLK_GPIO_NUM;
  config.pin_pclk = PCLK_GPIO_NUM;
  config.pin_vsync = VSYNC_GPIO_NUM;
  config.pin_href = HREF_GPIO_NUM;
  config.pin_sscb_sda = SIOD_GPIO_NUM;
  config.pin_sscb_scl = SIOC_GPIO_NUM;
  config.pin_pwdn = PWDN_GPIO_NUM;
  config.pin_reset = RESET_GPIO_NUM;
  config.xclk_freq_hz = 20000000;
  config.pixel_format = PIXFORMAT_RGB888;
  config.frame_size = FRAMESIZE_QQVGA;
  config.fb_count = 1;

  // camera init
  esp_err_t err = esp_camera_init(&config);
  if (err != ESP_OK) {
    Serial.printf("Camera init failed with error 0x%x", err);
    return;
  }

  pinMode(GROVE_PIN, INPUT);
}

void loop() {

int val = digitalRead(GROVE_PIN);
if(pVal == 0 && val == 1) {
  Serial.println("push!!");

  camera_fb_t *fb = esp_camera_fb_get();
  // ゴニョゴニョしていく

}
pVal = val;
delay(10);
}
ボタンを押したらカメラから画像を取得して色々できる
まるでシャッターボタンですね
他にも距離センサーで近づいたらキャプチャなど色々できそう
espでfirebase
以下のライブラリを利用しました
https://github.com/mobizt/Firebase-ESP32
サンプルコード
#include "esp_camera.h"
#include <WiFi.h>
#include <FirebaseESP32.h>

#define FIREBASE_HOST "<YOUR-PROJECT>.firebaseio.com" //Do not include https:// in FIREBASE_HOST
#define FIREBASE_AUTH "<YOUR-AUTH>"
#define WIFI_SSID "<YOUR-SSID>"
#define WIFI_PASSWORD "<YOUR-PASS>"

FirebaseData firebaseData;

#define PWDN_GPIO_NUM -1
#define RESET_GPIO_NUM 15
#define XCLK_GPIO_NUM 27
#define SIOD_GPIO_NUM 22
#define SIOC_GPIO_NUM 23

#define Y9_GPIO_NUM 19
#define Y8_GPIO_NUM 36
#define Y7_GPIO_NUM 18
#define Y6_GPIO_NUM 39
#define Y5_GPIO_NUM 5
#define Y4_GPIO_NUM 34
#define Y3_GPIO_NUM 35
#define Y2_GPIO_NUM 32
#define VSYNC_GPIO_NUM 25
#define HREF_GPIO_NUM 26
#define PCLK_GPIO_NUM 21

#define GROVE_PIN 13

int pVal = 0;

void setup() {
  Serial.begin(115200);
  Serial.println();

  WiFi.begin(WIFI_SSID, WIFI_PASSWORD);

  // wifiの接続
  Serial.print("connecting wifi");
  while (WiFi.status() != WL_CONNECTED) {
    Serial.print(".");
    delay(500);
  }
  Serial.println();
  Serial.print("connected: ");
  Serial.println(WiFi.localIP());

  // firebaseの初期化
  Firebase.begin(FIREBASE_HOST, FIREBASE_AUTH);
  Firebase.reconnectWiFi(true);

  // m5cameraの設定
  // 省略します... 内容は上のサンプルコードにて

  // cameraの初期化
  // 省略します... 内容は上のサンプルコードにて

  // groveのボタンをインプットに
  pinMode(GROVE_PIN, INPUT);
}

void loop() {

  delay(10);
  int val = digitalRead(GROVE_PIN);
  if (pVal == 0 && val == 1) {
    // ボタンが押された瞬間一回だけの処理
    Serial.println("push!!");

    // カメラから画像をキャプチャ
    camera_fb_t *fb = esp_camera_fb_get();
    if (!fb) {
      Serial.println("Camera capture failed");
      return;
    }

    // 平均値を取得
    uint8_t *test_buf = fb->buf;
    int red = 0, green = 0, blue = 0;
    const uint16_t max_h_pix = 160 * 3;
    const uint16_t max_v_pix = 120;
    int c = 0;
    for (int j = 0; j < max_v_pix; j += 20) {
      for (int i = 0; i < max_h_pix; i += 20) {
        red += *(test_buf + j * max_h_pix + i);
        green += *(test_buf + j * max_h_pix + (i + 1));
        blue += *(test_buf + j * max_h_pix + (i + 2));
        i += 2;
        c++;
      }
    }

    Firebase.setInt(firebaseData, "m5camera/avgColorRed", (red / c));
    Firebase.setInt(firebaseData, "m5camera/avgColorGreen", (green / c));
    Firebase.setInt(firebaseData, "m5camera/avgColorBlue", (blue / c));
  }
  pVal = val;
}
ライブラリを使えばシンプルなコードになりました
データベースのシークレットキー(追記)
読み返して自分でもわからなくなったので追記します
ソースコード内の
#define FIREBASE_AUTH "<YOUR-AUTH>"
はどこで取得すんねんって思ったので以下に手順をメモメモ
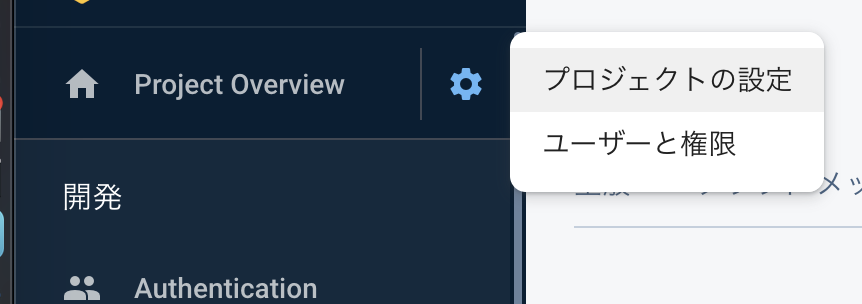
プロジェクトのコンソール画面から「プロジェクトの設定」→「サービスアカウント」タブへ
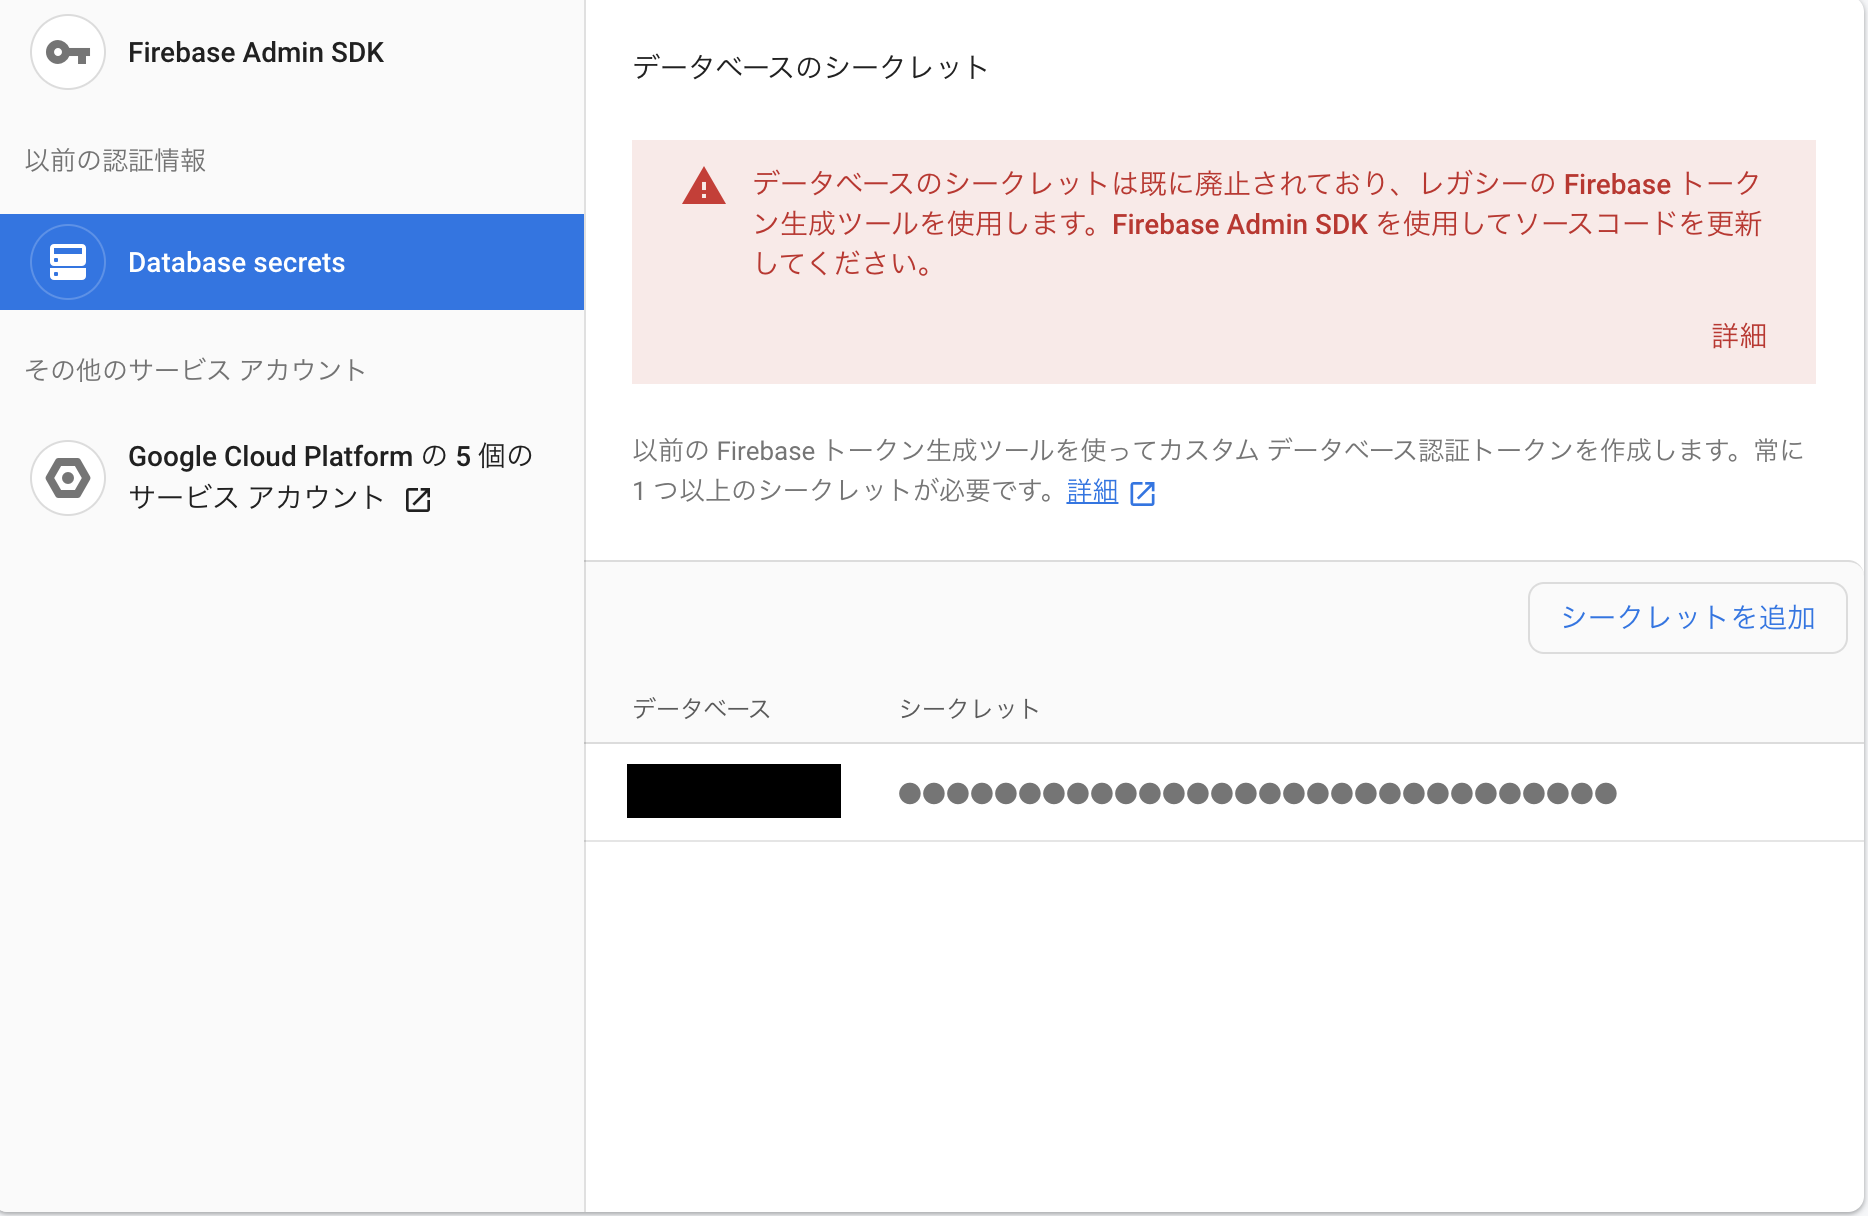
「Database Secrets」へ行けばもらえます
レガシーっぽいので今後どうなるかわかりませんがとりあえず
結果
以下はfirebaseコンソール画面(https://console.firebase.google.com/u/0/?hl=ja)
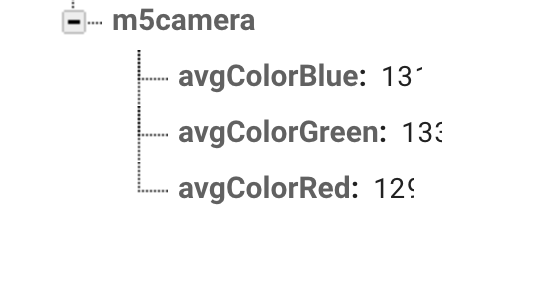
うまくできました
ですが,やっぱりm5cameraのformat_jpegが使えないのがつらい...
画像で保存したい...
MLとかにも使いたい...
値下げしたらしいしもう一個買ってみよう....