問題:複数組織のカレンダー管理とダブルブッキング
複数の組織にまたがって仕事をする場合、Google WorkspaceとOffice 365など、異なるカレンダーシステムを併用する必要があります。
この環境で発生する問題:
- 2つのカレンダーを常に確認する必要がある
- ダブルブッキングが発生しやすい
- 既存の同期ツール(OneCal、CalendarBridge等)が組織のOAuth制限で使えない
解決方法の概要
ICS(iCalendar形式)とGoogle Apps Scriptを組み合わせて、以下を実現します。
- Google → Outlook: ICS購読で一方向同期(5分で完了)
- Outlook → Google: GASでブロック予定を差分同期(本記事の主題)
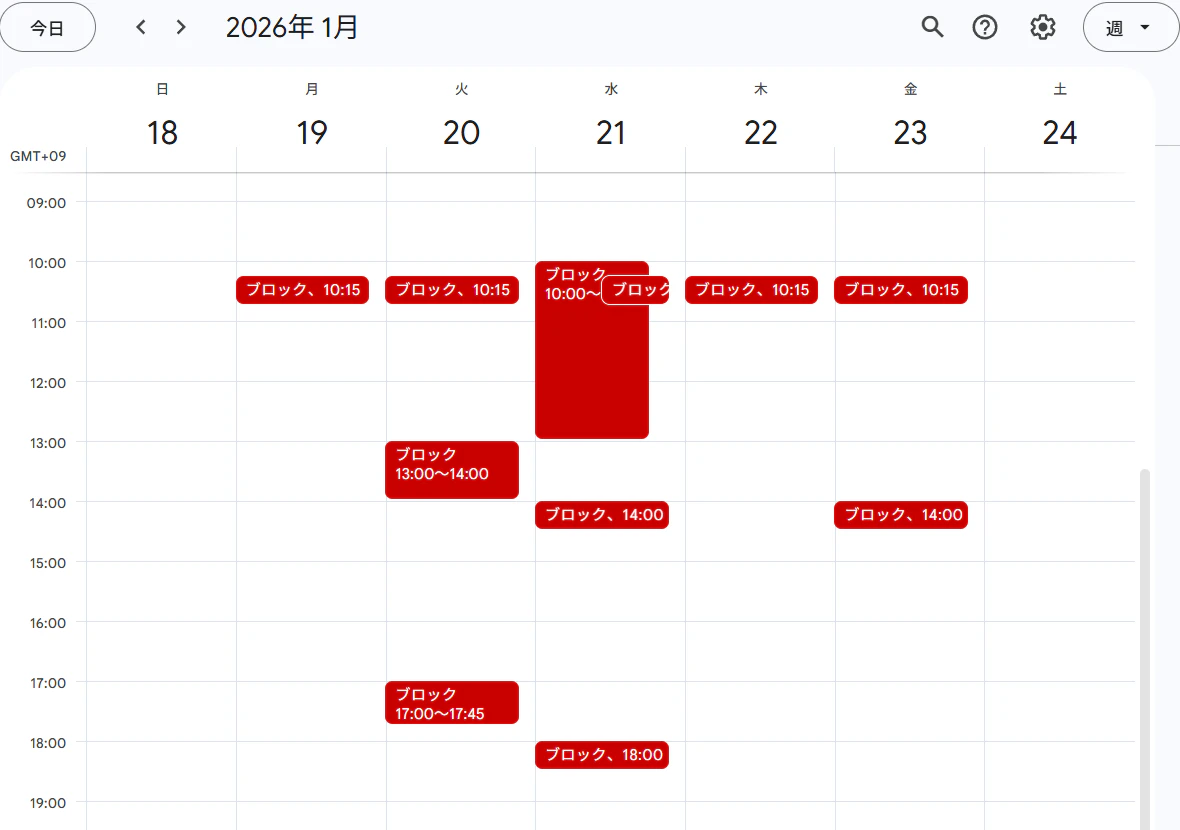
最終的に、両方のカレンダーで空き時間判定が効くようになり、ダブルブッキングを防げます。
↓Googleカレンダーのブロックの様子
環境
- Google Workspace(個人)
- Office 365(組織)
- Google Apps Script
実装手順
Step 1: Google → Outlookの一方向同期
1-1. GoogleカレンダーのICS URLを取得
- Googleカレンダーを開く
- 同期したいカレンダーの設定を開く
- 「カレンダーの統合」セクションを表示
- 「非公開アドレス(iCal形式)」のURLをコピー
1-2. OutlookにICS URLを追加
- Outlook Web( https://outlook.office.com )にアクセス
- カレンダーを開く
- 「予定表を追加」→「個人用予定表を追加」
- Googleアカウントと連携する
これでOutlook側では、Google由来の予定も含めて空き時間が計算されます。
Step 2: Outlook → Googleの同期実装
2-1. OutlookカレンダーのICS URLを取得
- Outlook Webでカレンダーを開く
- 「設定」→「カレンダー」→「共有」
- 「公開」または「共有リンクを作成」
- ICS URLをコピー
注意: タイトル非表示やBusy/Freeのみにする設定を推奨
2-2. Googleにブロック用カレンダーを作成
- Googleカレンダーで新しいカレンダーを作成
- 名前は「Outlookブロック専用」など
- 色を濃いグレーなどに設定(視認性のため)
2-3. GASプロジェクトを作成
- https://script.google.com にアクセス
- 新しいプロジェクトを作成
- 以下のコードを実装
実装コード
// 設定
const PAST_DAYS = 10;
const FUTURE_DAYS = 60;
const BUSY_TITLE = 'ブロック';
const BUSY_VISIBILITY = CalendarApp.Visibility.PRIVATE;
const BUSY_TRANSPARENCY = CalendarApp.EventTransparency.OPAQUE;

// Properties keys
const PROP_SOURCE_CAL_ID = 'SOURCE_CAL_ID';
const PROP_TARGET_CAL_ID = 'TARGET_CAL_ID';
const PROP_MAP = 'SOURCE_TO_TARGET_MAP_V1';

/**
 * 初回セットアップ
 */
function setup() {
  const props = PropertiesService.getScriptProperties();

  // ソースカレンダーID: GoogleにURL購読で追加したOutlookカレンダー
  props.setProperty(PROP_SOURCE_CAL_ID, 'YOUR_SOURCE_CALENDAR_ID');

  // ターゲットカレンダーID: 作成したブロック用カレンダー
  props.setProperty(PROP_TARGET_CAL_ID, 'YOUR_TARGET_CALENDAR_ID');

  console.log('Setup complete.');
}

/**
 * メイン同期処理
 */
function run() {
  const props = PropertiesService.getScriptProperties();
  const SOURCE_CAL_ID = props.getProperty(PROP_SOURCE_CAL_ID);
  const TARGET_CAL_ID = props.getProperty(PROP_TARGET_CAL_ID);

  if (!SOURCE_CAL_ID || !TARGET_CAL_ID) {
    throw new Error('Calendar IDs not configured. Please run setup() first.');
  }

  const sourceCal = CalendarApp.getCalendarById(SOURCE_CAL_ID);
  const targetCal = CalendarApp.getCalendarById(TARGET_CAL_ID);

  if (!sourceCal) throw new Error(`Source calendar not found: ${SOURCE_CAL_ID}`);
  if (!targetCal) throw new Error(`Target calendar not found: ${TARGET_CAL_ID}`);

  // 同期期間の設定
  const now = new Date();
  const startTime = new Date(now.getTime() - PAST_DAYS * 24 * 3600 * 1000);
  const endTime = new Date(now.getTime() + FUTURE_DAYS * 24 * 3600 * 1000);

  // ソースカレンダーから予定を取得
  const sourceEvents = sourceCal.getEvents(startTime, endTime);

  // マッピング読み込み(ソースイベントキー → ターゲットイベントID)
  const map = JSON.parse(props.getProperty(PROP_MAP) || '{}');
  const seenKeys = new Set();

  let created = 0, updated = 0, deleted = 0, skipped = 0;

  // ソース予定をターゲットに同期
  for (const sourceEvent of sourceEvents) {
    const start = sourceEvent.getStartTime();
    const end = sourceEvent.getEndTime();

    // 終日イベントや無効な時刻をスキップ
    if (!start || !end || end <= start) {
      skipped++;
      continue;
    }

    // キー: 開始時刻と終了時刻のタイムスタンプ
    const eventKey = `${start.getTime()}_${end.getTime()}`;
    seenKeys.add(eventKey);

    // 既存のターゲット予定を探す
    let targetEvent = null;
    if (map[eventKey]) {
      try {
        targetEvent = targetCal.getEventById(map[eventKey]);
      } catch (err) {
        targetEvent = null;
      }
    }

    if (targetEvent) {
      // 更新
      targetEvent.setTitle(BUSY_TITLE);
      targetEvent.setTime(start, end);
      targetEvent.setVisibility(BUSY_VISIBILITY);
      targetEvent.setTransparency(BUSY_TRANSPARENCY);
      updated++;
    } else {
      // 新規作成
      const newEvent = targetCal.createEvent(BUSY_TITLE, start, end, {
        visibility: BUSY_VISIBILITY,
        description: '',
      });
      newEvent.setTransparency(BUSY_TRANSPARENCY);
      map[eventKey] = newEvent.getId();
      created++;
    }
  }

  // ソースにない予定をターゲットから削除
  for (const key of Object.keys(map)) {
    if (!seenKeys.has(key)) {
      const targetEventId = map[key];
      try {
        const targetEvent = targetCal.getEventById(targetEventId);
        if (targetEvent) {
          targetEvent.deleteEvent();
        }
      } catch (err) {
        // イベントが既に削除されている場合は無視
      }
      delete map[key];
      deleted++;
    }
  }

  // マッピング保存
  props.setProperty(PROP_MAP, JSON.stringify(map));

  // ログ出力
  console.log(`Source calendar: ${sourceCal.getName()} (${SOURCE_CAL_ID})`);
  console.log(`Target calendar: ${targetCal.getName()} (${TARGET_CAL_ID})`);
  console.log(`Sync done. source_events=${sourceEvents.length}, created=${created}, updated=${updated}, deleted=${deleted}, skipped=${skipped}`);
}
Step 3: カレンダーIDの取得と設定
3-1. ソースカレンダーID(URL購読で追加したOutlook)の取得
- Googleカレンダーを開く
- 左側のカレンダー一覧で、URL購読で追加したOutlookカレンダーを探す
- カレンダー名の右の「︙」→「設定と共有」
- 「カレンダーの統合」セクションの「カレンダーID」をコピー
3-2. ターゲットカレンダーID(ブロック用)の取得
- 同様に、作成したブロック用カレンダーの設定を開く
- カレンダーIDをコピー
3-3. GASで設定を実行
- GASエディタで
setup()関数内のカレンダーIDを実際の値に書き換え - 関数
setupを選択して実行 - 初回は権限の承認が必要
Step 4: トリガーの設定
- GASエディタの左メニューから「トリガー」を選択
- 「トリガーを追加」をクリック
- 以下のように設定:
- 実行する関数:
run - イベントのソース: 時間主導型
- 時間ベースのトリガー: 時間ベースのタイマー
- 時間の間隔: 4時間おき(または1時間おき)
- 実行する関数:
- 保存
動作確認
初回実行
- GASエディタで
run関数を手動実行 - ログを確認:
Source calendar: Outlook (xxxxx@group.calendar.google.com)
Target calendar: Outlookブロック専用 (yyyyy@group.calendar.google.com)
Sync done. source_events=27, created=27, updated=0, deleted=0, skipped=0
Googleカレンダーで確認
- Googleカレンダーを開く
- 左のカレンダー一覧で「Outlookブロック専用」にチェックが入っているか確認
- Outlookの予定がある時間帯に「ブロック」が表示されているか確認
ダブルブッキング防止の確認
- Googleカレンダーで新しい予定を作成しようとする
- Outlookの予定がある時間帯は「埋まっている」と表示される
トラブルシューティング
カレンダーIDが見つからない
- ソースカレンダー(URL購読)が正しく追加されているか確認
- カレンダーIDのコピー時に余分な空白が入っていないか確認
予定が同期されない
-
run()を手動実行してログを確認 -
source_eventsが0の場合、ソースカレンダーに予定がない可能性 -
skippedが多い場合、終日イベントや無効な時刻が原因
重複して予定が作られる
- Script Propertiesの
PROP_MAPをクリア - 関数
clearProperties()を追加して実行:function clearProperties() { const props = PropertiesService.getScriptProperties(); props.deleteProperty(PROP_MAP); console.log('Cleared event mapping data.'); }
仕様と制限
仕様
- 同期期間: 過去10日〜未来60日(変更可能)
- 同じ時間帯の予定は1つのブロックに集約
- タイトルは固定(「ブロック」)
- 詳細・参加者情報は同期しない
制限
- リアルタイム同期ではない(トリガー間隔に依存)
- Outlook側のICS更新遅延がある場合がある
- 終日イベントはスキップされる(変更可能)
カスタマイズ例
同期期間を変更
const PAST_DAYS = 30;    // 過去30日
const FUTURE_DAYS = 90;  // 未来90日
終日イベントも同期
run() 関数内の以下の部分を削除:
if (!start || !end || end <= start) {
  skipped++;
  continue;
}
トリガー頻度を変更
- 1時間おき: より頻繁に同期(リアルタイムに近い)
- 8時間おき: API呼び出しを減らす
まとめ
OAuth制限がある環境でも、ICSとGASを組み合わせることで、カレンダー同期とダブルブッキング防止を実現できました。
重要なポイント:
- ICS購読は空き時間計算に使われないため、実体予定が必要
- 差分同期により効率的な運用が可能
- 必要十分な機能に絞ることで実装を簡潔に
この実装は約200行のコードで、実用的なカレンダー同期を実現しています。