概要
本記事は AWSでWebアプリを構築してみる シリーズの8回目の記事です。
前回の記事は こちら。
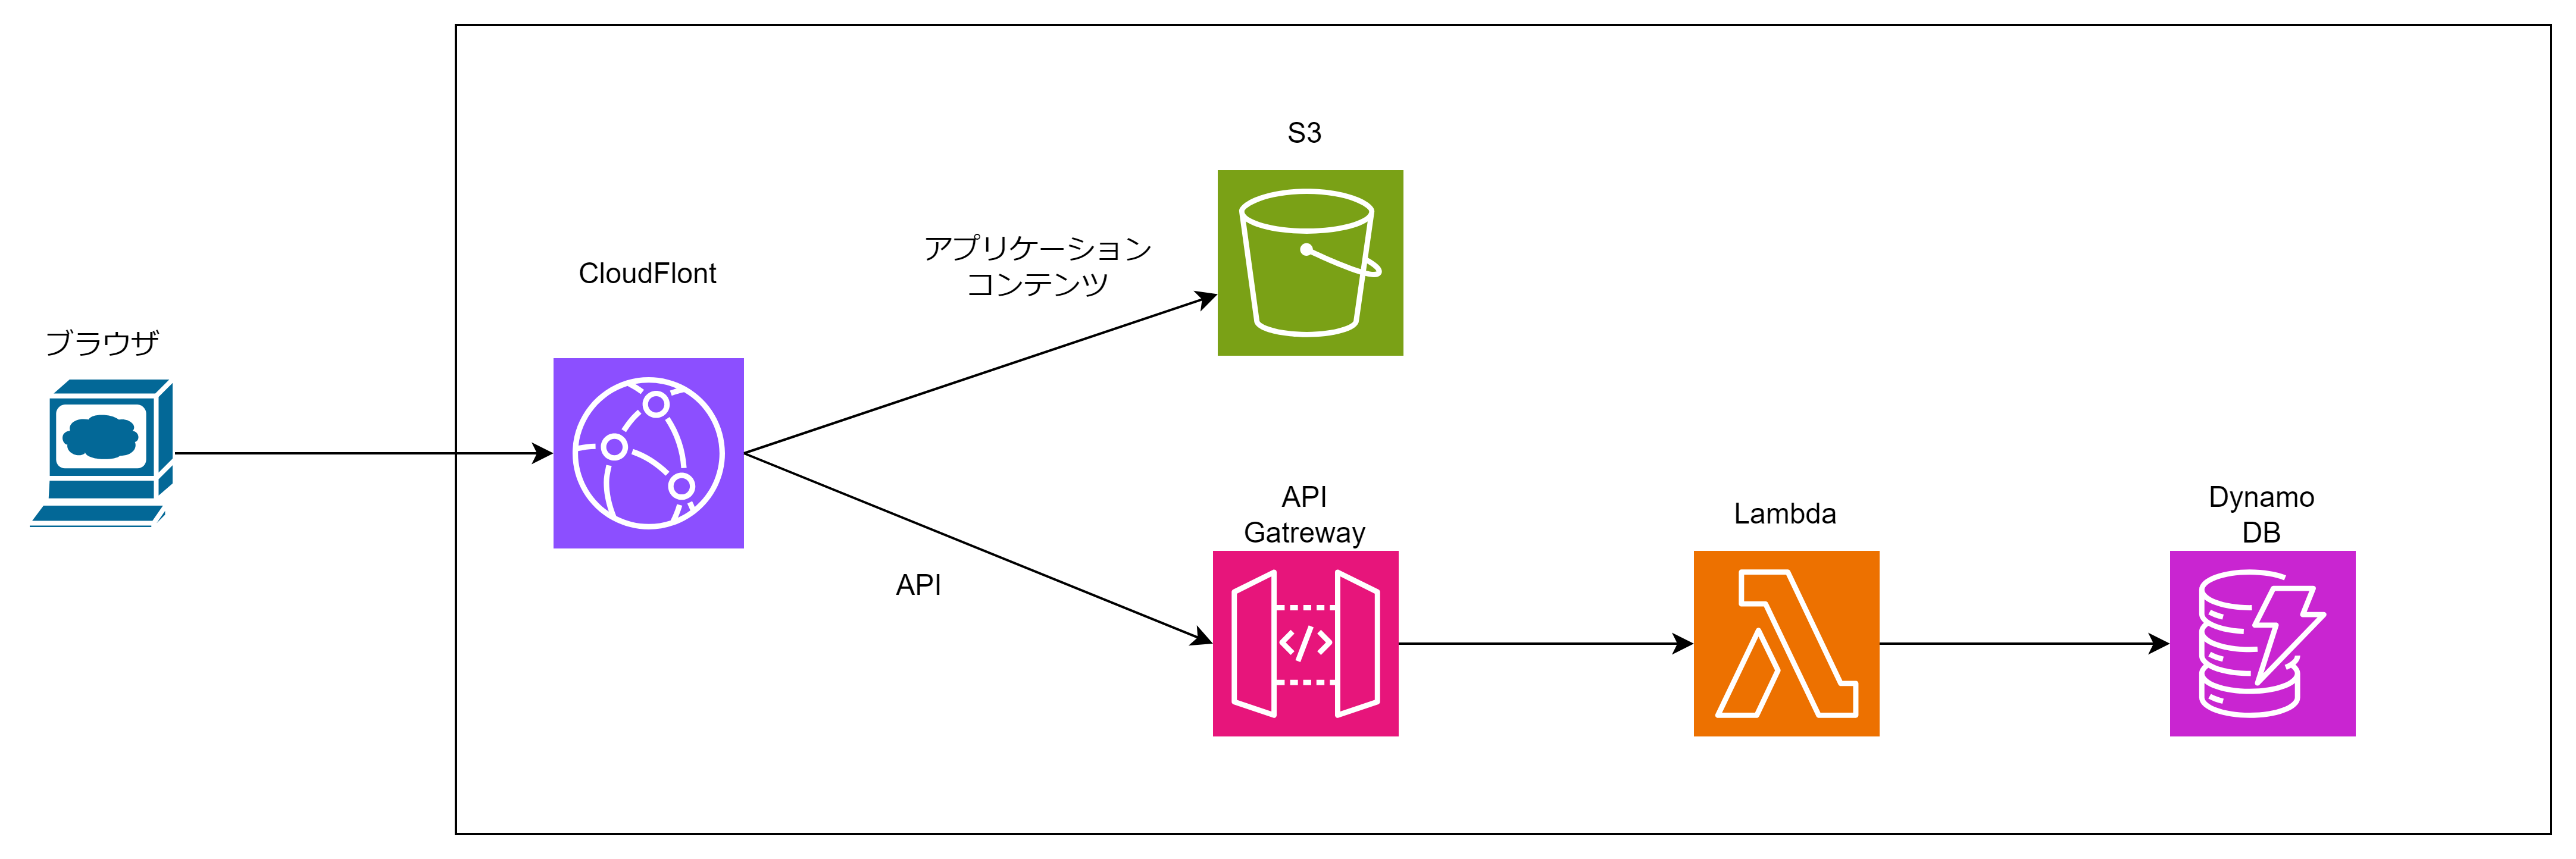
本記事で作成する構成
構成自体は前回と同じですが、今回は静的ウェブサイトからREST APIを呼び出して、Webアプリケーションっぽくしていきます。
静的ウェブサイトからREST APIを呼び出してみる
HTMLを修正し、S3バケットに配置する
-
静的ウェブサイトホスティングでホスティングしてみる で作成した index.html を以下のように修正し、静的ウェブサイトホスティングでホスティングしてみる で配置したS3のバケットにアップロードする
<html xmlns="http://www.w3.org/1999/xhtml" > <head> <title>My Website Home Page</title> <link href="https://cdn.jsdelivr.net/npm/bootstrap@5.3.0/dist/css/bootstrap.min.css" rel="stylesheet" integrity="sha384-9ndCyUaIbzAi2FUVXJi0CjmCapSmO7SnpJef0486qhLnuZ2cdeRhO02iuK6FUUVM" crossorigin="anonymous"> </head> <body class="container mt-4"> <h1>Welcome to my website</h1> <p>Now hosted on Amazon CloudFront!</p> <button onclick="getUsers()">Get Users</button> <div id="user-table"> <script src="https://cdn.jsdelivr.net/npm/axios/dist/axios.min.js"></script> <script> async function getUsers() { const users = await axios({ method: 'get', url: '/api/' }).then((res) => { console.log(res); const users = res.data; let usersTable = (users) => { const tableContentHTML = users.map((user) => {return `<tr><td>${user.name}</td><td>${user.age}</td></tr>`}).join(''); return `<table class="table"><thead><th>名前</th><th>年齢</thead><tbody>` + tableContentHTML + `</tbody></table>`; } document.getElementById("user-table").innerHTML = usersTable(users); }); } </script> </body> </html> -
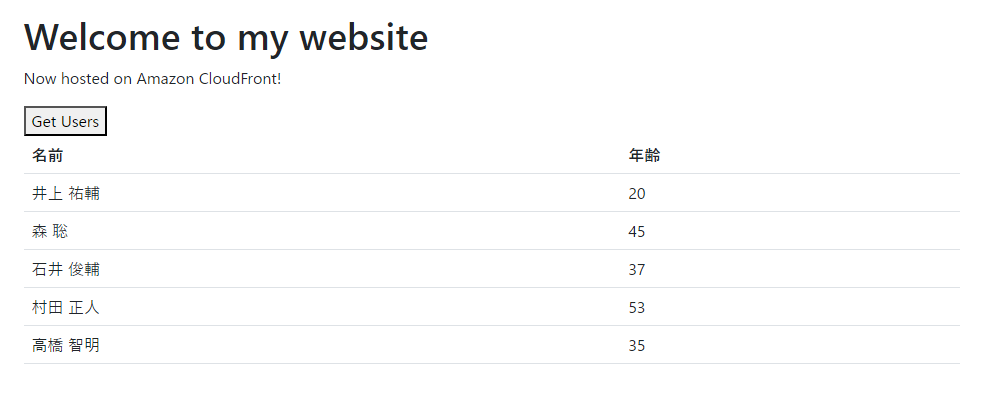
静的ウェブサイトをCloudFront経由のアクセスしか許可しないようにしてみる で作成したディストリビューションの一般タブを開き、「ディストリビューションドメイン名」をコピーしてブラウザで開き、アクセスして以下のように表示されることを確認する

