はじめに
本記事ではPhoenixにtailwindをdaisyuiを導入し
ユーザーログイン画面とログイン後ページを実装します
PhoenixではPETALという技術スタックでいこうぜ!という空気(要出典)があります
PETALとは以下の頭文字です
- Phoenix
- Elixir
- Tailwind
- AlpineJS
- LiveView
Tailwindはちょっと前までは自前でwebpackに組み込んだり、設定を色々する必要があったのですが、
Phoenix 1.6からwebpackからesbuildに変わったり以下のように公式にguideができたりして導入が楽になっています
今回はguideなんかすっ飛ばして、コマンド一発で導入するぜ!という phx_gen_tailwindというライブラリでtailwindを導入し、component libraryのdaisyuiを使用して実際にユーザーログインページとダッシュボード的な画面を作っていきます
環境
Phoenix 1.6.6
Elixir 1.13.0
Elrang 24.2
使用するライブラリのphx_gen_tailwindがesbuildを前提としているので
webpackを使用している1.5以前では動かないのでご注意ください
プロジェクト作成
プロジェクトを作成して移動し、DBを作成します
mix phx.new daisy
cd daisy
mix ecto.setup
tailwindを導入
defmodule Daisy.MixProject do
  defp deps do
    [
      ...,
      {:phx_gen_tailwind, "~> 0.1.3", only: :dev} #追加
    ]
  end
end
mix deps.get
mix phx.gen.tailwind
コマンドを実行するとファイルをゴニョゴニョしてくれて最後にnpmインストールの実行をきかれるのでyで進めてください
$ mix phx.gen.tailwind
* creating assets/package.json
* creating assets/tailwind.config.js
* injecting assets/css/app.css
* injecting config/dev.exs
* injecting mix.exs
* injecting assets/js/app.js

NPM install new dependencies? [Yn]
* running cd assets/ && npm install
これで完了! すばらしい!
daisyuiの導入
次にdaisyuiをインストールします
cd assets
npm i daisyui
pluginsで追加して完了です
module.exports = {
  mode: 'jit',
  purge: [
    './js/**/*.js',
    '../lib/*_web/**/*.*ex'
  ],
  theme: {
  },
  variants: {
    extend: {},
  },
  plugins: [
    require("daisyui") // ここ追加
  ],
}
認証機能の追加
認証機能を使うので phx.gen.authでちゃちゃっといきましょう
mix phx.gen.auth Accounts User users
mix ecto.migrate
全体のレイアウト
ログインページではヘッダーを表示したくないのでログイン前とその後を分けるようにします
<!DOCTYPE html>
<html lang="en">
  <head>
    <meta charset="utf-8"/>
    <meta http-equiv="X-UA-Compatible" content="IE=edge"/>
    <meta name="viewport" content="width=device-width, initial-scale=1.0"/>
    <%= csrf_meta_tag() %>
    <%= live_title_tag assigns[:page_title] || "Daisy", suffix: " · Phoenix Framework" %>
    <link phx-track-static rel="stylesheet" href={Routes.static_path(@conn, "/assets/app.css")}/>
    <script defer phx-track-static type="text/javascript" src={Routes.static_path(@conn, "/assets/app.js")}></script>
  </head>
  <body>
    <%= render "_user_menu.html", assigns %>
    <%= @inner_content %>
  </body>
</html>
app(html) live(LiveView)の横方向のマージン(mx-auto)を設定します
<main class="container mx-auto">
  <p class="alert alert-info" role="alert"><%= get_flash(@conn, :info) %></p>
  <p class="alert alert-danger" role="alert"><%= get_flash(@conn, :error) %></p>
  <%= @inner_content %>
</main>
<main class="container mx-auto">
  <p class="alert alert-info" role="alert"
    phx-click="lv:clear-flash"
    phx-value-key="info"><%= live_flash(@flash, :info) %></p>

  <p class="alert alert-danger" role="alert"
    phx-click="lv:clear-flash"
    phx-value-key="error"><%= live_flash(@flash, :error) %></p>

  <%= @inner_content %>
</main>
Header
if @current_userでログイン時のみヘッダーを表示するようにしています
headerはnavbarで実装します
<%= if @current_user do %>
  <header>
    <section>
      <nav class="navbar bg-primary text-primary-content">
        <div class="flex-1">
          <a class="btn btn-ghost normal-case text-4xl" href="/">Daisy</a>
        </div>
        <div class="flex-none">
          <ul class="menu menu-horizontal">
            <li><p><%= @current_user.email %></p></li>
            <li><%= link "Settings", to: Routes.user_settings_path(@conn, :edit) %></li>
            <li><%= link "Log out", to: Routes.user_session_path(@conn, :delete), method: :delete %></li>
          </ul>
        </div>
      </nav>
    </section>
  </header>
<% end %>
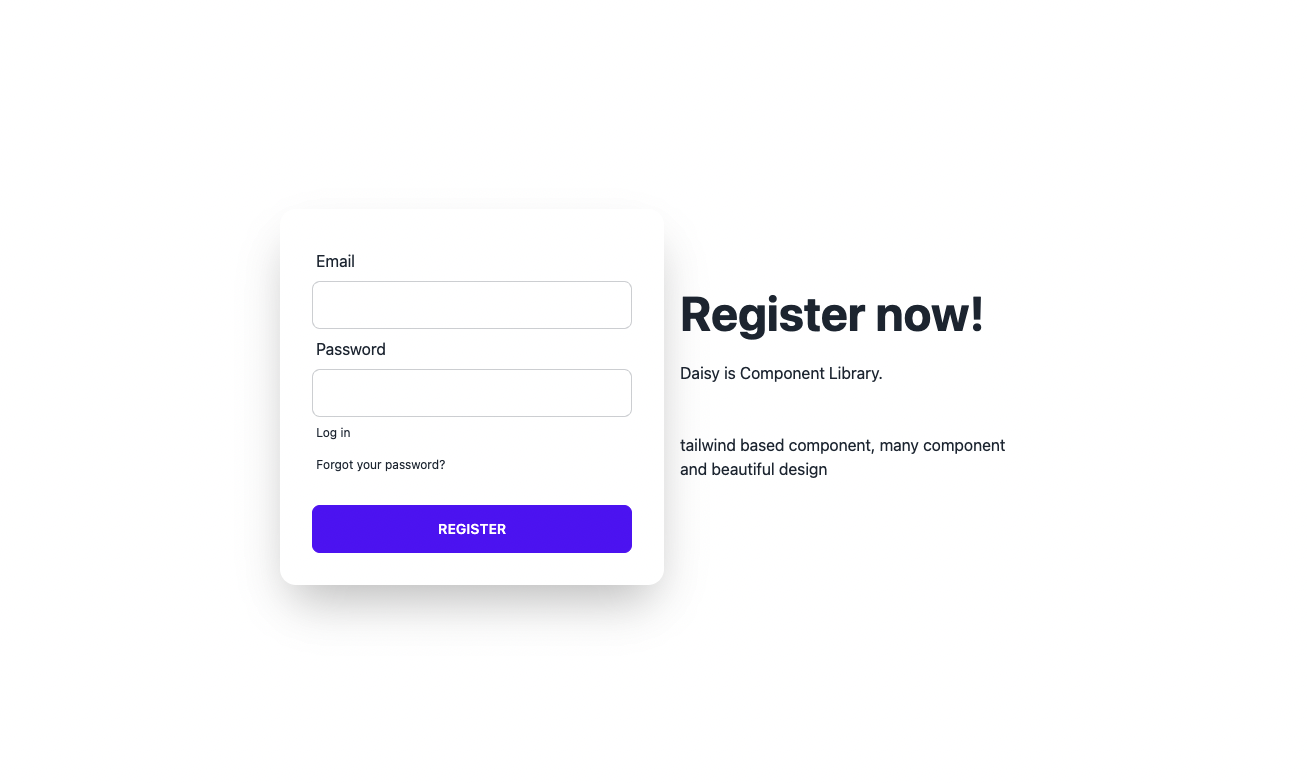
Register Page
登録ページを作成します
heroにいい感じなサンプルがあるのでこちらをベースに実装します
<div class="hero min-h-screen">
  <div class="hero-content flex-col lg:flex-row-reverse">
    <div class="text-center lg:text-left">
      <h1 class="text-5xl font-bold">Register now!</h1>
      <p class="py-6">Daisy is Component Library.</p>
      <p class="py-6">tailwind based component, many component and beautiful design</p>
    </div>
    <div class="card flex-shrink-0 w-full max-w-sm shadow-2xl bg-base-100">
      <div class="card-body">
        <.form let={f} for={@changeset} action={Routes.user_registration_path(@conn, :create)}>
          <%= if @changeset.action do %>
            <div class="alert alert-danger">
              <p>Oops, something went wrong! Please check the errors below.</p>
            </div>
          <% end %>
          <div class="form-control">
            <%= label f, :email, class: "label" %>
            <%= email_input f, :email, required: true, class: "input input-bordered" %>
            <%= error_tag f, :email %>
          </div>

          <div class="form-control">
            <%= label f, :password, class: "label" %>
            <%= password_input f, :password, required: true, class: "input input-bordered" %>
            <%= error_tag f, :password %>
          </div>

          <label class="label">
            <%= link "Log in", to: Routes.user_session_path(@conn, :new), class: "label-text-alt link link-hover" %>
          </label>
          <label class="label">
            <%= link "Forgot your password?", to: Routes.user_reset_password_path(@conn, :new), class: "label-text-alt link link-hover" %>
          </label>

          <div class="form-control mt-6">
            <%= submit "Register", class: "btn btn-primary" %>
          </div>
        </.form>
      </div>
    </div>
  </div>
</div>
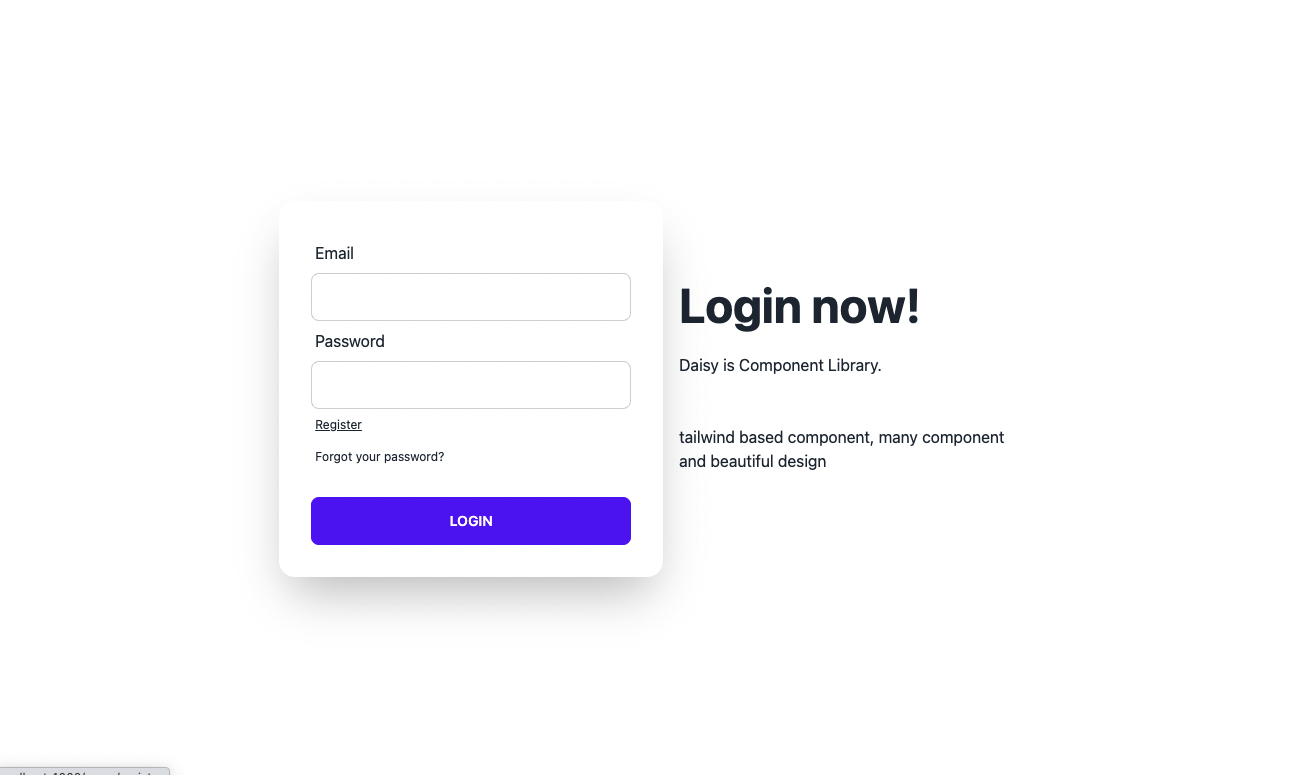
Login Page
次にログインページ
formのパラメーターとエラー表示、リンクが登録ページと違っているので気をつけましょう
<div class="hero min-h-screen">
  <div class="hero-content flex-col lg:flex-row-reverse">
    <div class="text-center lg:text-left">
      <h1 class="text-5xl font-bold">Login now!</h1>
      <p class="py-6">Daisy is awesome Component Library.</p>
      <p class="py-6">tailwind based component</p>
more...</p>
    </div>
    <div class="card flex-shrink-0 w-full max-w-sm shadow-2xl bg-base-100">
      <div class="card-body">
        <.form let={f} for={@conn} action={Routes.user_session_path(@conn, :create)} as={:user}>
          <%= if @error_message do %>
            <div class="alert alert-danger">
              <p><%= @error_message %></p>
            </div>
          <% end %>
          <div class="form-control">
            <%= label f, :email, class: "label" %>
            <%= email_input f, :email, required: true, class: "input input-bordered" %>
            <%= error_tag f, :email %>
          </div>

          <div class="form-control">
            <%= label f, :password, class: "label" %>
            <%= password_input f, :password, required: true, class: "input input-bordered" %>
            <%= error_tag f, :password %>
          </div>

          <label class="label">
            <%= link "Register", to: Routes.user_registration_path(@conn, :new), class: "label-text-alt link link-hover" %>
          </label>
          <label class="label">
            <%= link "Forgot your password?", to: Routes.user_reset_password_path(@conn, :new), class: "label-text-alt link link-hover" %>
          </label>

          <div class="form-control mt-6">
            <%= submit "Login", class: "btn btn-primary" %>
          </div>
        </.form>
      </div>
    </div>
  </div>
</div>
dashboard
最後にログイン後のページを作成します
コンテンツは特に無いのでheroのこのサンプルを表示します
<div class="hero min-h-screen bg-base-200">
  <div class="hero-content text-center">
    <div class="max-w-md">
      <h1 class="text-5xl font-bold">Hello there</h1>
      <p class="py-6">Provident cupiditate voluptatem et in. Quaerat fugiat ut assumenda excepturi exercitationem quasi. In deleniti eaque aut repudiandae et a id nisi.</p>
      <button class="btn btn-primary">Get Started</button>
    </div>
  </div>
</div>
完成画面
これで実装が完了したので実際の画面を見てみましょう
登録ページ
ログインページ
ダッシュボード & ヘッダー

最後に
いかがでしたでしょうか?
tailwindをコマンド一発でいれて、サンプルを基にいい感じな画面を作ることができました
daisyuiは他にもモーダルやカードなど色々なコンポーネントがあるので試してみてください
本記事は以上になりますありがとうございました
デザイン参考ページ(追記)
このデザインどうやんの?は以下のページを参考にすると組みやすかったです
- https://v1.tailwindcss.com/components/forms
- https://www.tailwind-kit.com/templates
- https://tailblocks.cc/
- https://daisyui.com/
参考ページ
- https://qiita.com/im_miolab/items/f26bfb10efe638e32bf8
- https://tailwindcss.com/docs/guides/phoenix
- https://github.com/phoenixframework/tailwind
- https://github.com/kevinlang/phx_gen_tailwind
- https://daisyui.com/
- https://daisyui.com/components/navbar/#navbar-with-menu-and-submenu
- https://daisyui.com/components/hero/#hero-with-form
- https://daisyui.com/components/hero/#centered-hero