はじめに
本記事はPhoenix 1.6で組み込まれたアプリケーションに認証機能を追加するphx.gen.authを使用して、
通常のユーザー認証とAPIのトークン認証を実装していきます
本記事はPhoenix 1.6を使用するため、以下で最新版にアップデートをお願いします
mix archive.install hex phx_new
プロジェクト作成
mix phx.new auth_sample
cd auth_sample
mix ecto.create
通常の認証機能を追加
mix phx.gen.auth Accounts User users
コマンド一発で登録、ログイン、パスワードリセット、パスワード・アドレス変更、メール送信まで作ってくれるって素晴らしいですね
APIのトークン認証を実装
APIの作成
こちらとgen.authで生成されたファイルのcreateの箇所をベースにログインAPIを作成します
lib/auth_sample_web/controllers/user_session_controller.ex
フォームデータではないので受け取るパラメーターを
%{"user" => params} から、
%{"email" => email, "password" => password}にしているので注意してください
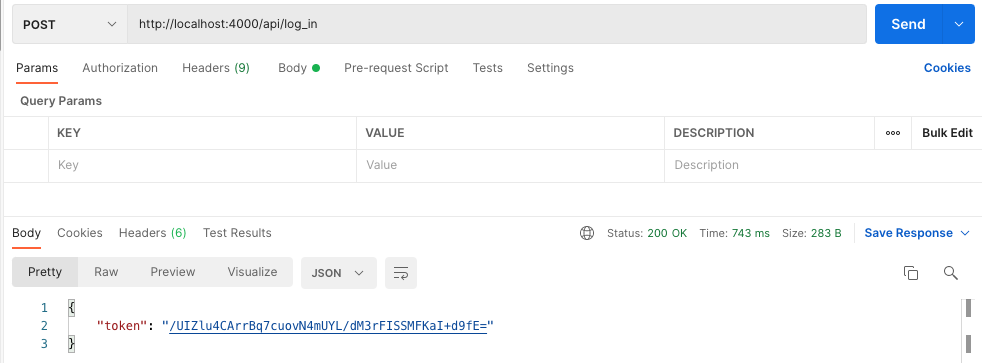
生成されたトークンはBinaryなので、レスポンスで返す用に Base64でエンコードします
また検証用にstatus APIも作成します
defmodule AuthSampleWeb.UserApiSessionController do
  use AuthSampleWeb, :controller

  alias AuthSample.Accounts

  def create(conn, %{"email" => email, "password" => password}) do
    if user = Accounts.get_user_by_email_and_password(email, password) do
      render(
        conn,
        "token.json",
        token: Accounts.generate_user_session_token(user) |> Base.encode64()
      )
    else
      conn
      |> put_status(:unauthorized)
      |> put_view(AuthSampleWeb.ErrorView)
      |> render(:"401")
    end
  end

  def status(conn, _params) do
    user = conn.assigns.current_user
    render(conn, "status.json", status: user.email <> " enable")
  end
end
viewファイルの作成も忘れずに
defmodule AuthSampleWeb.UserApiSessionView do
  use AuthSampleWeb, :view

  def render("token.json", %{token: token}) do
    %{token: token}
  end

  def render("status.json", %{status: status}) do
    %{status: status}
  end
end
header Authorizationを確認
require_authenticated_userの下辺りにpipelineを追加
authorization headerは Bearer tokenとなっているのでBearerのあとのスペースを忘れないこと
tokenはbase64でDBのtokenはBinaryなのでデコードが必要です
ユーザーが取得したらconnにアサインして各APIから参照できるようにしておきます
defmodule AuthSampleWeb.UserAuth do
  import Plug.Conn
  import Phoenix.Controller

...
  def require_verify_header(conn, _opts) do
    with ["Bearer " <> token] <- get_req_header(conn, "authorization"),
         user <- Accounts.get_user_by_session_token(token |> Base.decode64!()) do
      conn
      |> assign(:current_user, user)
    else
      _error ->
        conn
        |> put_status(:unauthorized)
        |> put_view(AuthSampleWeb.ErrorView)
        |> render(:"401")
        |> halt()
    end
...
  end
end
routerにapi scopeを認証なし、ありの2つを作成
defmodule AuthSampleViewWeb.Router do
  use AuthSampleWeb, :router

  import AuthSampleWeb.UserAuth

...
  scope "/api", AuthSampleWeb do
    pipe_through :api

    post "/log_in", UserApiSessionController, :create
  end

  scope "/api", AuthSampleWeb do
    pipe_through [:api, :require_verify_header]

    get "/status", UserApiSessionController, :status
  end
...
end
実装は以上です!
Guardianより簡単!
動作確認
参考ページ
https://www.phoenixframework.org/
https://hexdocs.pm/phoenix/mix_phx_gen_auth.html
https://dev.to/onpointvn/implement-jwt-authentication-with-phoenix-token-n58


