はじめに
本記事は以下のスライドを参考にElixirDesktopのAndroid Exampleで mix phx.newで作成したプロジェクトを動かした備忘録になります
Androidプロジェクト作成
READMEに沿ってやっていきます
How to build & run
-
Install the beta OTP build *(see known issues)
-
Install Android Studio + NDK.
-
Go to "Files -> New -> Project from Version Control" and enter this URL: https://github.com/elixir-desktop/android-example-app/
Phoenixプロジェクト作成
プロジェクトをcloneしたらappディレクトリに移動しプロジェクトを作成します
DBはサンプルはSQliteですが今回はPostgresqlにします
cd app
mix phx.new blog
cd blog
ライブラリの追加
desktopとwxを追加します
defmodule Blog.MixProject do
  use Mix.Project

  defp deps do
    [
      ...
      {:desktop, "~> 1.4"},
      {:wx, "~> 1.0.10", hex: :bridge, targets: [:android, :ios]}
    ]
  end
end
変更したらmix deps.getを忘れずに
mix deps.get
mix ecto.create
Desktop化
PhoenixプロジェクトをElixirDesktopプロジェクトに変えていきます
Blog.ApplicationをBlogに変更
defmodule Blog.MixProject do
  use Mix.Project

  # Configuration for the OTP application.
  #
  # Type `mix help compile.app` for more information.
  def application do
    [
      mod: {Blog, []},
      extra_applications: [:logger, :runtime_tools]
    ]
  end
end
desktopの設定を追加します
defmodule Blog do
  @app Mix.Project.config()[:app]
  def config_dir() do
    Path.join([Desktop.OS.home(), ".config", "blog"])
  end

  def start(:normal, []) do
    {:ok, sup} = Supervisor.start_link([Blog.Repo], name: __MODULE__, strategy: :one_for_one)
    {:ok, _} = Supervisor.start_child(sup, BlogWeb.Sup)

    {:ok, _} =
      Supervisor.start_child(sup, {
        Desktop.Window,
        [
          app: @app,
          id: BlogWindow,
          title: "BlogApp",
          size: {600, 500},
          url: &BlogWeb.Endpoint.url/0
        ]
      })
  end
end
PubSubとsession管理用etsを管理するSuperviserを作成します
defmodule BlogWeb.Sup do
  use Supervisor

  @moduledoc """
    Supervisor for the WebApp
  """

  def start_link([]) do
    Supervisor.start_link(__MODULE__, [], name: __MODULE__)
  end

  def init([]) do
    children = [
      {Phoenix.PubSub, name: Blog.PubSub},
      BlogWeb.Endpoint
    ]

    :session = :ets.new(:session, [:named_table, :public, read_concurrency: true])
    Supervisor.init(children, strategy: :one_for_one, max_restarts: 1000)
  end
end
EndpointとsessionをDesktop向けに変更します
Phoenix.EndpointをDesktop.Endpointへ
sssion_potionsをcookieからetsに変更します
defmodule BlogWeb.Endpoint do
  use Desktop.Endpoint, otp_app: :blog

  # The session will be stored in the cookie and signed,
  # this means its contents can be read but not tampered with.
  # Set :encryption_salt if you would also like to encrypt it.
  @session_options [
    store: :ets,
    key: "_blog_key",
    table: :session
  ]
  ...
end
Scaffolding
いつもどおり mix phx.gen.liveをしていきます
mix phx.gen.live Blogs Post posts title:string body:text
mix ecto.migrate
routesはトップページで表示したいのでpostsを消しています
defmodule BlogWeb.Router do
  use BlogWeb, :router

  scope "/", BlogWeb do
    pipe_through :browser

    live "/", PostLive.Index, :index
    live "/new", PostLive.Index, :new
    live "/:id/edit", PostLive.Index, :edit

    live "/:id", PostLive.Show, :show
    live "/:id/show/edit", PostLive.Show, :edit
  end
end
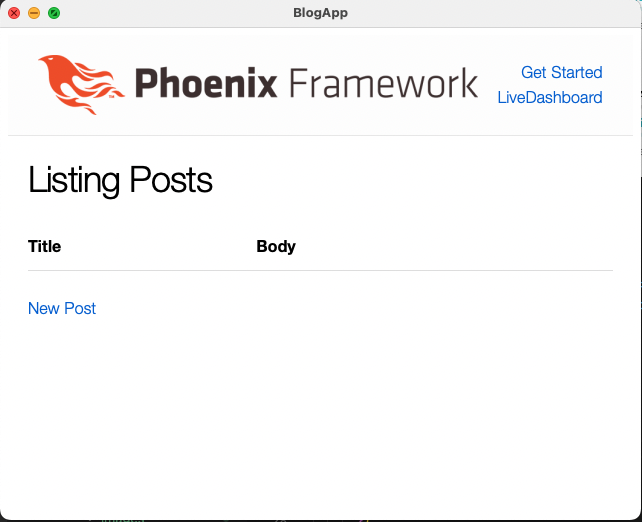
一旦起動させてみましょう
iex -S mix phx.server
無事起動できました!
Android用設定
このままではAndroidでは起動できないので設定を変えていきます
config/runtime.exがあると RELEASE_SYS_CONFIG がセットされていないとエラーになるので削除します
Endpointの設定を書き換えます
import Config

config :blog,
  ecto_repos: [Blog.Repo]

# Configures the endpoint
config :blog, BlogWeb.Endpoint,
  http: [ip: {127, 0, 0, 1}, port: 0],
  render_errors: [view: BlogWeb.ErrorView, accepts: ~w(html json), layout: false],
  pubsub_server: Blog.PubSub,
  live_view: [signing_salt: "sWpG9ljX"],
  secret_key_base: :crypto.strong_rand_bytes(32),
  server: true
AndroidはprodでreleaseするのでprodにDB設定を追加します
AndroidからローカルホストのPostgresqlに接続する場合は hosnameを 10.0.2.2に設定してください
config :blog, Blog.Repo,
  username: "postgres",
  password: "postgres",
  hostname: "10.0.2.2",
  database: "blog_dev",
  stacktrace: true,
  show_sensitive_data_on_connection_error: true,
  pool_size: 10
ビルドスクリプト修正
#!/bin/bash
set -e
BASE=`pwd`

. ~/projects/24.beta/activate
export MIX_ENV=prod
export MIX_TARGET=android

cd blog

# assetsに何も入れてないのでコメントアウトします
# if [ ! -d "assets/node_modules" ]; then
#  cd assets && npm i && cd ..
# fi

mix assets.deploy && \
  mix release --overwrite && \
  cd _build/android_prod/rel/blog && \ #最後をtodo_appからblogに変更
  zip -0r $BASE/src/main/assets/app.zip lib/ releases/ --exclude "*.so" && \
  xz -9ef $BASE/src/main/assets/app.zip
このままビルドするとエラーになるのでrun_mixをコピーして中身が空のビルドスクリプトを実行するようにして
Elixirは別でビルドするようにします
#!/bin/bash
set -e
commandLineのrun_mixのパスを先ほど作成した空の run_mixに差し替えます
plugins {
    id 'com.android.application'
    id 'kotlin-android'
}

android {
    compileSdkVersion 30
    buildToolsVersion "30.0.3"

    task buildNum(type: Exec, description: 'Update Elixir App') {
        commandLine './run_mix', 'package.mobile'
    }
ビルド & Run
AndroidとiOSはカスタムビルドしたErlangOTPを使用しないと動かないのと
asdfが起動しているとうまく行かないのでdirenvでasdfを無効化します
userは適宜自分のユーザー名に変えてください
PATH_rm /Users/user/.asdf/shims
PATH_rm /Users/user/.asdf/bin
ファイルを作成したら以下のコマンドで設定を有効化します
direnv allow
一度cleanしてからビルドを実行します
mix deps.clean --all
mix deps.get
cd ..
../run_mix
ビルドが完了したら
AndroidStudioを実行ボタンを押します
これで無事成功したらアプリが起動します
失敗したらこちらの該当するエラーがないか確認してください
DEMO
同一マイグレーションファイルをpriv/repoに突っ込んだphoenixアプリと同時に起動します
同じDBにアクセスするので双方の更新が反映されます
最後に
phx.newで作成したPhoenixプロジェクトを無事Androidアプリとしてビルドすることができました
ですがiOSはこちらで動かせましたが、外部のPostgresqlにアクセスしようとするとアプリがクラッシュしてしまって成功しない状態です(2022/07/30現在)
こちらが解決できれば、複数のプラットフォームでLiveViewやPubSubでリアルタイムに更新できるネイティブアプリをElixir/Phoenixで爆速で作ることができるようになるので、Elixirで覇権が取れますね!(妄想)
本記事は以上になりますありがとうございました
参考サイト
https://speakerdeck.com/piacerex/elixirdesktopru-men-web-sumahowo1tufalsesosude-api-hellnixian-ranaikai-fa-ti-yan-elixirimp-number-22
https://github.com/elixir-desktop/android-example-app
https://araramistudio.jimdo.com/2018/01/11/android%E3%81%AE%E3%82%A8%E3%83%9F%E3%83%A5%E3%83%AC%E3%83%BC%E3%82%BF%E3%83%BC%E3%81%8B%E3%82%89%E8%87%AA%E8%BA%AB%E3%81%AEpc-localhost-%E3%81%B8%E6%8E%A5%E7%B6%9A/
https://qiita.com/the_haigo/items/fd0282821c4a942cafda
https://qiita.com/the_haigo/items/a2ec7f328b40e1e6783b

