はじめに
ReactとGoogle mapをつかったアプリを作成した際、初学者が参考となる資料が思いの外少なかったので、本記事を投稿いたしました。
本記事では、2020/7月現在、最もアクティブかつ使いやすいと思われる@react-google-maps/apiを使用しています。
このライブラリは、Google Maps API機能を広くカバーしており、Reactコンポーネントとして提供してくれているのでとても便利です。感謝。
今回ご紹介する機能
- Mapコンポーネントの描画
- マーカーと情報の表示
- マーカーアイコンのクラスター表示
- 多地点を回る際の最適ルートを表示
事前準備
- GoogleMapのAPIキーを取得
- Map関連のGoogleAPI(今回は
Maps JavaScript APIとDirections API)を有効化
Mapの描画
基本となるGoogleMapを描画するMapコンポーネントを作ります。
Snazzy Mapsからカスタムデザインをインポートすることができます。

GoogleMapComponent.js
import React, { useCallback, useRef } from "react";
import { GoogleMap, useLoadScript } from "@react-google-maps/api";

import mapStyles from "./mapUtils/mapStyles";
// 地図のデザインを指定することができます。
// デザインは https://snazzymaps.com からインポートすることができます。

const libraries = ["places"];
const mapContainerStyle = {
  height: "60vh",
  width: "100%",
};
// 地図の大きさを指定します。

const options = {
  styles: mapStyles,
  disableDefaultUI: true,
  // デフォルトUI(衛星写真オプションなど)をキャンセルします。
  zoomControl: true,
};

export default function GoogleMapComponent() {
  const { isLoaded, loadError } = useLoadScript({
    googleMapsApiKey: process.env.REACT_APP_googleMapsApiKey,
    // ここにAPIキーを入力します。今回は.envに保存しています。
    libraries,
  });

  const mapRef = useRef();
  const onMapLoad = useCallback((map) => {
    mapRef.current = map;
  }, []);
  //API読み込み後に再レンダーを引き起こさないため、useStateを使わず、useRefとuseCallbackを使っています。

  if (loadError) return "Error";
  if (!isLoaded) return "Loading...";

  return (
      <GoogleMap
        id="map"
        mapContainerStyle={mapContainerStyle}
        zoom={8}
     // デフォルトズーム倍率を指定します。
        center={{
          lat: 43.048225,
          lng: 141.49701,
        }}
     // 札幌周辺にデフォルトのセンターを指定しました。
        options={options}
        onLoad={onMapLoad}
      >
      </GoogleMap>
  );
}
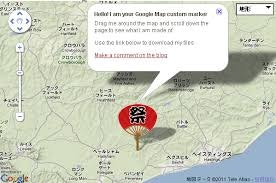
マーカーと情報の表示
クリックなどのイベントに合わせてアイコンや場所情報を表示するMarkerコンポーネントを作ります。
GoogleMapComponent.js
import PlaceInfo from "./PlaceInfo";
export default function GoogleMapComponent() {
  return (
      <GoogleMap>
        <PlaceInfo/>
      </GoogleMap>
  );
}
PlaceInfo.js
import React, { useState } from "react";
import { Marker, InfoWindow } from "@react-google-maps/api";

export default function PlaceInfo() {
  const places = [
    { info: "info1", location: { lat: 43.048225, lng: 141.49701 } },
    { info: "info2", location: { lat: 44.048225, lng: 142.49701 } },
  ];

  const [selected, setSelected] = useState(null);

  return (
    <>
      {places.map((marker) => (
        <Marker
          key={`${marker.location.lat * marker.location.lng}`}
          position={{
            lat: marker.location.lat,
            lng: marker.location.lng,
          }}
          onMouseOver={() => {
            setSelected(marker);
            // マウスオーバーで<InfoWindow>が描画されます。
          }}
          icon={{
            url: "url of icon",
            origin: new window.google.maps.Point(0, 0),
            anchor: new window.google.maps.Point(15, 15),
            scaledSize: new window.google.maps.Size(30, 30),
            // ここでアイコン表示の設定ができます。
          }}
        />
      ))}

      {selected ? (
        // MarkerにマウスオーバーされたときにInfoWindowが表示されます。
        <InfoWindow
          position={{
            lat: selected.location.lat,
            lng: selected.location.lng,
          }}
          onCloseClick={() => {
            setSelected(null);
          }}
        >
          <div>{selected.info}</div>
        </InfoWindow>
      ) : null}
    </>
  );
}
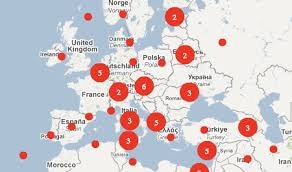
マーカーアイコンのクラスター表示
マーカーアイコンをいくつも表示するとアイコン同士が重なって見えにくくなってしまいます。
それを回避するために、地図の表示倍率にしたがってクラスター表示することができます。
今回はクラスター表示にカスタムアイコンを使用する方法も併せて紹介します。
GoogleMapComponent.js
import CustomMarkerClusterer from "./CustomMarkerClusterer";
export default function GoogleMapComponent() {
  return (
      <GoogleMap>
        <CustomMarkerClusterer/>
      </GoogleMap>
  );
}
CustomMarkerClusterer.js
import React from "react";
import { Marker, MarkerClusterer } from "@react-google-maps/api";

export default function CustomMarkerClusterer() {
  const places = [
    { info: "info1", location: { lat: 43.048225, lng: 141.49701 } },
    { info: "info2", location: { lat: 44.048225, lng: 142.49701 } },
  ];

  const clusterStyles = [
    {
      textColor: "white",
      url: "path/to/smallclusterimage.png",
      height: 50,
      width: 50,
    },
    {
      textColor: "white",
      url: "path/to/mediumclusterimage.png",
      height: 50,
      width: 50,
    },
    {
      textColor: "white",
      url: "path/to/largeclusterimage.png",
      height: 50,
      width: 50,
    },
  ]);
  // クラスターサイズに応じてカスタムアイコンで表示することができます。

  const options = {
    gridSize: 50,
    styles: clusterStyles,
    maxZoom: 15,
  };

  return (
    <MarkerClusterer options={options}>
      {(clusterer) =>
        places.map(
          (marker) =>
            selectedActivities[marker.activityClass] && (
              <Marker
                key={`${marker.location.lat * marker.location.lng}`}
                clusterer={clusterer}
                position={{
                  lat: marker.location.lat,
                  lng: marker.location.lng,
                }}
                icon={{
                  url: "url of icon",
                  origin: new window.google.maps.Point(0, 0),
                  anchor: new window.google.maps.Point(15, 15),
                  scaledSize: new window.google.maps.Size(30, 30),
                }}
              />
            )
        )
      }
    </MarkerClusterer>
  );
}
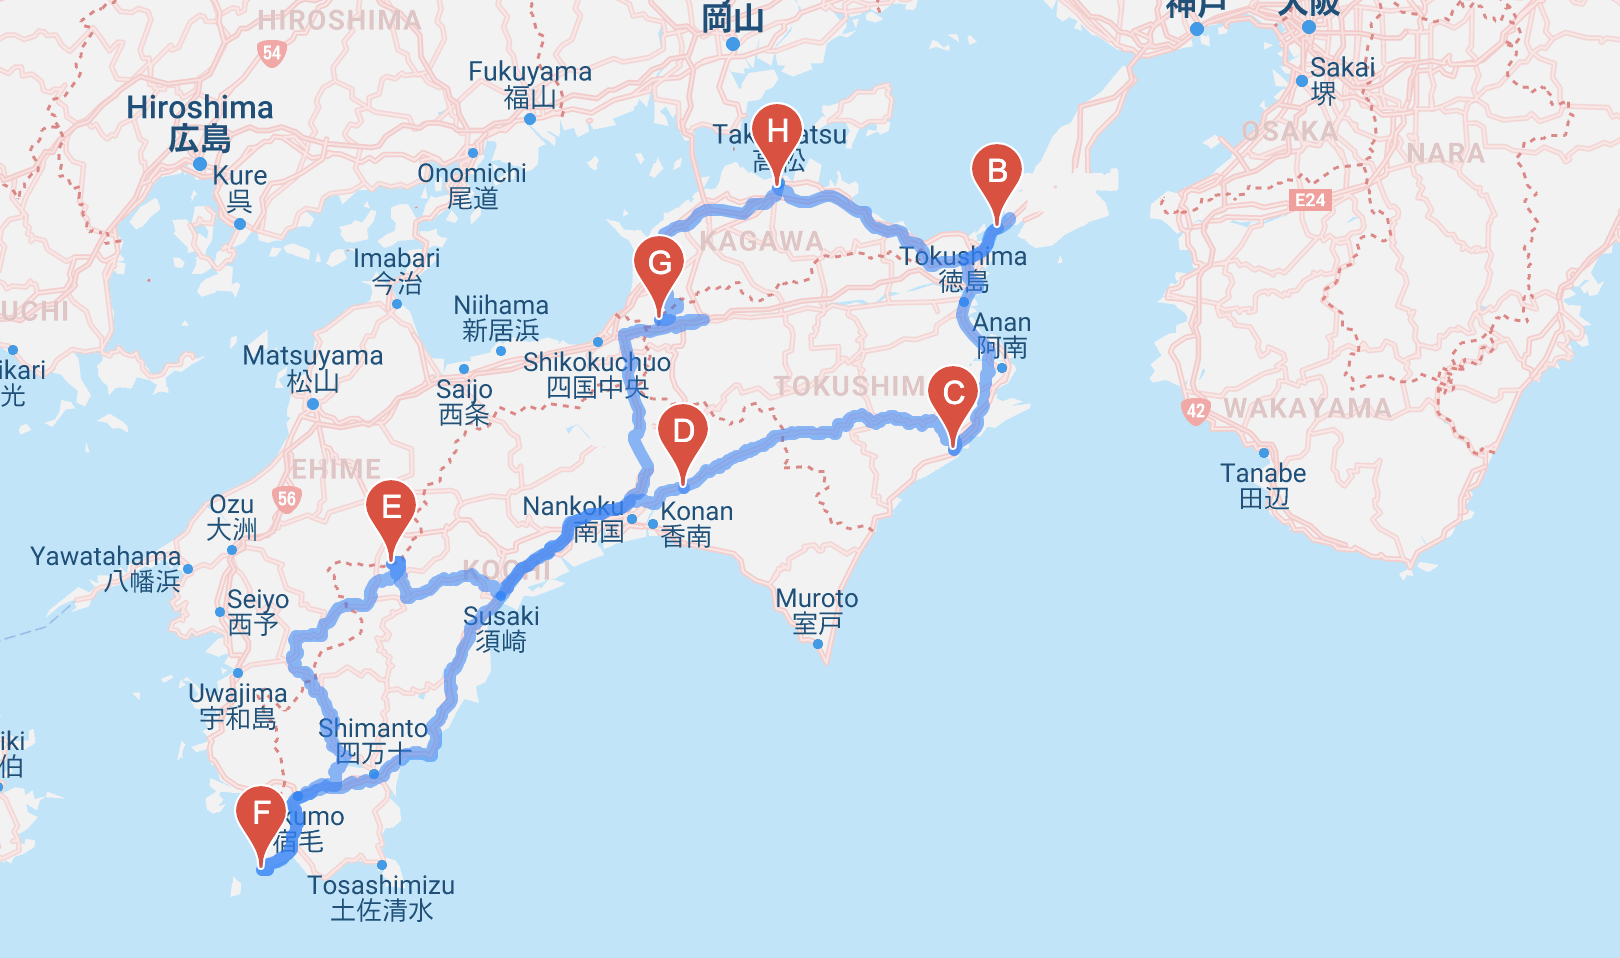
多地点を回る際の最適ルートを表示
Directions APIを使うことで、2地点を結ぶ最短ルートだけでなく、多地点を結ぶ最短ルートを表示することができます。
今回は、始点と終点と経由地を指定することで、経由地の順序を最適化してルートを表示する方法を紹介します。
GoogleMapComponent.js
import Direction from "./Direction";
export default function GoogleMapComponent() {
  return (
      <GoogleMap>
        <Direction/>
      </GoogleMap>
  );
}
Direction.js
import React, { useState, useCallback } from "react";
import { DirectionsRenderer, DirectionsService } from "@react-google-maps/api";

export default function Direction() {
  const origin = { lat: 42.755955, lng: 141.32816 };
  // 始点を指定する
  const destination = { lat: 45.299023, lng: 141.65308 };
  // 終点を指定する
  const transitPoints = [
    {
      location: { lat: 43.66406, lng: 142.85445 },
      stopover: true,
    },
    { location: { lat: 43.906742, lng: 144.79872 } },
    { location: { lat: 43.286533, lng: 143.18524 } },
  ];
  // 経由地を(順不同で)指定する

  const [currentDirection, setCurrentDirection] = useState(null);
  // ここにDirectionsServiceへのAPIコールで得られたルート情報を保存する

  const directionsCallback = useCallback((googleResponse) => {
    if (googleResponse) {
      if (currentDirection) {
        if (
          googleResponse.status === "OK" &&
          googleResponse.geocoded_waypoints.length !==
            currentDirection.geocoded_waypoints.length
        ) {
          console.log("ルートが変更されたのでstateを更新する");
          setCurrentDirection(googleResponse);
        } else {
          console.log("前回と同じルートのためstateを更新しない");
        }
      } else {
        if (googleResponse.status === "OK") {
          console.log("初めてルートが設定されたため、stateを更新する");
          setCurrentDirection(googleResponse);
        } else {
          console.log("前回と同じルートのためstateを更新しない");
        }
      }
    }
  });
  // (1) DirectionsServiceコンポーネントはレンダーされるとルート検索し、結果をcallbackとして返す。
  // (2) このAPIレスポンスを今回のようにstateに保存すると、stateが変わったことにより、DirecitonsServiceコンポーネントが再度レンダーされる。
  // (3) DirectionsServiceコンポーネントがレンダーされると再度APIコールを行う。
  // 上記(1)~(3)の無限ループを防ぐため、(3)の結果がstateと変わらなければstateを更新しない、という処理を上記に実装した

  return (
    <>
      <DirectionsService
        options={{
          origin,
          destination,
          travelMode: "DRIVING",
          // 走行モードを指定する。今回は自動車に設定
          optimizeWaypoints: true,
          // 経由地の順序を最適化する場合はtrueに設定する
          waypoints: transitPoints,
        }}
        callback={directionsCallback}
      />
      {currentDirection !== null && (
        <DirectionsRenderer
          options={{
            directions: currentDirection,
          }}
        />
        // DirectionsServiceのAPI検索の結果としてcurrenctDirectionがあれば、その結果をDirectionsRendererで表示する。
        // 予めルート情報を持っていれば、DirecitonsServiceでAPIコールする必要はない。
      )}
    </>
  );
}
最後に
冒頭に申し上げた通り、@react-google-maps/api はGoogle Maps API機能を広くカバーしており、Reactコンポーネントとして提供してくれているのでとても便利です。
今回ご紹介した以外にも様々な機能があるので、ReactをつかってGoogleMapを実装したい方にはマストなライブラリだと思いました。