はじめに
Ruby on Rails初心者が、ローカル開発環境構築~HEROKU(本番環境)へのデプロイまでの手順をまとめたものです。
環境
- Windows 10 (ホストマシン)
- PowerShell
- Vagrant 2.1.2
- ubuntu-18.04 (仮想マシン)
- Ruby 2.5.1
- Ruby on Rails 5.2.1
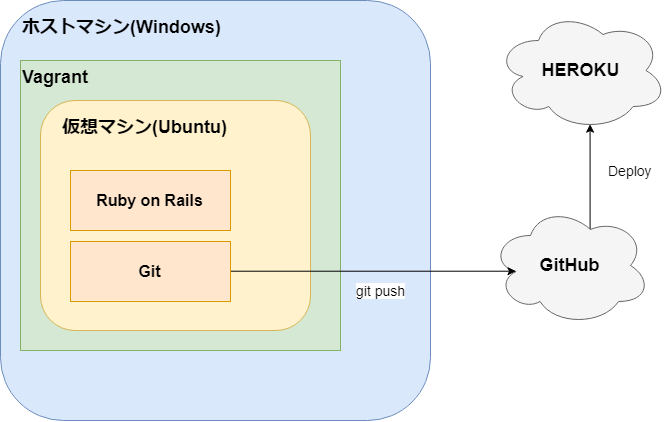
構成図
以下環境構築手順
Vagrantで仮想マシン環境(Ubuntu)を構築する
VirtualBoxとVagrantのインストール
まずは以下のソフトウェアをインストール
VirtualBox
Vagrant
したらばPowerShellを起動して仮想マシン環境の構築を行う。
Vagrantfileを作成する
> vagrant init bento/ubuntu-18.04
Vagrantfileを編集する
ホストマシン(Windows)から見れるようにIPアドレスの開放だけ行う
  # Create a forwarded port mapping which allows access to a specific port
  # within the machine from a port on the host machine and only allow access
  # via 127.0.0.1 to disable public access
  # config.vm.network "forwarded_port", guest: 80, host: 8080, host_ip: "127.0.0.1"

  # Create a private network, which allows host-only access to the machine
  # using a specific IP.
  config.vm.network "private_network", ip: "192.168.33.10"
  ## ↑コメントをはずしてIPアドレスを開放する
Vagrantを起動する
同時に vagrant init で指定したBOXファイル(bento/ubuntu-18.04)が自動的にインストールされる
> vagrant up
仮想マシン(Ubuntu)にssh接続する
> vagrant ssh
仮想マシンにログインしたら、パッケージのアップデートをする
$ sudo apt-get update
※仮想マシン上での作業を終える場合はVagrantを停止させること
> vagrant halt
Ruby on Railsインストール
Vagrantで仮想マシン環境を立ち上げたら、仮想マシンにログインした状態のまま、
以下の手順を参考に、Ruby on Rails開発環境を構築する
Ruby on Rails 4.2 を Ubuntu にインストールする手順をかなり丁寧に説明してみました
※RubyとRailsはそれぞれ執筆時点(2018年8月)の最新バージョンをインストール
- Ruby:2.5.1
- Rails:5.2.1
Vagrantのファイル共有設定
Vagrantfileにプロジェクトフォルダのパスを指定してあげればOK
  # Share an additional folder to the guest VM. The first argument is
  # the path on the host to the actual folder. The second argument is
  # the path on the guest to mount the folder. And the optional third
  # argument is a set of non-required options.
  config.vm.synced_folder "./workspace", "/home/vagrant/workspace"
 ## ↑ config.vm.synced_folder <ホストマシン側のパス(Windows)> <仮想マシン側のパス(Ubuntu)> でディレクトリの同期設定

  config.vm.provider "virtualbox" do |vb|
    vb.customize ["setextradata", :id, "VBoxInternal2/SharedFoldersEnableSymlinksCreate//home/vagrant/workspace", "1"]
  end
  ## ↑ シンボリックリンクを作るのに必要
ホストマシンと仮想マシンのディレクトリを同期させたので、
こんな感じでホストマシン上のエディタでソースコードを直接編集できる。
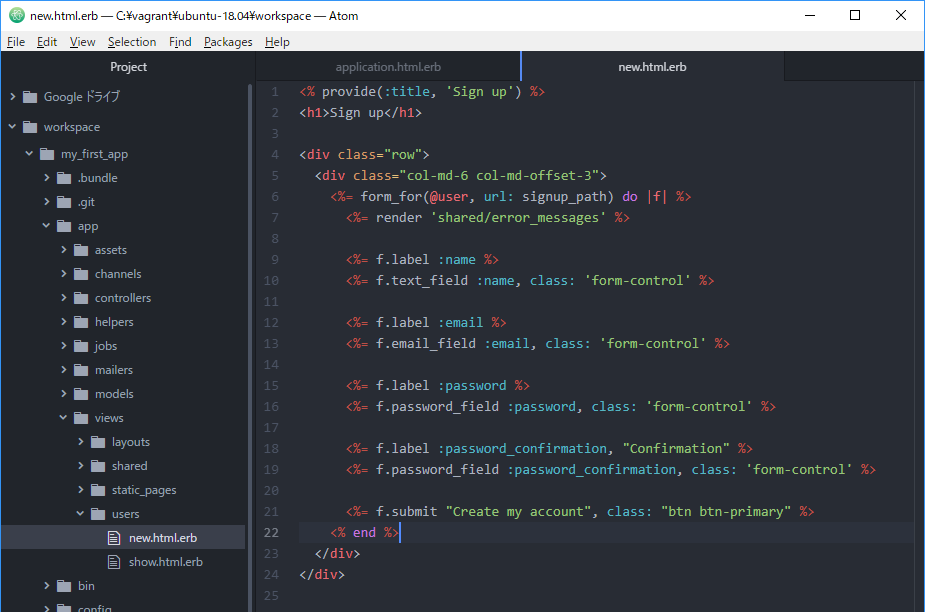
上記の例だと"./workspace"と"/home/vagrant/workspace"が紐づいている
以下HEROKUへのデプロイ手順
GitHubにソースを登録する
HEROKUとの連携が便利なのでGitHubにリモートリポジトリを作成する
GitHub登録からプッシュまでの流れ
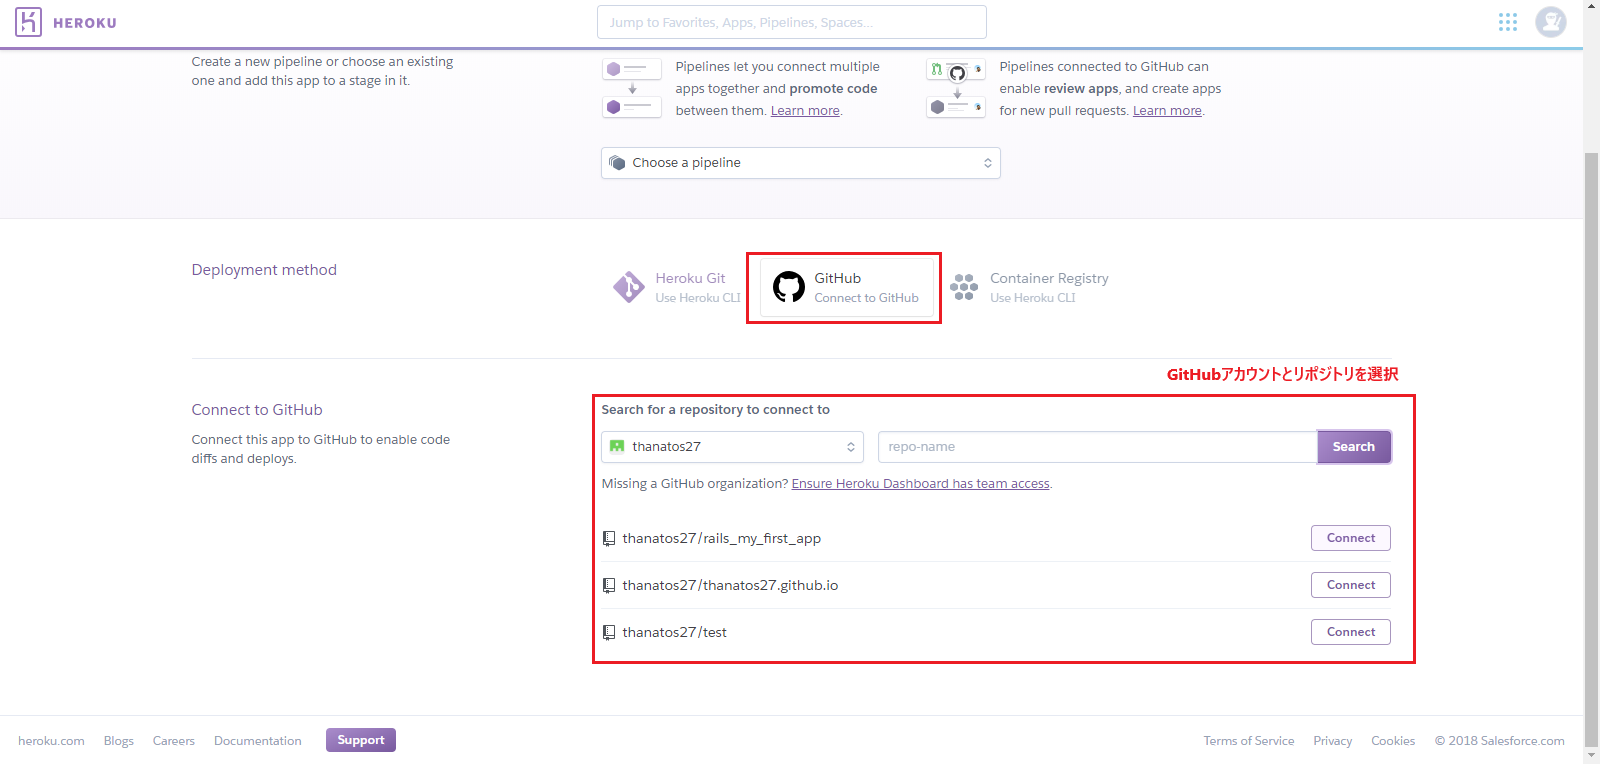
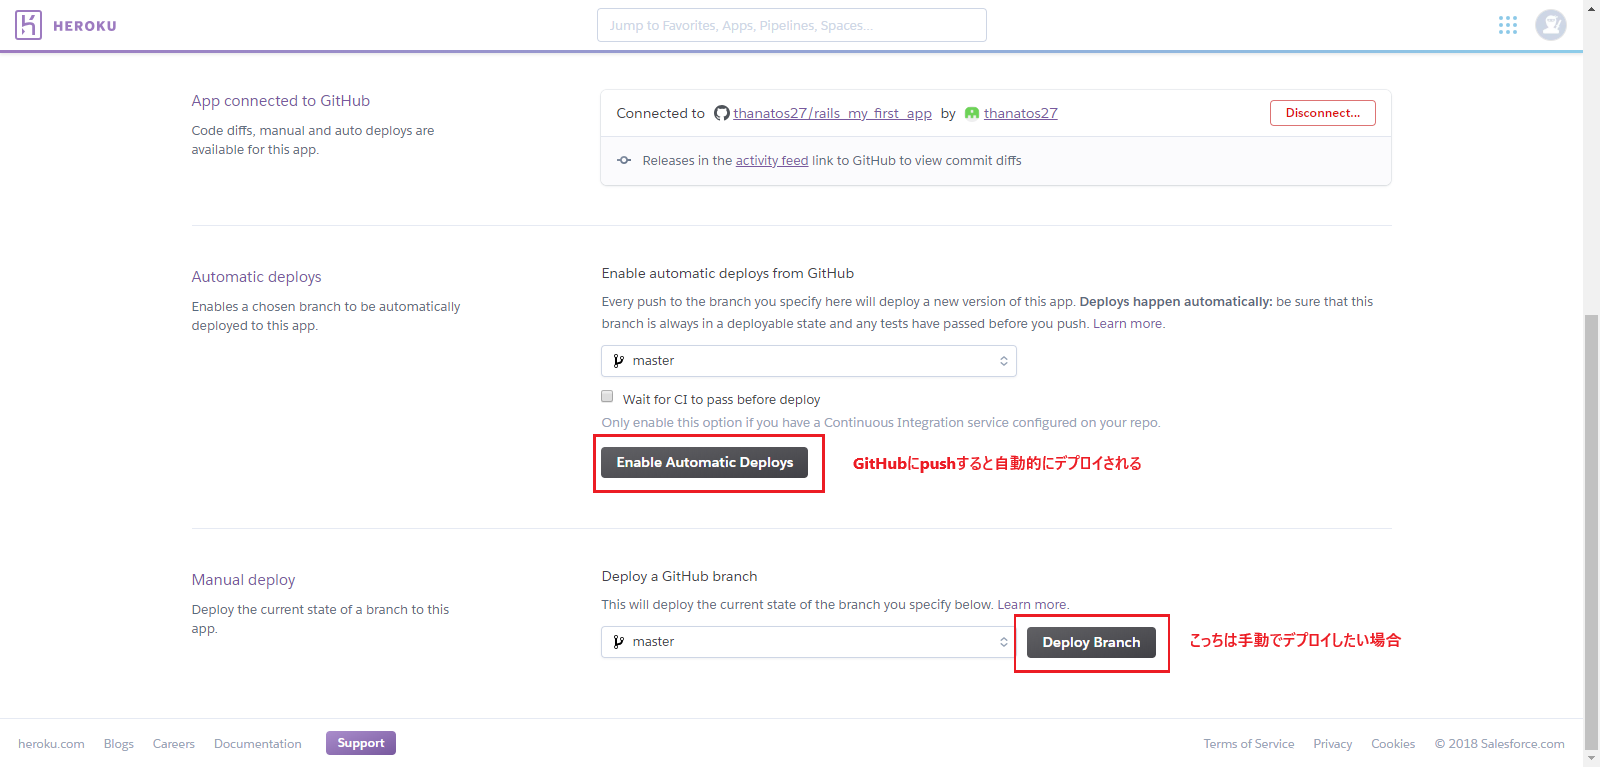
アプリをHEROKUへデプロイ
HEROKUにログイン
GitHubのリポジトリと接続
デプロイ
参考
Vagrant + VirtualBoxでWindows上に開発環境をサクッと構築する
Ruby on Rails 4.2 を Ubuntu にインストールする手順をかなり丁寧に説明してみました
Vagrant + Rails + Sublime Textで開発環境をつくる
Ruby on Rails チュートリアル:実例を使って Rails を学ぼう
GitHub登録からプッシュまでの流れ
Meteor アプリを Heroku にデプロイしよう!