はじめに
オリジナルアプリケーションを作成中に、疑問に思いました。
「7つのアクション以外にviewって作れるのか?」
初心者なら必ずこう思うはず、
そして、作れないことはないはず!!
調べてみたら作れました!!
忘れないために記事に残したいと思います。
やることは、以下の3つになります。
1.コントローラーへの記述
2.ルーティングの設定
3.ビューの作成
順を追って説明します。
バージョン
・Ruby 2.6.5
・Rails 6.0.0
コントローラーの設定
まずは、コントローラーに新しいアクションを設定します。
def index
    @post = Post.includes(:user).order("created_at DESC")
    @post_like = Post.includes(:post_likes).sort {|a,b| b.post_likes.size <=> a.post_likes.size}
  end

  def new
    @post = Post.new
  end

  def create
    @post = Post.new(post_params)
      if @post.save
        redirect_to root_path
      else
        render :new
      end
  end

  def show
    @comment = Comment.new
    @comments = @post.comments.includes(:user)
    @comment_like = @post.comments.includes(:likes).sort {|a,b| b.likes.size <=> a.likes.size}
  end

  def edit
  end

  def update
    if @post.update(post_params)
      redirect_to post_path
    else
      render :edit
    end
  end


  def destroy
    if @post.destroy
      redirect_to root_path
    end
  end

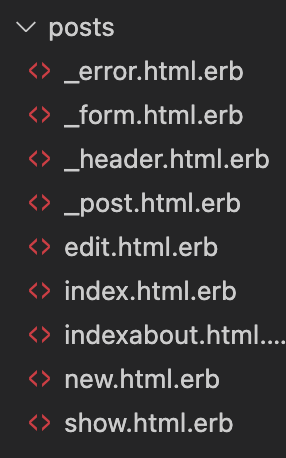
  def indexabout
  end
# 以下省略
今回は、アプリケーションの概要説明みたいなページを作成しました。
1番下に記述されている、indexaboutが新しく設定したアクションです。
名前はなんでも大丈夫です。
説明が書いてあるだけのページなので、処理も書いていません。
ルーティングの設定
次にルーティングを設定します。
root to: 'posts#index'
  resources :users, only: [:show, :edit, :update, :destroy]
  resources :posts do
    collection do
      get 'indexabout'
    end
# 以下省略
7つのアクション以外のルーティングを設定するには、collectionかmember
これを使用すると、生成されるルーティングのURLと実行されるコントローラーを
任意にカスタムできます。
collectionとmemberの違いは?
collection→ルーティングにidがつかない
member→ルーティングにidがつく
この違いです。
例えば、ユーザー情報の編集ページには、idが必要ですよね。
そういったページを作成する場合は、memberを使います。
今回は、説明だけのページなのでcollectionを使いました。
ルーティングに記述を行った後にターミナルで確認すると
% rails routes
しっかりと設定されているのがわかります。
ビューの設定
最後にビューを設定します。
<div class="what_index">
    <%= link_to "正解のない問題たちとは?",  indexabout_posts_path, class: :nav__btn %>
</div>
リンク先の指定をしてあげる。
該当箇所にビューの設定を行い、
作成したビューに記述すれば完了です。
これで、7つのアクション以外にもビューが作成できました。
初心者のため、まだまだ誤った記述があるかもしれません。
見つけた方はコメントを残していただければ幸いです。

