1. はじめに
Red Hat OpenShift on IBM CloudにはClassic Infrastructure版とVPC版がありますが、この記事ではVPC版でのアクセス経路を確認しています。Classic Infrastructure版はこちらです。
OpenShiftではアプリケーションPodで稼働するサービスをRouteを使って外部公開することが可能です。でも、実際に外部からのアクセスはどのような経路を辿ってアプリケーションPodにアクセスしているのでしょうか?
Red Hat OpenShift on IBM Cloudでは、ここに公式の説明がありますが、この記事では実際に処理を追いかけてみることで、実装を深く理解したいと思います。
最初に結論を書いておきますが、
- DNSによる名前解決を行い、VPC Load BalancerのIPアドレスを取得。
- VPC Load Balancerにアクセス
- VPC Load Balancerが、所謂Kubernetesのtype: LoadBalancerのCloud Provider実装。
- VPC Load Balancerに届いた80/TCPと443/TCPへのアクセスを、L4レベルで、Worker node上のNodePortに割り振る。
-
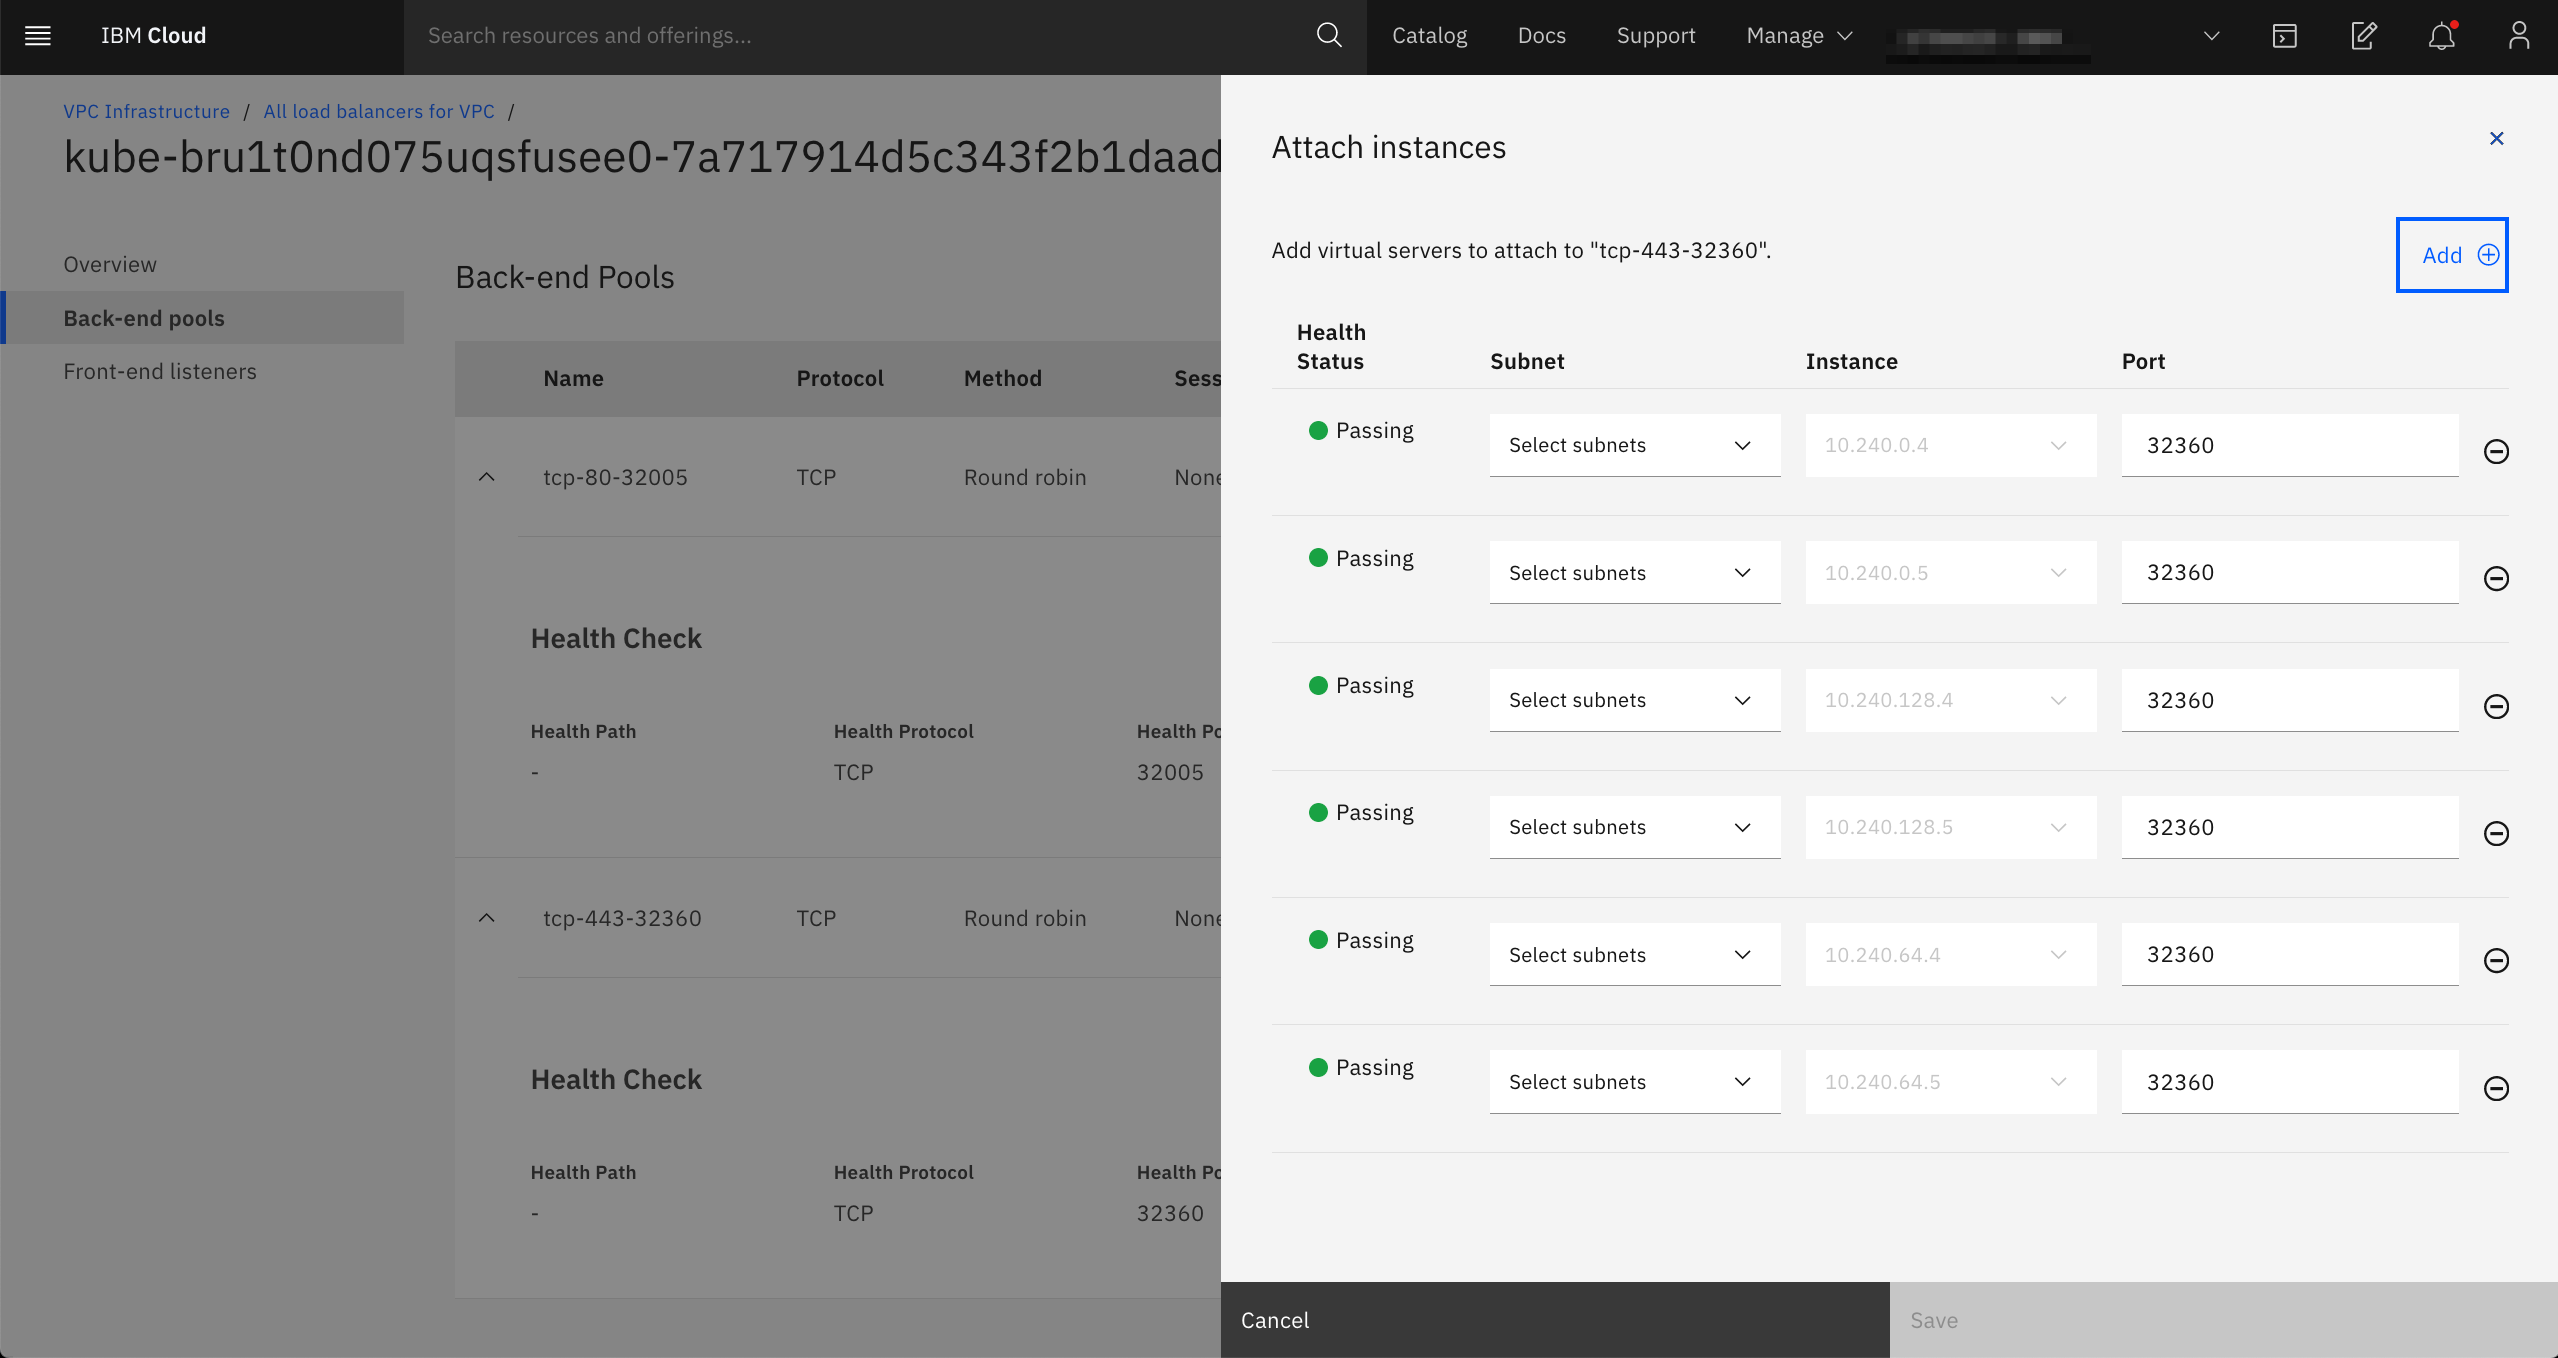
externalTrafficPolicy=Localが設定されているため、Router Podが存在するWorker nodeにしか割り振りが行われない(それ以外のWorker nodeにはヘルスチェックに失敗して割り振りから除外される。https://cloud.ibm.com/docs/openshift?topic=openshift-vpc_lb_healthcheck)。- (2020/07/09追記 -> 2023/07/25文言を修正)Red Hat OpenShift on IBM Cloudでは、
externalTrafficPolicy=Clusterがデフォルト値であり、全てのWorker nodeのNode Portに割り振りが行われるのがデフォルトの動作のようです。ただし、検証時のバージョンにおいては、externalTrafficPolicy=Localがデフォルトとなっていたクラスターもありました。もちろん、 - (2023/07/25文言を追記)一般的に、
externalTrafficPolicy=Localにすると、「Worker nodes上のkube-proxyはローカルに存在するエンドポイントへのプロキシーリクエストだけを処理し、他のノードへはトラフィックを転送しなくなるため、クライアントの送信元IPアドレスが保持される」と、Kubernetesのドキュメントなどには書かれてあります。しかし、Red Hat OpenShift on IBM Cloud(VPC)では、クライアントの送信元IPアドレスはWorker nodeに到達する前に、既にVPC Load Balancer(ALB: Protocol=TCP)にてVPC Load BalancerのIPアドレスに置き換えられているため、クライアントの送信元IPアドレスは保持されていません。クライアントの送信元IPアドレスを取得したい場合は、PROXYプロトコルを有効にする必要があります。参考: Ingress の構成 - ソース IP アドレスの保持
- (2020/07/09追記 -> 2023/07/25文言を修正)Red Hat OpenShift on IBM Cloudでは、
- Router Pod(router-default-xxxxxx)にアクセス
- Router PodはPrivate IP(172.17.xx.xx)を持つ
- HAProxyを利用してL7 Load Balancerを提供
- HAProxyの機能で(HTTPヘッダを元に)Application Podに割り振りを行う。
- Application Podにアクセス
2. 事前準備
この環境では、DAL1/DAL2/DAL3にまたがるVPC上のマルチゾーンクラスターを利用しています。
また、以下のようにアプリケーションを展開し、Routeを作成します。これによって、外部からRoute経由でこのアプリケーションPodにアクセス可能になります。
$ oc new-app --name hello-world https://github.com/IBM/container-service-getting-started-wt --context-dir="Lab 1"

$ oc scale --replicas=5 dc hello-world

$ oc expose service hello-world

$ # oc get pods,svc,route
NAME                       READY   STATUS      RESTARTS   AGE
pod/hello-world-1-45m9j    1/1     Running     0          3m36s
pod/hello-world-1-b75zr    1/1     Running     0          3m37s
pod/hello-world-1-build    0/1     Completed   0          4m24s
pod/hello-world-1-deploy   0/1     Completed   0          3m39s
pod/hello-world-1-gl5sd    1/1     Running     0          3m37s
pod/hello-world-1-j8w4f    1/1     Running     0          3m36s
pod/hello-world-1-rb8nt    1/1     Running     0          3m37s

NAME                  TYPE        CLUSTER-IP     EXTERNAL-IP   PORT(S)    AGE
service/hello-world   ClusterIP   172.21.14.37   <none>        8080/TCP   4m25s

NAME                                   HOST/PORT                                                                                                        PATH   SERVICES      PORT       TERMINATION   WILDCARD
route.route.openshift.io/hello-world   hello-world-syasuda.myroksclustervpc-xxxxxxxxxxxxxxxxxxxxxxxxxxxxxxxx-0000.us-south.containers.appdomain.cloud          hello-world   8080-tcp                 None
3. Routerへのアクセス経路を追いかける
3-1. DNS名前解決
Routeで公開されたFQDNを名前解決すると、DAL1/DAL2/DAL3の複数拠点のPublic IPアドレスが返ってきます。
$ dig A +noall +answer @1.1.1.1 hello-world-syasuda.myroksclustervpc-xxxxxxxxxxxxxxxxxxxxxxxxxxxxxxxx-0000.us-south.containers.appdomain.cloud
hello-world-syasuda.myroksclustervpc-xxxxxxxxxxxxxxxxxxxxxxxxxxxxxxxx-0000.us-south.containers.appdomain.cloud.	300 IN CNAME xxxxxxxx-us-south.lb.appdomain.cloud.
xxxxxxxx-us-south.lb.appdomain.cloud. 120 IN A	52.116.xxx.xxx
xxxxxxxx-us-south.lb.appdomain.cloud. 120 IN A	52.116.xxx.xxx
このCNAMEで構成されているFQDNが、まさにVPC Load BalancerのFQDNです。


3-2. VPC Load Balancer
以下のようにVPC Load BalancerはPort80/443で待ち受けしていますが、HTTP/HTTPSとしてではなくTCPとしてのL4レベルでの待ち受けを行なっています。

Port 80/443でVPC Load Balancerにアクセスされたトラフィックは、割り振り時にそれぞれPort 32005/32360が利用されています。


$ oc get services --all-namespaces|grep -e NAME -e LoadBalancer
NAMESPACE                                               NAME                                          TYPE           CLUSTER-IP       EXTERNAL-IP                            PORT(S)                      AGE
openshift-ingress                                       router-default                                LoadBalancer   172.21.164.127   xxxxxxxx-us-south.lb.appdomain.cloud   80:32005/TCP,443:32360/TCP   19h

$ oc describe service -n openshift-ingress router-default
Name:                     router-default
Namespace:                openshift-ingress
Labels:                   app=router
                          ingresscontroller.operator.openshift.io/owning-ingresscontroller=default
                          router=router-default
Annotations:              service.kubernetes.io/ibm-load-balancer-cloud-provider-ip-type: public
Selector:                 ingresscontroller.operator.openshift.io/deployment-ingresscontroller=default
Type:                     LoadBalancer
IP:                       172.21.164.127
LoadBalancer Ingress:     xxxxxxxx-us-south.lb.appdomain.cloud
Port:                     http  80/TCP
TargetPort:               http/TCP
NodePort:                 http  32005/TCP
Endpoints:                172.17.74.10:80,172.17.93.91:80
Port:                     https  443/TCP
TargetPort:               https/TCP
NodePort:                 https  32360/TCP
Endpoints:                172.17.74.10:443,172.17.93.91:443
Session Affinity:         None
External Traffic Policy:  Cluster
Events:                   <none>

# oc get pods -o wide --all-namespaces|grep -e 172.17.74.10 -e 172.17.93.91
openshift-ingress                                       router-default-69cbd48fc7-49q77                                   1/1     Running     0          19h   172.17.93.91     10.240.0.5     <none>           <none>
openshift-ingress                                       router-default-69cbd48fc7-6mmbl                                   1/1     Running     0          19h   172.17.74.10     10.240.64.5    <none>           <none>
この結果をよく読んでみましょう。
- EXTERNAL-IPがVPC Load BalancerのFQDNになっている。つまり、
type:LoadBalancerの実装はClassic InfrastructureではNLB Podだったが、VPCではVPC Load Balancerであることが分かる - VPC Load Balancerから割り振られている32005/TCPと32360/TCPは、NodePortである。
- Node Portからは、
172.17.74.10および172.17.93.91に割り振られている。これは、Router Podである。
3-3. Router Pod
VPC Load Balancerからノードに割り振られたアクセスは、同一Worker node上にあるRouter Podに転送されます。Router PodではHAProxyが稼働しており、そこから該当のアプリケーションPodに割り振りが行われます。このあたりはClassic Infrastructureの時と同じですね。
$ oc rsh -n openshift-ingress router-default-69cbd48fc7-49q77
sh-4.2$ ps -ef
UID         PID   PPID  C STIME TTY          TIME CMD
1000020+      1      0  0 Jul01 ?        00:02:51 /usr/bin/openshift-router
1000020+    916      1  0 01:00 ?        00:00:02 /usr/sbin/haproxy -f /var/lib/haproxy/conf/haproxy.config -p /var/lib/haproxy/run/haproxy.pid -x /var/lib/ha
1000020+    923      0  0 01:10 pts/0    00:00:00 /bin/sh
1000020+    929    923  0 01:11 pts/0    00:00:00 ps -ef


sh-4.2$ cat /var/lib/haproxy/conf/haproxy.config
(途中略)
# Plain http backend or backend with TLS terminated at the edge or a
# secure backend with re-encryption.
backend be_http:syasuda:hello-world
  mode http
  option redispatch
  option forwardfor
  balance leastconn

  timeout check 5000ms
  http-request set-header X-Forwarded-Host %[req.hdr(host)]
  http-request set-header X-Forwarded-Port %[dst_port]
  http-request set-header X-Forwarded-Proto http if !{ ssl_fc }
  http-request set-header X-Forwarded-Proto https if { ssl_fc }
  http-request set-header X-Forwarded-Proto-Version h2 if { ssl_fc_alpn -i h2 }
  # Forwarded header: quote IPv6 addresses and values that may be empty as per https://tools.ietf.org/html/rfc7239
  http-request add-header Forwarded for=%[src];host=%[req.hdr(host)];proto=%[req.hdr(X-Forwarded-Proto)];proto-version=\"%[req.hdr(X-Forwarded-Proto-Version)]\"
  cookie 50180e4b662b224b6f27aade3ab06d5c insert indirect nocache httponly
  server pod:hello-world-1-45m9j:hello-world:172.17.111.9:8080 172.17.111.9:8080 cookie 0bb2b8528eac3ab6386b92c9a7ced00f weight 256 check inter 5000ms
  server pod:hello-world-1-b75zr:hello-world:172.17.115.137:8080 172.17.115.137:8080 cookie 745d3eb2f6eb5e81e282bbef3de8ac38 weight 256 check inter 5000ms
  server pod:hello-world-1-rb8nt:hello-world:172.17.123.76:8080 172.17.123.76:8080 cookie 4505838bc8e37737b8f7b548ee86aaa1 weight 256 check inter 5000ms
  server pod:hello-world-1-j8w4f:hello-world:172.17.67.14:8080 172.17.67.14:8080 cookie 12c420b6de1b2062042a09b0cfdb645c weight 256 check inter 5000ms
  server pod:hello-world-1-gl5sd:hello-world:172.17.74.18:8080 172.17.74.18:8080 cookie e9437ccfd5b296555d9e85b6ed275482 weight 256 check inter 5000ms


sh-4.2$ cat /var/lib/haproxy/conf/os_http_be.map|grep hello
^hello-world-syasuda\.myroksclustervpc-xxxxxxxxxxxxxxxxxxxxxxxxxxxxxxxx-0000\.us-south\.containers\.appdomain\.cloud(:[0-9]+)?(/.*)?$ be_http:syasuda:hello-world
