1. はじめに
JavaScriptでカウントダウンタイマーを作る学習を通じて、時刻の計算・定期処理・表示の整形について理解を深めました。今回はその内容を整理しつつ、最終的に setInterval から setTimeout への書き換えにもチャレンジしたので、その違いも含めてまとめていきます。
2. アプリの構成
HTMLとJavaScriptファイルを用意して、最小限の部品からスタートします。スタイリングは後回しにして、まず動作を確認できる状態を作るのがポイントのようです。
2.1 HTML
<main>
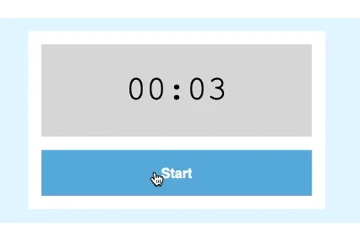
<p id="timer">00:03</p>
<button id="btn">Start</button>
</main>
<script src="main.js"></script>
2.2 JavaScriptの初期設定
"use strict";
{
  const timer = document.getElementById("timer");
  const btn = document.getElementById("btn");
}
getElementById() で要素を取得しておくことで、あとの処理で使い回せます。
3. タイマー機能の実装
カウントダウンタイマーは「終了時刻を求める → 一定時間ごとに残り時間をチェック → 0を下回ったら終了」という3ステップで実装できます。この流れを図で整理してから実装に入ると、コードの意味が理解しやすくなりました。
3.1 終了時刻の計算
btn.addEventListener("click", () => {
  // new Date().getTime() でミリ秒単位の現在時刻を取得
  // 3秒後 = 3 * 1000 ミリ秒を足す
  endTime = new Date().getTime() + 3 * 1000;
});
new Date() は日付オブジェクトを返すので、そのままでは計算できません。getTime() を使って「基準日からの経過ミリ秒(整数値)」に変換してから計算する、というのが時刻計算の定番テクニックのようです。
new Date() は呼ばれるたびにその時点の時刻を取得します。Start ボタンを押した瞬間の new Date() と、残り時間チェック時の new Date() は別物です。同じ命令でも取得される値が違うので注意が必要です。
3.2 setInterval による定期チェック
"use strict";
{
  function check() {
    // 残り時間 = 終了時刻 - 現在時刻
    let countdown = endTime - new Date().getTime();

    if (countdown < 0) {
      clearInterval(intervalId);
      countdown = 3 * 1000;
      btn.disabled = false;
      btn.classList.remove("inactive");
    }

    const totalSeconds = Math.floor(countdown / 1000);

    // 80秒 → 1分20秒
    // 80 ÷ 60 = 1 余り 20
    const minutes = Math.floor(totalSeconds / 60);
    const seconds = totalSeconds % 60;

    const minutesFormatted = String(minutes).padStart(2, "0");
    const secondsFormatted = String(seconds).padStart(2, "0");

    timer.textContent = `${minutesFormatted}:${secondsFormatted}`;
  }

  const timer = document.getElementById("timer");
  const btn = document.getElementById("btn");
  let endTime;
  let intervalId;

  btn.addEventListener("click", () => {
    endTime = new Date().getTime() + 3 * 1000;
    btn.disabled = true;
    btn.classList.add("inactive");

    // setInterval の返り値を保持しておかないと clearInterval できない
    intervalId = setInterval(check, 100);
  });
}
setInterval() を止めるには clearInterval() に識別子を渡す必要があります。この識別子は setInterval() の返り値として取得できます。
setInterval に関数を渡すとき、check() と書くと関数の返り値が渡されてしまいます。関数そのものを渡すには check とカッコなしで書く必要があります。
3.3 分・秒への変換と2桁表示
ミリ秒から分・秒への変換は割り算と余りを使います。
// ミリ秒 → 秒
const totalSeconds = Math.floor(countdown / 1000);

// 秒 → 分・秒(例:80秒 = 1分20秒)
const minutes = Math.floor(totalSeconds / 60); // 商
const seconds = totalSeconds % 60;             // 余り
2桁表示には padStart() を使います。
// padStart() は文字列にしか使えないので String() で変換が必要
const minutesFormatted = String(minutes).padStart(2, "0");
const secondsFormatted = String(seconds).padStart(2, "0");

timer.textContent = `${minutesFormatted}:${secondsFormatted}`;
padStart() は文字列専用のメソッドです。数値のまま使うとエラーになるので、必ず String() で変換してから使います。
3.4 ボタンの制御
// クリック時:ボタンを無効化
btn.disabled = true;
btn.classList.add("inactive");

// タイマー終了時:ボタンを再び有効化
btn.disabled = false;
btn.classList.remove("inactive");
disabled 属性を true にするとボタンがクリックできなくなります。classList.add() と classList.remove() でCSSクラスを付け外しすることで、見た目の変化も合わせて制御できます。
4. setInterval から setTimeout への書き換え
レッスンの最後に、setInterval を setTimeout で書き換えることに自分でチャレンジしてみました。
4.1 setInterval との違い
| setInterval | setTimeout | |
|---|---|---|
| 動作 | 一定間隔で自動的に繰り返す | 指定時間後に1回だけ実行 |
| 停止 | clearInterval() |
clearTimeout() または再帰を止める |
setTimeout で繰り返しを実現するには、処理の末尾で再び自分自身(check())を呼ぶ再帰呼び出しを使います。タイマー終了時は return で再帰を止めることで処理を終わらせます。
4.2 書き換えたコード
"use strict";
{
  function check() {
    setTimeout(() => {
      // 残り時間 = 終了時刻 - 現在時刻
      let countdown = endTime - new Date().getTime();
      let stopTimer;

      // タイマーの終了
      if (countdown < 0) {
        clearInterval(intervalId);
        countdown = 3 * 1000;
        btn.disabled = false;
        btn.classList.remove("inactive");
        stopTimer = true;
      }

      const totalSeconds = Math.floor(countdown / 1000);

      // 80秒 → 1分20秒
      const minutes = Math.floor(totalSeconds / 60);
      const seconds = totalSeconds % 60;

      const minutesFormatted = String(minutes).padStart(2, "0");
      const secondsFormatted = String(seconds).padStart(2, "0");

      timer.textContent = `${minutesFormatted}:${secondsFormatted}`;

      // stopTimer が true なら再帰を止める
      if (stopTimer) {
        stopTimer = false;
        return;
      }

      // 次のチェックを予約(再帰呼び出し)
      check();
    }, 100);
  }

  const timer = document.getElementById("timer");
  const btn = document.getElementById("btn");
  let endTime;
  let intervalId;

  btn.addEventListener("click", () => {
    endTime = new Date().getTime() + 3 * 1000;
    btn.disabled = true;
    btn.classList.add("inactive");

    // 最初のチェックを予約
    intervalId = setTimeout(check, 100);
  });
}
stopTimer フラグを使って再帰を制御しています。フラグの確認より前に check() を呼んでしまうと、タイマー終了後も処理が止まらなくなるので、フラグチェックは check() の前に置くのがポイントです。
5. CSSスタイリング
JavaScriptで動作が確認できたら、CSSでスタイリングします。
5.1 CSSファイルの設定
@charset "utf-8";
CSSファイルの先頭に書いておくと、日本語の値を使うときに文字化けを防げます。
5.2 各要素のスタイリング
body {
  background: #e6f6ff;
}

main {
  background: #fff;
  width: 320px;
  margin: 16px auto 0;
  text-align: center;
  padding: 16px;
}

p {
  margin: 0;
  background: #ddd;
  padding: 32px 0;
  font-size: 40px;
  font-family: "Courier New";
}

button {
  all: unset;
  width: 100%;
  background: #08c;
  color: #fff;
  font-weight: bold;
  padding: 16px 0;
  margin-top: 16px;
  cursor: pointer;
}

button:hover {
  opacity: 0.6;
}

button:active {
  opacity: 0.4;
}
all: unset でブラウザのデフォルトスタイルをリセットしてからスタイリングすると、思った通りの見た目にしやすくなります。
5.3 非活性ボタンのスタイリング
.inactive {
  background: #ddd;
  color: #444;
  cursor: default;
}

/* inactive クラスがついているときはホバーしても色を変えない */
.inactive:hover {
  opacity: 1;
}
JavaScriptで .inactive クラスを付け外しすることで、タイマー動作中はボタンの見た目を変えてクリックできないことを視覚的に伝えられます。
まとめ
今回のカウントダウンタイマー実装を通じて、以下の点を整理できました。
-
new Date().getTime()でミリ秒単位の時刻を取得して計算する -
setInterval()の返り値(識別子)を変数に保持しておかないとclearInterval()で止められない -
padStart()は文字列専用なのでString()で変換してから使う -
disabled属性とclassListでボタンの操作可否と見た目を合わせて制御できる -
setIntervalはsetTimeoutの再帰呼び出しで書き換えられる
時刻関連の処理はミリ秒変換など慣れない概念が多かったですが、図で流れを整理してからコードを書くと理解しやすくなりました。