ついノリで気づいたらアドベントカレンダーに登録していて割と後悔しています。
最近WordPressの記事をReactで表示することをやったので(Headless CMSというらしいです。)
そのときに苦しんだことを一通り書いておこうかなと思います。
多分いうほど闇ではないし、ReactよりもWordPressの話メインです。(フロント側はReactでなくてもできる)
ちなみに弊社の闇の魔術の対抗術の先生は今年も不在です。
みなさまもクルーシオ(苦しめ)!

ちなみにReactメインの闇じゃない記事はこちら
お前らのReactは遅い
Headless CMS
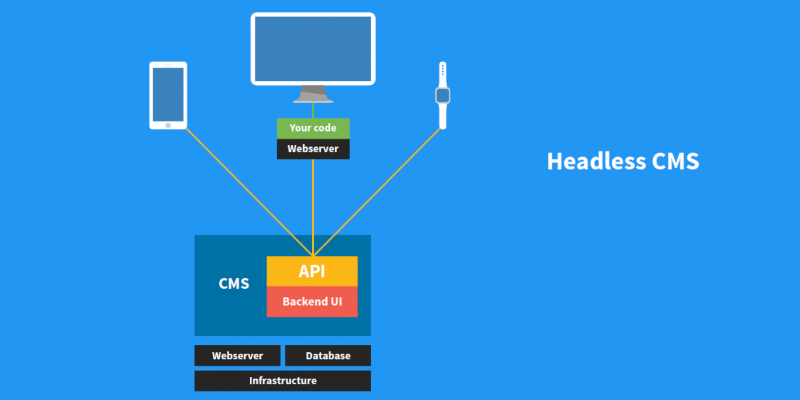
Headless CMSとはAPI経由でCMSのデータを取得して
フロントエンドの描画を別のシステムで行う仕組みを指します。
今回はCMSはWPなので記事の編集はWP側で行い、
WP REST API経由で記事データを取得して
別サーバにてフロントエンドの描画を行います。
参考:Headless CMS
Genesisテーマ
有料テーマですが、SEOで世界的に有名な元Googleのマット・カッツが
自身のブログに導入しているのがWordPressであり、StudioPress社のGenesis Frameworkです。
WordPressでSEO対策を本気でする前提であれば入れたいテーマです。
このテーマを前提にして改造する話を進めます。
使っているプラグイン(一部抜粋)
Headless CMSにあたり、使っているプラグインを一部紹介します。
Accelerated Mobile Pages(WPのAMP化プラグイン)とかも使っていたのですが
今ひとつできが良くなかった(微妙にレイアウト崩れする)のと、本体側でAMP対応したので外しました。
Redirection
Redirectionプラグインを使うと
WPの記事表示時に別のURLにリダイレクトできます。
Headless CMSで記事をWP以外で表示したい場合に元記事の方を新記事のURLにリダイレクトする必要があります。
参考:Redirectionの使い方ーWordPressプラグイン【初心者向け】
正規表現も使えるので一括でredirectさせるルールにしたほうが良いでしょう
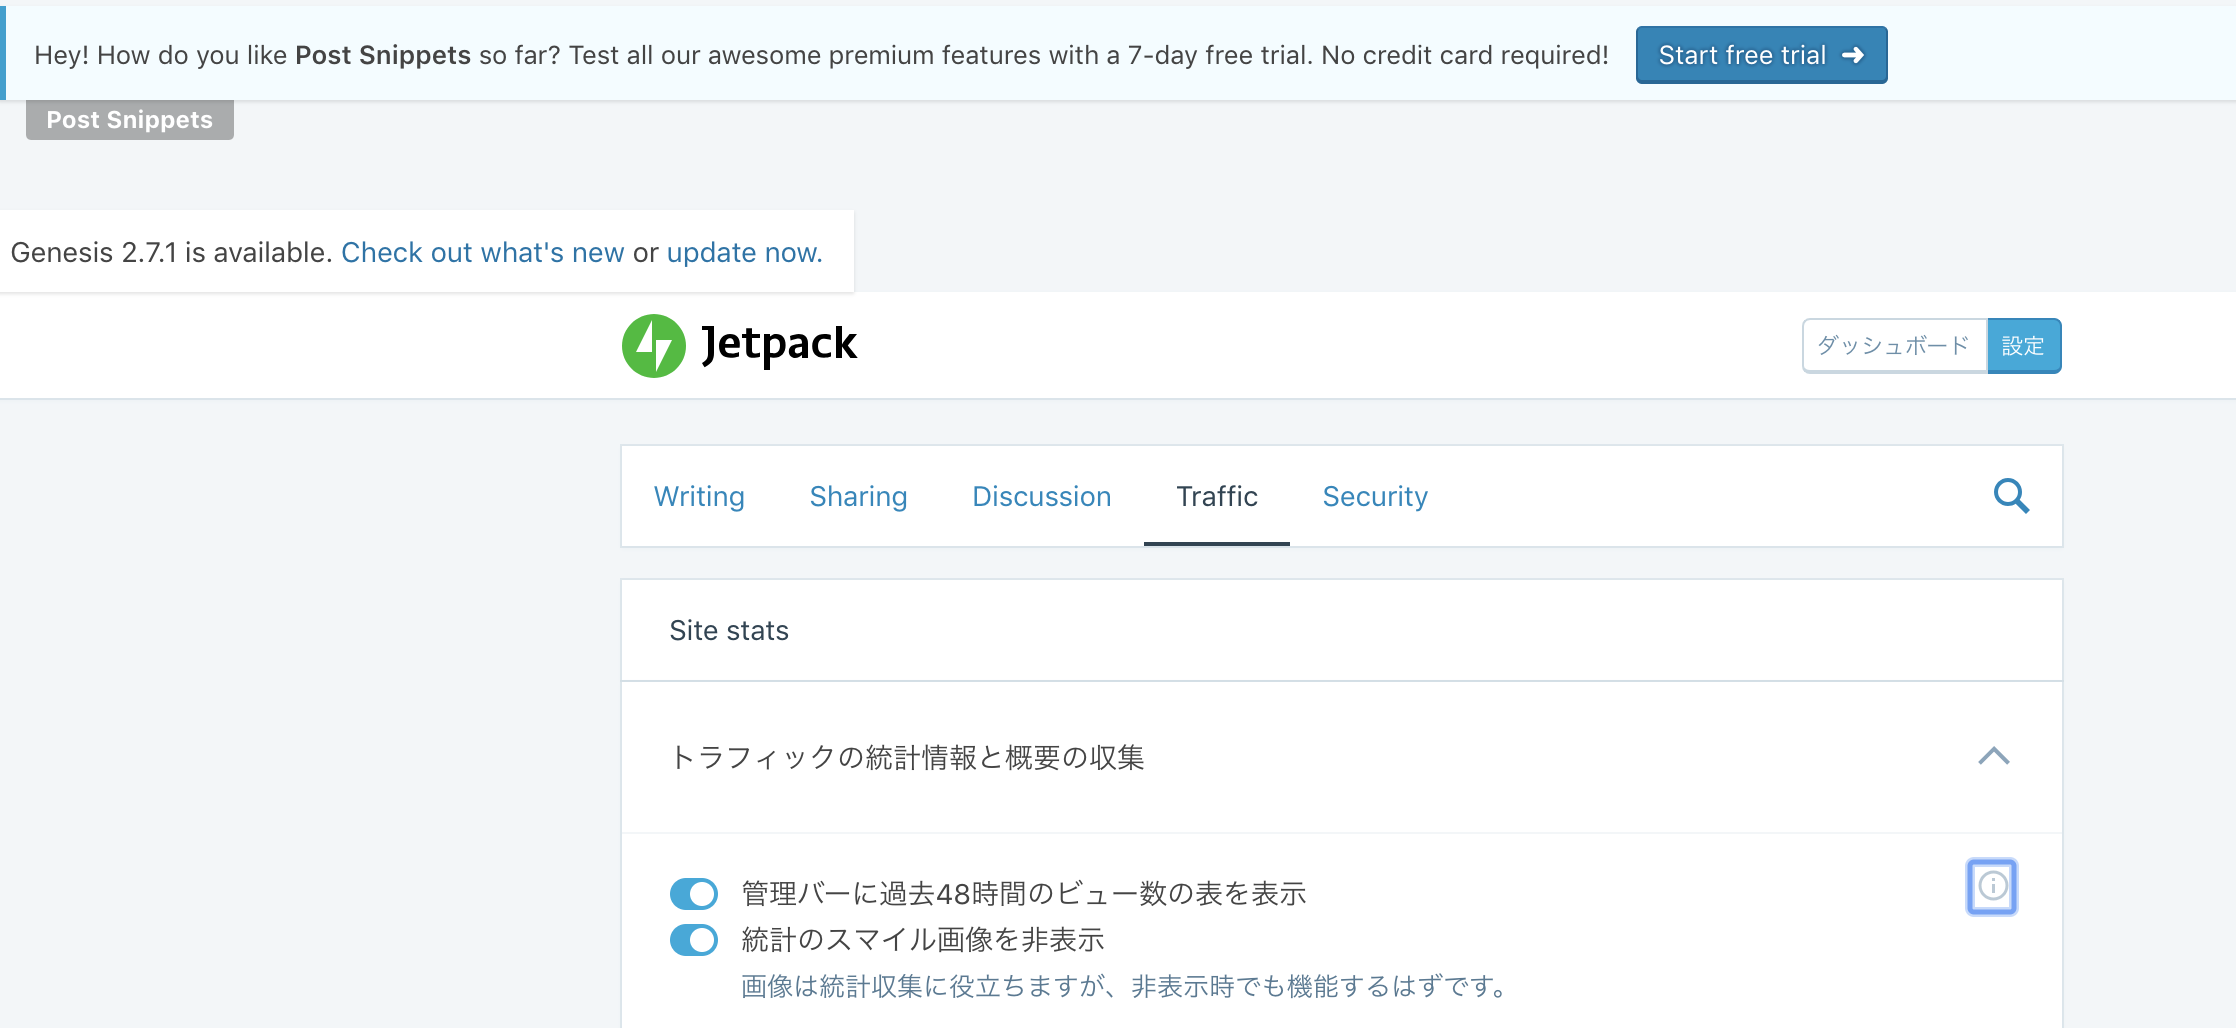
Jetpack by WordPress.com
Jetpack by WordPress.comはWP公式のプラグインです。記事のアクセス解析などができます。
Headless CMSをやるに当たって、このアクセス解析の処理を移行するのが一番苦労しました。(後述します)

Advanced Custom Fields
Advanced Custom Fieldsプラグインは記事に独自のフィールドを埋め込むことができるプラグインです。
使い方は以下の記事を参考にしてください。
参考:Advanced Custom Fieldsの使い方
ACF to REST API
ACF to REST APIプラグインはWP REST APIにカスタムフィールドパラメータ(acf)を付与します。
ACF設定画面でカスタムフィールド定義後、記事ごとにカスタムフィールドパラメータを設定します。
参考:WordPress REST APIで投稿の取得から新規投稿を行う
Yoast SEO
Yoast SEOプラグインはSEO対策に特化したプラグインです。
次のような機能を持っています
- XMLサイトマップを生成する機能
- パンくずリストを付与する機能
- canonical URLを設定する機能
- タイトルタグ、メタディスクリプションを設定する機能
Yoast to REST API
Yoast to REST APIはWP REST APIにcanonical、title、メタディスクリプションを付与するプラグインです。
{
  id: 123,
  ...
  yoast_meta: {
    yoast_wpseo_title: "Testy Test | My WordPress site",
    yoast_wpseo_metadesc: "My description",
    yoast_wpseo_canonical: "http://my-wordpress-site.test/testy-test"
  }
}
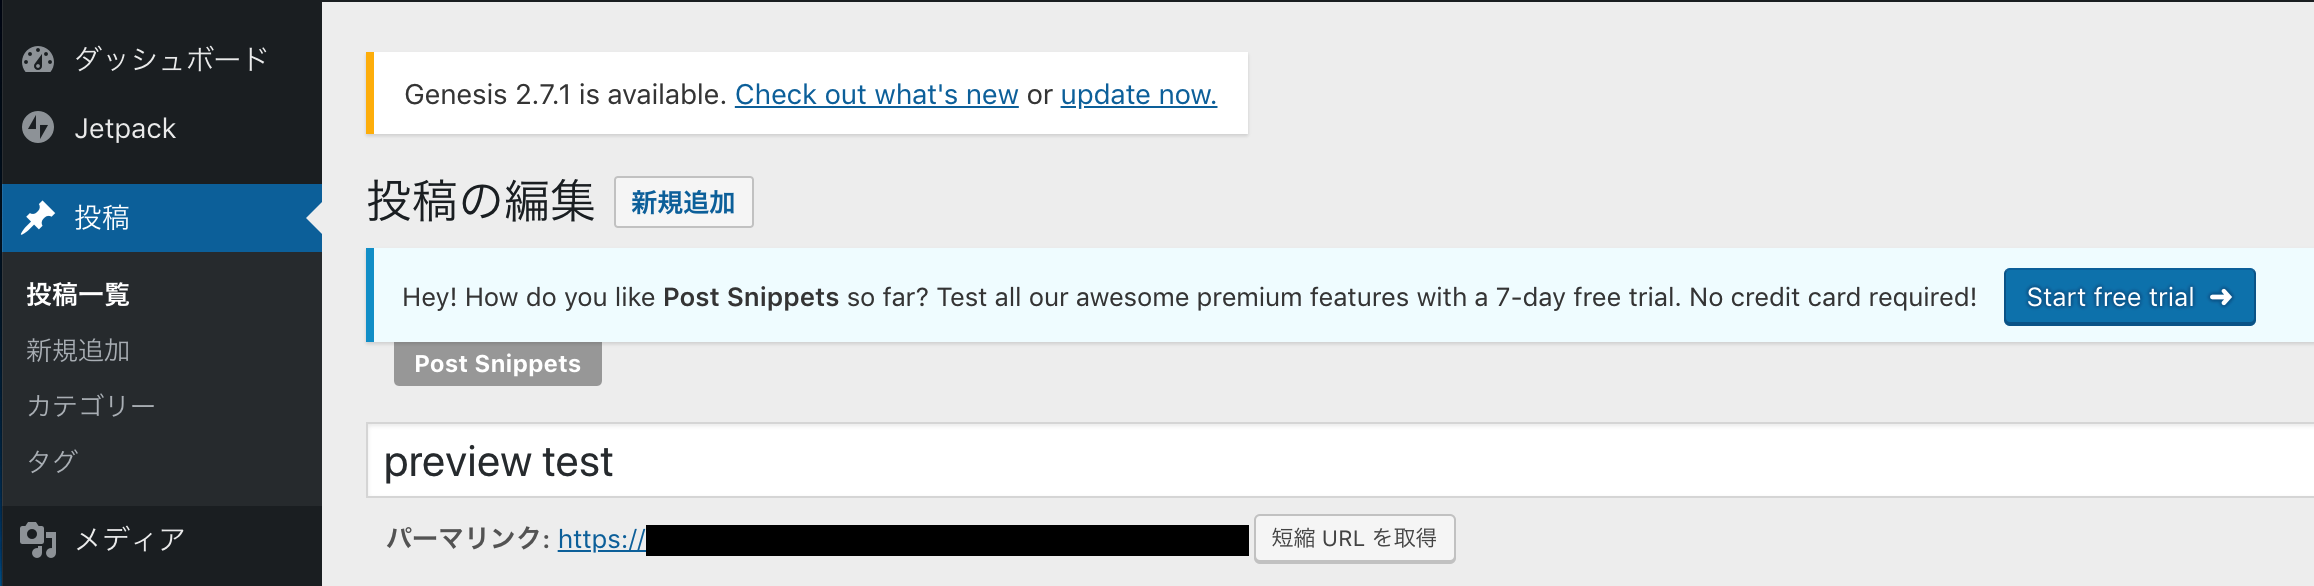
Post Snippets
Post Snippetsプラグインはオリジナルのモジュールを作成でき、記事内のショートコードにて呼び出しができるようにしてくれるプラグインです。
システム側のモジュールを記事側指定箇所に埋め込みたい場合などに使えます。
この場合、ショートコードで埋め込まれたDOMをさらにapi取得側でパースして独自のReact Componentをレンダリングするようにします。
使い方に関しては次の記事が参考になります。
参考:Post Snippets – HTML・PHPコードを登録してパーツを使い回せるWordPressプラグイン
WP User Avatar
WP User AvatarプラグインはユーザのavatarをGravatar経由ではなく、WPに直接アップロードした画像を設定させることができるプラグインです。
また、画像が設定されていない場合は組織のデフォルト画像を設定させることもできます。
ユーザプロフィールから設定できるようになります。

記事取得APIの軽量化とパラメータ追加
genesis-themeフォルダにcustomフォルダを作成し、api.phpを作成します。
functions.phpにてrequire_onceで読み込みを行います。
// custom hook
require_once(dirname(__FILE__) . '/custom/api.php');
一番良く使われるであろう記事取得APIです。
一覧取得:
GET: /wp-json/wp/v2/posts
記事詳細取得:
GET: /wp-json/wp/v2/posts/:id
ここでの:idは記事IDを指しています。
実際に取得してみると分かるのですがこのAPIは情報過多なため、
rest_prepare_postアクションをadd_filter関数を用いてフックしてレスポンス前に不要なパラメータを削除することができます。(レスポンスの軽量化)
適宜必要に応じて不要なデータを削除します。
link以下のパラメータはremove_linkメソッドで削除し、それ以外はunset関数で削除します。
今回はapi.phpにて上記APIのレスポンス処理のフックを行います。
参考:[WordPress] WP-APIの不要な項目を削除する
<?php

// format api reponse
add_filter( 'rest_prepare_post', function ($response, $post, $request) {
  $params = $request->get_params();
  if (isset($params['id'])) {
    // 記事詳細 /wp-json/wp/v2/posts/:id
    unset($response->data['excerpt']);
    unset($response->data['guid']);
    unset($response->data['modified_gmt']);
    unset($response->data['featured_media']);
    unset($response->data['comment_status']);
    unset($response->data['ping_status']);
    unset($response->data['sticky']);
    unset($response->data['template']);
    unset($response->data['format']);
    $response->remove_link('self');
    $response->remove_link('collection');
    $response->remove_link('about');
    $response->remove_link('author');
    $response->remove_link('replies');
    $response->remove_link('version-history');
    $response->remove_link('predecessor-version');
    $response->remove_link('https://api.w.org/attachment');
    $response->remove_link('https://api.w.org/term');
  } else {
    // 記事一覧 /wp-json/wp/v2/posts
    unset($response->data['slug']);
    unset($response->data['excerpt']);
  }
  return $response;
}, 10, 3);
featured_imageパラメータやauthor情報を付与するには、この記事が参考になりました。WP REST APIをシングルページアプリケーションで使うためにいろいろカスタマイズしてみた
独自の処理を追加したいときは、add_action関数でrest_api_initアクションをフックして処理を追加します。
register_rest_field関数を使うことでパラメータを追加することができます。
add_action('rest_api_init', 'wp_add_param_to_JSON');
function wp_add_param_to_JSON() {
  // Add featured image
  register_rest_field('post',
    'featured_image', //NAME OF THE NEW FIELD TO BE ADDED - you can call this anything
    array(
      'get_callback' => 'wp_get_image',
      'update_callback' => null,
      'schema' => null,
    )
  );
  // Add author
  register_rest_field('post',
    'article_author', //NAME OF THE NEW FIELD TO BE ADDED - you can call this anything
    array(
      'get_callback' => 'wp_get_author',
      'update_callback' => null,
      'schema' => null,
    )
  );
}

function wp_get_image($object, $field_name, $request) {
  $feat_img_array = wp_get_attachment_image_src($object['featured_media'], 'full', true);
  return [
    'src' => $feat_img_array[0],
    'width' => $feat_img_array[1],
    'height' => $feat_img_array[2],
  ];
}

function wp_get_author($object, $field_name, $request) {
  $author = get_the_author();
  return [
    'name' => $author,
  ];
}
ACFパラメータを付与するには次のadd_filterを追加します。
// acf-to-rest-api
add_filter( 'acf/rest_api/field_settings/show_in_rest', '__return_true' );
add_action関数やadd_filter関数で既存のAPIをフックして処理を上書きすることで大体なんとかなります。

Custom APIの作成
register_rest_route関数を使うことで自前のapiを作成することができます。
add_action('rest_api_init', 'add_custom_endpoint');
function add_custom_endpoint() {
  register_rest_route('custom/v1', '/is_wploggedin', array(
    'methods' => 'GET',
    'callback' => 'is_wploggedin'
  ));
  register_rest_route('custom/v1', '/posts', array(
    'methods' => 'GET',
    'callback' => 'post_list_api'
  ));
  register_rest_route('custom/v1', '/authors/(?P<id>\d+)', array(
    'methods' => 'GET',
    'callback' => 'get_author_info'
  ));
}

// ユーザがログイン済みかどうかの判定
// 呼び出し側システムがWPサーバと同一ドメインの場合はwordpress_logged_in_xxxxクッキー内にWPのログイントークンが保存されている
// wptokenパラメータにてログイントークンをこのAPIでチェックするとログイン済み状態(セッション切れ含め)かどうかわかる
// プレビュー画面を呼び出し側システムで作る際等に使う
function is_wploggedin(WP_REST_Request $request) {
  $wptoken = $request->get_param('wptoken');
  $data = wp_validate_auth_cookie($wptoken, 'logged_in');
  $response = new WP_REST_Response($data);
  $response->set_status(200);
  return $response;
}

// 記事一覧取得API
// /wp-json/wp/v2/postsよりもカスタマイズもきくし、レスポンスも高速
function post_list_api(WP_REST_Request $request) {

  // 検索条件
  $args = array(
    'posts_per_page' => -1,
    'post_type' => 'post',
    'post_status' => 'publish',
    // redirectありを省く
    'meta_query' => array(
      array(
        'relation' => 'OR',
        array(
          'key' => 'redirect',
          'value' => ''
        ),
        array(
          'key' => 'redirect',
          'value' => '',
          'compare' => 'NOT EXISTS'
        )
      )
    )
  );

  $p_author = $request->get_param('author');
  if ($p_author) {
    $args['author'] = $p_author;
  }
  $p_category = $request->get_param('category');
  if ($p_category) {
    $args['cat'] = $p_category;
  }
  $p_per_page = $request->get_param('per_page');
  if ($p_per_page) {
    $args['posts_per_page'] = $p_per_page;
  }
  $p_page = $request->get_param('page');
  if ($p_page) {
    $args['paged'] = $p_page;
  }
  $post_status = $request->get_param('post_status');
  if ($post_status && current_user_can('manage_options')) {
    $args['post_status'] = $post_status;
  }

  // $argsに記事の取得条件を設定する
  $the_query = new WP_Query($args);
  $total = $the_query->found_posts;
  $data = array();
  while ($the_query->have_posts()) {
    // 次のpostに進む
    $the_query->the_post();

    // postを整形
    $post = get_post();
    $categories = get_the_category();
    // レスポンスデータ
    $data[] = array(
      'id' => $post->ID,
      'title' => get_the_title(),
      'author'=> get_the_author(),
      'authorId' => get_the_author_meta('ID'),
      'date' => $post->post_date,
      'category' => $categories[0]->term_id,
      'thumbnail' => get_the_post_thumbnail_url(null, 'medium'),
      'excerpt' => get_the_excerpt(),
      'status' => $post->post_status,
      'redirect' => $post->redirect,
    );
  }

  // レスポンス
  $response = new WP_REST_Response($data);
  $response->header('X-WP-Total', $total);
  $response->set_status(200);
  return $response;
}

// 記事の著者情報取得
function get_author_info(WP_REST_Request $request) {
  $author = $request['id'];
  $display_name = get_the_author_meta('display_name', $author);
  $description = get_the_author_meta('description', $author);
  $avatar = get_avatar_url($author);

  $data = array(
    'author' => $author,
    'display_name' => $display_name,
    'description' => $description,
    'avatar' => $avatar
  );
  $response = new WP_REST_Response($data);
  $response->set_status(200);
  return $response;
}
改変してはいけないあの変数$post
PHPではグローバル領域に変数を定義してファイルをまたいだアクセスが可能です。
global 変数名で定義するとグローバル変数となります。
その中でWordPress固有のグローバル変数である$postに関しては記事の情報を取得するために必要なため頻繁にアクセスすることになると思います。また、アクセスするタイミングで内容が変わります。
参考:wordpressで重要なグローバル変数$postの中身の説明
基本的に直接改変することは避けましょう、後々原因究明に苦しむことになるので。
その他のWordPress固有のグローバル変数はここを参考にしてください。
注意: 適切な API 関数があればそれを使うのがベストです。グローバル変数を直接変更するのは避けましょう。

「おいおい、グローバル変数とか冗談だろ・・・」
パーマリンクの変更
編集画面のパーマリンクを変更します。
post_linkアクションをフックすることで、パーマリンクのurlを変更することができます。
次の例では公開している記事のurlのリンクを変更します。
// パーマリンクをフックしてurlを書き換える
// jetpack-related-postsのurlを書き換える
add_filter('post_link', 'change_to_new_media_url', 10, 3);
function change_to_new_media_url($link, $post, $leavename) {
  // 公開済み記事
  if ($post->post_type === 'post' && $post->post_status === 'published') {
    $url = parse_url($link);
    // 記事のカテゴリを取得
    $category = get_the_category($post->ID);
    // カテゴリが設定されている
    if (count($category) > 0) {
      // 新しいurl(適宜変更)
      return 'https://' . $url['host'] . '/category/' . $category[0]->description . '/media/' . $post->ID;
    }
  }
  // 未公開は元のリンク
  return $link;
}
Jetpackプラグインのトラッキングコードを埋め込む
Jetpackの記事別のアクセス解析にはJetpackが埋め込むトラッキングイメージをページに埋め込む必要があります。
これはJetpackプラグインに記載されている統計のスマイル画像のことを指しています。
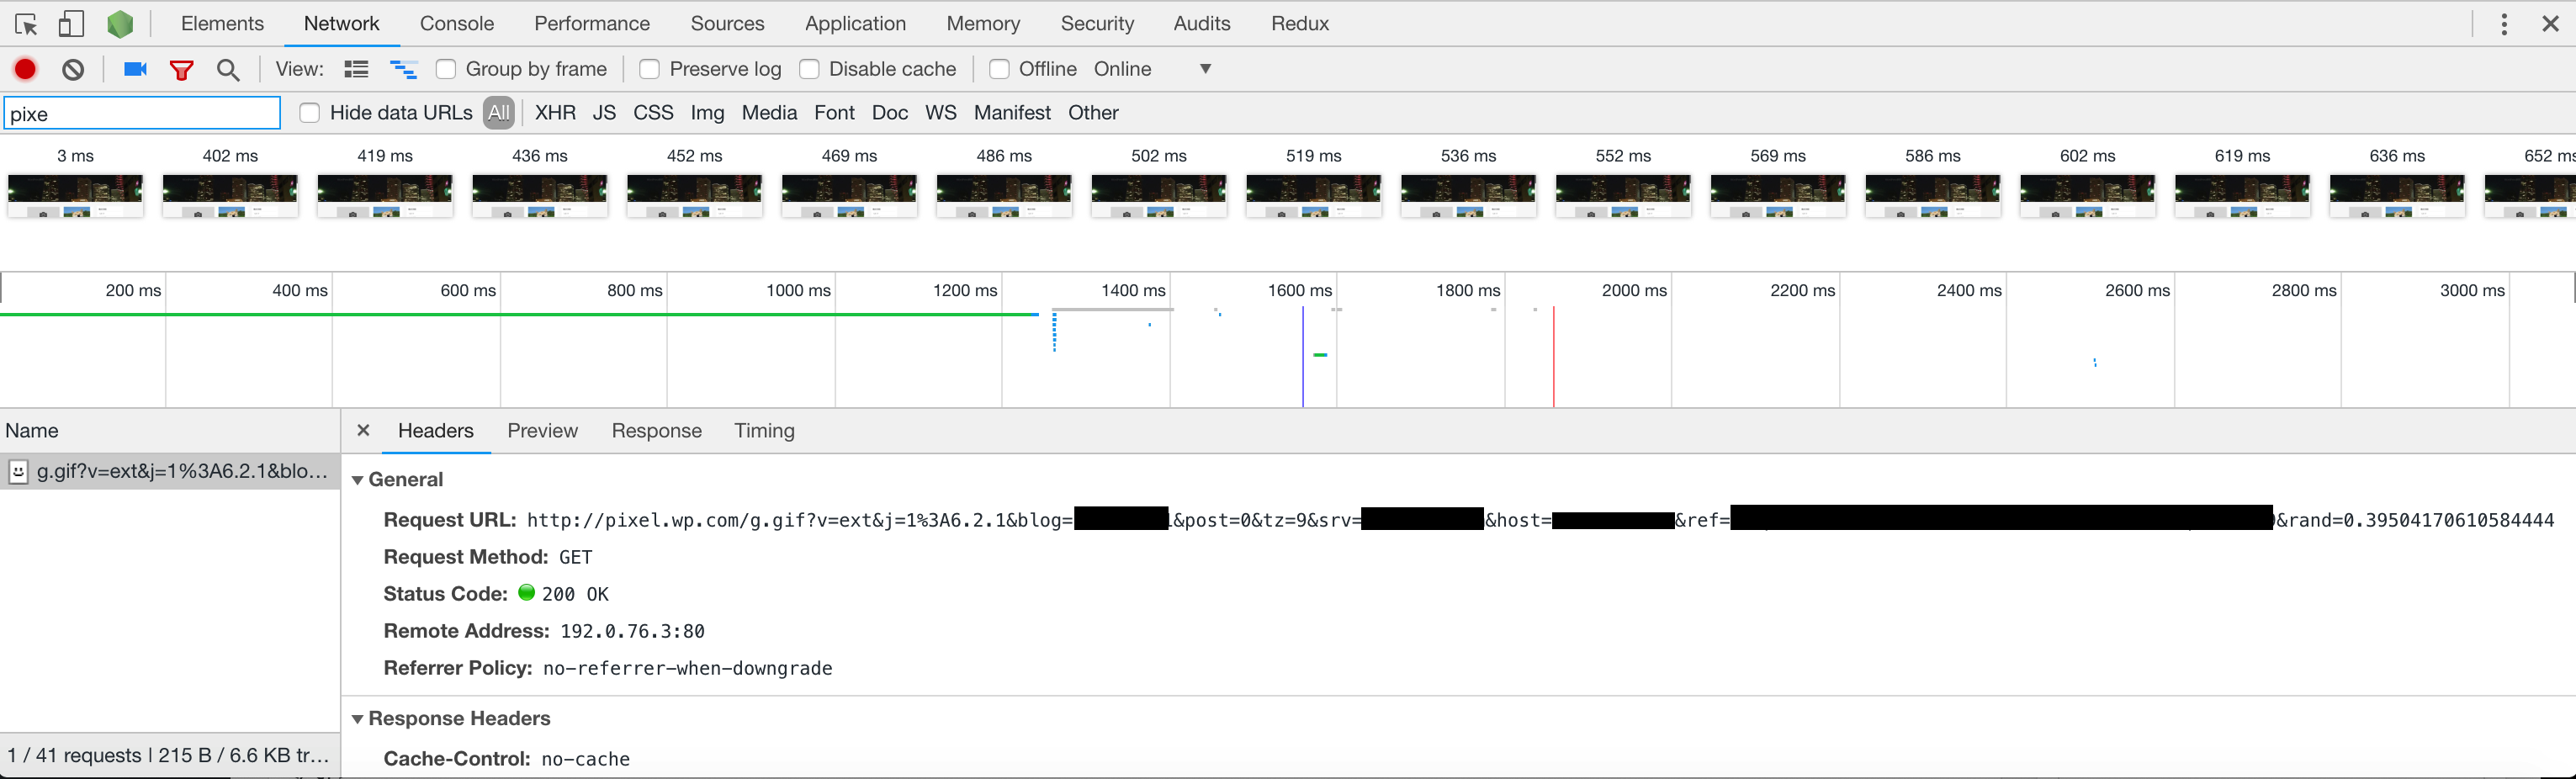
色々解析した結果、https://pixel.wp.com/g.gif・・・のようなイメージURLが表示されたときにアクセスカウントが増えます。
呼び出し側サーバのフロントエンド側でこのスマイルイメージ画像を埋め込む実行コードは以下のようになります。
CloudFrontなどでキャッシュされているページではランダムの値が更新されないため、フロントエンドのJSで毎回生成する必要があります。また、AMP対応している場合はamp-pixelタグで表示します。(rand=RANDOMのRANDOMの値が毎回書き換わる)
import React from 'react'

export default class WPTracker extends React.Component {

  componentDidMount () {
    const { postId, isAMP } = this.props

    if (!isAMP && postId) {
      const img = document.createElement('img')
      img.src = `${this.createViewTrackerURL(postId)}&rand=${Math.random()}`
      img.width = 1
      img.height = 1
      img.className = 'track-img'
      // css
      /*
      .track-img {
        visibility: hidden;
      }
      */
      document.body.appendChild(img)
    }
  }

  createViewTrackerURL = (postId) => {
    // WP jetpackプラグインのview数計測トラッカーを埋め込む
    const domain = 'abcd.com' // サイトのドメイン
    const blogId = '111111111' // jetpackの連携ID
    return `https://pixel.wp.com/g.gif?v=ext&j=1%3A5.8&blog=${blogId}&post=${postId}&tz=9&srv=${domain}&host=${domain}&ref=`
  }

  render () {
    const { postId, isAMP } = this.props
    if (isAMP && postId) {
      return <amp-pixel src={`${this.createViewTrackerURL(postId)}&rand=RANDOM`} layout='nodisplay' width={1} height={1} />
    }
    return null
  }
}
blogのIDはJetpackプラグインをwordpress.comアカウントと連携したときに払い出されるIDです。
連携アカウント単位に払い出されるIDが違うため、本番環境と開発環境は別のアカウントで連携する必要があります。
現在は直接確認する方法がなくなってしまったので、WP側の記事のリクエストのblogパラメータより確認します。
あれから14年・・・
ハリーがめっちゃダンディになってた・・・
10年以上経ってるからそりゃそうか