会社のポータルサイトがOffice365のSharePointで構築されているのですが、どうにも見づらいのでAngular8 + Graph APIで独自に構築してみることにしました。
GraphAPIを使うまでの道のりを残しておこうと思います。
長くなりそうなので、今回は何回かに分けて書いていきます。
続き⇒SharePointで作られた社内ポータルをAngular+GraphAPIでステキに閲覧する②
なお、APIを使って色々やる場合、以下のようなフローとなるそうなので、今回は①、②の部分を書きます。
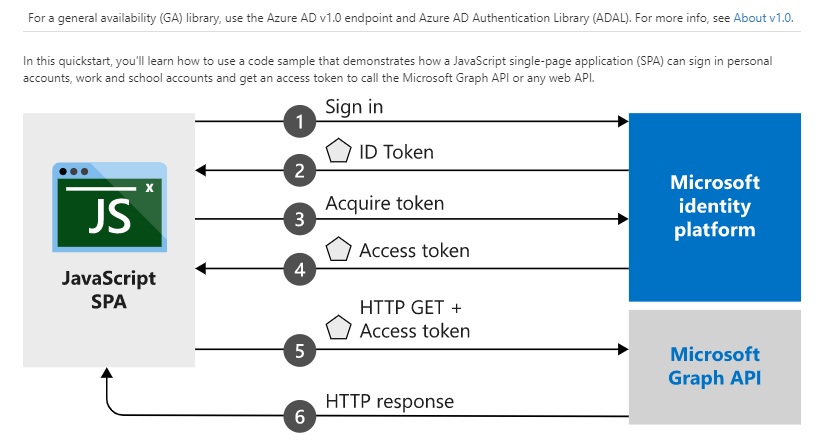
※この図はAzureでアプリ登録後のクイックスタートで確認できます
Azureでアプリを登録する
アプリ登録
※概要でクライアントID、テナントIDが確認できます。
Angularへの組み込みが必要になりますので、メモっておいてください。

各種設定
リダイレクトURLを設定
- 「認証」からリダイレクトURLを設定

※ローカル環境で動かす場合は「localhost:4200」を登録
⇒localhost以外はhttps必須みたいです。
また、複数件登録できるので、localhost、共用開発環境、本番環境といった登録ができます。
⇒Angular側で指定するリダイレクトURLで切り分けられると思います。
暗黙的な許可フローの許可
ログインやアクセストークンの取得を暗黙的に実行したい場合はチェックを入れて保存します
Angularでフロントエンドの構築
Azureにクイックスタートがありますが、Angular向けに「@azure/msal-angular」というパッケージが用意されているので、以降はそちらの導入手順に従って実装していきます。
Angularバージョンは以下で進めていきます。
テンプレートプロジェクトの生成
以下のコマンドでテンプレートを生成します
ng new sp-portal --routing
※ルーティング欲しいので--routingオプション付けてます
msal-angularのインストール
クイックスタートはExpress.jsによるJavascriptコードで面倒くさいので、msal-angularをインストールします
npm install @azure/msal-angular --save
必要なパッケージをインストール
msal-angularはrxjs-compatを使うみたいなので、インストールします。
npm install --save rxjs-compat
コードの組み込み
ここからは@azure/msal-angularのページを参考に組み込んでいきます
AppModuleでMsalModuleをインポート
ここで、Azureに登録したアプリのクライアントIDとテナントID、リダイレクトURLを指定します。
※リダイレクトURLはログインやログアウト完了後にリダイレクトするURL
Azure側で設定したURLと一致させる必要があります。
import { MsalModule } from '@azure/msal-angular';
import { environment } from "../environments/environment";
@NgModule({
  ・・・
  imports: [
    ・・・
    MsalModule.forRoot({
      clientID: environment.msal.clientID,
      authority: environment.msal.authority,
      redirectUri: environment.msal.redirectUrl,
    })
  ]
})
export class AppModule { }
※設定できる項目はこちらを参照
なお、今回は各種設定値をenvironments.tsに切り出しています。
export const environment = {
  production: false,
  msal: {
    clientID: "{Your Client ID}",
    authority: "https://login.microsoftonline.com/{Your Tenant ID}",
    redirectUrl: "http://localhost:4200/",
  }
};
ルーティング設定
import { NgModule } from '@angular/core';
import { Routes, RouterModule } from '@angular/router';
import { MsalGuard } from '@azure/msal-angular';
import { LoginComponent } from './login/login.component';

const routes: Routes = [
  { path: 'login', component: LoginComponent },
  // Angular8のDynamic Imports
  { path: 'pages', canActivate: [MsalGuard], loadChildren: () => import('./pages/pages.module').then(m => m.PagesModule) },
  { path: '', redirectTo: 'login', pathMatch: 'full' }
];

@NgModule({
  imports: [RouterModule.forRoot(routes)],
  exports: [RouterModule]
})
export class AppRoutingModule { }
path: 'pages'にcanActive:'MsalGuard'を指定しているため、/pages~のURLにアクセスする際にMsalGuardによるチェックが走り、認証できていない場合は強制的にOffice365のログイン画面にリダイレクトされます。
ちなみに、今回は↓のようなディレクトリ構成にしてます。
└─src
    │
    ├─app
    │  │  app-routing.module.ts
    │  │  app.component.html
    │  │  app.component.ts
    │  │  app.module.ts
    │  │
    │  ├─login
    │  │      login.component.ts
    │  │
    │  └─pages
    │      │  pages-routing.module.ts
    │      │  pages.module.ts
    │      │
    │      ├─detail
    │      │      detail.component.ts
    │      │
    │      └─top
    │              top.component.ts
    │
    ├─environments
    │      environment.prod.ts
    │      environment.ts
    │
    └─services
            auth.service.ts
画面遷移イメージ
今回は、ヘッダにログイン/ログアウトボタンを置いて、任意のタイミングで認証できるようにしたいと思います。
※Angular Materialとflex-layoutを使って画面構築してます。

↓ ログイン押下
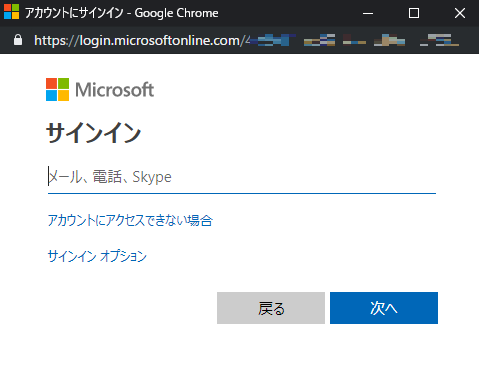
※2段階認証にも対応してます
↓ ログイン後

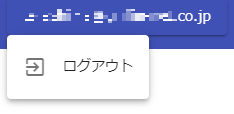
※ログイン後はログインボタンはログイン中ユーザーのアドレスを表示し、クリックするとメニューが開いてログアウトができます。
各種コンポーネント
app.component
ここでは、主にヘッダ部分の制御を記載しています。
import { Component, OnInit } from '@angular/core';
import { Router } from '@angular/router';
import { User } from 'msal';
import { AuthService } from 'src/services/auth.service';

@Component({
  selector: 'app-root',
  templateUrl: './app.component.html',
})
export class AppComponent implements OnInit {
  /** ログイン中ユーザー情報 */
  user: User = null;

  constructor(
    private router: Router,
    private authService: AuthService,
  ) { }

  ngOnInit() {
    // ユーザー取得
    this.user = this.authService.getUser();
  }

  /**
   * ログインチェック
   */
  get isLogin() {
    return this.user ? true: false;
  }

  /**
   * タイトル押下
   */
  OnClickTitle() {
    if (this.isLogin) {
      this.router.navigate(['/pages']);
    }
  }

  /**
   * ログイン押下
   */
  async OnClickLogin() {
    // ログインポップアップ表示
    const token = await this.authService.showLoginPopup();
    if (token) {
      // ユーザー情報を取得
      this.user = this.authService.getUser();
      // TOP画面に遷移
      this.router.navigate(['/pages']);
    } else {
      this.user = null;
      alert('ログイン失敗');
    }
  }

  /**
   * ログアウト押下
   */
  async OnClickLogout() {
    this.user = null;
    // ログアウト
    this.authService.logout();
  }

}
<mat-toolbar fxLayout="row" fxLayoutAlign="space-between" color="primary">
    <div fxFlexAlign="center">
        <button mat-flat-button color="primary" (click)="OnClickTitle()"><h1>Title</h1></button>
    </div>
    <div fxFlexAlign="center"></div>
    <div fxFlexAlign="center">
        <button mat-raised-button color="accent" *ngIf="!isLogin" (click)="OnClickLogin()">ログイン</button>
        <button [matMenuTriggerFor]="menu" *ngIf="isLogin" mat-raised-button color="primary">{{user.displayableId}}</button>
        <mat-menu #menu="matMenu">
            <button mat-menu-item (click)="OnClickLogout()">
                <mat-icon>exit_to_app</mat-icon>
                <span>ログアウト</span>
            </button>
        </mat-menu>
    </div>
</mat-toolbar>
<router-outlet></router-outlet>
login.component.ts
ログイン済みかチェックし、ログイン済みであれば/pagesに遷移させます。
import { Component, OnInit } from '@angular/core';
import { Router } from '@angular/router';
import { AuthService } from 'src/services/auth.service';

@Component({
  selector: 'app-login',
  template: '<span>ログインしてください</span>',
})
export class LoginComponent implements OnInit {
  constructor(
    private router: Router,
    private authService: AuthService,
  ) { }

  ngOnInit() {
    if (this.authService.getUser()) {
      // ログイン済みの場合はTOPページに遷移
      this.router.navigate(['/pages']);
    }
  }
}
src/app/pages下のcomponent
今回はログインがメインなので、暫定の画面です
import { Component } from '@angular/core';

@Component({
  selector: 'app-pages-top',
  template: `
  <h1>Top Component</h1>
  <ul>
    <li><a routerLink="/pages/detail/1">ID1のページを表示</a></li>
    <li><a routerLink="/pages/detail/2">ID2のページを表示</a></li>
  </ul>
  `,
})
export class TopComponent {
}
import { Component, OnInit } from '@angular/core';
import { ActivatedRoute, Params } from '@angular/router';

@Component({
  selector: 'app-pages-detail',
  template: `
  <h1>Detail Component</h1>
  <span>ID:{{id}}のページです</span>
  `,
})
export class DetailComponent implements OnInit {
  id: number;

  constructor(private ar: ActivatedRoute) {}

  ngOnInit() {
    // IDを取得
    this.ar.params.subscribe((params: Params) => {
      if (params['id']) {
        this.id = params['id'];
      } else {
        alert('idを指定してください')
      }
    })
  }
}
サービスの登録
サービスの作成
ログイン/ログアウト、ユーザー情報取得処理を定義しています。
なお、サンプルでもユーザー情報の有無でログインしているかチェックしていました。
import { Injectable } from '@angular/core';
import { MsalService } from '@azure/msal-angular';

@Injectable({
    providedIn: 'root',
})
export class AuthService {
    constructor(private msalService: MsalService) { }

    /**
     * ユーザー取得
     */
    getUser() {
        return this.msalService.getUser();
    }

    /**
     * ログインポップアップ表示
     */
    async showLoginPopup() {
        try {
            return await this.msalService.loginPopup();
        } catch (err) {
            console.log(err);
            return null;
        }
    }

    /**
     * ログアウト
     */
    logout() {
        this.msalService.logout();
    }
}
SharePointAPI用のサービスを作成
※今回はまだ空です。
import { Injectable } from '@angular/core';

@Injectable({
    providedIn: 'root',
})
export class SharePointApiService {

}
プロバイダーにサービスを登録
TTP_INTERCEPTORSでMsalInterceptorを指定することで指定のサービスを呼び出す際に認証チェックが走り、認証できていない場合はOffice365のログイン画面にリダイレクトするようになります。
import { MsalModule, MsalInterceptor } from '@azure/msal-angular';
import { HTTP_INTERCEPTORS } from '@angular/common/http';
import { SharePointApiService } from 'src/services/sharepoint-api.service';
@NgModule({
  ・・・
  providers: [
    SharePointApiService,
    { provide: HTTP_INTERCEPTORS, useClass: MsalInterceptor, multi: true }
  ],
})
export class AppModule { }
※AuthServiceは認証チェック不要な処理しか置かないので、providersには登録してません。
登録してしまうとgetUser読んだだけでログイン画面に勝手に飛んでしまうので。。。
サーバー起動
これで準備は完了です!
以下のコマンドで起動します。
ng serve
ブラウザでhttp://localhost:4200にアクセスします

まとめ
無事にログインまではできました。
次のアクセストークン取得は別途記事に起こしたいと思います。
TIPS
ログイン周りでいくつかはまったところがあったので、書いておきます。
※上記手順には反映済みです。
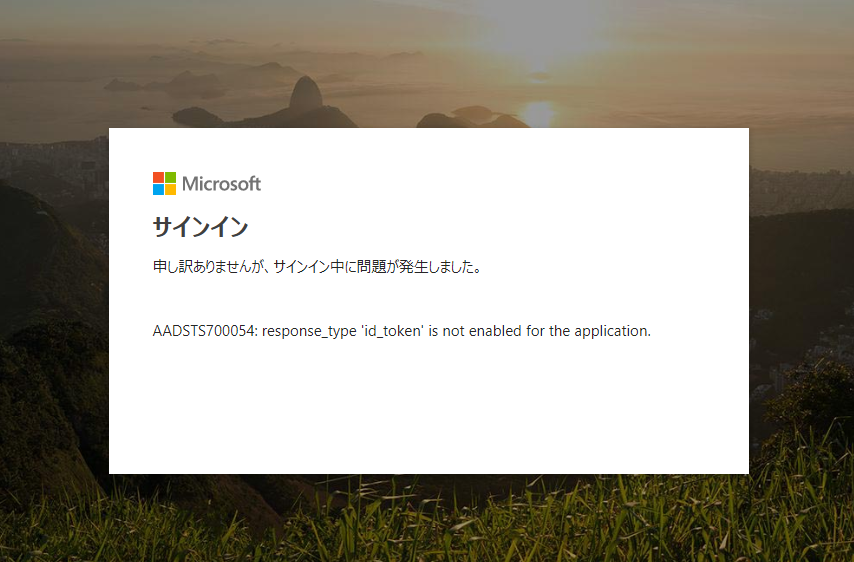
AADSTS700054: response_type 'id_token' is not enabled for the application.
Azureの「アプリの登録⇒認証」からIDトークンにチェックを入れる
※一度キャッシュを消すか、シークレットウィンドウで開く
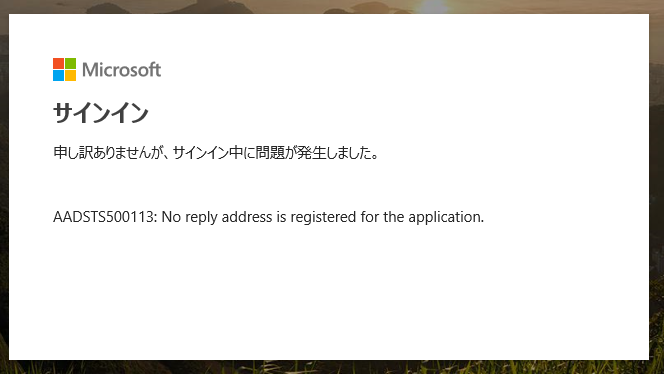
AADSTS500113: No reply address is registered for the application.
Azureの「アプリの登録⇒認証」でリダイレクトURLを選択する
※ここで指定したURLとAppModuleで指定したredirectUriが一致しないとエラーになる
AADSTS700051: response_type 'token' is not enabled for the application.
acquireTokenSilentでアクセストークンを取得しようとした際に発生
マニフェストで暗黙的なトークン取得を許可する必要があるらしい
参考:https://community.dynamics.com/crm/b/akmscrmblog/archive/2016/03/16/response-type-token-is-not-enabled-for-the-application


