Reduxの公式チュートリアルにあるTodoListアプリのExampleですが、これをReact Nativeで置き換えてみようという記事です。
僕が参加したプロジェクトがReduxによるState管理を行っており、Reduxの概念などがイマイチ分からなかったため、勉強のためにReactNative + Reduxの簡単なアプリを作ってみようということで上記のチュートリアルにたどり着きました。ただこちらはReactでの実装でしたので、ReactNativeに置き換えてみました。さらに、こちらの記事を参考に僕なりにReduxについても解説を交えていきたいと思います。
ある程度ReactNative、Reduxについて理解している方が対象となります。
以下はReduxの概念系で非常にわかりやすかった記事です。
React + Redux の基本的な使い方
Redux入門【ダイジェスト版】10分で理解するReduxの基礎
注:僕はゴリゴリの掛け出しエンジニアであり、自分の勉強としての投稿という面もあるので、もしミスや勘違い、ベストプラクティスではない、等がありましたら、コメントしていただけると幸いです。
Reduxとは
Reduxの概念を簡単に言うと、
store
reactのstateを保管する場所。
reducer
storeを書き換えるための関数。storeのstateを書き換える。
action
reducerに渡すjson。
action creatorが情報をjsonに加工する関数。
connect
storeに保管されたstateはreact-reduxのconnect関数を経由して、componentに渡される。
まずはexpoでアプリ作成
詳細な環境構築などは別記事を当たってください。僕は「expoによるReact Nativeのおさらい(最低限)」を参考にさせていただきました。
expo init todoExample
cd todoExample
reduxをインストール
npm install --save redux react-redux
もう一度npm install(これしないとなぜか動かないです。かなりつまったので記事化しました。)
npm install
参考:expo startをしてもQRコードが出てこない、Starting Webpackしてしまう、UnhandledPromiseRejectionWarningとなってしまう場合
Actions
Reduxでの機能開発ですが、actionsから開発していくことにします。
Redux ExampleのTodo Listをはじめからていねいに(3)の記事を参考にしています。
以下引用
1.actionCreatorとreducerでフィルターの値をstore(state)に格納
2.フィルターの値によってviewを変更(手動でフィルターを操作して動作確認)
3.リンクをクリックしてフィルターを操作してviewを変更
actionというのは、reduxの機能ではなく、純粋な関数です。(ファイルやディレクトリは適宜作成してください。)
以下でactionCreatorを定義します。
let nextTodoId = 0
export const addTodo = text => ({
    type: 'ADD_TODO',
    id: nextTodoId++,
    text
})
上記の意味としては、「textという引数を取り、{type: "ADD_NAME", text: text}を返す関数」ということです。
Reducers
reducerも単なる関数で、上記のactionCreatorで作成されたactionと現在のstoreに保存されているstateを受け取り、新たなstateを返します。
const todoReducers = (state = [], action) => {
    switch(action.type){
        case 'ADD_TODO':
            return [
                ...state,
                {
                    id: action.id,
                    text: action.text
                }
            ]
        default:
            return state
    }
}

export default todoReducers
Store
Storeはアプリケーションで1つしかありません。stateを管理してくれます。
作り方としては、createStore関数でreducerを呼び出すことで作られます。
import { createStore } from 'redux'
import todoReducers from '../reducers/todos'

const store = createStore(todoReducers);

export default store;
一度動作確認
いったん、動作確認するためにsrc/components/Main.jsを作成しておきます。
import React, { Component } from 'react'
import {
    View,
    Text,
    StyleSheet,
} from 'react-native';

class Main extends Component {
  render(){
      return (
        <View style={styles.container}>
            <Text>Hello World!!</Text>
        </View>
      );
  }
}

const styles = StyleSheet.create({
  container: {
    marginTop: Platform.OS === "ios" ? 30 : 0,
    flex: 1,
    justifyContent: "space-between",
    flexDirection: "column",
  }
});

export default Main;
それでは、ここまでで、最初に紹介したaction -> reducer -> storeのデータの流れができました。ここで一度動作確認をしてみます。
import { createStore } from 'redux'
import todoReducers from './reducers/index'

const store = createStore(todoReducers);

export default store;
上記で、expoを実行するとconsoleに
Array [
  Object {
    "id": 0,
    "text": "Hello World!",
  },
]
このように表示されているはずです。
データの流れとしては、
1.addTodo('Hello World!')で{"id": 0, "text": "Hello World!",}というオブジェクトを作成
2.store.dispatch関数にactionを渡すことで、store内にあるtodoReducerへ上記オブジェクトと現在のstateを渡す
3.store内でtodoReducerが新たなstateを返す
4.store.getState()でstore内のstateをget
という感じです。
ちなみに、画面には「Hello World!!」と表示されているだけです。
Reducerファイルを分ける
今後、todosというreducer以外にも、reducerを作成していきますので、それぞれのreducerをまとめるファイルを作成します。
import { combineReducers } from 'redux'
import todoReducers from './todos'

const todoAppReducers = combineReducers({ todoReducers })
export default todoAppReducers
store.jsの参照するreducerもしっかり変えておきましょう。
import { createStore } from 'redux'
import todoAppReducers from './reducers/index' //参照を変更

const store = createStore(todoAppReducers); //変更箇所

export default store;
ContainerとComponentについて
ここから、Store内にあるstateをView側で表示させるという部分を実装していきます。
ここで、react + reduxにおけるViewの2つのコンポーネントについて解説します。
-
Presentational Components
-
Reactでいうコンポーネントと全く同じ
-
単にpropsを受け取ってそれらを描画するコンポーネント
-
Reduxの要素は特にない
-
Container Components
-
storeとのstateからデータを受け取る
-
stateのデータの変更もここで行う
Todoリストを表示するためのコンポーネント(Presentational Components)を作成
import React, { Component } from 'react'
import {
    Text,
    FlatList,
    Button,
    View,
    StyleSheet
} from 'react-native'

class TodoList extends Component {
    render() {
        return(
            <View>
                <FlatList
                    data={this.props.todos}
                    renderItem={({item}) =>
                        <View style={style.todoList}>
                            <Text>
                                {item.text}
                            </Text>
                        </View>
                    }
                    keyExtractor={item => item.id.toString()}
                />
            </View>
        )
    }
}

const style = StyleSheet.create({
    todoList: {
      marginBottom: 10,
      flexDirection: "row"
    }
})

export default TodoList
上記のdataの中の「this.props.todos」というのがこのあとすぐ実装するContainer Componentsから送られてくるtodoの一覧です。
ちなみに、FlatListの中のkeyExtractorはstring型でなければいけないため、toStirngでstring型へ変更しています。
TodoListコンポーネントをReduxとつなげるためのコンポーネント(Container Components)の作成
import { connect } from 'react-redux'
import TodoList from '../components/TodoList'

const mapStateToProps = (state) => {
  return { todos: state.todos }
}

const VisibleTodoList = connect(
  mapStateToProps
)(TodoList)
export default VisibleTodoList
このファイルでは、TodoListコンポーネントをconnectしています。
mapStateToPropsは、Store.getState()のような役割をして、ComponentのpropsにStateの中身を詰め込んでくれます。先ほど、src/components/TodoList.jsでthis.props.todosとするとtodoの一覧が取れると書きましたが、ここでmapStateToPropsを定義しているからです。
例えば、
const mapStateToProps = (state) => {
  return { todoList: state.todos }
}
のような形で渡せば、src/components/TodoList.jsではthis.props.todoListのような形で取り出します。
アプリに表示
ようやく、storeにtodoを追加し、Viewで表示するという一連の流れができましたので、アプリにtodoリストを表示してみます。
import VisibleTodoList from '../containers/VisibleTodoList' //追加

class Main extends Component {
  render(){
      return (
        <View style={styles.container}>
            <VisibleTodoList /> //変更
        </View>
      );
  }
}
Todoを追加するフォームはまだ作成していないので、直接追加していきます。
store.dispatch(addTodo('Hello React!')) //追加
store.dispatch(addTodo('Hello Redux!')) //追加
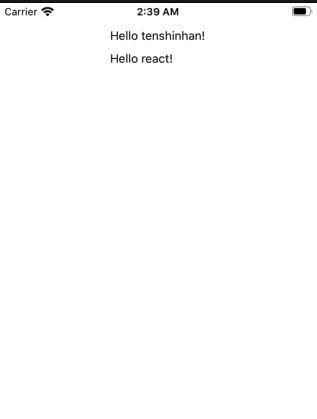
こんな感じになっているかと思います!
AddTodoのフォームを作成
次はフォームからTodoを作成できるようにAddTodoフォームを作成していきます。
先ほど、コンポーネントには2種類あると書きましたが、このAddTodoコンポーネントは、どちらでもありません。公式ドキュメントでは、Other Componentsという風になっています。
ディレクトリについては、今回はcontainers配下に作成します。
import React, { Component } from 'react'
import { connect } from 'react-redux'
import { addTodo } from '../actions/index'
import {
    View,
    TextInput,
    StyleSheet,
    Button
} from 'react-native';


class AddTodo extends Component {
    constructor(props) {
        super(props)
        this.state = {
            text: "",
        }
    }

    _addTodo () {
        this.props.dispatch(addTodo(this.state.text))
        this.setState({
            text: "" ,
        })

    }

    render() {
        return (
            <View>
                <TextInput
                    type="todoName"
                    style={style.input}
                    value={this.state.text}
                    onChangeText={text => this.setState({text})}
                />
                <Button title='追加' onPress={() => this._addTodo()} />
            </View>
        )
    }
}

const style = StyleSheet.create({
    input: {
        height: 40,
        borderColor: 'gray',
        borderWidth: 1
    }
})

AddTodo = connect()(AddTodo)

export default AddTodo
Buttonをクリックすると、_addTodo関数が呼ばれます。_addTodo関数では、this.props.dispatch(addTodo(this.state.text))
でinputに入っているテキストをstore内のtodo一覧に追加します。
import AddTodo from '../containers/AddTodo' //追加

class Main extends Component {
  render(){
      return (
        <View style={styles.container}>
            <AddTodo /> //追加
            <VisibleTodoList />
        </View>
      );
  }
}
最後にMain.jsにAddTodoコンポーネントを追加すればAddTodo機能は完成です!!
お手元のシミュレーターでお試しください。
ここまでのソースコードはGitHubに上げていますのでご参考ください。
次回はTodoの完了・未完了を切り替える「Toggle Todo」機能を実装していきます。