はじめに
Djangoを使って、LINEアプリのチャットボットを作成した備忘録![]()
今回使ったAPIは
- LINE Messaging API
- Google Cloud Vision API
- DeepL API
開発環境
- macOS
- Python 3.10.10
構造
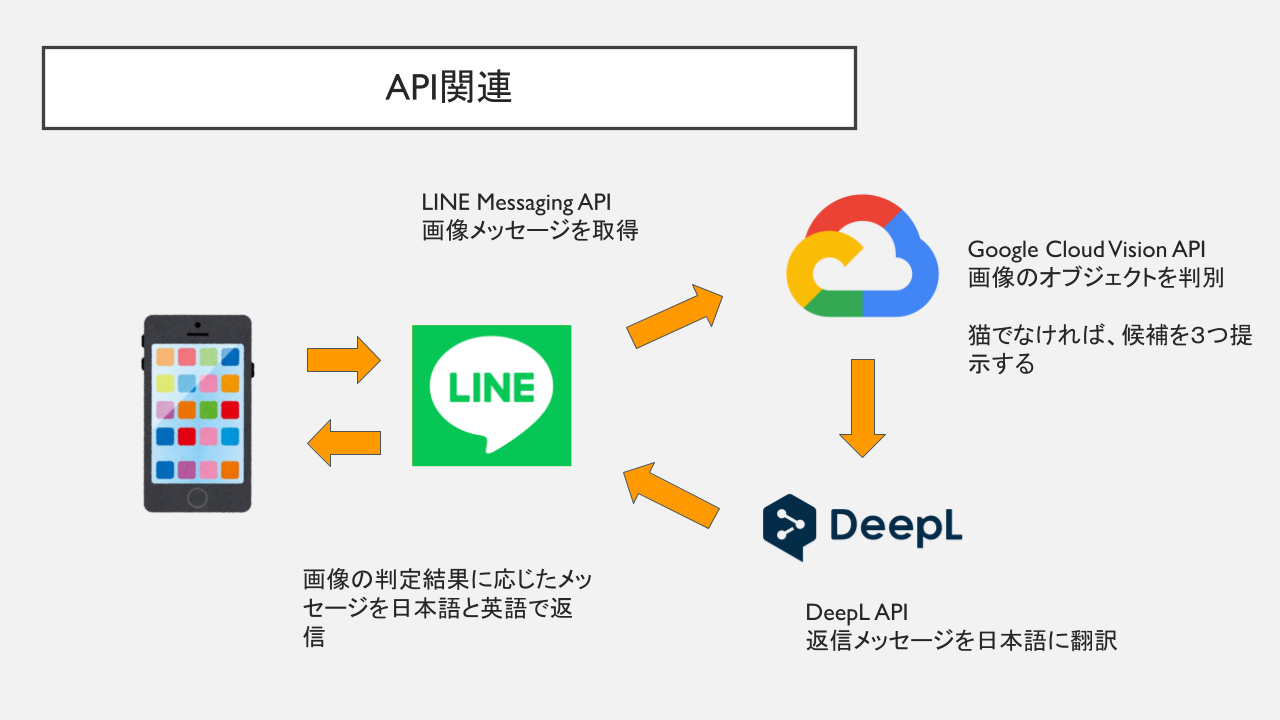
ざっくりとしたイメージ
- チャットボットがメッセージを受信する
- 画像メッセージであれば、猫かどうかを判別する
- 判別結果に応じて、返信メッセージを作成
猫でなければ、可能性のある候補を3つ提示 - 返信メッセージを和訳して、日本語と英語のメッセージを返信する
それでは、LINEチャットボットアカウントの作成と実際のpythonコードを見ていきます![]()
LINEチャットボットアカウントの作成と設定
LINE Developersでボットアカウントを作成する
![]() LINE Develpersにアクセスし、右上の
LINE Develpersにアクセスし、右上のコンソールにログインから、ログイン・新規登録を行う

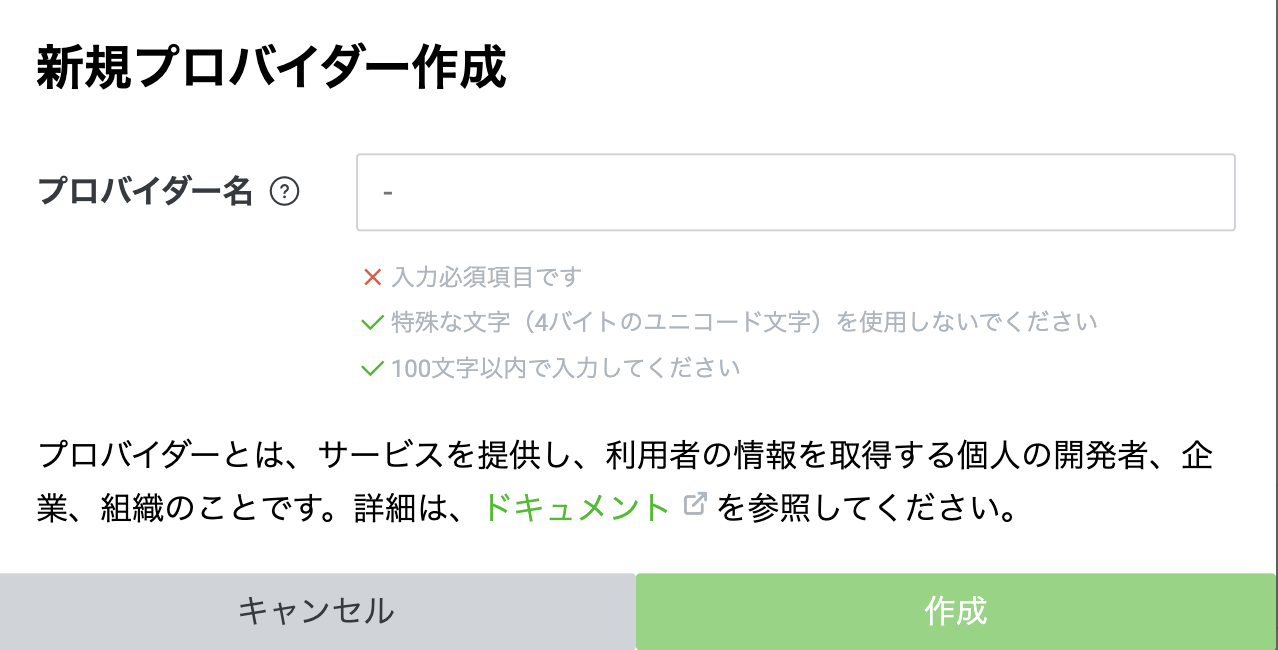
![]() ログイン後、
ログイン後、コンソールトップ画面 > プロバイダーから作成を押して、ボットアカウントを作成する
![]()
Messaging APIを選択して、必須項目を入力する
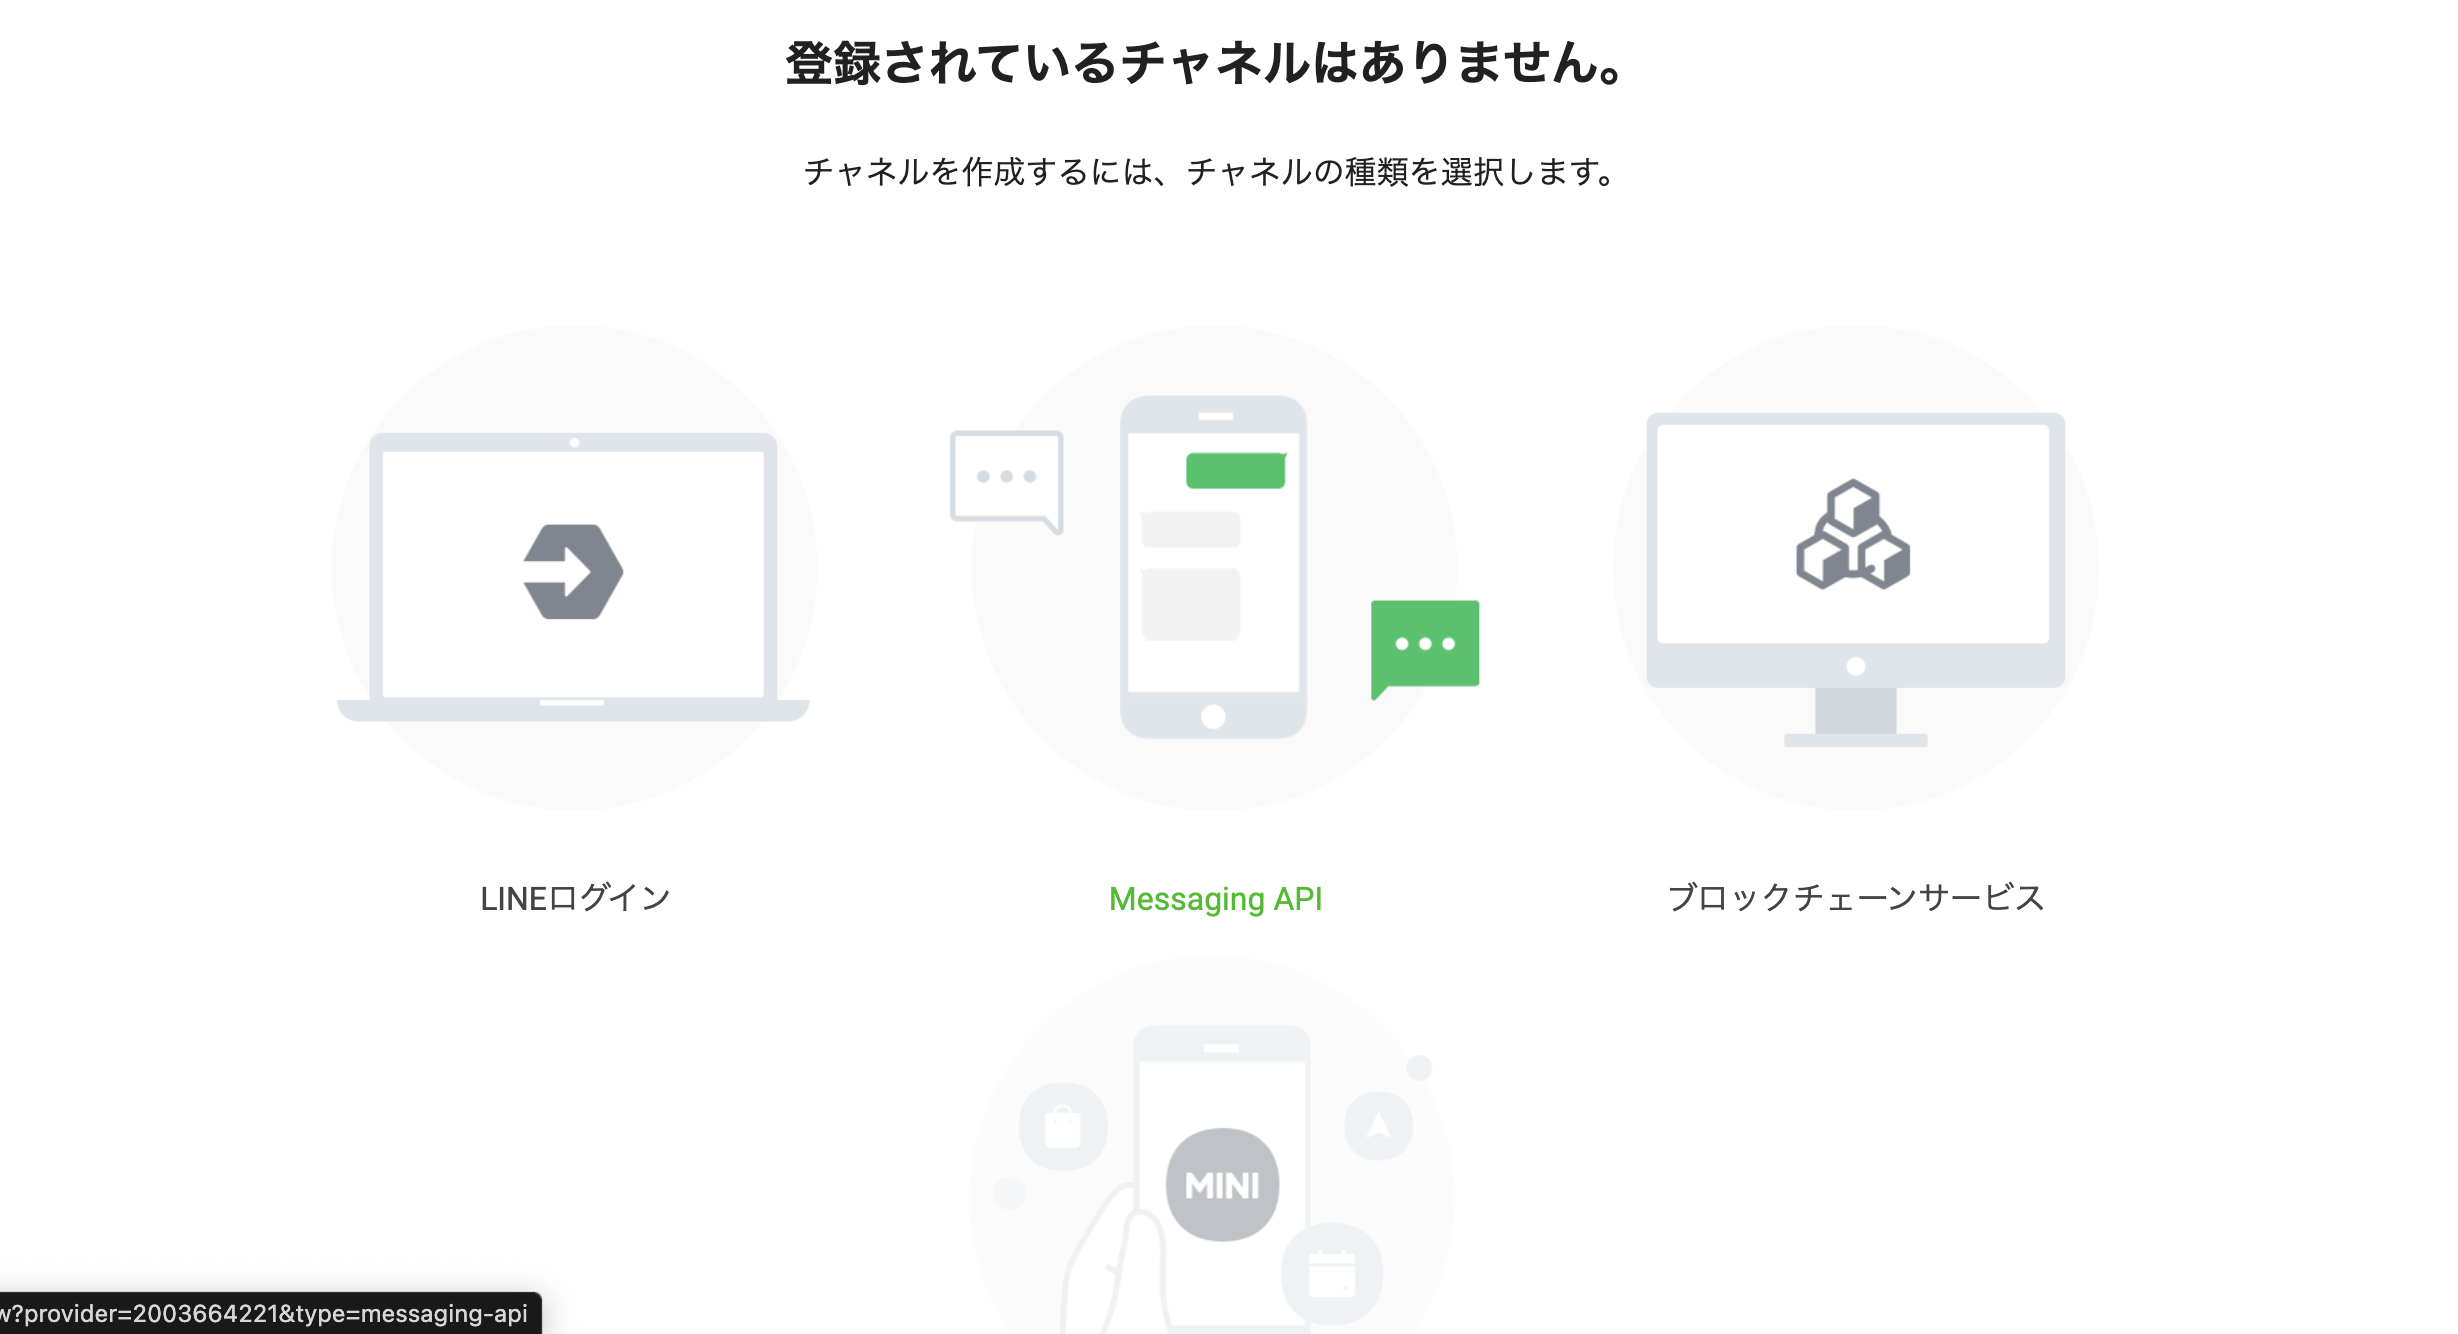
ここでボットアカウント作成はひとまず完了![]()
Djangoの実装
プロジェクト名: linebot
アプリ名: linebot_cat
以下はディレクトリツリーです
linebot -- linebot
        |   |
        |   |-- settings.py
        |   |-- urls.py
        |
        |- linebot_cat
            |
            |-- views.py
            |-- urls.py
            |-- api.py
触らないファイルは上に記載していません。
1. urls.py
![]() プロジェクト側の
プロジェクト側のurls.pyに、アプリ側のurls.pyへのパスを追加する
from django.contrib import admin
from django.urls import path, include

urlpatterns = [
    path('admin/', admin.site.urls),
    path('', include('linebot_cat.urls')),
]
![]() アプリ側の
アプリ側のurls.pyにview関数を追加。今回はlinebot_webhookという名前に設定する
from django.urls import path
from . import views

urlpatterns = [
    path('linebot_cat/', views.linebot_webhook, name='callback'),
]
2. views.py
![]()
views.pyにview関数を定義する。ここではチャットボットが受け取った画像メッセージを処理をする。
@csrf_exempt
def linebot_webhook(request):
    if request.method == 'POST':
        req_body = json.loads(request.body.decode('utf-8'))
        for event in req_body['events']:
            if event.get('type') == 'message' and event.get('message', {}).get('type') == 'image':
                reply_token = event['replyToken']
                img_id = event['message']['id']
                handle_image_message(reply_token, img_id)
        return JsonResponse({'status': 'ok'}, status=200)
    return JsonResponse({'status': 'error', 'message': 'Invalid request'}, status=400)
以下、メッセージ処理に使うヘルパー関数を明記する。(@linebot_app/views.py)
![]() 処理を行うメインヘルパー関数。
処理を行うメインヘルパー関数。![]() 、
、![]() 、
、![]() を内部で呼ぶ。
を内部で呼ぶ。
def handle_image_message(reply_token, img_id):
    IMG_URL = f'https://api-data.line.me/v2/bot/message/{img_id}/content'
    headers = {'Authorization': f'Bearer {ACCESS_TOKEN}'}
    response = requests.get(IMG_URL, headers=headers)
    img_content = response.content

    is_cat, possibility_text = detect_cat(img_content)

    if is_cat:
        text = f'Meow, {possibility_text}'
        translated = translate_text(text)
        if translated:
            text += f' \ {translated}'
        reply_msg = {'type': 'text', 'text':text}
    else:
        text = f'Oops, it\'s not cat! {possibility_text}'
        translated = translate_text(text)
        if translated:
            text += f' \ {translated}'
        reply_msg = {'type': 'text', 'text': text}
    reply(reply_token, [reply_msg])
![]() Google Cloud Vision APIによって、猫かどうかを判断する
Google Cloud Vision APIによって、猫かどうかを判断する
def detect_cat(img_content):
    encoded_image = base64.b64encode(img_content).decode('utf-8')
    payload = {
        'requests': [{
            'image': {
                'content': encoded_image
            },
            'features': [{
                'type': 'LABEL_DETECTION',
                'maxResults': 10
            }]
        }]
    }

    response = requests.post(GOOGLE_CLOUD_VISION_API, json=payload)

    if response.status_code != 200:
        print(f'Error Code:{response.status_code}')
        print(response.text)
        return False

    response_data = response.json()
    if 'responses' not in response_data or not response_data['responses']:
        print('Invalid response data:', response_data)
        return False

    labels = response_data['responses'][0]['labelAnnotations']
    // 類似度によるメッセージは適当に。
    for label in labels:
        if label['description'].lower() == 'cat':
            if label['score'] >= 0.9:
                text = 'Abusolutely!!'
            elif label['score'] >= 0.8:
                text = 'Certainly!'
            elif label['score'] >= 0.6:
                text = 'Probably'
            elif label['score'] >= 0.4:
                text = 'Maybe?'
            else:
                text = 'Possibly...'
            return True, text
    # もし猫でない場合3つ候補を返信する
    text = f"Is it among {labels[0]['description']}, {labels[1]['description']} or {labels[2]['description']}?"
    return False, text
![]() ボットの返信メッセージをDeepL APIを使って、日本語訳する
ボットの返信メッセージをDeepL APIを使って、日本語訳する
def translate_text(text):
    headers = {'Content-Type': 'application/json', 'Authorization': f'DeepL-Auth-Key {DEEPL_AUTH_KEY}'}
    payload = {
        'text': [text],
        'source_lang': 'EN',
        'target_lang': 'JA'
    }
    response = requests.post(DEEPL_API, headers=headers, json=payload)
    if response.status_code == 200:
        response_data = response.json()
        translated = response_data.get('translations')[0].get('text')
        return translated
    return None
![]() 画像識別後に、トーク画面にメッセージを返信する
画像識別後に、トーク画面にメッセージを返信する
def reply(reply_token, messages):
    headers = {
        'Content-Type': 'application/json',
        'Authorization': 'Bearer ' + ACCESS_TOKEN
    }
    body = {
        'replyToken': reply_token,
        'messages': messages
    }
    requests.post(REPLY_ENDPOINT_URL, headers=headers, data=json.dumps(body))
3. api.py
APIエンドポイントや、アクセストークンなどのまとめ
.gitignoreに追加するなどして、リモートリポジトリにあげないように注意
# LINE
REPLY_ENDPOINT_URL = 'https://api.line.me/v2/bot/message/reply'
ACCESS_TOKEN = '以下説明①'

# Deepl
DEEPL_AUTH_KEY = '以下説明②'
DEEPL_API = 'https://api-free.deepl.com/v2/translate'

# Google Cloud Vision API endpoint
GOOGLE_CLOUD_VISION_API = 'https://vision.googleapis.com/v1/images:annotate?key=以下説明③'
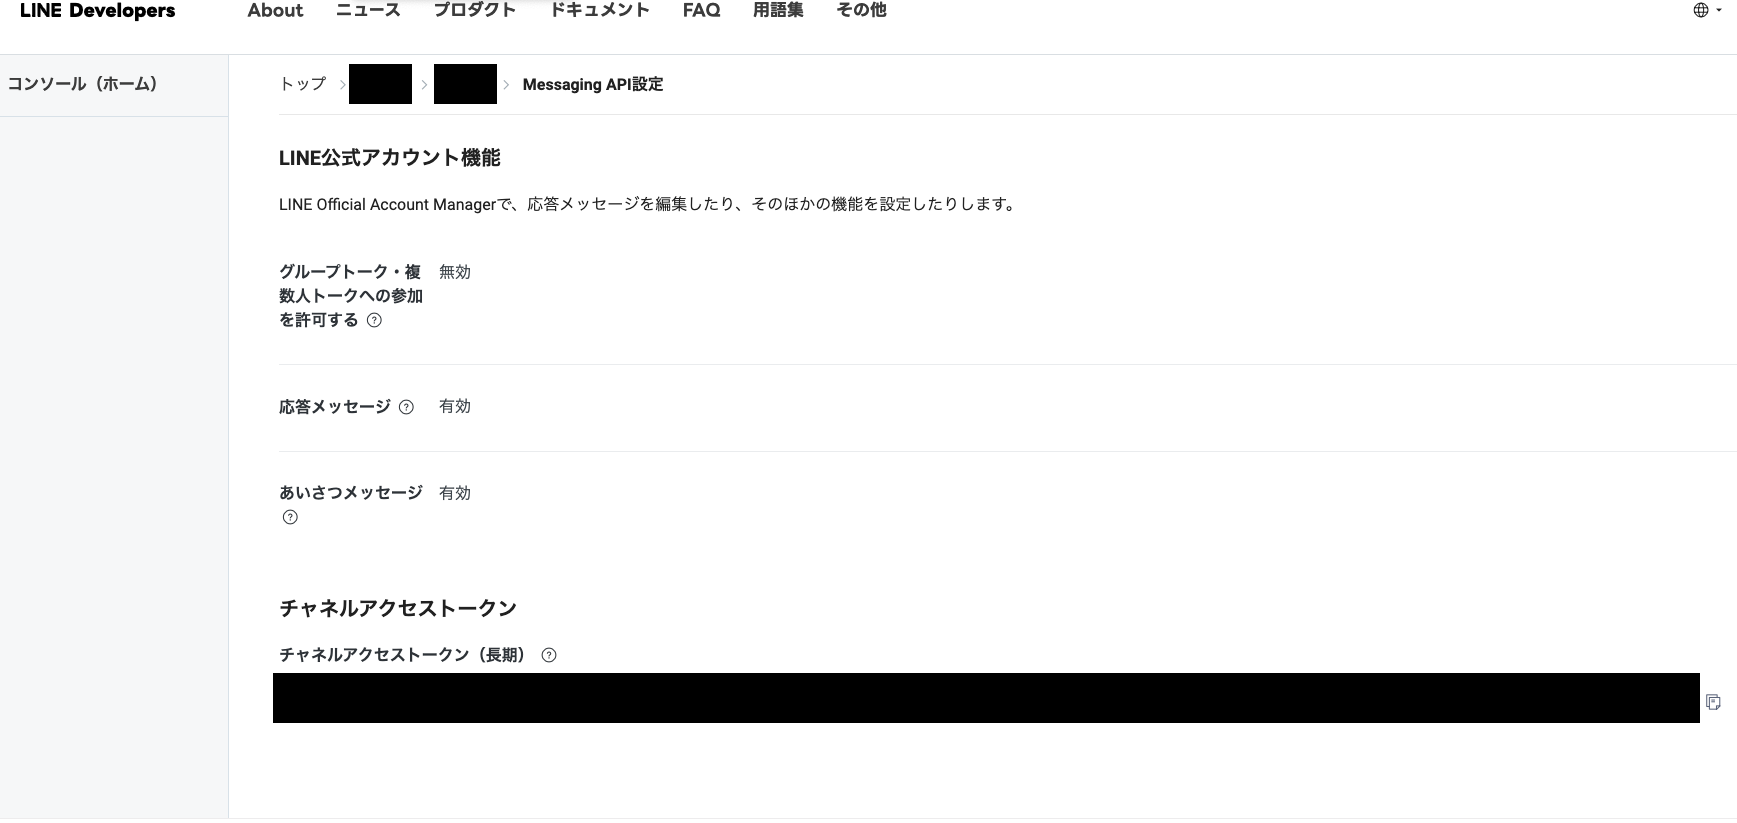
① LINE Messaging API アクセストークンの取得方法
最初に登録したLINE Develpersへログインし、トップ > ボット名 > Messaging API設定の下部にあるチャンネルアクセストークンから取得する
② DeepL API アクセストークンの取得方法
DeepLにアクセスし、右上の自分の名前 > アカウント > API Keysからキーを生成し取得する。登録方法やAPIの使い方などはこの記事を参考にしました。
今回のようなチャットボットはフリープランで十分です。

③ Google Cloud Vision API アクセストークンの取得方法
![]() APIを利用するために、まずOAuthクライアントIDを作成します。この記事通りに進めます。
APIを利用するために、まずOAuthクライアントIDを作成します。この記事通りに進めます。
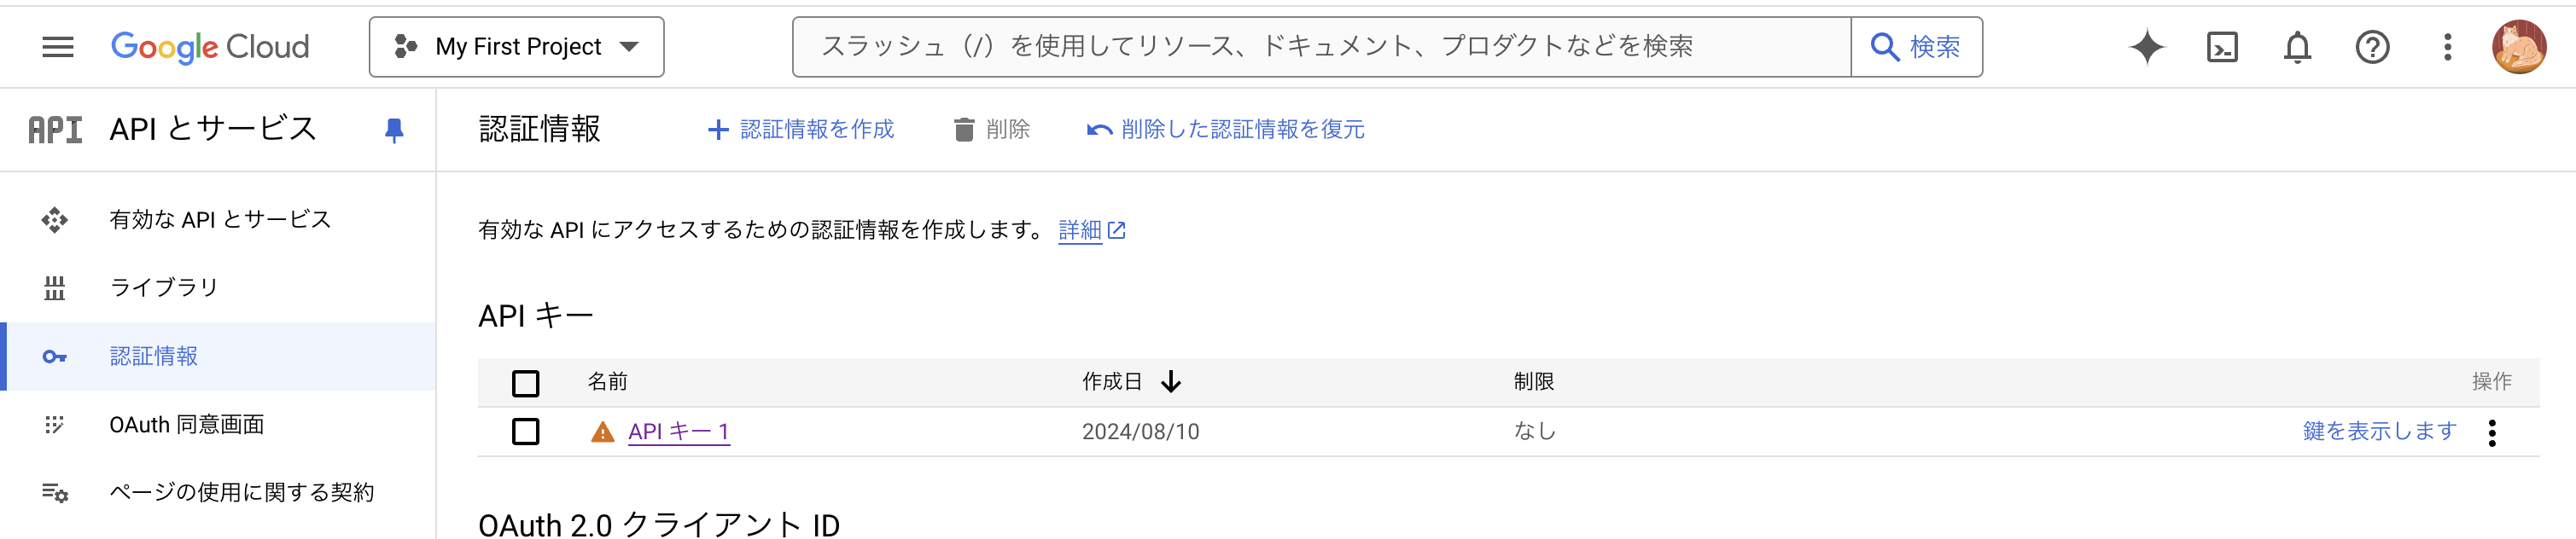
![]() Cloud Vision APIにアクセスし、画面中央の
Cloud Vision APIにアクセスし、画面中央の+認証情報を作成をクリックし、APIキーを選択します

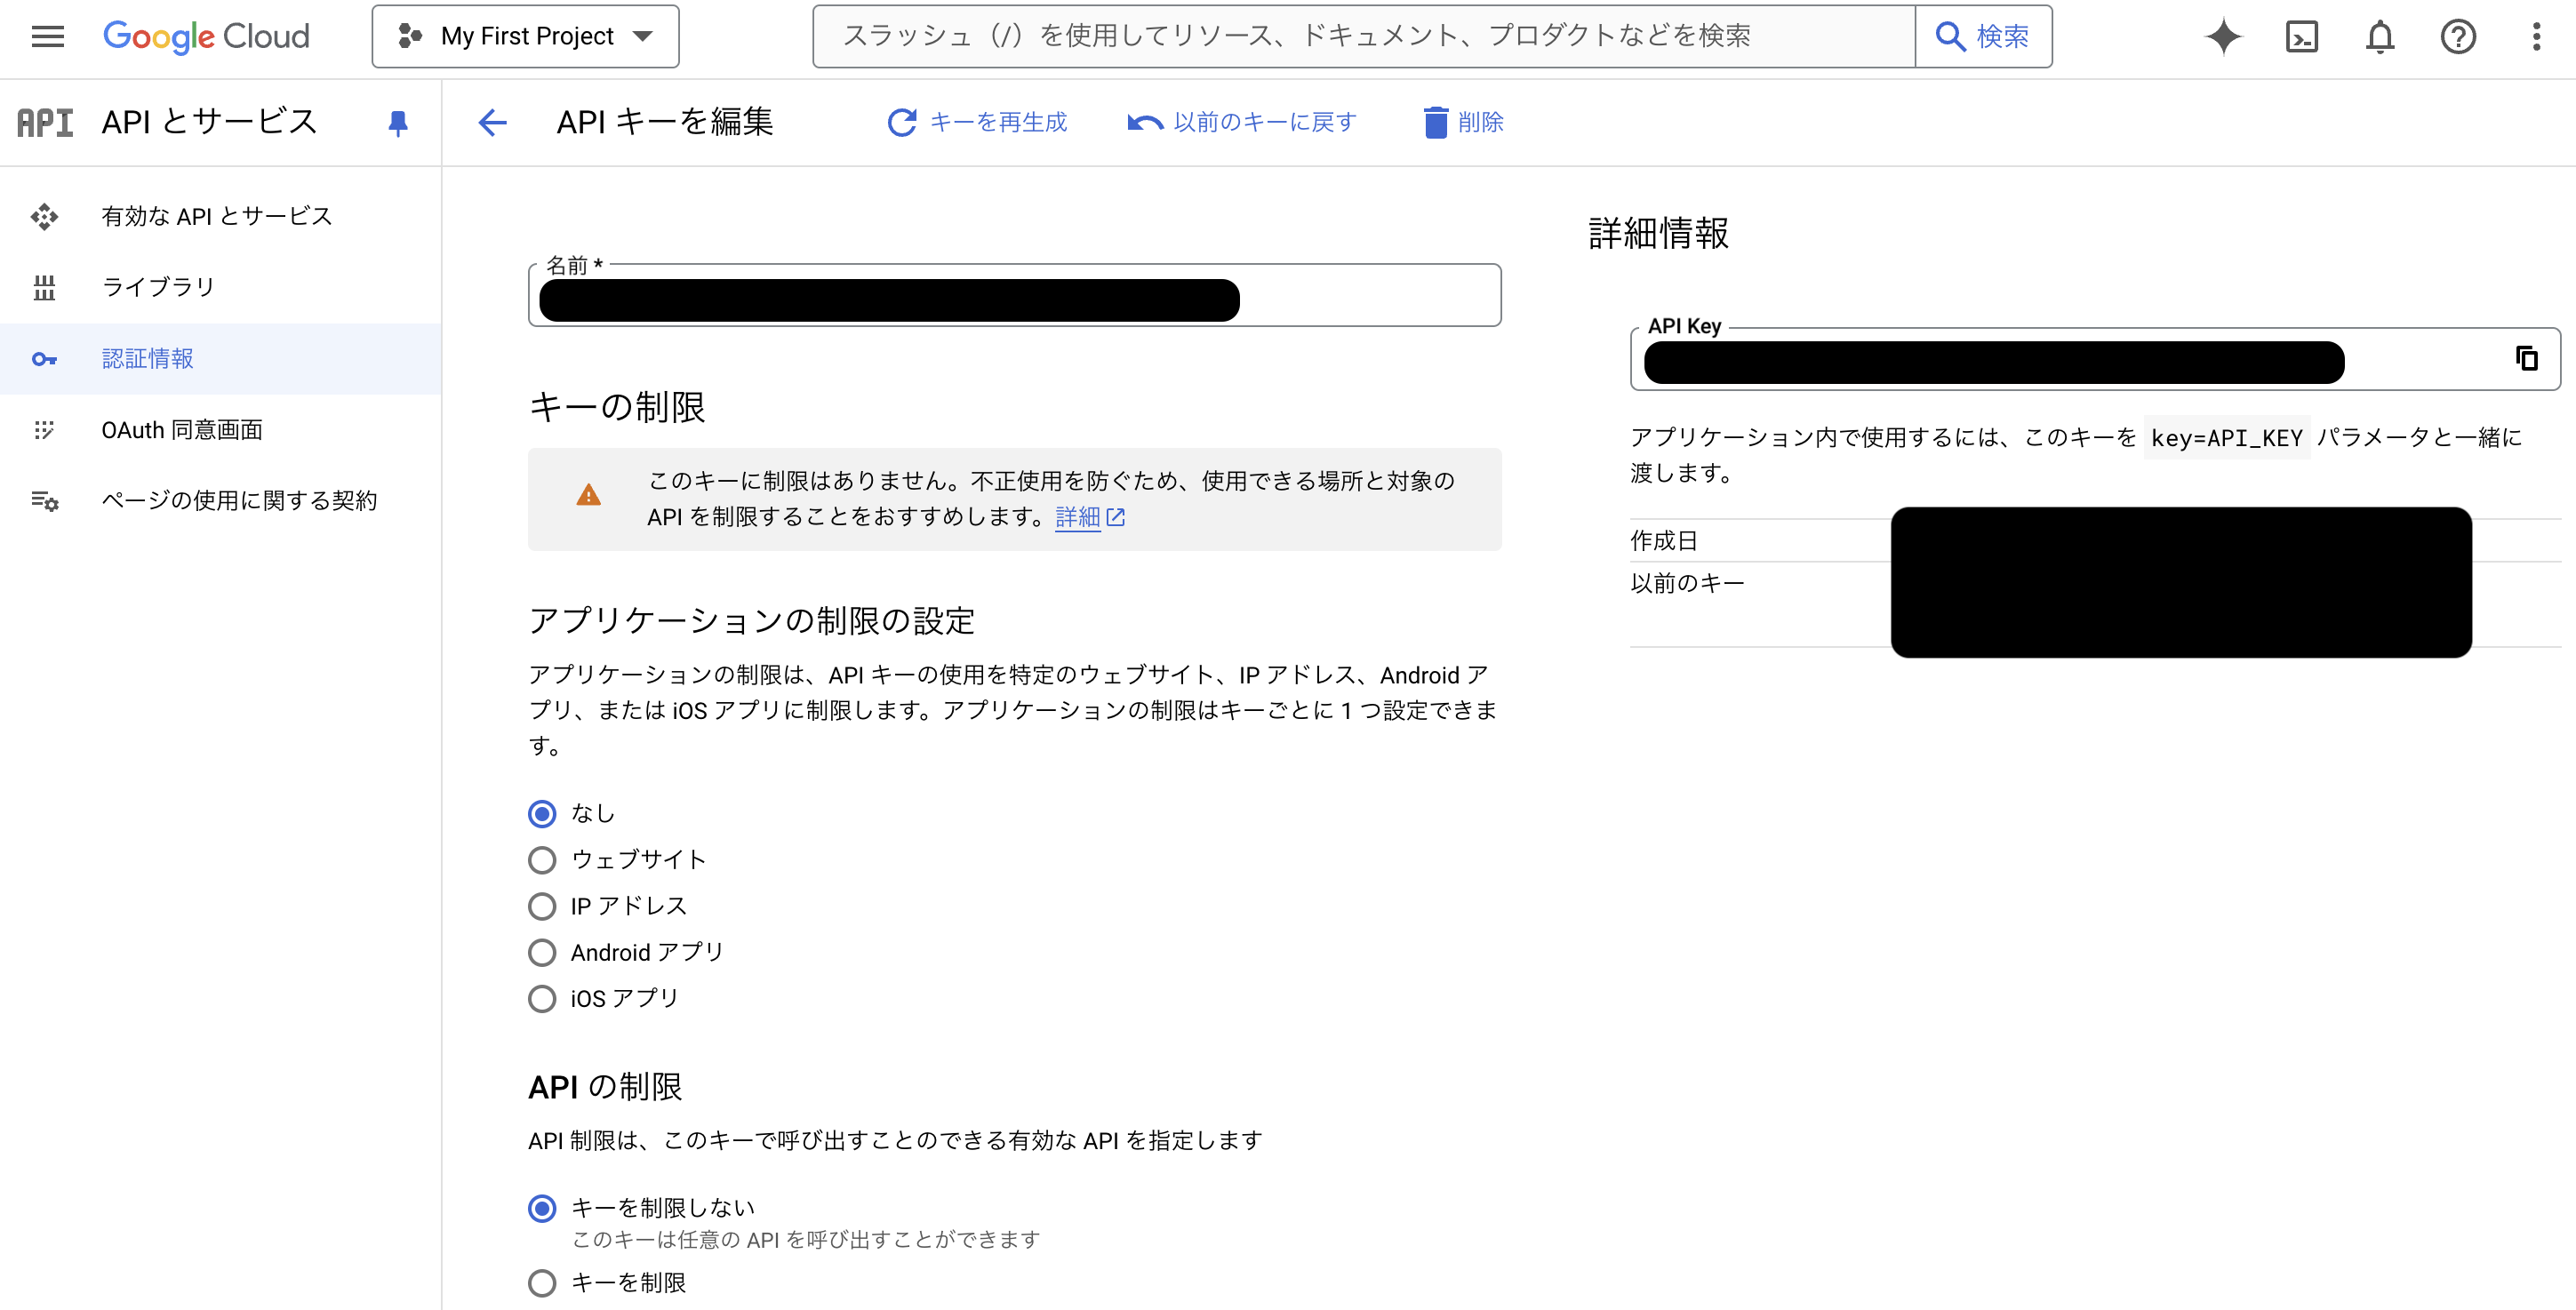
生成されたAPIキーを選択し、
詳細情報 > API Keyから取得する
実装はこれにて終了![]()
ngrokでチャットボットを動かしてみる
① ngrok公式から、該当するファイルをダウンロード
ダッシュボードからYourAuthTokenを取得し、以下のコマンドを当プロジェクトフォルダにて実行します。
ngrok config add-authtoken YOUR_AUTHTOKEN
ngrok http 8000
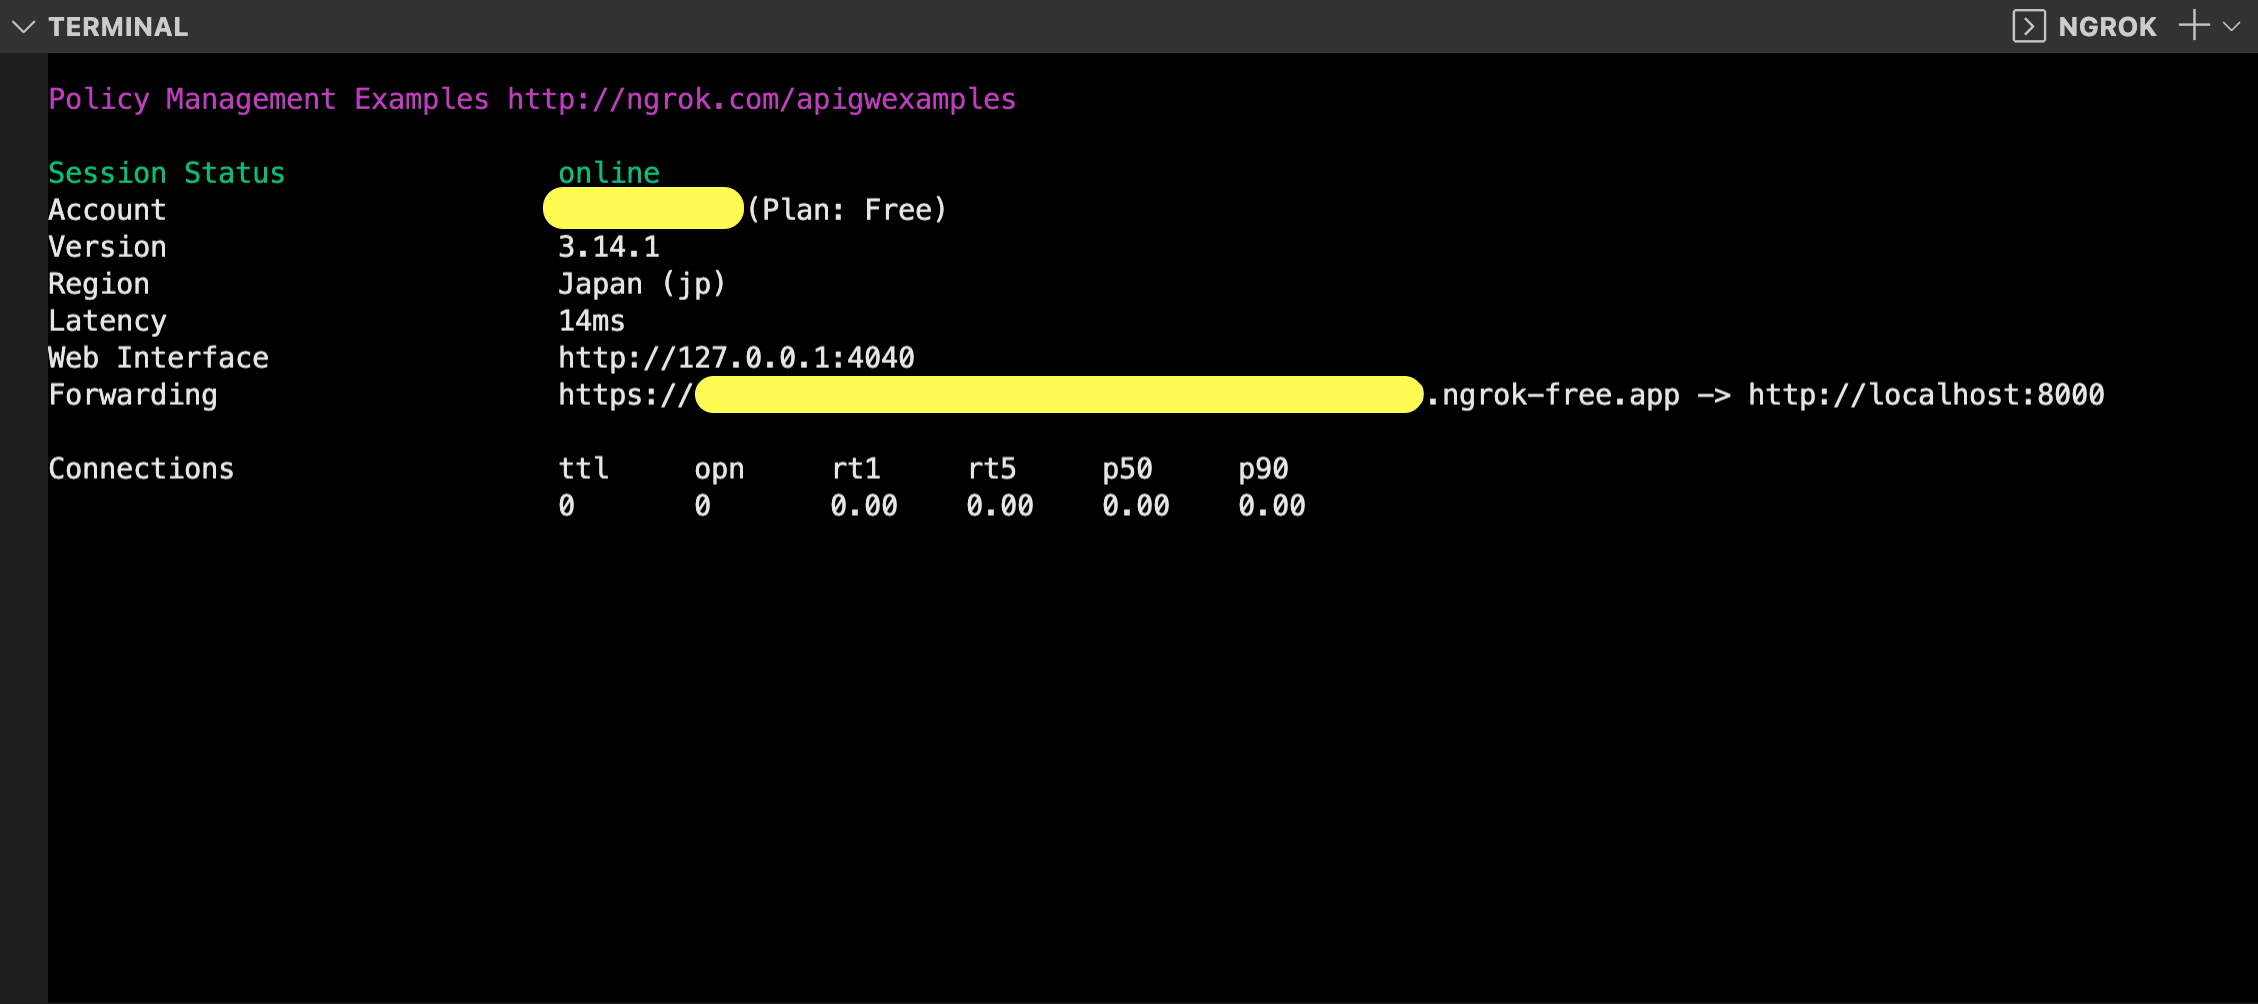
以下のような情報がターミナル上に表示されたらngrokの起動成功です。
② settings.pyにホストを追加
起動したngorkがDjangoプロジェクトにアクセスできるようにします
上の画像、黄色で塗られているForwarding > https:// の右部分を追加する ( -> の前まで)
ALLOWED_HOSTS = ['黄色部分.ngrok-free.app']
③ LINE Developers側にもホストを追加
LINE Develpersへログインし、トップ > ボット名 > Messaging API設定 > Webhook URLにも同じようにホストを追加
上の画像、黄色で塗られているForwarding > https:// の右部分 + /linebot_cat(Djangoプロジェクトのアプリ名)

④ 最後にDjangoプロジェクトの開発サーバーを立ち上げて、ボットを使ってみる
./manage.py runserver
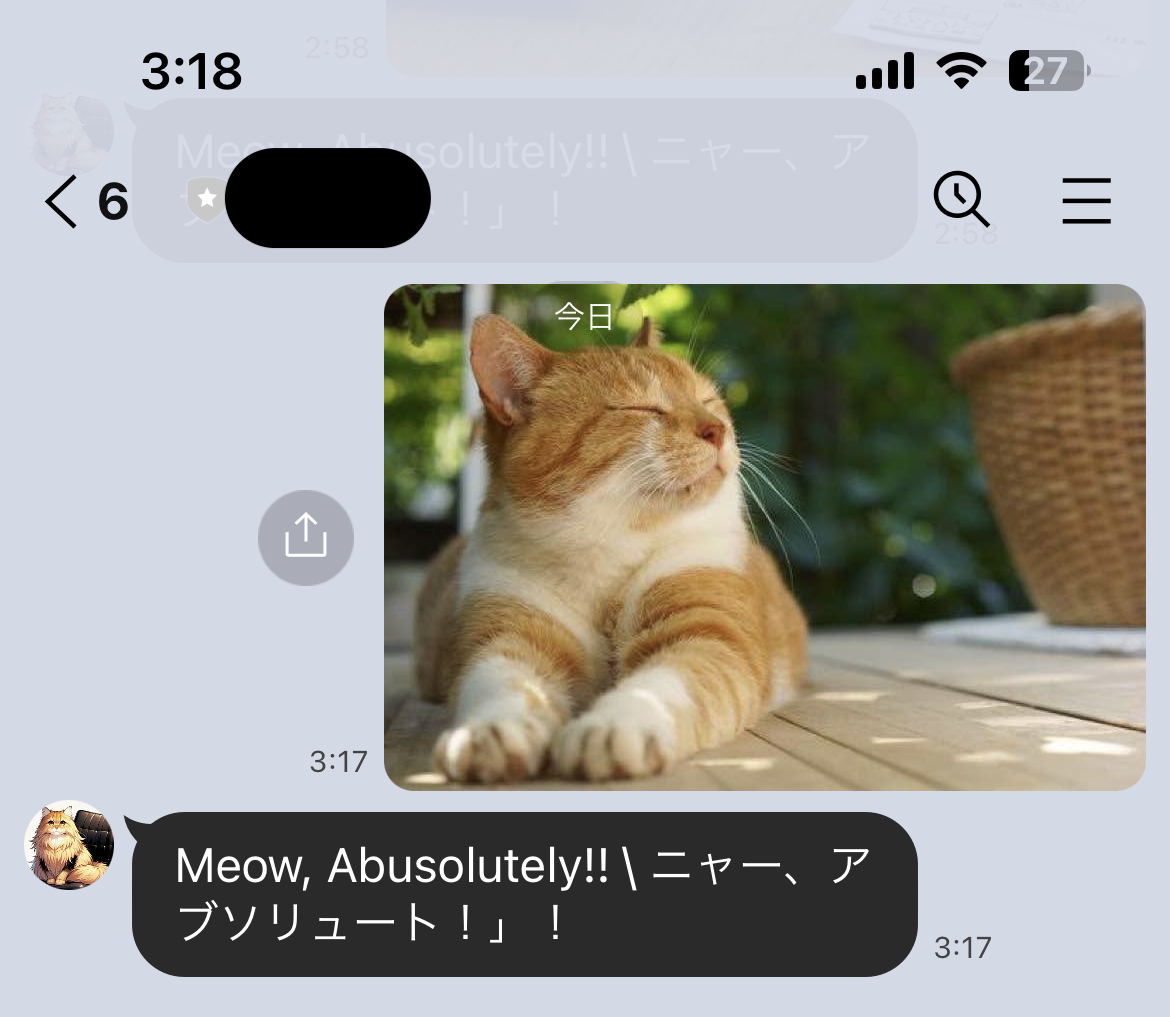
日本語訳が不自然なのはツッコまないでください
猫の場合
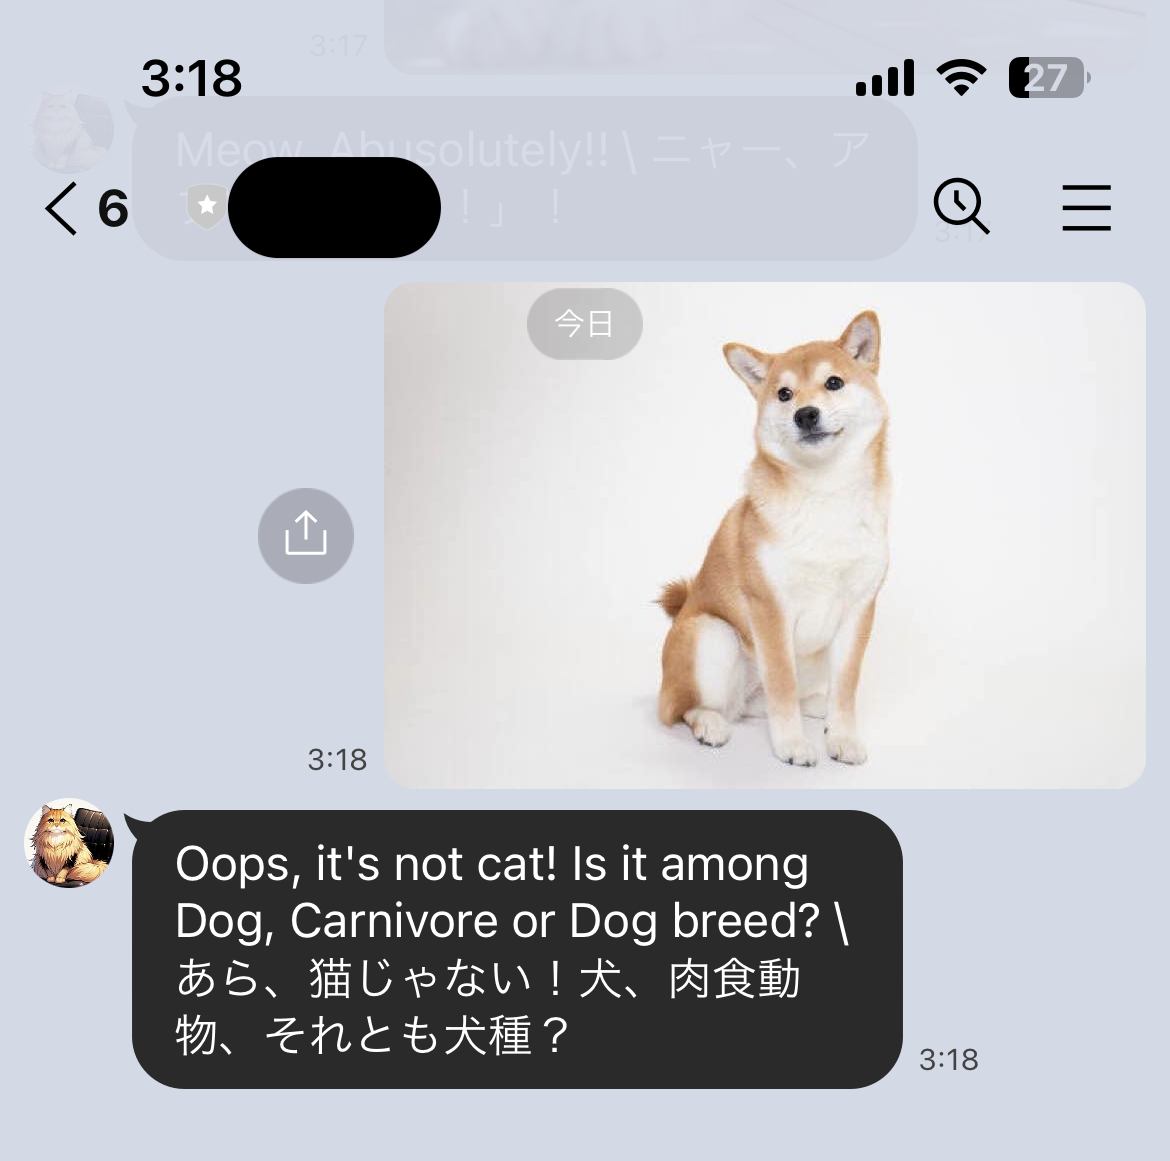
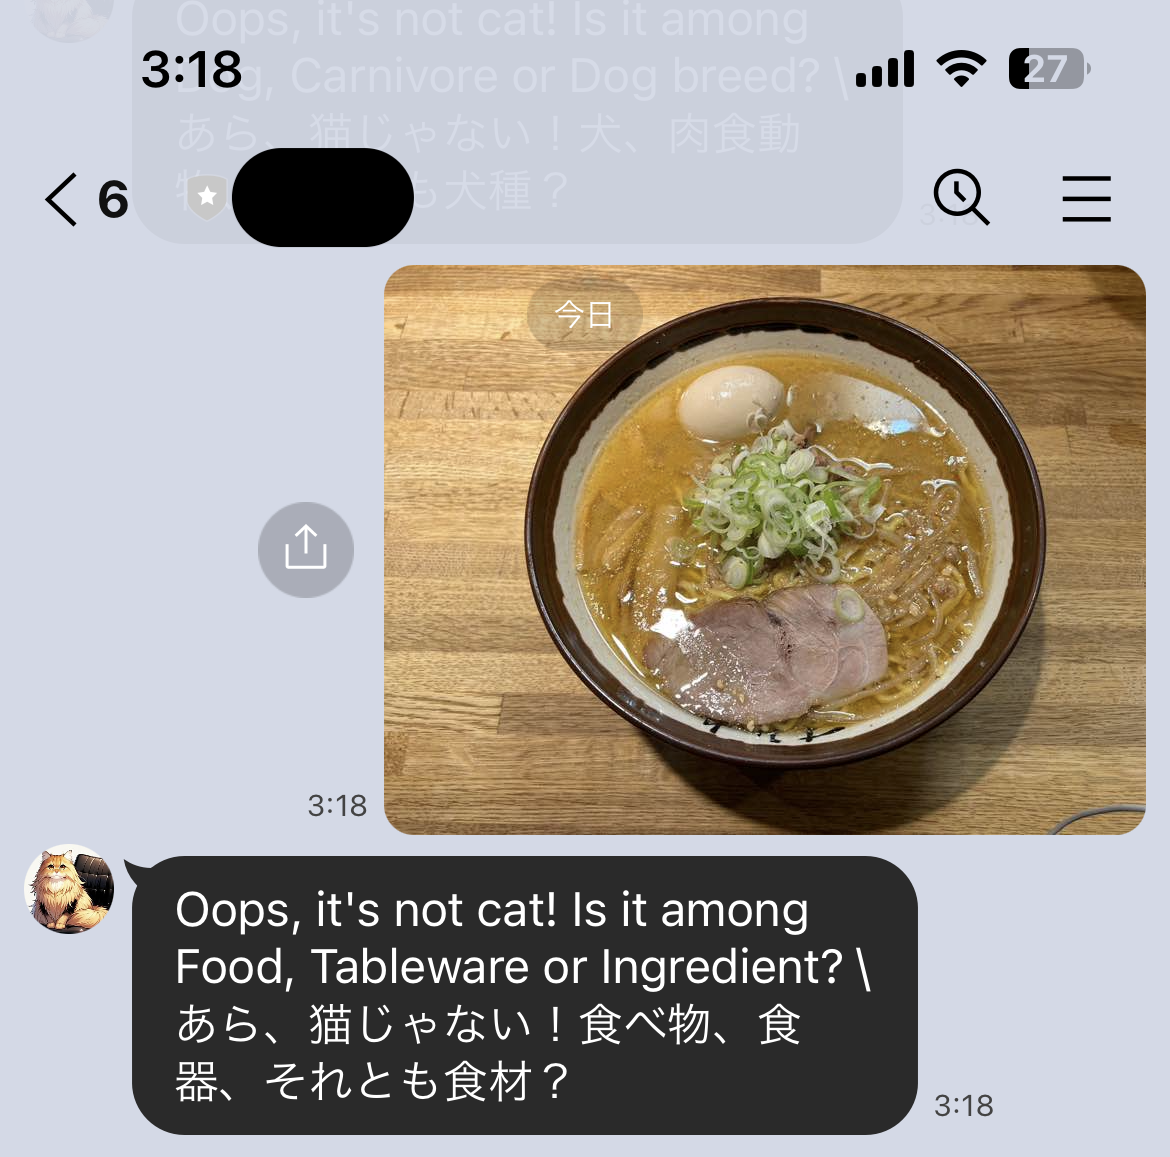
以下、猫以外ならば3つの候補を提示します
└ Google Cloud Visionの結果から、類似度の高い順
犬の場合
ラーメンの場合
GitHub