はじめに
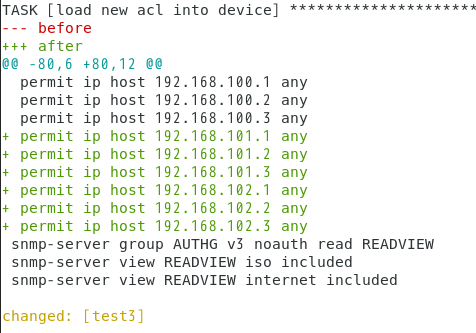
CLIベースのNW機器に対し、Ansibleを使って事前・事後でConfig比較する場合、xxx_configモジュールのdiff_againstオプションを使う事が多いと思います。
簡単に差分確認できて便利なのですが、
- Configの途中を抜粋して表示しているため、例えばACLのエントリ追加を行った時、どのアクセスリストに追加されたかが分かりづらい。
- 標準出力はされるものの、結果を
register等で変数に格納できない。
そのため、比較結果のチェックを含めて自動化する場合は、別の方法が必要なのかなと思いました。
そこで、サードパーティー製のCisco IOSのdiffツール「diffios」を、Ansibleのフィルタープラグインとして取り込んでみました。(diffiosの詳細はGitHubを参照願います。)
セットアップ
Python3.6.7の仮想環境内にインストールした、Ansible2.8.0を使いました。
追加で、diffiosのインストールが必要です。
(venv) [centos@localhost ansible]$ pip install diffios
カスタムフィルター
以下のPythonスクリプトを作成しました。
# !/usr/bin/python
from ansible.errors import AnsibleError

# diffiosのインポート。インポートに失敗した場合、後続の処理でエラー出力できるようにする。
try:
    import diffios
    HAS_DIFFIOS = True
except ImportError:
    HAS_DIFFIOS = False


class FilterModule(object):

    def filters(self):
        return {
            # 左側がPlaybook内で使用するフィルター名、右側が紐付ける関数名。
            'diffios': self.diffios,
        }


    def diffios(self, before, after, mode=None, ignore='ignore.txt'):
    # 差分比較の処理を定義。引数として、before(事前Config)、after(事後Config)、mode(デフォルトは追加・削除分、
    # 'additional'は追加分のみ、'missing'は削除分のみを出力)、ignore(比較対象外のコマンドを記載したファイルパス。
    # デフォルトはAnsible実行ディレクトリ内のignore.txt。)を指定。
        if not HAS_DIFFIOS:
            raise AnsibleError('diffios filter requires Diffios library to be installed')

        diff = diffios.Compare(before, after, ignore)

        if mode is None:
            diff_delta = diff.delta()
            diff_list = diff_delta.split('\n')
            return diff_list

        if mode == 'additional':
            return diff.additional()

        if mode == 'missing':
            return diff.missing()
ベストプラクティスに従い、Playbookを格納しているディレクトリ配下に、filter_pluginsディレクトリを作成し、その中に本ファイルを格納しました。
また、Ansibleがこのカスタムフィルターを認識できるよう、ansible.cfgの設定を以下の通り書き換えました。
[defaults]
filter_plugins     = [Playbook格納ディレクトリのフルパス]/filter_plugins
※ ansible.cfgの格納先は以下コマンドで確認可能です。
(venv) [centos@localhost ansible]$ ansible --version
ansible 2.8.0
  config file = /etc/ansible/ansible.cfg
~ 省略 ~
ignore.txtには、show run実行のタイミングで値の変わるもの、show runとshow confで違いのあるものなどを定義します。
^Using
Building configuration
Current configuration
crypto pki certificate
^end$
Inventoryファイル
今回の対象ホストtest3は、Cisco CSR1000V(IOS-XE)です。
[cisco]
test3 ansible_user=test3 ansible_password=cisco ansible_become_pass=test3

[cisco:vars]
ansible_network_os=ios
ansible_become=yes
ansible_become_method=enable
Playbook
大まかな流れは以下の通りです。
<事前Config取得>
(1) show runの実行
(2) ファイル保存
<設定変更>
(3) ACL追加・削除
(4) 新規インターフェース設定
※各タスクで設定保存も実施
<事後Config取得>
(5) show runの実行
(6) ファイル保存
<Config比較>
diffiosフィルターを使い、事前・事後のConfigファイルに対し、
(7) オプションなしで追加・削除分を出力
(8) additionalオプションで追加分のみを出力
(9) missingオプションで削除分のみを出力
---

- hosts: cisco
  gather_facts: no
  connection: network_cli

  tasks:
    - name: collect config (before)  #(1)
      ios_command:
        commands:
          - show run
      register: result_before

    - name: export log (before)  #(2)
      copy:
        owner: centos
        group: centos
        content: "{{ result_before.stdout[0] }}"
        dest: "{{ dest_before }}"

    - name: load new acl into device  #(3)
      ios_config:
        lines:
          - no permit ip host 192.168.108.1 any
          - no permit ip host 192.168.108.2 any
          - no permit ip host 192.168.108.3 any
          - permit ip host 192.168.109.1 any
          - permit ip host 192.168.109.2 any
          - permit ip host 192.168.109.3 any
        parents: ip access-list extended test
        save_when: modified

    - name: configure interface  #(4)
      ios_config:
        lines:
          - description test
          - ip address 10.10.10.10 255.255.255.0
          - no shutdown
        parents: interface GigabitEthernet3
        save_when: modified

    - name: collect config (after)  #(5)
      ios_command:
        commands:
          - show run
      register: result_after

    - name: export config (after)  #(6)
      copy:
        owner: centos
        group: centos
        mode: '0644'
        content: "{{ result_after.stdout[0] }}"
        dest: "{{ dest_after }}"

    - name: debug compare result (delta)  #(7)
      debug:
        msg: '{{ dest_before | diffios(dest_after) }}'

    - name: debug compare result (additional)  #(8)
      debug:
        msg: "{{ dest_before | diffios(dest_after, 'additional') }}"

    - name: debug compare result (missing)  #(9)
      debug:
        msg: "{{ dest_before | diffios(dest_after, 'missing') }}"

  vars:
    dest_before: ./log_before/{{ inventory_hostname }}_shrun.cfg
    dest_after: ./log_after/{{ inventory_hostname }}_shrun.cfg
実行結果
(7)では差分が削除(-)、追加(+)がリスト形式で出力されています。(8)は追加分のみが、(9)は削除分のみがConfigと同じ形式で(+/-なしで)表示されているのが分かります。
(venv) [centos@localhost ansible]$ ansible-playbook -i inventory playbook1_shrun6.yml

PLAY [cisco] ***************************************************************************************************

TASK [collect config (before)] *********************************************************************************
ok: [test3]

TASK [export log (before)] *************************************************************************************
changed: [test3]

TASK [load new acl into device] ********************************************************************************
changed: [test3]

TASK [configure interface] *************************************************************************************
changed: [test3]

TASK [collect config (after)] **********************************************************************************
ok: [test3]

TASK [export config (after)] ***********************************************************************************
changed: [test3]

TASK [debug compare result (delta)] ****************************************************************************
ok: [test3] => {
    "msg": [
        "--- baseline",
        "+++ comparison",
        "",
        "-   1: interface GigabitEthernet3",
        "-       no ip address",
        "-       shutdown",
        "-   2: ip access-list extended test",
        "-       permit ip host 192.168.108.1 any",
        "-       permit ip host 192.168.108.2 any",
        "-       permit ip host 192.168.108.3 any",
        "",
        "+   1: interface GigabitEthernet3",
        "+       description test",
        "+       ip address 10.10.10.10 255.255.255.0",
        "+   2: ip access-list extended test",
        "+       permit ip host 192.168.109.1 any",
        "+       permit ip host 192.168.109.2 any",
        "+       permit ip host 192.168.109.3 any",
        ""
    ]
}

TASK [debug compare result (additional)] ***********************************************************************
ok: [test3] => {
    "msg": [
        [
            "interface GigabitEthernet3",
            " description test",
            " ip address 10.10.10.10 255.255.255.0"
        ],
        [
            "ip access-list extended test",
            " permit ip host 192.168.109.1 any",
            " permit ip host 192.168.109.2 any",
            " permit ip host 192.168.109.3 any"
        ]
    ]
}

TASK [debug compare result (missing)] **************************************************************************
ok: [test3] => {
    "msg": [
        [
            "interface GigabitEthernet3",
            " no ip address",
            " shutdown"
        ],
        [
            "ip access-list extended test",
            " permit ip host 192.168.108.1 any",
            " permit ip host 192.168.108.2 any",
            " permit ip host 192.168.108.3 any"
        ]
    ]
}

PLAY RECAP *****************************************************************************************************
test3                      : ok=9    changed=4    unreachable=0    failed=0    skipped=0    rescued=0    ignored=0
最後に
今回は差分出力までの例をご紹介しましたが、後続のタスクで追加・削除の想定Configを同じくリスト形式で定義すれば、differenceフィルターによる比較チェックも可能だと思います。