🧑💻はじめに(自己紹介)
『チームぶんたん』のカバかもんです。
普段はシナリオライターとして活動しつつ、
UnityやNaninovelを用いたADVゲームの実装支援を行っています。
- Unity実装、宴・Naninovelカスタマイズ
- ゲームスクリプト
- シナリオ制作
など、ノベルゲームにまつわることはワンストップで丸投げでお任せできます。
ぜひ下記団体のリンクからお問合せください!
👉 団体サイトはこちら
→ チームぶんたん
🎯この記事でできること
この記事では
- Unity 6 (6000.0.62f)
- Naninovel v1.21-stable build 2026-03-28
上記のソフトウェアを使用しています
👉 Naninovelのシナリオから任意のSprite(画像)を表示する方法
具体的には…
- アイテム画像をポップアップ表示
- UIに画像を差し込む
- シナリオ制御と連動させる
といったことができるようになります。
なぜこの仕組みが必要なのか?
Naninovelには標準で背景やキャラクターを表示する機能があります。
……ところがなんと、Spriteを専門で表示させるコマンドがない!😱
つまりノベルゲームやアドベンチャーゲームでよく見かけるこんなかんじのSprite…
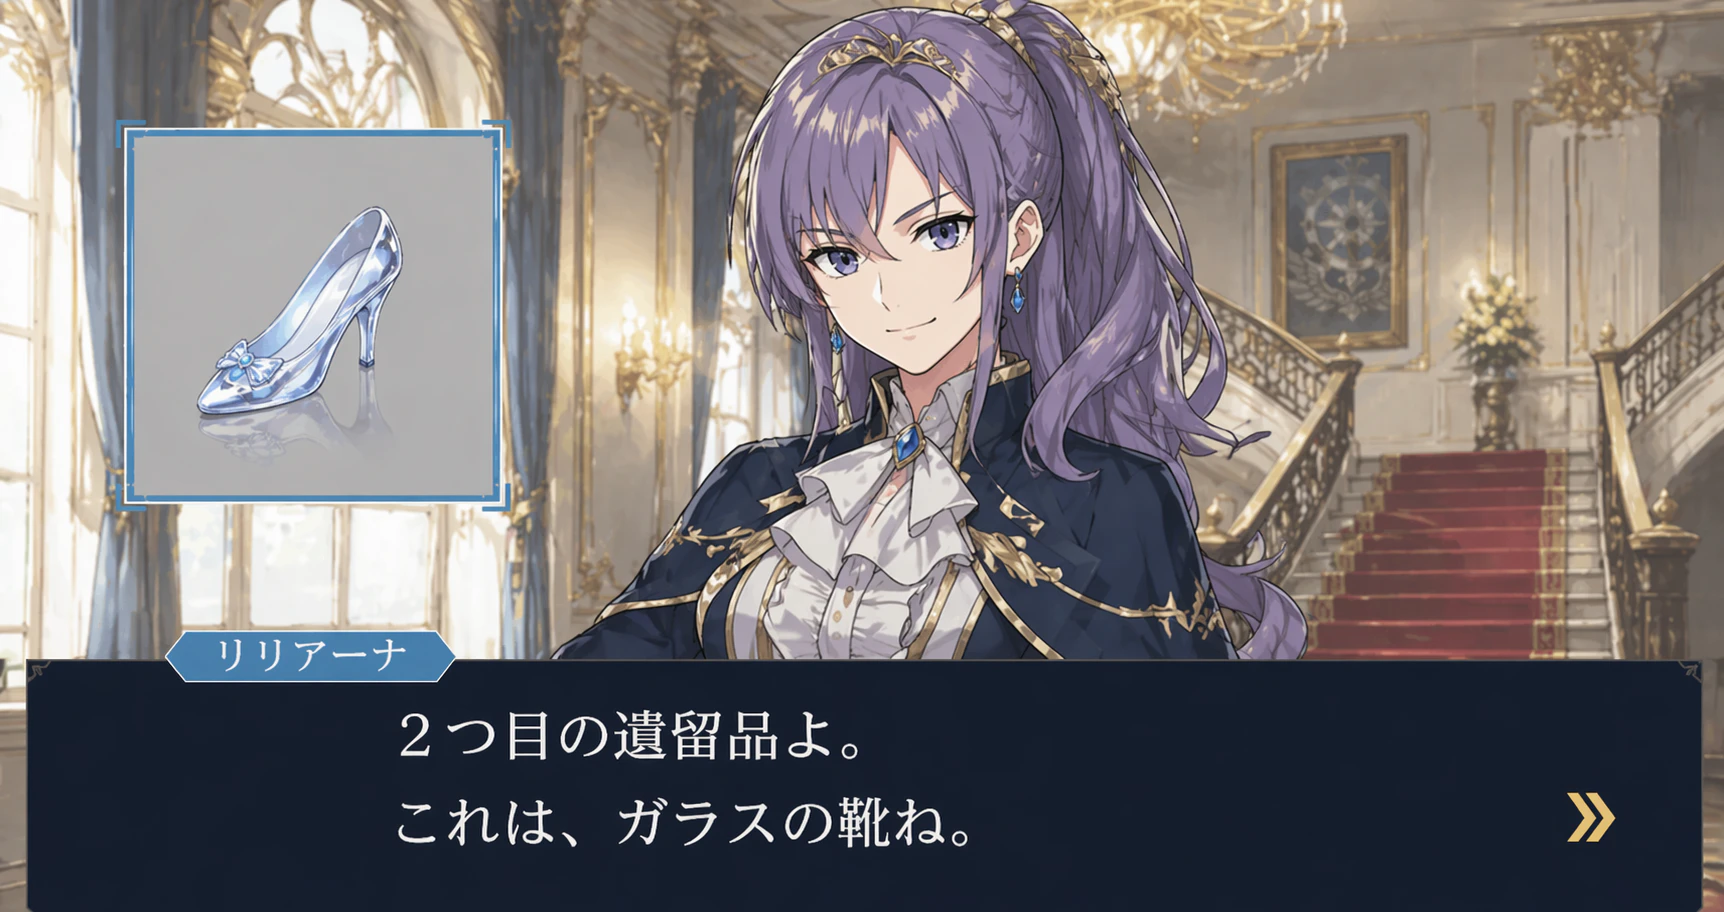
これを出すのがなかなか難しいんです😭
この記事の読者にはきっと…
- 昔ながらの恋愛・探偵もののアドベンチャーゲームを作りたい
- 入手したアイテム画像を自由に表示させたい
と思っている方がいっぱいいらっしゃるはずです。
ですがこれ……
👉 専用UI + カスタムコマンドで解決できます
「そんなシステム、イチから作るのめんどい……😩」
ごもっともです。なので今回私が……
* 『触れて、愛して、お願い』で実装したアイテムUIのシステムの配布
* システムの実装方法の解説
を行います🎉
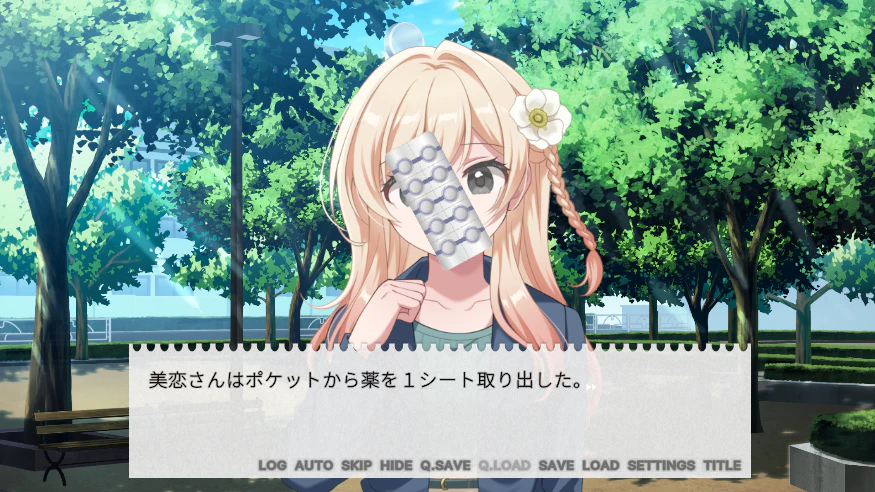
本作では物語のキーとなる『薬』を表示するのに使いました
引用元『触れて、愛して、お願い』
(https://freegame-mugen.jp/adventure/game_14665.html)
アドオンをオープンソース化したのでどなたでも楽に導入いただけます🤩
実装デモ
実装
やることはシンプルで、
- UIを1枚用意
- Sprite差し替え処理を書く
- Naninovelから呼ぶ
これだけです。
方法A:GitHubアドオンで導入(初心者向け)
👉 とりあえず動かしたい人はこちら
手順
下記リンクからアドオンをダウンロード
 ↓
アドオンから欲しい素材を Assets フォルダに配置
 ↓
NaninovelのUI設定を確認
※やり方は本稿『失敗しやすいポイント』の③Prefab未設定を参照してください
 ↓
シナリオを再生
これだけでOKです。
アドオンをZIPでダウンロードする
方法B:一から組み上げる
👉 仕組みを理解したい人はこちら
① UIを作成
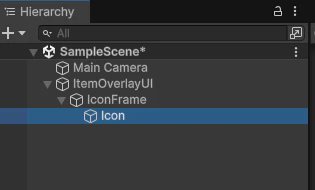
- ItemOverlayUI は: UI > Canvas
- IconFrame と Icon は: UI > Image
から作成してください
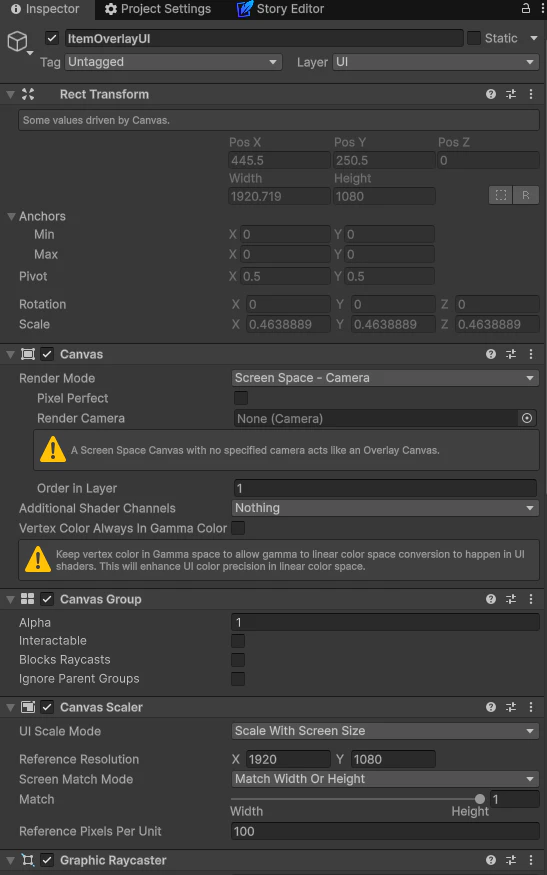
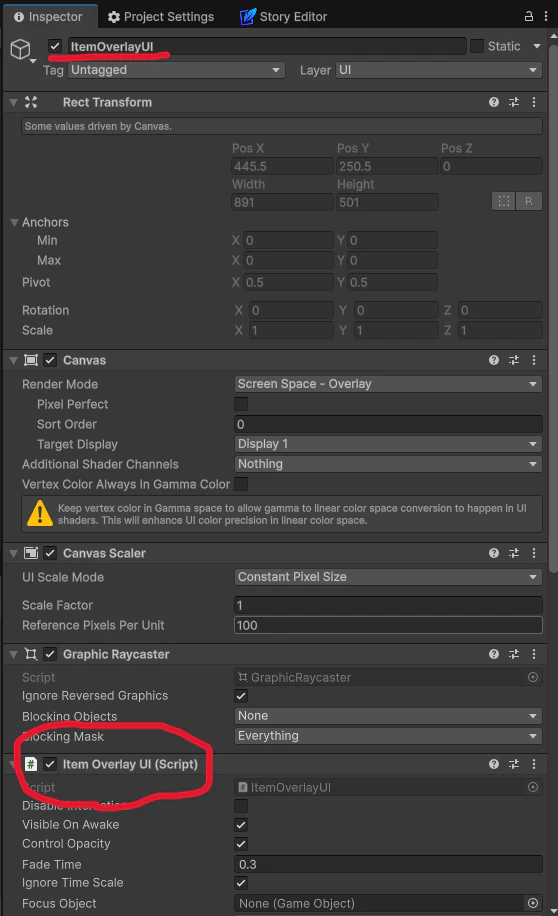
②ゲームオブジェクトの設定
| ゲームオブジェクト | Inspectorビューにてこのように設定 |
|---|---|
| ItemOverlay |
|
| IconFrame | Image コンポーネントをRemoveしてください |
ItemOverlayに、ItemOverlay.csスクリプトを Add Component します。
💻 コード
📄 ItemOverlayUI.cs(クリックで展開)
using Naninovel.UI;
using UnityEngine;
using UnityEngine.UI;

public class ItemOverlayUI : CustomUI
{
    [Header("Assign in prefab")]
    [SerializeField] private RectTransform iconFrame;
    [SerializeField] private Image icon;

    private RectTransform iconRect;
    private float frameWidth = 300f;
    private float frameHeight = 300f;

    protected override void Awake()
    {
        base.Awake();

        if (icon)
        {
            iconRect = icon.rectTransform;
            icon.raycastTarget = false;
            icon.enabled = false;

            iconRect.anchorMin = new Vector2(0.5f, 0.5f);
            iconRect.anchorMax = new Vector2(0.5f, 0.5f);
            iconRect.pivot = new Vector2(0.5f, 0.5f);
            iconRect.anchoredPosition = Vector2.zero;
            iconRect.localScale = Vector3.one;
        }

        if (iconFrame)
        {
            iconFrame.anchorMin = iconFrame.anchorMax = new Vector2(0.5f, 0.5f);
            iconFrame.pivot = new Vector2(0.5f, 0.5f);
            iconFrame.anchoredPosition = Vector2.zero;
        }
    }

    public void SetSprite(Sprite sprite)
    {
        if (!icon || !iconRect) return;

        icon.sprite = sprite;
        icon.enabled = sprite != null;
        icon.raycastTarget = false;

        RefreshIconSize();
    }

    public void SetSize(int width, int height)
    {
        frameWidth = Mathf.Max(1, width);
        frameHeight = Mathf.Max(1, height);

        if (iconFrame)
            iconFrame.sizeDelta = new Vector2(frameWidth, frameHeight);

        RefreshIconSize();
    }

    public void SetCenter()
    {
        if (!iconFrame) return;

        iconFrame.anchorMin = iconFrame.anchorMax = new Vector2(0.5f, 0.5f);
        iconFrame.pivot = new Vector2(0.5f, 0.5f);
        iconFrame.anchoredPosition = Vector2.zero;
    }

    public void SetColor(Color color)
    {
        if (!icon) return;
        icon.color = color;
    }

    private void RefreshIconSize()
    {
        if (!icon || !iconRect || !icon.sprite) return;

        var r = icon.sprite.rect;
        if (r.width <= 0 || r.height <= 0) return;

        float spriteW = r.width;
        float spriteH = r.height;

        float scale = Mathf.Min(frameWidth / spriteW, frameHeight / spriteH);

        float finalW = spriteW * scale;
        float finalH = spriteH * scale;

        iconRect.sizeDelta = new Vector2(finalW, finalH);
        iconRect.anchoredPosition = Vector2.zero;
        iconRect.localScale = Vector3.one;
    }
}
アドオンの Assets/Scripts/UI にあります
ItemOverlay.csはCustomUIクラスを継承しているので
相方になるC#スクリプトがないと動いてくれません
相方となるC#スクリプトはこちら
💻 コード
📄 ItemSpriteCommand.cs(クリックで展開)
using System;
using Naninovel;
using Naninovel.Commands;
using UnityEngine;

[Serializable, Alias("itemSprite")]
public class ItemSpriteCommand : Command
{
    [Alias("path")] public StringParameter Path;
    [Alias("w")] public IntegerParameter Width;
    [Alias("h")] public IntegerParameter Height;
    [Alias("color")] public StringParameter ColorHex;

    public override Awaitable Execute(ExecutionContext ctx)
    {
        var ui = Engine.GetService<IUIManager>()?.GetUI<ItemOverlayUI>();
        if (ui == null)
        {
            Debug.LogError("[itemSprite] ItemOverlayUI UI not found.");
            return Async.Completed;
        }

        int width = Assigned(Width) ? Width.Value : 300;
        int height = Assigned(Height) ? Height.Value : 300;

        ui.SetCenter();
        ui.SetSize(width, height);

        if (!Assigned(Path))
        {
            Debug.LogError("[itemSprite] 'path' parameter is required.");
            ui.SetSprite(null);
            return Async.Completed;
        }

        var path = Path.Value.Trim('"');
        var sprite = Resources.Load<Sprite>(path);
        if (sprite == null)
        {
            Debug.LogError($"[itemSprite] Sprite not found at Resources path: {path}");
            ui.SetSprite(null);
            return Async.Completed;
        }

        ui.SetSprite(sprite);

        if (Assigned(ColorHex))
        {
            var hex = ColorHex.Value.Trim().Trim('"');
            if (ColorUtility.TryParseHtmlString(hex, out var color))
                ui.SetColor(color);
            else
            {
                Debug.LogError($"[itemSprite] Invalid color hex: {hex}");
                ui.SetColor(Color.white);
            }
        }
        else
        {
            ui.SetColor(Color.white);
        }

        return Async.Completed;
    }
}
アドオンの Assets/Scripts/Commands にあります
ItemSpriteCommand.csはゲームオブジェクトにアタッチする必要ありません
スクリプト内容の説明は紙幅を大きく割いてしまうので
[こちらにて解説いたします]
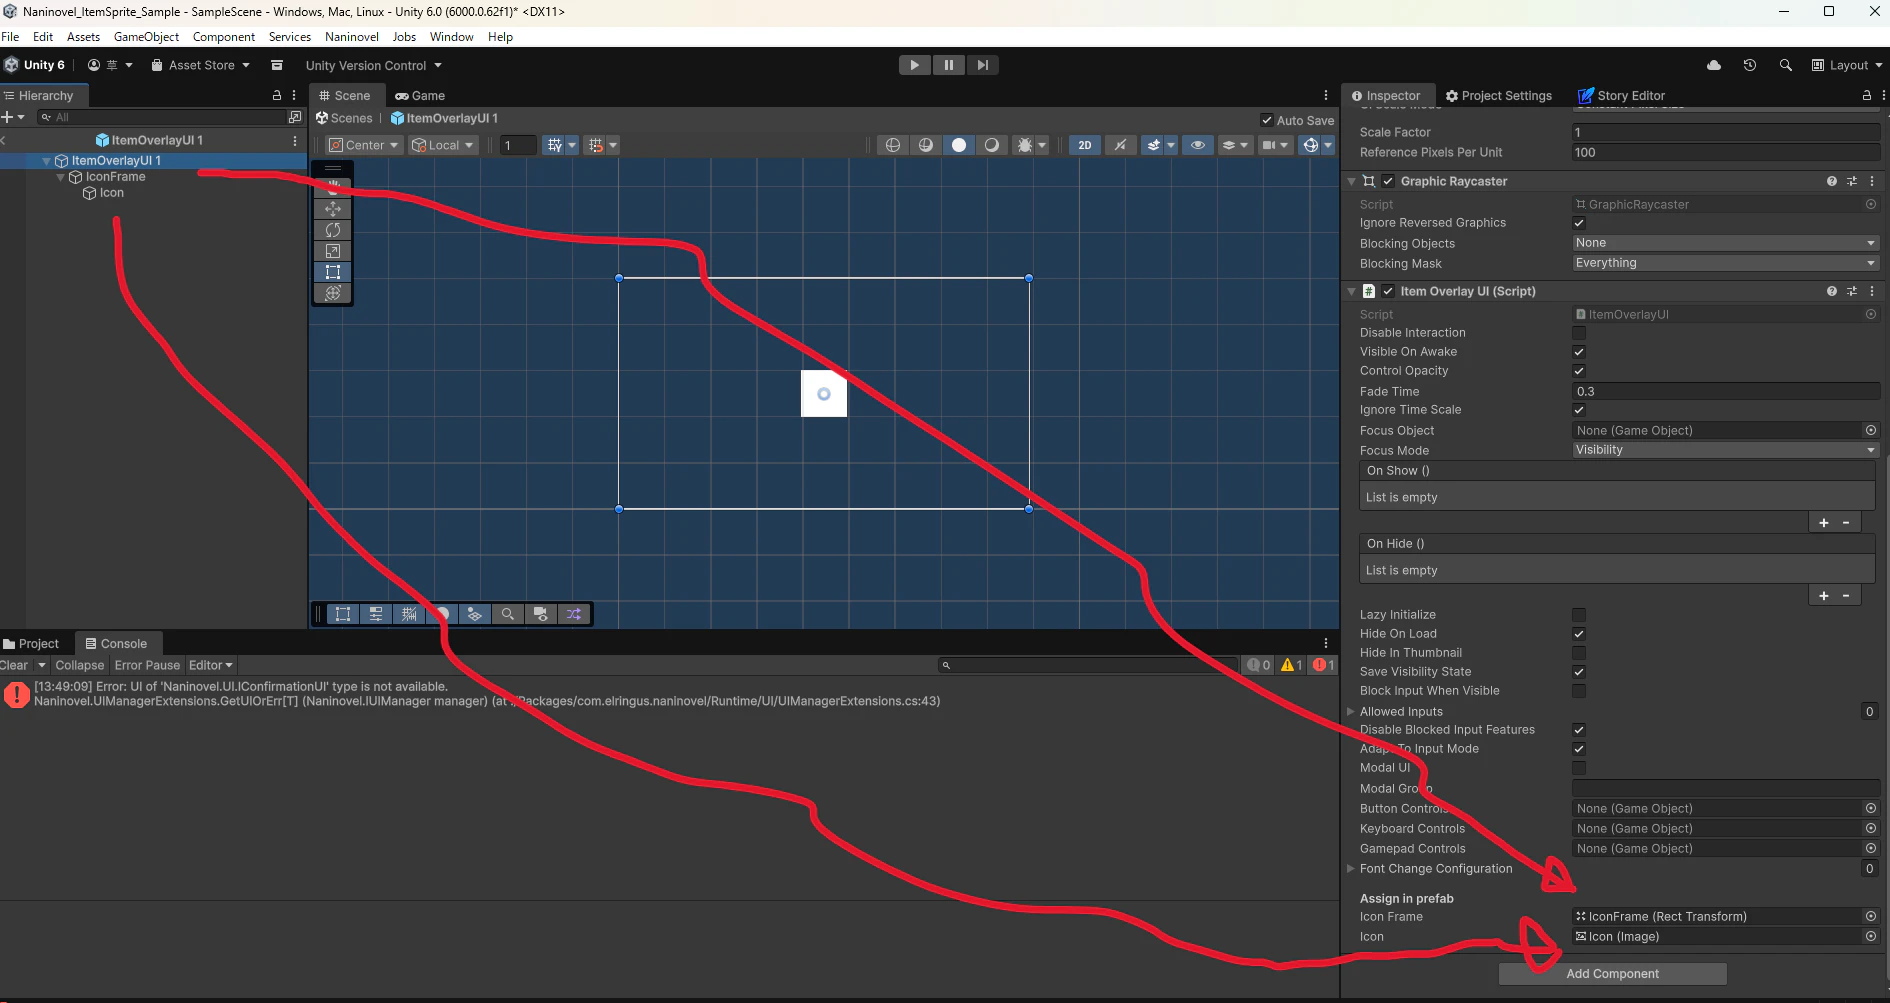
ItemOverlayコンポーネントにオブジェクトをアタッチ
ItemOverlayゲームオブジェクトにとりつけた
ItemOverlayコンポーネントに(ややこしい…)
他のゲームオブジェクトをアタッチします。
こうしないとItemOverlay.csが
どのゲームオブジェクトになんの処理をしていいかがわからず
正しく動作してくれなくなります
| ゲームオブジェクト | ItemOverlayのInspectorビューにて設定 |
|---|---|
| IconFrame | Assaign in Prefab > Icon Frame |
| Icon | Assaign in Prefab > Icon |
③ Prefab化
ItemOverlayUI を Prefab化
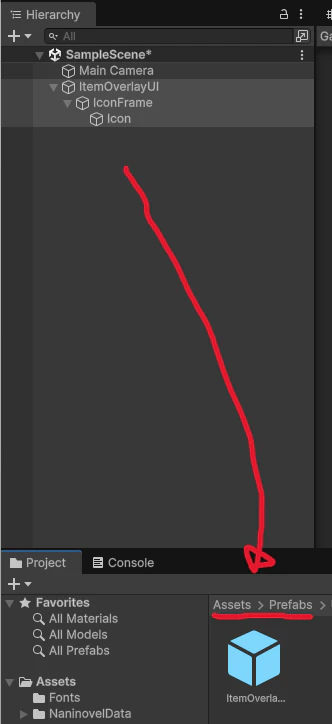
ヒエラルキービューからItemOverlayUI,IconFrame,Iconを複数選択して
任意の場所にドラック&ドロップ
※アドオンでは Assets/Prefabs にしています
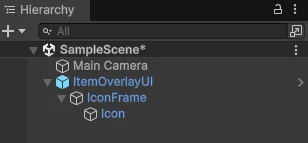
上手くいくと、ヒエラルキービューのItemOverlayUI,IconFrame,Iconが青くなります。
④ Resources配置(超重要)
Naninovelでは基本的に、Resorce配下の素材しか読み取ってくれません
なのでアドオンではSpriteとして表示させる素材を
Assets/Naninovel/ReSource/Naninovel/MiniSprite に格納しています
🎊 これで準備は完了 🎊
呼び出し:

@itemSprite path:パス名 で呼び出せます✨
カスタムコマンドに赤い波線が入るけど気にするな❗
スクリプトの要点まとめ
ItemSpriteCommand.csを作ることでCustomCommandとして登録
 ↓
pathを受け取る
 ↓
Resources.LoadでSprite取得
 ↓
ItemOverlayUI.csでImageを参照
 ↓
Spriteを差し替え
失敗しやすいポイント(重要)
ここはちゃんと潰します👇
❌① Resourcesパスミス
-Assets/Textures/teddyBear_whiteBack.png (👉 NG)
+Assets/Resources/Items/teddyBear_whiteBack.png  (👉 OK)
パス名はきちんと正確に👍
❌② Sprite Import設定
👉 Singleにすること
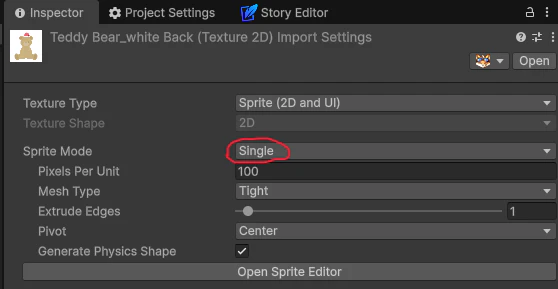
デフォルトで設定される Multiple は分割・拡大縮小するときは便利なんですけど……
今回の場合、表示する画像のサイズは固定するので、
取り回しのしやすい Single にしました!
❌③ Prefab未設定
UIとして登録されないと、Naninovel側が認識してくれません。
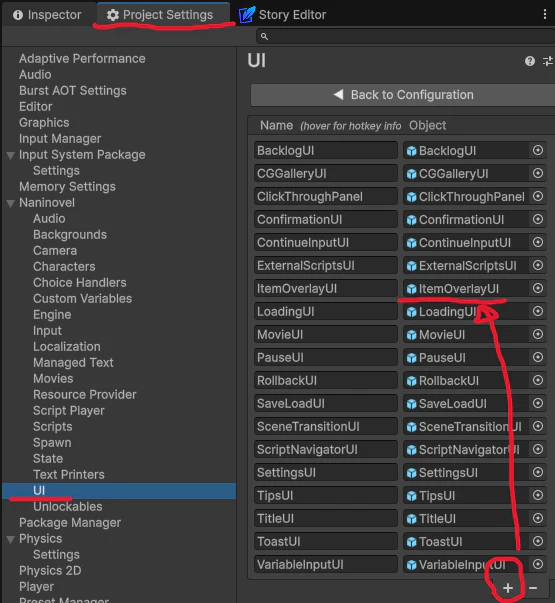
Unityのメニューバー > Naninovel > Configuration をクリック
Project Settings を開いてください
 ↓
Naninovel > UI をクリック
UI という項目に Manage UI Resource というボタンが表示されます
 ↓
UI の一覧が表示されますので
一覧表の一番下にある『+』ボタンをクリック
 ↓
空欄ができるのでそこにあなたが作成した
ItemOverlayUIのプレファブをドラック&ドロップしてください
まとめ
「たかだかSpriteひとつ表示させるのにこんなメンドクサイのかよ💢」
そう感じたかたもいらっしゃることでしょう……
ですが Naninovel って実は他のソフトよりもSprite表示強いんです✨
「どこがだよ❗」ってお思いの方、いらっしゃるでしょう。
ですがカメラの取り回し、画像操作の自由度は他のソフトと別格です
例として、記事を執筆している
チームぶんたんの小間使いことカバかもんがスクリプトのお手伝いをした
『アイリス・オデッセイ パンドラの少女』をご覧ください❗
バトルシーケンスなんか、行きつく間もないぐらい絵がグリグリ動きますよ🤩
実はこの記事……
「Naninovelって日本語のリファレンスないし、とっつきにくいよね」
というクライアント様のお声に触発されて作成いたしました。
今後、Naninovel を日本人でもわかりやすく、
日本のゲームに合う仕様にカスタムする方法などお伝えしますので
興味があればフォローしてお待ちいただけると嬉しいです🥰
おわりに
Unity × Naninovel の実装で困っていませんか?
- UIカスタマイズ
- ADVシステム構築
- シナリオ連動処理
など対応できます。
👉 チームぶんたんにお気軽にご相談ください✨
筆🖊️:カバかもん(チームぶんたん)